
1. Introduction and Overview
The Bresser ClearView WiFi Weather Station with its 7-in-1 sensor provides comprehensive weather information. The multifunctional outdoor sensor measures wind speed, wind direction, humidity, temperature, precipitation, UV level, and light intensity, transmitting data wirelessly to the base station via 868 MHz frequency. The 8.3-inch True Black color display on the base station shows current and historical data, including a 24-hour record. Based on collected measurements, the station generates a local weather trend forecast for the next 12 hours, displayed with graphic symbols. Wi-Fi functionality enables data sharing with online weather platforms like AWEKAS, Weather Underground, or Weather Cloud. It also supports internet time synchronization and firmware updates. Customizable alarms for maximum and minimum values provide audible and visual alerts. A specific frost/ice warning activates for outdoor temperatures below -3 °C. The station also monitors indoor climate with a dedicated indicator and displays moon phases. An alarm clock with a snooze function is included. Data can be transferred to platforms like AWEKAS for global access and integration with smart home systems.

Image 1.1: The Bresser ClearView Wireless Weather Station base unit displaying various weather parameters in a home environment.
2. Package Contents
Please check that all components are present in the package:
- Base Station with 8.3" True Black Color Display
- Professional 7-in-1 Outdoor Sensor (measures wind speed, wind direction, humidity, temperature, precipitation, UV level, light intensity)
- Mounting Accessories for Outdoor Sensor (pole, clamps, screws)
- Power Adapter and Cable for Base Station
- User Manual
3. Components Overview
3.1 Base Station
The base station features an 8.3-inch color display that presents all collected weather data, forecasts, and time information. It includes control buttons for navigation and settings, along with a power input and a stand for desktop placement or wall mounting.
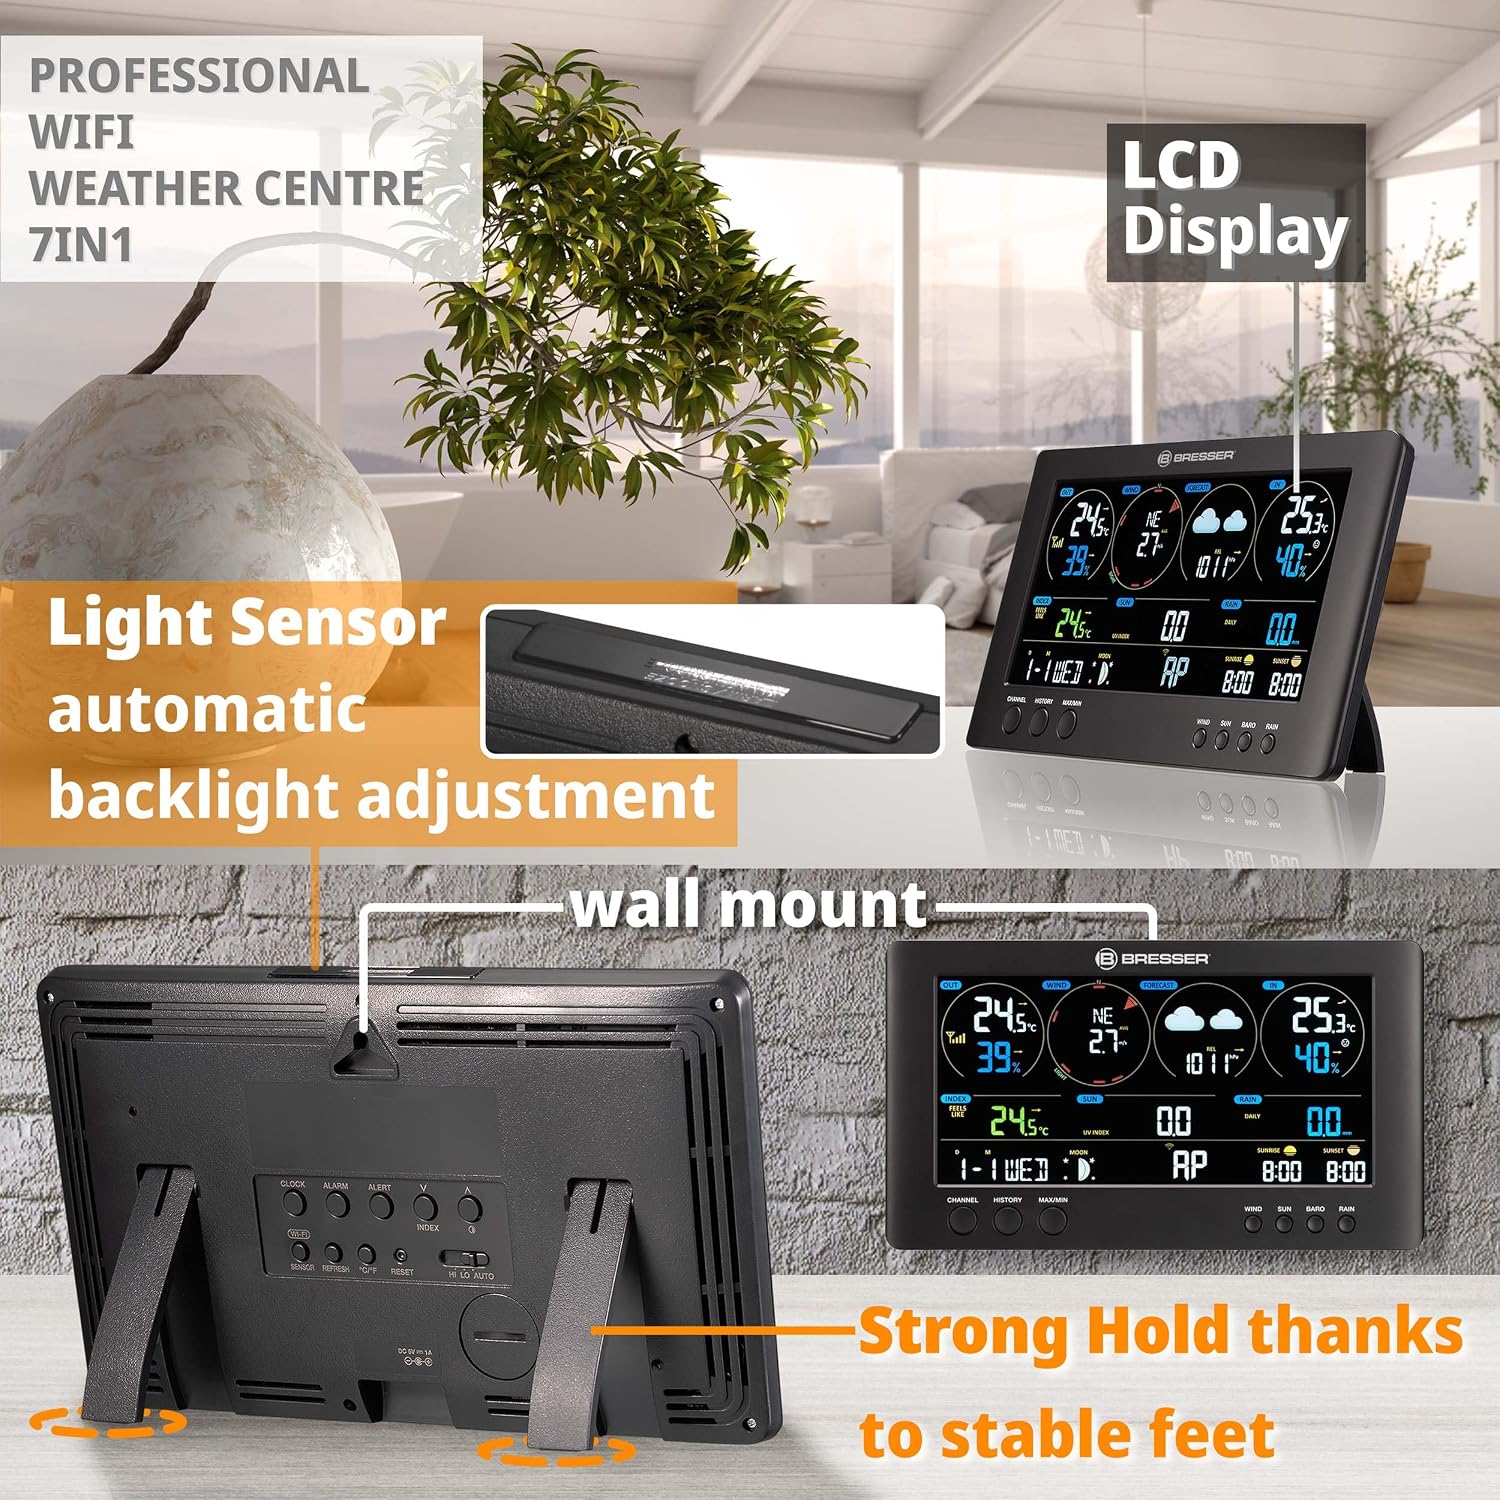
Image 3.1: Detailed view of the base station's color display, showing outdoor and indoor temperature, humidity, wind data, forecast, UV, light intensity, and time.
3.2 7-in-1 Outdoor Sensor
The outdoor sensor is a compact unit designed to measure multiple environmental parameters. It includes a wind vane for direction, an anemometer for wind speed, a thermo-hygrometer for temperature and humidity, a rain collector for precipitation, and sensors for UV level and light intensity. It transmits data wirelessly to the base station.

Image 3.2: Breakdown of the 7-in-1 outdoor sensor's components and their functions.
4. Setup
4.1 Outdoor Sensor Installation
The 7-in-1 outdoor sensor should be installed in an open area to ensure accurate readings for wind, rain, and sunlight. Choose a location free from obstructions like buildings or trees. The sensor can be mounted on a pole, on top of a surface, or on the side of a structure using the provided mounting accessories.
- Select Location: Identify an elevated, open area for optimal wind, rain, and light exposure.
- Assemble Sensor: Attach the wind cups and wind vane to the main sensor body if not already assembled.
- Insert Batteries: Open the battery compartment on the sensor and insert 3 AA batteries (not included), ensuring correct polarity.
- Mount Sensor: Use the pole, clamps, or screws to securely fasten the sensor. Ensure it is level for accurate rain measurements.

Image 4.1: Various mounting configurations for the 7-in-1 outdoor sensor.
4.2 Base Station Setup
Place the base station indoors, away from direct sunlight and heat sources, to ensure accurate indoor temperature and humidity readings. Connect the power adapter to the base station and plug it into a power outlet.
- Power On: Connect the power adapter to the base station and a wall outlet. The display will light up.
- Sensor Connection: The base station will automatically search for and connect to the outdoor sensor. This may take a few minutes. Ensure the sensor is within range (up to 150 meters line of sight).
- Initial Settings: Follow the on-screen prompts or refer to the detailed manual for setting time, date, measurement units (e.g., °C/°F, km/h/mph), and Wi-Fi configuration.

Image 4.2: Back of the base station, highlighting power input and control buttons.
5. Operation
5.1 Display Overview
The base station's color display provides a clear overview of all current and historical weather data. Key information includes:
- Outdoor Data: Temperature, humidity, wind speed, wind direction, UV index, light intensity, precipitation.
- Indoor Data: Temperature, humidity, indoor climate indicator.
- Forecast: 12-hour local weather trend forecast with graphic symbols.
- Time & Date: Current time, date, moon phase, sunrise/sunset times.
- Historical Data: Access to 24-hour records for various parameters.
5.2 Wi-Fi Connectivity and Online Platforms
The integrated Wi-Fi function allows the weather station to connect to your home network and share data with popular online weather platforms. This enables remote monitoring of your local weather conditions and contributes to global weather networks.
- Connect to Wi-Fi: Navigate to the Wi-Fi settings on the base station and follow the instructions to connect to your local Wi-Fi network.
- Platform Integration: Register your station on platforms like AWEKAS, Weather Underground, or Weather Cloud. The manual provides specific instructions for each platform.
- Internet Time Sync & Firmware Updates: Once connected, the station will automatically synchronize its time via the internet and receive firmware updates to ensure optimal performance and new features.

Image 5.1: The Wi-Fi connectivity feature allows data sharing with online weather platforms.
5.3 Alarms and Alerts
The weather station offers customizable alarms for various weather parameters:
- Max/Min Value Alarms: Set individual high and low thresholds for temperature, humidity, wind speed, etc. An audible and visual alert will activate when these thresholds are met.
- Frost/Ice Warning: A dedicated alarm activates when outdoor temperatures drop to -3 °C or below, alerting you to potential frost or ice conditions.
- Alarm Clock: A standard alarm clock function with snooze is also included.
6. Maintenance
Regular maintenance ensures the longevity and accuracy of your weather station.
- Cleaning: Periodically clean the outdoor sensor, especially the rain collector and wind sensors, to remove dirt, leaves, or debris that could affect readings. Use a soft, damp cloth.
- Battery Replacement: Replace the batteries in the outdoor sensor annually, or when the low battery indicator appears on the base station. Use high-quality alkaline batteries.
- Base Station Care: Keep the base station clean and dry. Avoid using abrasive cleaners.
7. Troubleshooting
If you encounter issues with your weather station, refer to the following common troubleshooting steps:
- No Outdoor Sensor Data:
- Check if the outdoor sensor batteries are correctly installed and have sufficient charge.
- Ensure the sensor is within the wireless range of the base station (up to 150m line of sight) and there are no major obstructions.
- Perform a manual search for the sensor on the base station (refer to the detailed manual for specific steps).
- Incorrect Readings:
- Verify the outdoor sensor's mounting location is free from obstructions and direct heat sources.
- Ensure the rain collector is clean and free of debris.
- Check that the base station is not near heat sources or direct sunlight for indoor readings.
- Wi-Fi Connection Issues:
- Confirm your Wi-Fi network is 2.4 GHz (5 GHz networks are typically not supported).
- Ensure the Wi-Fi password is entered correctly.
- Restart your router and the base station.
- Display Not Working:
- Check the power adapter connection to the base station and the wall outlet.
- Try a different power outlet.
For more detailed troubleshooting, please consult the full user manual or contact Bresser customer support.
8. Specifications
| Feature | Specification |
|---|---|
| Model Number | 7002586 |
| Display Type | 8.3" True Black Color LED |
| Outdoor Sensor | 7-in-1 Multi-sensor (Wind Speed, Wind Direction, Humidity, Temperature, Precipitation, UV Level, Light Intensity) |
| Wireless Frequency | 868 MHz |
| Connectivity | Wi-Fi (2.4 GHz) |
| Power Source (Base Station) | AC Power Adapter |
| Power Source (Outdoor Sensor) | 3 x AA Batteries (not included) |
| Dimensions (Base Station) | 2.1 x 14 x 24 cm (D x W x H) |
| Weight (Item) | 2 Kilograms |
| Material | Plastic |
| Temperature Accuracy | ±1 °C |
| Special Features | Wi-Fi, Internet Time Synchronization, Firmware Updates, Frost/Ice Warnings, Indoor Climate Indicator, Moon Phases, Alarm Clock |
9. Warranty and Support
For warranty information, technical support, or service inquiries, please refer to the warranty card included with your product or visit the official Bresser website. Keep your purchase receipt as proof of purchase for warranty claims.
Bresser Official Website: www.bresser.de


