
Jectse Jectse8gkeymuzn3
Jectse 5.0MP USB HD CMOS Microscope Camera
Instruction Manual
Model: Jectse8gkeymuzn3
1. Introduction
Thank you for choosing the Jectse 5.0MP USB HD CMOS Microscope Camera. This digital electronic camera is designed to convert traditional microscopes into electronic microscopes, enabling real-time image viewing, video recording, and measurement functions on a computer or monitor. It features a 5.0MP sensor, high resolution (2592 x 1944), and a standard USB2.0 interface for easy connectivity.

Figure 1: Front view of the Jectse 5.0MP USB HD CMOS Microscope Camera.
This product offers simple installation, great versatility, and rich functionality, making it suitable for various applications including microelectronics, molds, jewelry, watches, fingerprint identification, ticket identification, printing, mobile phone repair, archaeology, biological anatomy, and educational settings.
2. Package Contents
Please verify that all the following items are included in your package:
- 1 x Jectse 5.0MP USB Industrial Camera
- 1 x USB Data Cable
- 1 x 0.5x C-mount Adapter
- 1 x 30mm Adapter
- 1 x 30.5mm Adapter
- 1 x CD (Measurement and Video Software)
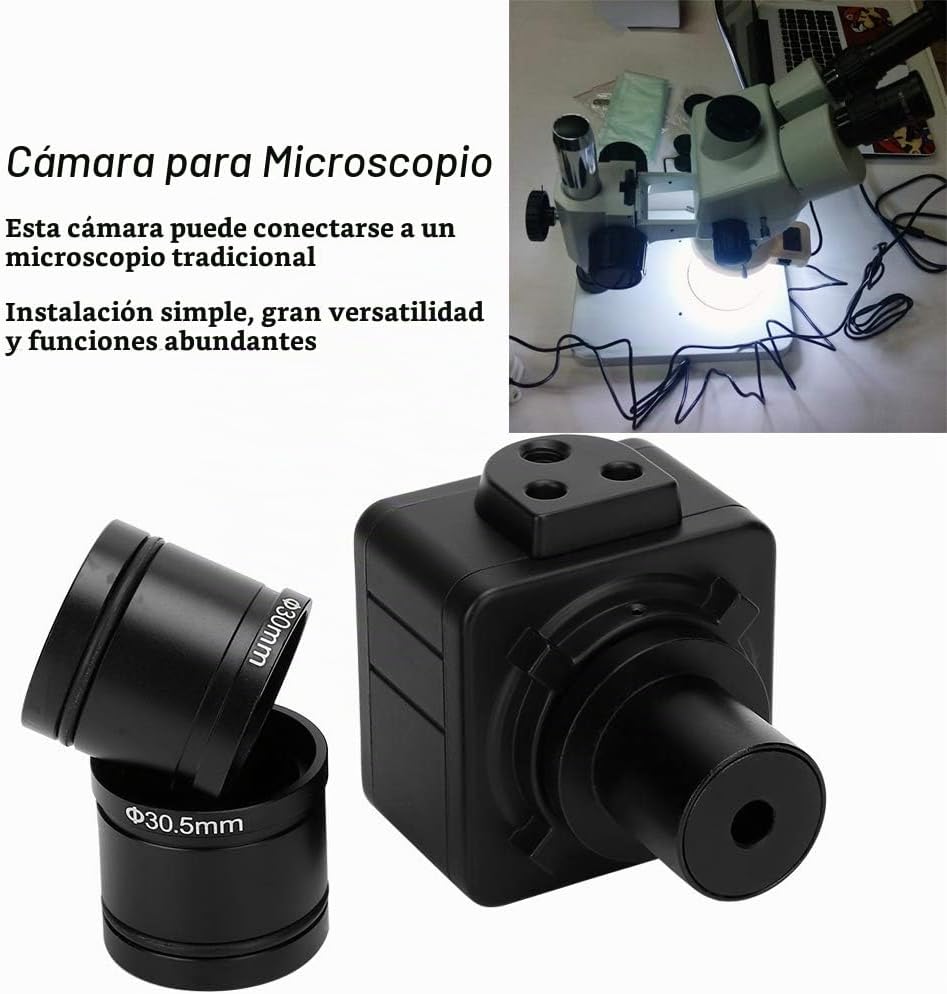
Figure 2: The microscope camera with included adapters, ready for installation.
3. Setup Instructions
Follow these steps to set up your Jectse microscope camera:
- Unpack the Camera: Carefully remove all components from the packaging.
- Attach the Appropriate Adapter:
- For microscopes with a C-mount port, attach the 0.5x C-mount adapter to the camera.
- For microscopes with 30mm or 30.5mm eyepiece tubes, select the corresponding adapter and attach it to the camera.
- Install the Camera on the Microscope: Insert the camera (with the attached adapter) into the eyepiece tube or C-mount port of your traditional microscope. Ensure it is securely seated.
- Connect to Computer: Connect one end of the provided USB data cable to the camera's USB port and the other end to an available USB 2.0 port on your computer.
- Install Software: Insert the included CD into your computer's CD-ROM drive. Follow the on-screen instructions to install the measurement and video software. If your computer lacks a CD drive, please contact Jectse support for software download options.
- Launch Software: Once the software installation is complete, launch the application. The camera feed should appear on your screen.

Figure 3: The camera properly installed on a microscope.
4. Operating Instructions
The Jectse microscope camera, in conjunction with its dedicated software, provides various functionalities:
- Real-time Image Viewing: Once the camera is connected and the software is running, you will see a live feed from your microscope on your computer screen. Adjust the microscope's focus and lighting for optimal clarity.
- Image Capture: Use the software interface to capture still images of your microscopic observations. Refer to the software's help documentation for specific controls and settings (e.g., resolution, exposure).
- Video Recording: The software allows you to record video footage of your observations. This is useful for dynamic processes or presentations.
- Measurement Functions: The included software typically offers tools for basic measurements (e.g., length, area) directly on the captured images or live feed. Calibrate the software according to your microscope's magnification for accurate measurements.
For detailed instructions on using specific software features, please consult the software's built-in help guide or user manual.
5. Maintenance
Proper care and maintenance will ensure the longevity and optimal performance of your microscope camera:
- Cleaning: Use a soft, dry cloth to clean the exterior of the camera. For the lens, use a specialized lens cleaning cloth and solution. Avoid abrasive materials or harsh chemicals.
- Storage: When not in use, store the camera in a clean, dry, and dust-free environment. Use the original packaging or a protective case if available.
- Handling: Handle the camera with care. Avoid dropping it or subjecting it to strong impacts.
- Environmental Conditions: Operate and store the camera within the specified working temperature range of 0-60 degrees Celsius. Avoid extreme humidity.
6. Troubleshooting
If you encounter issues with your Jectse microscope camera, refer to the following common problems and solutions:
| Problem | Possible Cause | Solution |
|---|---|---|
| No image displayed on screen. |
|
|
| Software fails to install or launch. |
|
|
| Poor image quality (blurry, dark). |
|
|
If the problem persists, please refer to the software's detailed help documentation or contact Jectse customer support.
7. Specifications
| Feature | Detail |
|---|---|
| Sensor | 5.0MP, 1/2.5 inch CMOS |
| High Resolution | 2592 x 1944 |
| Frame Rate (MJPG) |
|
| Pixel Size | 2.2µm x 2.2µm |
| Data Interface | Standard USB 2.0 |
| Support Interface | DirectShow, TWAIN, SDK |
| Working Temperature | 0-60 degrees Celsius |
| Lens Compatibility | C or CS interface |
| Material | ABS Plastic |
| Maximum Magnification | 400X (when combined with microscope optics) |
| Power Source | USB Cable |
| Model Number | Jectse8gkeymuzn3 |

Figure 4: Illustration of potential variations in USB port design (New Type vs. Old Type).
8. Warranty and Support
Jectse products are designed for quality and reliability. For specific warranty information regarding your 5.0MP USB HD CMOS Microscope Camera, please refer to the documentation included with your purchase or visit the official Jectse website.
For technical support, software updates, or any inquiries, please contact Jectse customer service through their official channels. You can often find support information on the Jectse Brand Store or their official website.
Ask a question about this manual
Ask about setup, troubleshooting, compatibility, parts, safety, or missing instructions. Manuals+ will review the question and use this page’s manual context to help answer it.