
1. Introduction
This manual provides essential instructions for the proper use and maintenance of your ieGeek OBD2 Scanner V312. This device is designed to diagnose engine-related issues in OBD II compliant vehicles by reading and clearing diagnostic trouble codes (DTCs), viewing live data, and performing other diagnostic functions. Please read this manual thoroughly before operating the device.

Image 1.1: ieGeek OBD2 Scanner V312. This image displays the main unit of the ieGeek V312 OBD2 scanner, featuring its color LCD screen, navigation buttons (DTC, I/M, Up, Down, OK, ESC), and the attached OBD-II connector cable.
2. Safety Information
- Always perform automotive testing in a well-ventilated area.
- Wear eye protection that meets ANSI standards.
- Keep clothing, hair, hands, and tools away from moving engine parts.
- Ensure the vehicle is in PARK (automatic transmission) or NEUTRAL (manual transmission) with the parking brake engaged.
- Do not connect or disconnect the scanner while the ignition is on or the engine is running.
- Avoid contact with hot engine components or exhaust systems.
- The device operates on 8-36V. Do not connect to voltages outside this range.
3. Product Overview
The ieGeek OBD2 Scanner V312 is a handheld diagnostic tool featuring a 2.8-inch TFT color screen and intuitive button controls. It is designed for ease of use, even for beginners.
3.1 Key Components
- LCD Display: 2.8-inch TFT color screen (240 RGB*320 resolution) for displaying diagnostic data.
- OBD-II Connector: Standard 16-pin connector for linking to the vehicle's Data Link Connector (DLC).
- DTC Button: Direct access to Diagnostic Trouble Codes.
- I/M Button: Quick access to I/M Readiness status.
- Up/Down Buttons: Navigate through menus and data.
- OK Button: Confirm selections.
- ESC Button: Exit current screen or cancel operation.
- USB Type-C Port: For software updates and data printing.

Image 3.1: Professional OBD2 Scanner Functions. This image highlights the various functions of the ieGeek V312, including I/M Readiness, View Freeze Frame, Read Fault Code, Retrieve Vehicle Information, Erase Fault Code, Read Data Flow, and Voltage Test.
4. Setup
4.1 Connecting the Scanner
- Locate the vehicle's 16-pin Data Link Connector (DLC). This is typically found under the dashboard on the driver's side.
- Ensure the vehicle's ignition is OFF.
- Firmly plug the scanner's OBD-II connector into the vehicle's DLC.
- Turn the vehicle's ignition to the ON position (engine off). The scanner will automatically power on and initiate communication with the vehicle.

Image 4.1: Scanner Connected to Vehicle. This image shows the ieGeek V312 OBD2 scanner connected to a vehicle's OBD-II port, demonstrating its plug-and-play design for direct operation.
5. Operating Instructions
5.1 Main Menu Navigation
Use the Up and Down buttons to scroll through menu options. Press the OK button to select an option. Press ESC to return to the previous screen.
5.2 Reading Diagnostic Trouble Codes (DTCs)
- From the main menu, select "OBD Diagnostic" or press the dedicated DTC button.
- The scanner will display any stored, pending, or permanent DTCs.
- Each code will have a description to help identify the issue.
5.3 Clearing Diagnostic Trouble Codes (DTCs)
Warning: Clearing DTCs erases all diagnostic data. Ensure the underlying issue is resolved before clearing codes.
- After reading codes, navigate to the "Erase Fault Code" option.
- Confirm the action when prompted. This will turn off the Malfunction Indicator Lamp (MIL) if the fault is no longer present.
5.4 I/M Readiness Status
The I/M Readiness function checks if the various emissions-related systems on the vehicle are operating correctly and are ready for inspection and maintenance testing.
- From the main menu, select "I/M View" or press the dedicated I/M button.
- The display will show the status of various monitors (e.g., Misfire Monitor, Fuel System Monitor).
- A "Ready" status indicates the monitor has completed its diagnostic cycle. "Not Ready" indicates it has not.

Image 5.1: One-Click I/M Button. This image emphasizes the dedicated I/M button on the ieGeek V312, which allows for quick access to I/M readiness status and fault code management.
5.5 Viewing Live Data
This function allows you to view real-time operational data from the vehicle's sensors and components.
- From the main menu, select "Data View".
- You can view data in numerical format or as a waveform graph.
- Use the Up and Down buttons to scroll through various data parameters.

Image 5.2: Waveform Display. This image illustrates the ieGeek V312's capability to display live sensor data in a graphical waveform format, aiding in more intuitive data analysis.
5.6 Viewing Freeze Frame Data
Freeze Frame Data records a snapshot of the vehicle's operating conditions at the moment a DTC was set. This can help in diagnosing intermittent problems.
- From the main menu, select "Freeze Frame".
- Review the recorded parameters such as engine RPM, vehicle speed, coolant temperature, etc.
5.7 Retrieving Vehicle Information
This function allows you to retrieve the Vehicle Identification Number (VIN), Calibration ID (CALID), and Calibration Verification Number (CVN) from the vehicle's ECU.
- From the main menu, select "Vehicle Info".
- The scanner will display the available vehicle information.
5.8 Printing Data
The scanner supports printing of diagnostic data for review or record-keeping.
- Connect the scanner to a computer using a USB Type-C cable.
- Install the necessary printing software (available from the official ieGeek website).
- Follow the software instructions to print stored data.
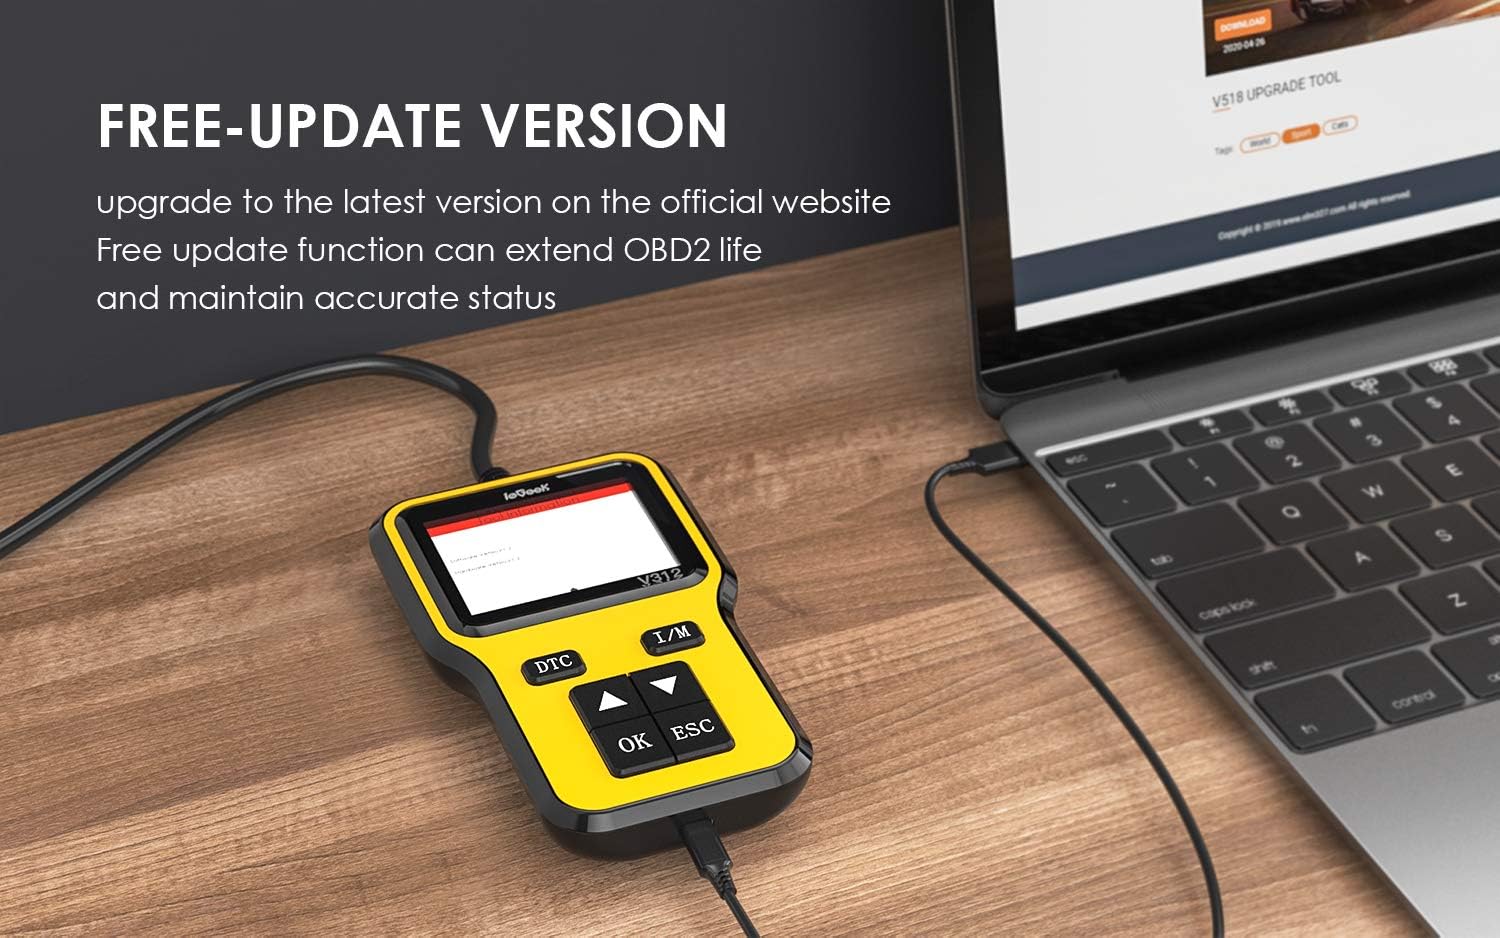
Image 5.3: Data Printing Function. This image highlights the data printing capability of the ieGeek V312, allowing users to record and review diagnostic reports for maintenance or annual inspections.
5.9 Language Selection
The device supports multiple languages.
- From the main menu, select "Settings" or "Configuration".
- Navigate to "Language" and select your preferred language (English, German, French, Spanish, Italian, Chinese, Russian, Portuguese).
6. Compatibility
The ieGeek OBD2 Scanner V312 is compatible with most American vehicles manufactured since 1996, and most European and Asian vehicles manufactured since 2000, that support OBD-II protocols.
6.1 Supported Protocols
- SAE J1850 PWM
- SAE J1850 VPW
- ISO9141-2
- ISO14230-4 KWP (Keyword Protocol 2000)
- ISO15765-4 CAN (Controller Area Network)
6.2 Important Notes on Compatibility
- Requires an OBD2 interface and 9-16V car voltages.
- Does not support modified vehicles, trucks, hybrid vehicles, or electric vehicles.
- Does not support detection and elimination of SRS (airbag) and ABS systems.

Image 6.1: Wide Compatibility. This image details the ieGeek V312's compatibility with cars from 1996 onwards that have an OBD2 interface and 9-16V car voltages, while also noting its limitations with trucks, hybrid, electric, and diesel vehicles.
7. Maintenance
7.1 Software Updates
The ieGeek V312 offers free software updates to ensure compatibility with newer vehicles and to fix any bugs. Regular updates help maintain accurate diagnostic status.
- Visit the official ieGeek website to download the latest update software.
- Connect the scanner to your computer using the USB Type-C cable.
- Follow the instructions provided with the update software to complete the process.

Image 7.1: Free Update Version. This image shows the ieGeek V312 connected to a laptop, illustrating the process of updating the device's software to ensure it has the latest features and bug fixes.
7.2 Cleaning
Clean the scanner's casing with a soft, damp cloth. Do not use abrasive cleaners or solvents. Keep the screen free of dust and scratches.
7.3 Storage
Store the device in a dry, cool environment, away from direct sunlight and extreme temperatures.
8. Troubleshooting
- Scanner does not power on:
- Check the connection to the vehicle's DLC. Ensure it is firmly seated.
- Verify the vehicle's ignition is in the ON position.
- Confirm the vehicle's battery has sufficient charge (8-36V).
- Communication error with vehicle:
- Ensure the vehicle is OBD-II compliant (most vehicles from 1996 in the US, 2000 in Europe/Asia).
- Check for damaged pins on the vehicle's DLC or the scanner's connector.
- Try the scanner on a different compatible vehicle to rule out a vehicle-specific issue.
- Screen is blank or frozen:
- Disconnect the scanner from the vehicle and reconnect it.
- If the issue persists, perform a software update if available.
9. Specifications
| Model Name | V312 |
| Manufacturer Part Number | HY-CR5308YEIG-UK |
| Working Voltage | 8-36V |
| Working Current | 58mA |
| Operating Environment | -20 ℃ ~ 65 ℃ |
| Storage Temperature | -30 ℃ ~ 80 ℃ |
| Screen Size | 2.8 inches (240 RGB*320 TFT color screen) |
| Dimensions | 152 x 87.5 x 22mm |
| Item Weight | 394 g |
| Connectivity | Wired OBD-II, USB Type-C |
| Supported Protocols | SAE J1850 PWM, SAE J1850 VPW, ISO9141-2, ISO14230-4 KWP, ISO15765-4 CAN |
| Special Features | Multi-language support, Overvoltage protection, Real-time data viewing, Data printing, storage and playback, USB online upgrade, I/M status, Vehicle information, Clear fault codes |
10. Warranty and Support
For warranty information, please refer to the 'After-sale Card' included in your product package or contact ieGeek customer support directly. For technical assistance, software updates, or further inquiries, please visit the official ieGeek website or contact their customer service department.
Image 10.1: Product Packaging. This image shows the ieGeek V312 OBD2 scanner alongside its retail packaging and included manual, indicating the complete product set.