1. Safety Information
Read all instructions carefully before assembly and use. Failure to follow these instructions may result in injury or damage to the product.
- Weather Conditions: This gazebo is designed for temporary use in calm weather conditions. Do not use in strong winds, heavy rain, snow, or thunderstorms. Severe weather can cause the gazebo to collapse, leading to injury or damage.
- Anchoring: Always secure the gazebo to the ground using the provided anchors and guy ropes. Ensure all legs are firmly planted.
- Assembly: Assembly should be performed by at least two adults. Keep children and pets away from the assembly area.
- Location: Choose a flat, level surface for setup, clear of overhead obstructions like power lines or tree branches. Avoid placing near open flames or heat sources.
- Maintenance: Regularly inspect the frame and fabric for any signs of wear or damage. Do not use if damaged.
2. Product Components
Your TOOLPORT folding gazebo includes the following main components:
- Pre-assembled Steel Frame (hexagonal profile legs, approx. 40mm thick)
- 750N Polyester Roof Tarpaulin with PVC coating
- Side Tarpaulins (quantity may vary by model)
- Guy Ropes
- Ground Anchors
- Transport Cover (wheeled for easy portability)

Image: The gazebo frame in its compact, folded state, ready for transport or storage.

Image: Detail of the hexagonal steel leg profile, indicating robust construction.

Image: The roof tarpaulin, made from durable 750N polyester with PVC coating.
3. Setup Instructions
Assembly of the TOOLPORT folding gazebo is quick and easy, typically requiring two people.
- Unpack: Remove the folded gazebo frame and all components from the transport cover.
- Initial Expansion: With a person at each end, gently pull the frame outwards to partially expand it. Do not fully extend yet.
- Attach Roof Tarpaulin: Drape the roof tarpaulin over the partially expanded frame. Ensure the corners align with the frame's corner posts. Secure the tarpaulin to the frame using any integrated fasteners (e.g., Velcro straps).
- Full Expansion: Continue to pull the frame outwards until it is fully expanded and the roof structure is taut. Ensure all cross-braces are locked into place.
- Adjust Height: Press the red ring/button on each leg to release the locking mechanism. Extend the legs to your desired height. The frame offers 5 height adjustment settings. Ensure all legs are set to the same height and the locking pins are securely engaged.
- Secure to Ground: Use the provided ground anchors and guy ropes to firmly secure each leg and corner of the gazebo to the ground. This is crucial for stability and safety.
- Attach Side Panels (if applicable): If your model includes side panels, attach them using the integrated fasteners (e.g., zippers, Velcro) to the frame and roof tarpaulin.

Image: Visual guide showing the four main steps for unfolding and setting up the gazebo frame.

Image: Detail of a frame connection point, illustrating the robust construction.
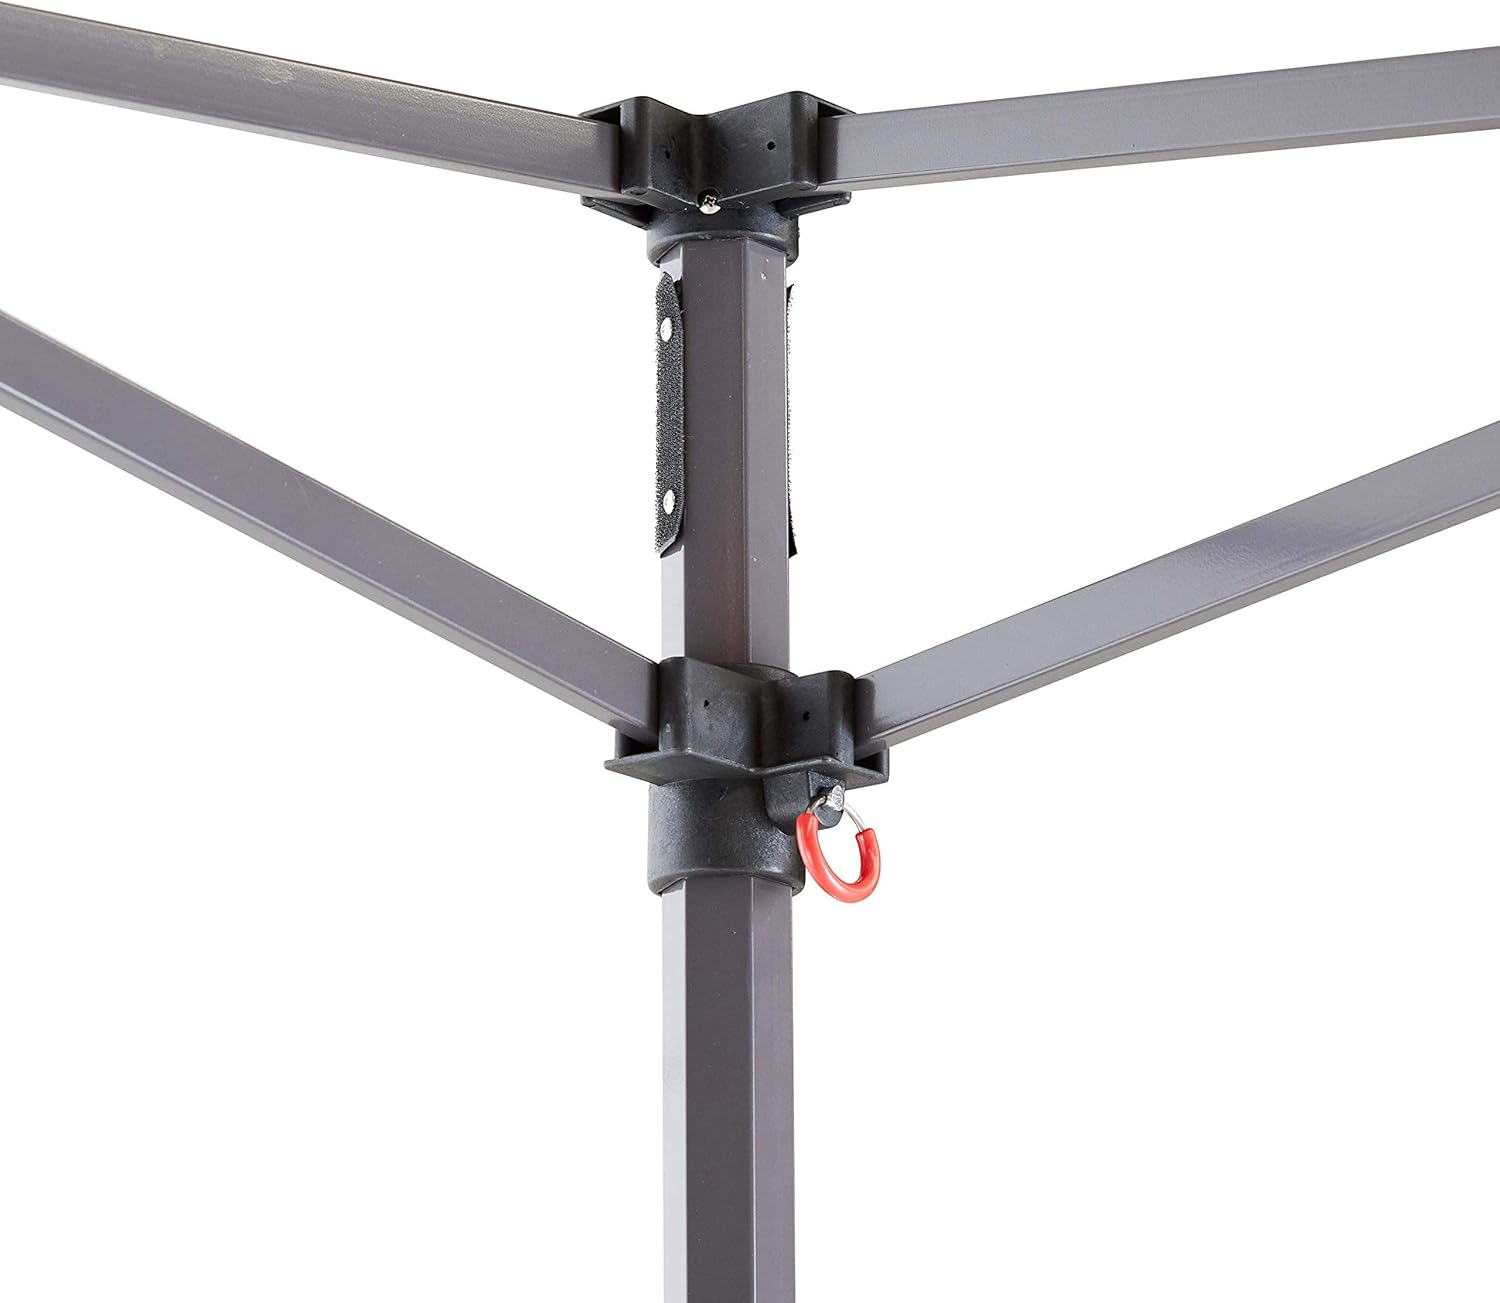
Image: The red ring mechanism for adjusting the height of the gazebo legs.

Image: The foot plate at the base of a gazebo leg, designed for anchoring.
4. Operating Instructions
Once assembled and secured, your TOOLPORT gazebo is ready for use.
- Height Adjustment: To adjust the height, ensure the gazebo is not under load. Press the red ring/button on each leg to disengage the locking pin, then carefully raise or lower the leg to the desired position. Ensure the pin re-engages securely in one of the 5 available height settings.
- Side Panels: If equipped, side panels can be opened or closed using zippers. Panoramic side panels offer visibility while providing shelter.
- Disassembly: To disassemble, reverse the setup steps. First, remove side panels and ground anchors/guy ropes. Then, lower the legs to their shortest position. Finally, unlock the frame joints and gently push the frame inwards until it is fully folded. Remove the roof tarpaulin and store all components in the transport cover.

Image: An example of the gazebo in use, providing shelter for outdoor activities.
5. Maintenance
- Cleaning Fabric: Clean the tarpaulin with mild soap and water. Do not use harsh chemicals or abrasive cleaners, as this can damage the PVC coating and waterproof properties. Allow the fabric to dry completely before folding and storing to prevent mildew.
- Cleaning Frame: Wipe the steel frame with a damp cloth to remove dirt. Ensure the frame is dry before storage to prevent rust.
- Storage: Store the gazebo in its transport cover in a dry, cool place, away from direct sunlight and extreme temperatures.
- Inspection: Periodically check all frame connections, fabric, and ropes for wear, tears, or damage. Replace any damaged parts immediately.

Image: Close-up of the waterproof fabric, showing water beading on the surface.

Image: The wheeled transport cover, designed for convenient storage and portability.
6. Troubleshooting
| Problem | Possible Cause | Solution |
|---|---|---|
| Gazebo is unstable or wobbly. | Not properly anchored; legs uneven; frame not fully expanded. | Ensure all legs are at the same height and locking pins are engaged. Use all provided guy ropes and ground anchors. Check that the frame is fully expanded and locked. |
| Water pooling on roof. | Insufficient tension in roof fabric; incorrect setup. | Ensure the roof tarpaulin is taut and correctly attached to the frame. Verify the frame is fully expanded and legs are at maximum height if possible. |
| Difficulty expanding/folding frame. | Frame joints are stiff or misaligned. | Ensure no fabric is caught in the joints. Apply a silicone-based lubricant to moving parts if necessary. Ensure two people are assisting with expansion/folding. |
| Side panels do not fit correctly. | Incorrect panel orientation; frame not fully expanded. | Check that side panels are oriented correctly. Ensure the main frame is fully expanded and legs are at the correct height. |
7. Specifications
| Feature | Detail |
|---|---|
| Product Dimensions (L x W x H) | 450 x 300 x 350 cm (14.76 x 9.84 x 11.48 ft) |
| Item Weight | 52.8 Kilograms |
| Manufacturer | TOOLPORT |
| Model Number | 600045 |
| Country of Origin | Germany |
| Frame Material | Alloy Steel, Plastic (Powder-coated grey, hexagonal profile approx. 40mm) |
| Tarpaulin Material | 750N High-quality Polyester with PVC coating |
| Color | Dark Blue |
| UV Protection | 80+ |
| Water Resistance Level | Waterproof (100% waterproof seams) |
| Height Adjustment | 5 adjustable height settings |
| Closure Type | Click system for leg adjustment |

Image: Dimensional diagram of the gazebo, showing height, width, and length measurements.
8. Warranty and Support
For warranty information, please refer to the documentation provided at the time of purchase or contact TOOLPORT customer service directly. Keep your purchase receipt as proof of purchase.
For technical support, missing parts, or any questions regarding your TOOLPORT gazebo, please contact the manufacturer:
- Manufacturer: TOOLPORT
- Website: Visit the TOOLPORT Store on Amazon


