
Introduction
This manual provides essential information for the safe and effective operation, maintenance, and troubleshooting of your Diecast Masters 1/24 Caterpillar D7E Dozer Radio Control. Please read through these instructions carefully before first use to ensure proper setup and to maximize your product's lifespan and performance.
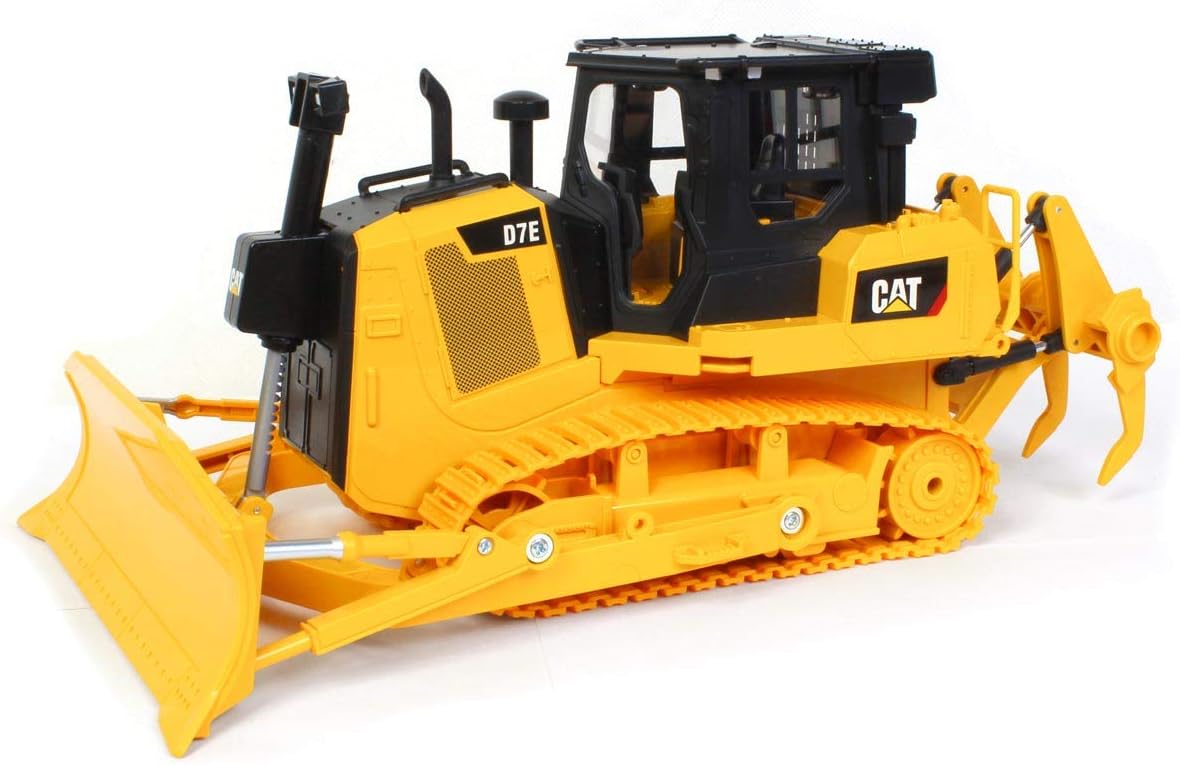
The Caterpillar D7E Dozer is a highly detailed 1:24 scale radio-controlled model featuring full functionality, including light and sound effects, and individual movements of the dozer blade and ripper. It is designed for authentic play and display.
Package Contents
Verify that all items listed below are included in your product package:
- 1/24 Caterpillar D7E Dozer Radio Control Model
- Remote Controller
- Rechargeable Lithium Polymer Battery (700mAh)
- USB Charging Cable
- 2 x AAA Batteries for Controller
- Instruction Manual

Setup
Battery Installation
For the Remote Controller:
- Locate the battery compartment on the back of the remote controller.
- Use a small screwdriver to open the battery cover.
- Insert 2 x AAA batteries, ensuring correct polarity (+/-).
- Replace the battery cover and secure it with the screw.
For the Dozer:
- Turn the dozer upside down to access the battery compartment located on the underside.
- Use a small screwdriver to open the battery cover.
- Connect the rechargeable Lithium Polymer battery to the dozer's battery connector.
- Carefully place the battery inside the compartment.
- Replace the battery cover and secure it with the screw.

Charging Instructions
The dozer's 700mAh Lithium Polymer battery requires charging before first use and after each play session. Use the provided USB charging cable.
- Connect the USB charging cable to the battery.
- Plug the USB end of the cable into a standard USB power adapter (e.g., phone charger, computer USB port).
- The indicator light on the USB charger will typically show red during charging and turn off or change color (e.g., green) when fully charged.
- Charging time is approximately 120-180 minutes for a full charge.
Note: Always supervise charging and disconnect the charger once the battery is full. Do not overcharge the battery.
Controller Pairing
To establish a connection between the remote controller and the dozer:
- Ensure both the dozer and the remote controller have fresh or fully charged batteries installed.
- Turn on the dozer using its power switch.
- Turn on the remote controller using its power switch. The indicator light on the controller should blink.
- Move the left joystick (forward/backward) up and down once. The indicator light on the controller should become solid, indicating successful pairing.
- Your dozer is now ready for operation.
Operating Your Dozer
Basic Controls
The remote controller features two joysticks and several buttons for controlling the dozer's movements and functions.
- Left Joystick: Controls forward and backward movement of the tracks. Pushing both forward moves the dozer straight forward; pulling both back moves it straight backward.
- Right Joystick: Controls turning. Pushing one joystick forward and the other backward will make the dozer turn in place.
- Blade Control Buttons: Dedicated buttons on the controller allow you to raise and lower the front dozer blade.
- Ripper: The rear ripper is manually adjustable and does not operate via the remote control.

Light and Sound Functions
The dozer is equipped with realistic light and sound functions. Refer to the controller diagram in the included paper manual for specific buttons to activate and deactivate these features. These functions enhance the realistic play experience.
Auto Demo Function
The auto demo function allows the dozer to perform a pre-programmed sequence of movements and functions automatically. This is ideal for showcasing the dozer's capabilities without manual control. Activate this feature using the designated button on the remote controller.
Recommended Usage Environment
The 1/24 Caterpillar D7E Dozer is designed for both indoor and outdoor use. For optimal performance and to prevent damage, operate the dozer on relatively flat and clear surfaces. It can handle light dirt, sand, and gravel, simulating real construction environments. Avoid operating in wet conditions, deep mud, or on extremely rough terrain that could impede track movement or damage components.
Maintenance
Cleaning
After each use, especially when operating outdoors, gently clean the dozer to remove dirt, dust, and debris. Use a soft, dry cloth. For stubborn dirt, a slightly damp cloth can be used, but ensure no water enters the electronic components. Regularly check the tracks for any trapped debris that could hinder movement.
Storage
When not in use, store the dozer and remote controller in a cool, dry place away from direct sunlight and extreme temperatures. If storing for an extended period, remove the batteries from both the dozer and the remote controller to prevent leakage and damage.
Battery Care
To prolong the life of the Lithium Polymer battery:
- Do not completely discharge the battery.
- Charge the battery fully before storing it for long periods.
- Avoid exposing the battery to extreme heat or cold.
- Only use the provided charging cable.
Troubleshooting
If you encounter issues with your dozer, please refer to the common problems and solutions below:
| Problem | Possible Cause | Solution |
|---|---|---|
| Dozer does not respond to controller. | Low batteries in dozer or controller; not paired correctly; interference. | Charge/replace batteries. Re-pair controller and dozer. Move away from other electronic devices. |
| Short play time. | Battery not fully charged; old battery; continuous heavy use. | Ensure full charge. Consider replacing battery if old. Reduce continuous heavy load. |
| Tracks not moving smoothly. | Debris in tracks; worn tracks; motor issue. | Clean tracks thoroughly. Inspect tracks for damage. Contact support if issue persists. |
| Lights/Sounds not working. | Function not activated; internal wiring issue. | Ensure function button is pressed. Check battery levels. Contact support. |
Product Specifications
| Feature | Detail |
|---|---|
| Scale | 1/24 |
| Product Dimensions | 13 x 8 x 7 inches |
| Item Weight | 2.7 pounds |
| Item Model Number | 37025001 |
| Manufacturer Recommended Age | 5 years and up |
| Dozer Battery | 1 Lithium Polymer battery (included) |
| Controller Batteries | 2 x AAA batteries (included) |
| Radio Control Frequency | 2.4G |
| Functions | Full Function RC, Light & Sound, Auto Demo, Individual movements of front arm & rear arm, buckets, rotational body |
| Material | Durable Plastic |
Warranty and Support
Diecast Masters products are manufactured to high-quality standards. For any questions, technical support, or warranty inquiries, please contact Diecast Masters customer service. Keep your purchase receipt as proof of purchase for warranty claims.
For further assistance, please visit the official Diecast Masters website or contact their support team directly. Contact information can typically be found on the product packaging or their official website.