
Introduction
This manual provides essential information for the setup, operation, and maintenance of your Korg Volca Sample 2 Digital Sample Sequencer Drum Machine. Please read this manual thoroughly to ensure proper use and to maximize the potential of your instrument.
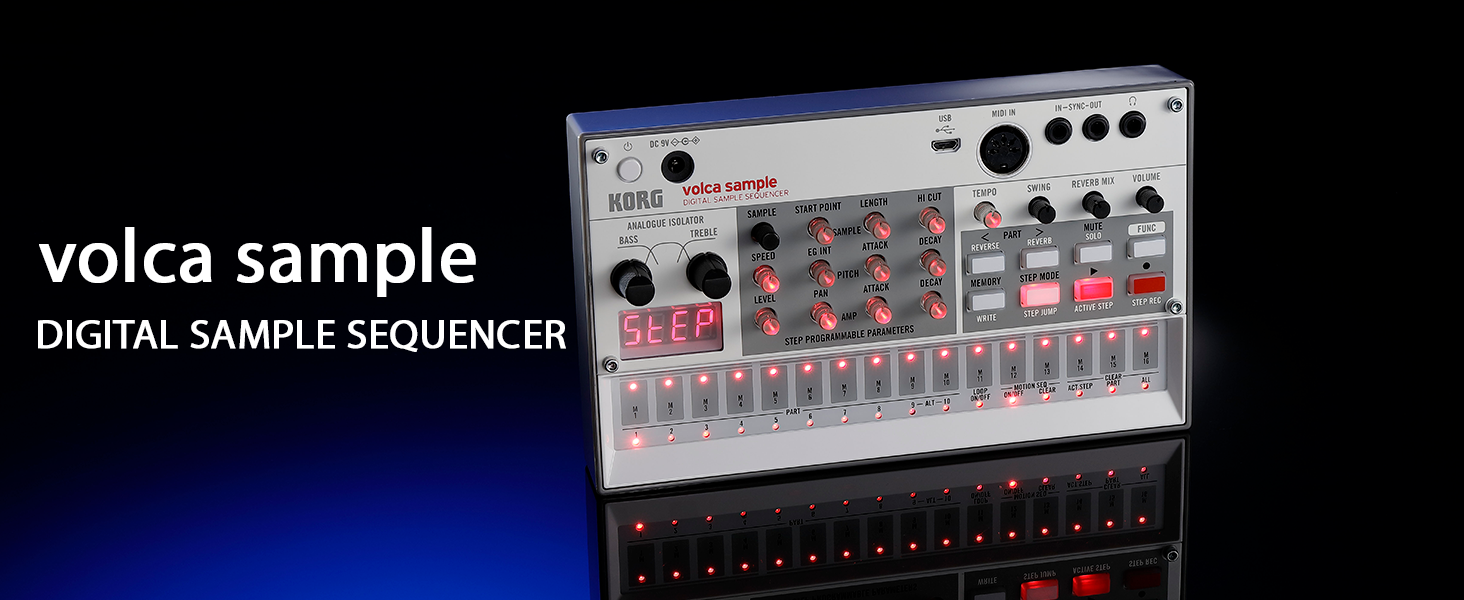
Image: Front view of the Korg Volca Sample 2, highlighting its digital sample sequencer capabilities.
Package Contents
Verify that all items listed below are included in your package:
- Korg Volca Sample 2 Unit
- Power adapter
- USB cable
- Sample library (pre-loaded or accessible via software)
- 6 AAA batteries (included)
Setup
1. Powering the Unit
The Volca Sample 2 can be powered using either the included AC adapter or 6 AAA batteries.
- AC Adapter: Connect the power adapter to the DC 9V input on the unit and then to a wall outlet.
- Batteries: Open the battery compartment on the underside of the unit and insert 6 AAA batteries, ensuring correct polarity.
2. Initial Connections
Before operation, connect your Volca Sample 2 to an audio output device (headphones or speakers) and optionally to other equipment.
- Audio Output: Connect headphones to the 3.5mm headphone jack or connect the unit's audio output to an amplifier or mixer.
- MIDI Input: Use a MIDI cable to connect the MIDI IN port to a MIDI controller or sequencer for external control.
- Sync In/Out: Use 3.5mm mono cables to synchronize with other Volca units or compatible devices.
- USB Connectivity: Connect the micro USB port to a computer for sample management using the dedicated Librarian software.

Image: Close-up of the rear panel of the Volca Sample 2, showing the DC 9V input, USB port, MIDI IN, IN-SYNC-OUT, and headphone jack.
Operating Instructions
1. Basic Sample Playback
The Volca Sample 2 features 100 pre-loaded samples. To play a sample:
- Press the PLAY button to start the sequencer.
- Press any of the 16 step keys to trigger the corresponding sample.
- Adjust the VOLUME knob to control the overall output level.
2. Sequencing and Pattern Creation
The 16-step sequencer allows for intuitive pattern creation.
- Step Recording: Press STEP REC to enter step recording mode. Press step keys to input notes.
- Real-time Recording: Press REC while the sequencer is playing to record your performance in real-time.
- Pattern Chain Mode: Link multiple patterns together to create longer sequences. Refer to the full manual for detailed instructions on chaining patterns.
- Motion Sequence: Record knob movements to automate parameter changes over time.

Image: A user adjusting controls on the Volca Sample 2, which is connected to other Korg Volca series instruments, demonstrating its integration into a larger setup.
3. Sample Management with Librarian Software
The Volca Sample 2 features double the memory of previous models and includes dedicated Librarian software for Mac and PC.
- Download the Korg Volca Sample 2 Librarian software from the official Korg website.
- Connect the Volca Sample 2 to your computer via the micro USB port.
- Use the Librarian software to import your own samples, organize existing samples, and manage patterns.

Image: The Volca Sample 2 connected via USB to a laptop displaying the Korg Librarian software interface, used for managing samples and patterns.
4. Sound Shaping
Utilize the onboard effects and parameters to sculpt your sound.
- Digital Reverb: Adjust the REVERB MIX knob to add spatial depth to your samples.
- Analogue Isolator: Use the BASS and TREBLE knobs to cut or boost low and high frequencies.
- Sample Parameters: Adjust parameters such as SPEED, PITCH, ATTACK, and DECAY for each sample part.
Maintenance
1. Cleaning
To maintain the appearance and functionality of your unit:
- Wipe the exterior with a soft, dry cloth.
- Avoid using abrasive cleaners, solvents, or waxes.
2. Battery Replacement
When the battery indicator is low or the unit behaves erratically, replace all 6 AAA batteries simultaneously. Do not mix old and new batteries or different types of batteries.
Troubleshooting
If you encounter issues with your Volca Sample 2, refer to the following common solutions:
- No Power: Ensure the AC adapter is securely connected or that fresh batteries are correctly installed.
- No Sound: Check headphone/audio cable connections. Verify the VOLUME knob is turned up. Ensure no parts are muted.
- Sequencer Not Playing: Confirm the PLAY button is pressed. Check TEMPO setting.
- USB Connectivity Issues: Ensure the USB cable is properly connected and the Librarian software is running. Try a different USB port or cable.
For further assistance, visit the official Korg support website or consult the comprehensive online manual.
Specifications
| Model Name | VOLCA SAMPLE2 |
| Dimensions (L x W x H) | 7.6 x 4.49 x 1.69 inches (193 x 114 x 43 mm) |
| Weight | 13.1 ounces (372 Grams) |
| Power Source | 6 AAA batteries or AC adapter (DC 9V) |
| Battery Type | Alkaline |
| Hardware Interface | 3.5mm Audio, Micro USB Type B, MIDI IN, Sync In/Out |
| Body Material | Bass Wood |
| Included Components | Power adapter, USB cable, Sample library, 6 AAA batteries |
Warranty and Support
KORG products are manufactured to high-quality standards. For warranty information and customer support, please refer to the documentation included with your purchase or visit the official KORG website.
Manufacturer: KORG
Online Support: www.korg.com/us/support/


