
Introduction
This manual provides detailed instructions for assembling, operating, and maintaining your FTVOGUE 4 DOF DIY Wood Robot Arm Kit. This kit is designed for educational purposes and hobbyists interested in robotics, electronics, and mechanical assembly, compatible with platforms like Arduino and Raspberry Pi.
The kit features a 4-degree-of-freedom robotic arm, offering flexible movement, with each joint driven by an SG90 servo motor. The lightweight wooden construction makes it an ideal project for students and DIY enthusiasts.

Image: The FTVOGUE 4 DOF Wood Robotic Arm DIY Assembly Kit, fully assembled and ready for programming.
Package Contents
Before beginning assembly, please verify that all components are present in your kit:
- 1 set of laser-cut wooden parts for the robot arm structure.
- 4 x SG90 Servo Motors.
- 1 package of screws, nuts, and standoffs for assembly.
- Small wrench and hex key (may be included for assembly).
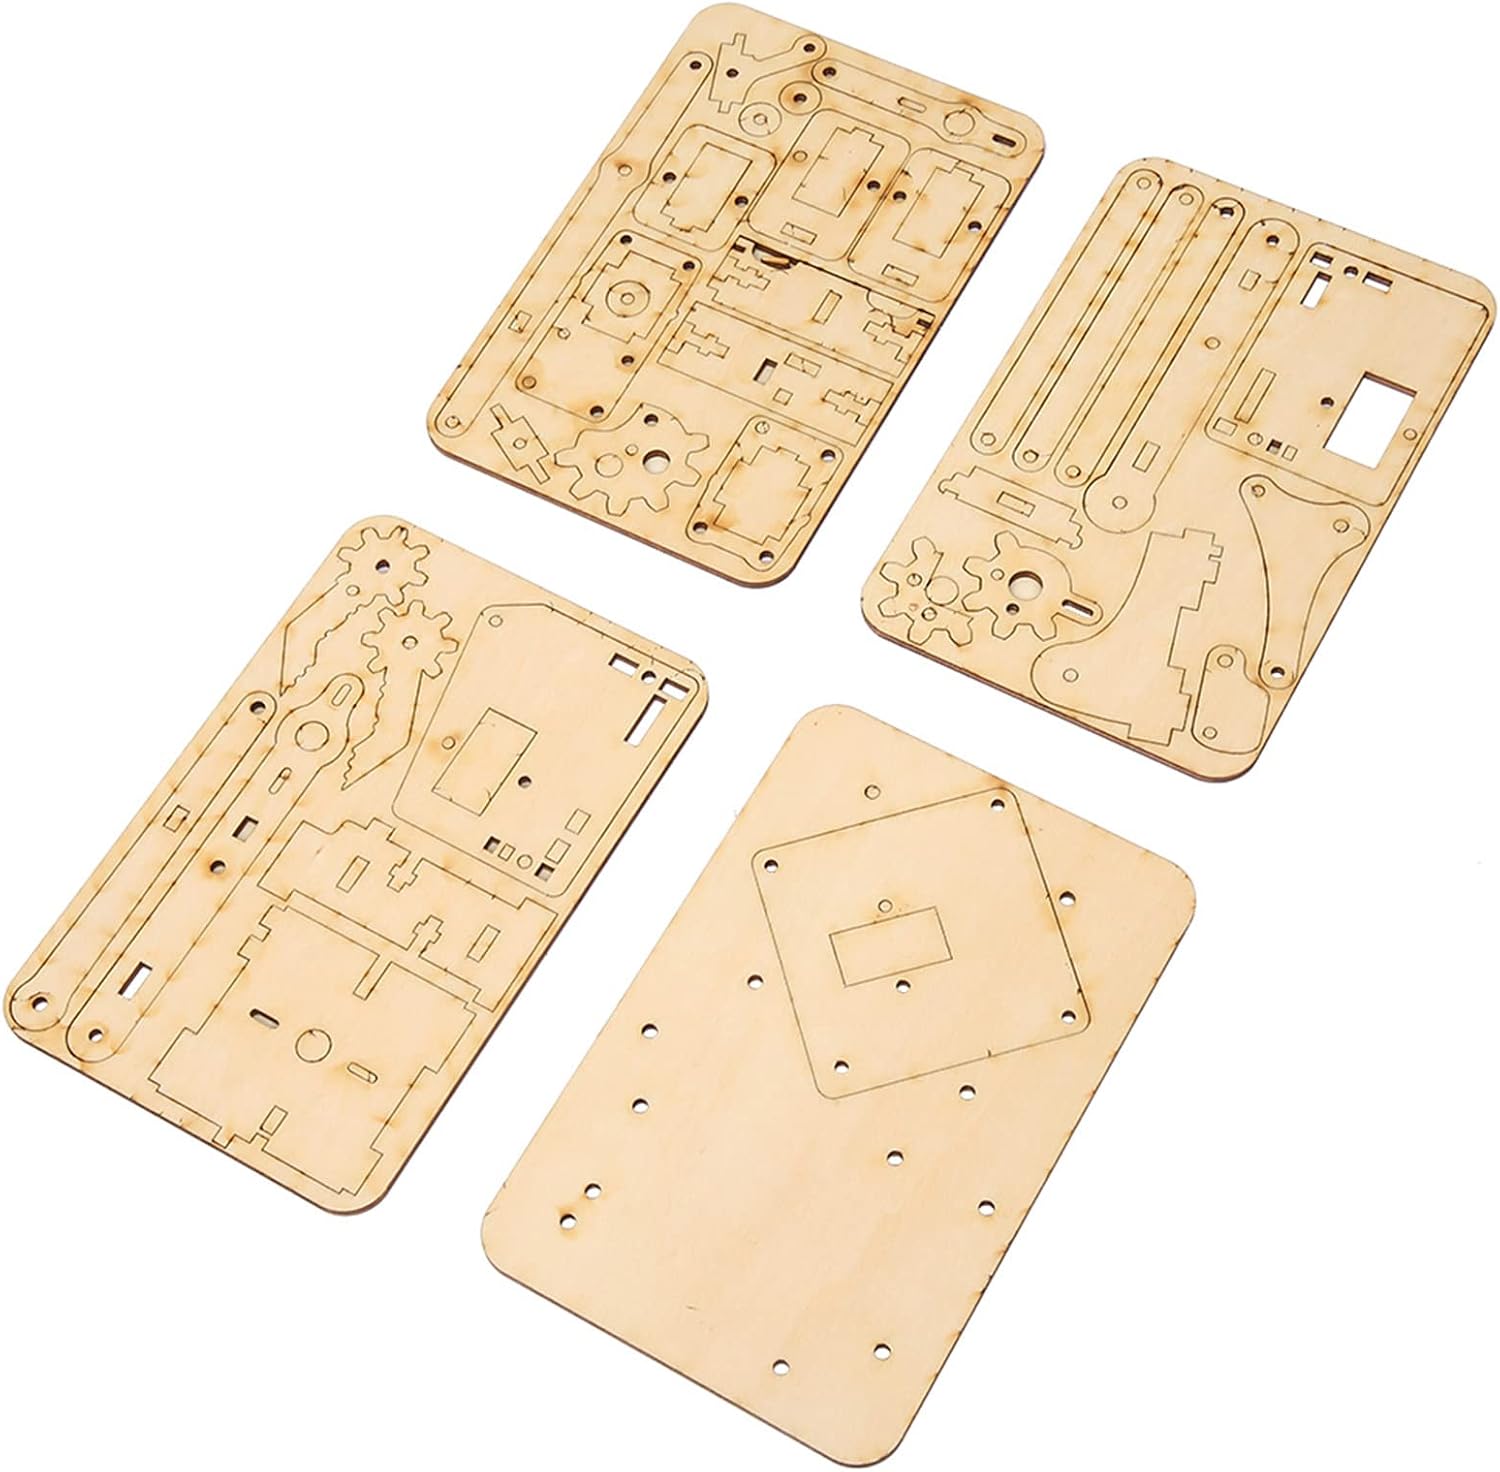
Image: Laser-cut wooden sheets containing all the structural components for the FTVOGUE Robot Arm Kit.

Image: A single SG90 Servo Motor, a key component for controlling the arm's movement. Four are included.

Image: The collection of fasteners, including screws and nuts, along with a small wrench and hex key for assembly.

Image: Various servo horns and small screws used to connect the servo motors to the wooden arm segments.
Setup and Assembly
The FTVOGUE Robot Arm Kit requires assembly. Please follow the instructions carefully. An online guide is recommended for detailed visual steps.
- Identify Components: Lay out all wooden parts, servo motors, screws, and nuts. Refer to the package contents section to ensure everything is present.
- Assemble Base: Begin by assembling the base of the robot arm. This typically involves attaching the main support pillars to the base plate using the provided screws and nuts.
- Attach Servos: Mount the SG90 servo motors into their designated slots on the wooden parts. Ensure they are oriented correctly for proper movement.
- Connect Arm Segments: Assemble the various wooden segments of the arm, connecting them with screws and nuts to form the articulated structure. Each joint will be driven by a servo.
- Install Servo Horns: Attach the appropriate servo horns to the servo motor shafts. These horns will connect to the wooden arm segments to transfer motion.
- Assemble Gripper: Construct the gripper mechanism, ensuring the gears and moving parts operate smoothly.
- Final Connections: Connect the gripper to the arm and ensure all servo wires are routed correctly.

Image: An assembly diagram illustrating the initial steps for constructing the robot arm's base.

Image: A diagram showing how to assemble one of the robot arm's segments.

Image: Another assembly diagram detailing the construction of a different arm segment.
Important Note:
Some users have reported that the provided online tutorial might not be entirely clear, and some pieces may not fit perfectly, requiring minor adjustments. It is recommended to search for "Assembly Manual for V1.0 de MeArm.io" by Scott Pierce as a reference, as this kit shares similarities in design. Ensure all screws are tightened securely but avoid over-tightening, especially into wooden parts, to prevent stripping.

Image: A fully assembled FTVOGUE 4 DOF Wood Robot Arm Kit, showing the wooden structure and servo motors from a front perspective.

Image: A side view of the assembled FTVOGUE 4 DOF Wood Robot Arm Kit, highlighting the articulated joints.
Operating Instructions
This robot arm kit is designed to be controlled using microcontrollers such as Arduino or Raspberry Pi. It does not come with pre-programmed functionality and requires programming to operate.
- Connect to Microcontroller: Connect the servo motors to your chosen microcontroller (e.g., Arduino, Raspberry Pi) according to its documentation. Each SG90 servo typically requires a power, ground, and signal pin connection.
- Power Supply: Ensure you have an adequate power supply for both the microcontroller and the servo motors. Servos can draw significant current, especially when moving.
- Programming:
- Arduino: Use the Arduino IDE and the Servo library to control the SG90 motors. You will write code to send pulse-width modulation (PWM) signals to each servo to control its angle.
- Raspberry Pi: Utilize Python libraries (e.g., RPi.GPIO or pigpio) to control the servo motors by generating PWM signals on the GPIO pins.
- Calibration: After initial programming, calibrate the servo angles to ensure the arm moves within its intended range and does not strain the motors or wooden parts.
- Experiment: Develop programs to make the arm perform various tasks, such as picking up and placing small objects, drawing, or following paths.
Numerous online tutorials and communities exist for controlling SG90 servos with Arduino and Raspberry Pi. Searching for "Arduino SG90 robot arm control" or "Raspberry Pi SG90 robot arm control" will provide ample resources.

Image: A detailed view of an assembled joint, illustrating how an SG90 servo motor is integrated to drive the mechanical arm's movement.
Maintenance
Proper maintenance will extend the lifespan and performance of your robot arm kit:
- Regular Inspection: Periodically check all screws and nuts for tightness. Wooden parts can expand or contract slightly, potentially loosening fasteners.
- Cleanliness: Keep the robot arm free from dust and debris. Use a soft, dry cloth for cleaning. Avoid using liquids directly on the wooden parts or electronics.
- Servo Care: Do not force the arm's movement manually against the servos, as this can damage the internal gears.
- Storage: Store the robot arm in a dry, stable environment away from extreme temperatures or humidity to prevent warping of the wooden components.
Troubleshooting
| Problem | Possible Cause | Solution |
|---|---|---|
| Missing Parts | Manufacturing error or shipping issue. | Contact FTVOGUE customer support with your purchase details and a list of missing components. |
| Difficulty Assembling | Unclear instructions, tight-fitting parts, or incorrect orientation. | Refer to online assembly guides (e.g., MeArm.io V1.0 manual). Gently sand edges if parts are too tight. Double-check component orientation before tightening. |
| Servos Not Moving | Incorrect wiring, insufficient power, or programming error. | Verify all wiring connections (power, ground, signal). Ensure adequate power supply for servos. Check your code for correct servo pin assignments and angle commands. |
| Arm Movement is Jerky/Weak | Insufficient power, loose connections, or mechanical friction. | Ensure power supply can deliver enough current. Check all mechanical joints for smooth movement and ensure no parts are rubbing excessively. Tighten loose screws. |
| Arm Does Not Reach Full Range of Motion | Mechanical obstruction or incorrect servo calibration. | Inspect the arm for any physical obstructions. Adjust servo angle limits in your code to match the arm's physical capabilities. |
Specifications
- Brand: FTVOGUE
- Model: SNAM1500 (FTVOGUEygt15qewxz)
- Degrees of Freedom (DOF): 4
- Material: Wood
- Servo Motors: 4 x SG90 Micro Servos
- Assembly Required: Yes
- Recommended Age: 0 - 1 years (Note: This manufacturer recommendation appears to be a generic placeholder and may not be accurate for a DIY robotics kit. User discretion is advised.)
- Dimensions (Assembled, approximate): 10 x 10 x 10 millimeters (Note: This dimension appears to be a generic placeholder and may not be accurate for the actual assembled robot arm.)
- Educational Value: Develops skills in robotics, electronics, and mechanical assembly.
- Compatibility: Designed for use with microcontrollers like Arduino and Raspberry Pi.
Warranty and Support
FTVOGUE aims to provide quality products. For specific warranty information or technical support, please refer to the documentation included with your purchase or visit the official FTVOGUE brand store on Amazon:
If you encounter issues such as missing parts or assembly difficulties, please contact the seller through your purchase platform for assistance.