Product Overview
The PERLESMITH PSXLF01 Long Arm TV Wall Mount is designed to provide versatile and secure mounting for your television. This full-motion mount features an articulating arm that allows for extensive extension, swivel, and tilt adjustments, optimizing your viewing experience from various angles within your room. It is engineered for durability and ease of installation on compatible wall types.

Image: The PERLESMITH Long Arm TV Wall Mount in its fully extended and articulated position, showcasing its robust design and flexibility.
Key Features
- Freedom of Movement: Features a 42.72-inch articulating extension arm and 90-degree swivel (left and right) to direct the screen towards your viewing position. Ideal for corner or recessed installations.
- Universal Design: Compatible with most 42-90 inch LCD, LED, OLED 4K flat screen or curved TVs. Supports VESA mounting patterns from 200x100mm to 800x400mm and can hold TVs up to 150 lbs.
- Easy Installation: Designed for installation on 16-24 inch wood studs, concrete, or brick walls. Includes a comprehensive instruction manual, wall template, and all necessary mounting hardware. Integrated cable management clips help organize cables.
- Enhanced Viewing Experience: Offers tilt adjustments (up 5°, down 15°) to reduce glare and optimize viewing angles. The TV can also be leveled by +4°/-4° after installation for perfect alignment.
- Space Saving: The mount allows the TV to be pulled closer for viewing and retracted to just 4.5 inches from the wall when not in use, maximizing room space.

Image: Illustration demonstrating the mount's capability to securely hold up to 150 lbs, highlighting its robust construction.
Specifications
| Brand | PERLESMITH |
| Model Number | PSXLF01 |
| Mounting Type | Wall Mount |
| Movement Type | Articulating (Full Motion) |
| Material | Alloy Steel |
| Color | Black |
| Compatible TV Sizes | 42 - 90 Inches |
| Maximum Load Capacity | 150 lbs |
| VESA Compatibility | 200x100mm to 800x400mm |
| Extension from Wall | Up to 42.72 inches |
| Retraction from Wall | 4.5 inches |
| Tilt Angle | +5° / -15° |
| Swivel Angle | ±90° |
| Level Adjustment | ±4° |
| Compatible Stud Spacing | 16", 18", 24" Wood Studs |
| Item Weight | 24.8 pounds |
| UPC | 619191901029 |

Image: A visual guide detailing the compatible TV sizes (37"-84"), maximum load capacity (132 lbs), suitable wall types (solid concrete, brick, 16"/18"/24" wood studs), and various VESA mounting patterns supported by the mount.
Setup and Installation
Proper installation is crucial for the safety and stability of your TV wall mount. Please read all instructions carefully before beginning. It is recommended to have at least two people for installation.
1. Pre-Installation Checklist
- Verify all parts are included as per the packing list.
- Ensure your TV's weight and VESA pattern are within the mount's specifications.
- Confirm your wall type (wood stud, concrete, or brick) is suitable. DO NOT mount on drywall alone.
- Gather necessary tools (e.g., drill, stud finder, level, screwdriver, socket wrench).
2. Attaching Brackets to TV
Carefully place your TV face down on a soft, clean surface. Identify the VESA mounting holes on the back of your TV. Select the appropriate screws and spacers (if needed) from the provided hardware kit that fit your TV's mounting holes. Attach the TV brackets to the back of your TV, ensuring they are securely fastened and aligned. The brackets should not extend past the bottom edge of the TV.
Video: Official PERLESMITH video demonstrating the installation process for the Long Arm Full Motion TV Wall Mount. This video provides a visual guide for attaching the mount to your TV and wall.

Image: A step-by-step visual guide illustrating the easy installation process: 1) Attach brackets to the TV, 2) Mount the wall plate, and 3) Hang the TV. A mounting template is shown for accurate placement.
3. Mounting Wall Plate
Use a stud finder to locate the center of your wood studs. For concrete or brick walls, mark your desired mounting location. Use the provided wall template to mark the drill holes accurately. Drill pilot holes according to the instructions for your wall type. Securely attach the wall plate to the wall using the appropriate lag bolts and washers. Ensure the wall plate is level before fully tightening all fasteners.
4. Hanging the TV
With assistance, carefully lift the TV with the attached brackets and hook them onto the wall plate. Ensure the TV is securely seated on the wall plate. Engage the security locks on the bottom of the TV brackets to prevent accidental dislodgement. These locks typically involve tightening screws or engaging clips to secure the TV to the wall plate.
Operating Instructions (Adjustments)
Once installed, your PERLESMITH TV mount offers various adjustments to achieve the perfect viewing angle.
- Swivel: Gently push or pull the TV to swivel it left or right up to 90 degrees in either direction. This allows you to direct the screen towards different seating areas.
- Tilt: Loosen the tilt knobs or bolts on the TV brackets, adjust the screen to your desired tilt angle (up 5° or down 15°), and then re-tighten the knobs/bolts to secure the position. This helps reduce glare.
- Level Adjustment: If your TV appears unlevel after installation, you can adjust the level by ±4° using the dedicated leveling screws on the TV brackets.
- Extension/Retraction: Pull the TV gently away from the wall to extend the arm up to 42.72 inches, or push it back towards the wall to retract it to 4.5 inches.

Image: A television mounted on the PERLESMITH arm, demonstrating its ability to swivel 90 degrees left or right for optimal viewing angles.
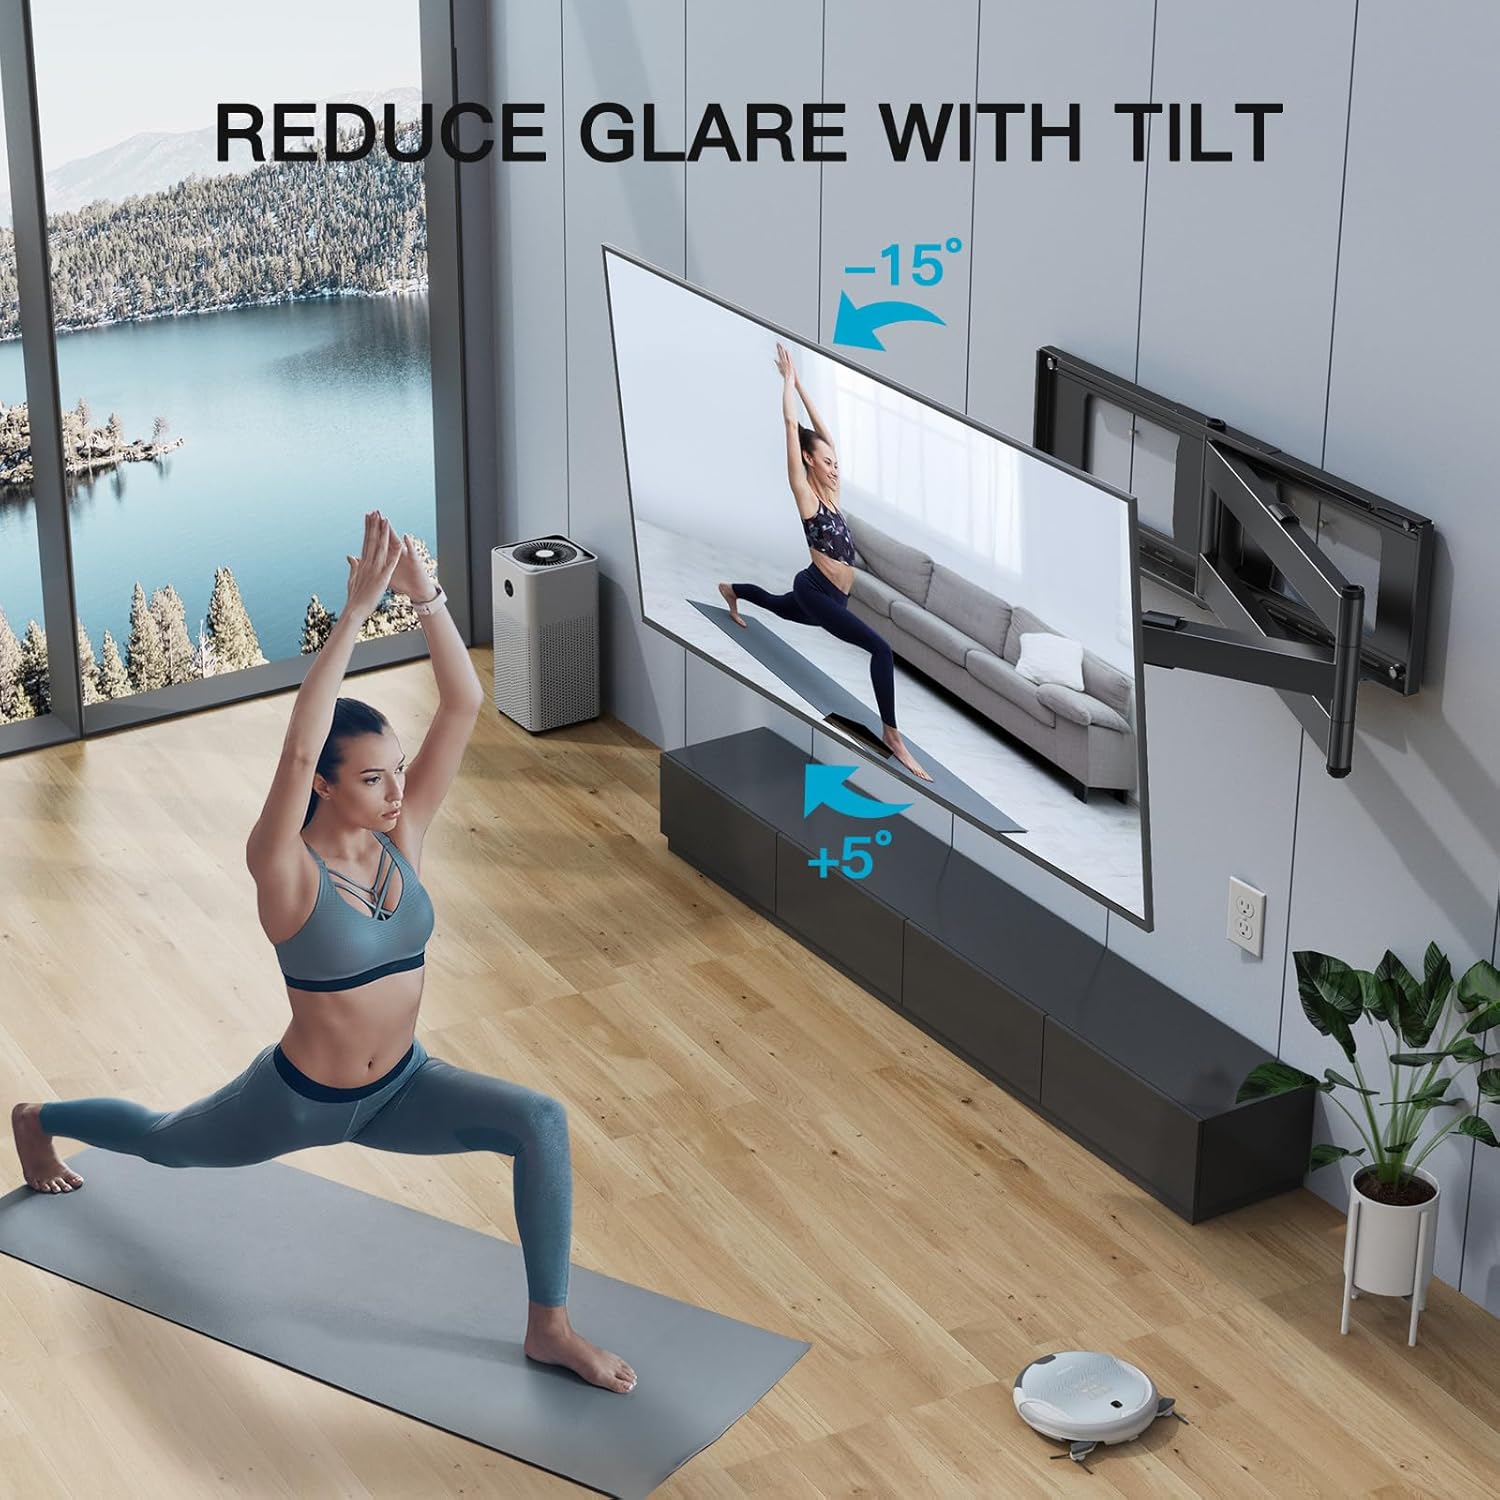
Image: An illustration showing the TV mount's tilt functionality, allowing the screen to be angled up by 5 degrees or down by 15 degrees to reduce glare and improve viewing comfort.

Image: The TV mount positioned in a room corner, illustrating its effectiveness as a space-saving solution for corner installations.

Image: The TV mount fully extended from the wall, demonstrating its long reach and the ability to swivel the TV for viewing from various positions in the room.
Maintenance
To ensure the longevity and safe operation of your TV wall mount, regular maintenance is recommended:
- Periodic Inspection: Annually, inspect all screws and bolts to ensure they remain tight. Over time, vibrations or movement can cause fasteners to loosen.
- Cleaning: Wipe the mount with a soft, dry cloth to remove dust. Avoid using abrasive cleaners or solvents that could damage the finish.
- Lubrication: If the articulating arm or swivel points become stiff, apply a small amount of silicone-based lubricant to the moving joints. Do not use oil-based lubricants as they can attract dust.
- Cable Management: Periodically check the cable management clips and ensure cables are not pinched or under excessive tension. Re-route if necessary.
Troubleshooting
| Problem | Possible Cause | Solution |
|---|---|---|
| TV is not level. | Level adjustment screws are loose or not properly set. | Adjust the level adjustment screws on the TV brackets until the TV is level, then tighten them securely. |
| Mount feels loose or wobbly. | Wall plate lag bolts or TV bracket screws are loose. | Carefully re-tighten all lag bolts securing the wall plate to the wall and all screws attaching the TV brackets to the TV. Do not overtighten. |
| Articulating arm is stiff or difficult to move. | Lack of lubrication or dust/debris in joints. | Clean the joints and apply a small amount of silicone-based lubricant to the moving parts of the arm. |
| TV cannot be tilted or swiveled. | Tilt/swivel mechanisms are locked or too tight. | Loosen the tilt knobs/bolts or swivel tension adjustments as per the installation guide. |
Warranty and Support
PERLESMITH products are designed and manufactured to the highest standards. For specific warranty information and customer support, please refer to the official PERLESMITH website or contact their customer service directly.
For any questions or assistance, please visit the PERLESMITH Store or consult the additional resources below.
Additional Resources
For more detailed instructions and information, please refer to the official PDF documents:
You can also learn more about the PERLESMITH brand and its commitment to quality through this video:
Video: "The Story Of PERLESMITH" - A video detailing the brand's philosophy and dedication to providing high-quality mounting solutions.


