
1. Introduction
This manual provides detailed instructions for the installation, operation, and maintenance of the LTS LTDHIP3662W-28ISM IP Eyeball Camera. This 6-megapixel camera features a built-in microphone, 2.8mm fixed lens, True WDR 120dB, H.265+ compression, and an IR range of up to 164 feet (50 meters). It is designed for both indoor and outdoor surveillance with an IP67 weatherproof rating. Please read this manual thoroughly before using the product to ensure proper setup and functionality.
2. Package Contents
Verify that all items are present and in good condition upon opening the package. If any items are missing or damaged, contact your vendor immediately.
- LTS LTDHIP3662W-28ISM IP Eyeball Camera
- Mounting Screws and Wall Plugs
- Waterproof Connector for Ethernet Cable
- Quick Start Guide (if applicable)
- Drill Template (if applicable)
3. Product Overview
The LTDHIP3662W-28ISM is a high-performance IP camera designed for reliable surveillance. It features a robust housing, advanced imaging capabilities, and flexible connectivity options.

Figure 3.1: Front View of the LTDHIP3662W-28ISM IP Eyeball Camera. This image displays the camera's main lens, IR illuminators, and built-in microphone, housed within its white eyeball-style casing.
Key Features:
- 6 Megapixel Resolution (3072x2048@20fps)
- 2.8mm Fixed Lens with 98° Horizontal FOV
- Built-in Microphone
- True WDR 120dB for clear images in challenging lighting
- H.265+/H.265/H.264 Video Compression
- Infrared (IR) Night Vision up to 164ft (50m)
- MicroSD Card Slot (up to 128GB) for local storage
- IP67 Weatherproof Rating for outdoor use
- Power over Ethernet (PoE/ePoE) and DC 12V power options
4. Setup and Installation
4.1 Safety Precautions
- Ensure power is disconnected before installation or maintenance.
- Use only approved power adapters (DC 12V) or PoE switches.
- Avoid pointing the camera directly at strong light sources.
- Do not disassemble the camera. Refer servicing to qualified personnel.
4.2 Physical Installation
- Choose a Mounting Location: Select a location that provides the desired field of view and is within range of your network and power source. The camera is IP67 rated for outdoor use.
- Prepare the Surface: Use the provided drill template (if included) to mark the screw holes on the wall or ceiling. Drill pilot holes.
- Mount the Camera: Secure the camera base to the mounting surface using the provided screws and wall plugs.
- Adjust Camera Angle: Loosen the adjustment screws on the camera body to position the lens for optimal coverage. Tighten the screws once the desired angle is achieved. The camera features 3-axis adjustment.
4.3 Network and Power Connection
The camera supports Power over Ethernet (PoE/ePoE) or a 12V DC power supply.
- Ethernet Connection:
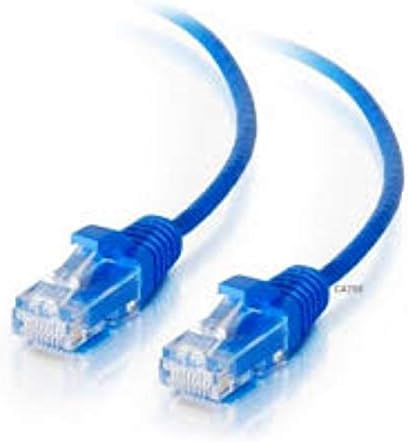
Figure 4.1: Standard Ethernet Cable. This image shows a blue Ethernet cable with RJ45 connectors, used for network and Power over Ethernet (PoE) connectivity.
- Connect one end of an Ethernet cable to the camera's RJ45 port.
- If using PoE, connect the other end of the Ethernet cable to a PoE-enabled switch or NVR.
- If not using PoE, connect the other end to a standard network switch/router and proceed to connect a 12V DC power adapter to the camera's power input.
- Use the provided waterproof connector for outdoor installations to protect the Ethernet connection.
- Power Connection (if not using PoE):
- Connect a 12V DC power adapter (not included) to the camera's power input port.
- Ensure the power source meets the camera's specifications.
4.4 Initial Network Configuration
After connecting the camera to your network, you will need to discover and activate it.
- Install SADP Tool: Download and install the SADP (Search Active Device Protocol) tool from the manufacturer's website on a computer connected to the same network as the camera.
- Discover Camera: Run the SADP tool. It will automatically detect all active LTS IP devices on your local network.
- Activate Camera: New cameras are inactive by default. Select the camera from the SADP list and set a strong password for it. This activates the camera.
- Modify IP Address (Optional): If your network requires a static IP address, you can modify it using the SADP tool. Ensure the IP address, subnet mask, and gateway are correct for your network.
- Access via Web Browser: Open a web browser (e.g., Chrome, Firefox) and enter the camera's IP address in the address bar. Log in using the password you set during activation.
5. Operating Instructions
5.1 Live View
Once logged into the camera's web interface, navigate to the "Live View" section to see the real-time video feed. You can adjust stream quality, resolution, and other display settings here.
5.2 Recording and Playback
The camera supports continuous recording, motion-triggered recording, and scheduled recording to a MicroSD card (up to 128GB) or a Network Video Recorder (NVR).
- MicroSD Card Installation: Power off the camera. Locate the MicroSD card slot (refer to the product diagram or quick start guide). Insert the card carefully until it clicks into place. Power on the camera.
- Formatting MicroSD Card: Access the camera's web interface, go to "Storage" or "SD Card Settings," and format the inserted MicroSD card.
- Recording Schedule: In the "Recording" or "Event" settings, configure your desired recording schedule and event triggers (e.g., motion detection).
- Playback: To view recorded footage, access the "Playback" section in the web interface or through your NVR/client software. Select the date and time to review recordings.
5.3 Motion Detection and Alerts
Configure motion detection to trigger recordings or send alerts.
- Enable Motion Detection: Navigate to "Event" or "Motion Detection" settings. Enable the feature.
- Define Detection Area: Draw or select the areas within the camera's view where motion should be detected.
- Adjust Sensitivity: Set the sensitivity level to minimize false alarms while ensuring important events are captured.
- Configure Linkage Actions: Specify what happens when motion is detected, such as:
- Trigger recording to MicroSD card or NVR.
- Send email notifications.
- Upload images/videos to an FTP server.
6. Maintenance
6.1 Cleaning
- Regularly clean the camera lens and housing with a soft, dry cloth.
- For stubborn dirt, use a cloth lightly dampened with water. Avoid harsh chemicals or abrasive cleaners.
- Ensure the camera is powered off before cleaning.
6.2 Firmware Updates
Periodically check the manufacturer's website for firmware updates. Firmware updates can improve performance, add new features, and address security vulnerabilities.
- Download the latest firmware file for your specific model from the LTS support website.
- Access the camera's web interface and navigate to "System" or "Maintenance" -> "Firmware Upgrade."
- Upload the firmware file and follow the on-screen instructions. Do not power off the camera during the upgrade process.
6.3 Data Backup
Regularly back up important video footage from your MicroSD card or NVR to an external storage device to prevent data loss.
7. Troubleshooting
| Problem | Possible Cause | Solution |
|---|---|---|
| Camera not powering on | No power supply; Faulty power adapter/PoE switch; Loose connection. | Check power adapter/PoE connection. Ensure power source is active. Test with a known good power source. |
| No video feed | Network connectivity issue; Incorrect IP address; Camera not activated; Firewall blocking access. | Verify network cable connection. Use SADP tool to check/modify IP address. Ensure camera is activated with a strong password. Check firewall settings on your computer/router. |
| Poor image quality | Dirty lens; Insufficient lighting; Incorrect video settings. | Clean the camera lens. Ensure adequate lighting or verify IR functionality. Adjust brightness, contrast, and resolution settings in the web interface. |
| Motion detection not working | Motion detection disabled; Incorrect sensitivity; Detection area not configured. | Enable motion detection in settings. Adjust sensitivity. Define detection areas correctly. |
| MicroSD card not recording | Card not inserted correctly; Card not formatted; Card full; Recording schedule not set. | Reinsert MicroSD card. Format the card via web interface. Check available storage. Configure recording schedule. |
8. Specifications
| Feature | Detail |
|---|---|
| Model | LTDHIP3662W-28ISM |
| Image Sensor | 1/2.9” Progressive Scan CMOS |
| Max. Resolution | 3072 × 2048 (6MP) |
| Frame Rate | 20 fps (3072 × 2048) |
| Lens | 2.8 mm fixed lens |
| Field of View (FOV) | Horizontal: 98°, Vertical: 67° |
| Minimum Illumination | Color: 0.04 Lux @ (F1.6, AGC ON), B/W: 0 Lux with IR |
| IR Range | Up to 50 m (164 ft) |
| Video Compression | H.265+/H.265/H.264+/H.264 |
| Wide Dynamic Range (WDR) | 120 dB True WDR |
| Digital Noise Reduction (DNR) | 3D DNR |
| Audio | Built-in Microphone |
| Local Storage | MicroSD slot, up to 128 GB |
| Network Interface | 1 RJ45 10M/100M self-adaptive Ethernet port |
| Power Supply | 12 VDC ± 25%, PoE (802.3af, class 3) |
| Power Consumption | Max. 7.5 W |
| Operating Conditions | -30 °C to 60 °C (-22 °F to 140 °F), Humidity 95% or less (non-condensing) |
| Ingress Protection | IP67 |
| Dimensions | (Refer to product diagram for exact measurements) |
| Weight | (Refer to product packaging) |
9. Warranty and Support
For information regarding product warranty, technical support, or service, please refer to the official LTS website or contact your authorized dealer. Keep your purchase receipt as proof of purchase for warranty claims.
Online Resources: Visit the LTS support portal for FAQs, firmware downloads, and additional documentation.


