
1. Product Overview
The TIMBERTECH Airbrush Kit with Compressor AS18-2K is a comprehensive basic start kit designed for various artistic and hobby applications. This kit includes an oil-less piston compressor, a dual-action gravity feed airbrush, an air hose, cleaning brushes, and test paints. It is suitable for tasks such as nail painting, temporary tattoos, cake decorating, craft painting, model art, and automotive graphics.
The compressor features an auto-start/auto-stop function, a pressure regulator with a gauge, a water trap, and an overheat protector, ensuring stable air pressure and safe operation. Its portable and quiet design makes it ideal for both beginners and experienced users in various environments.
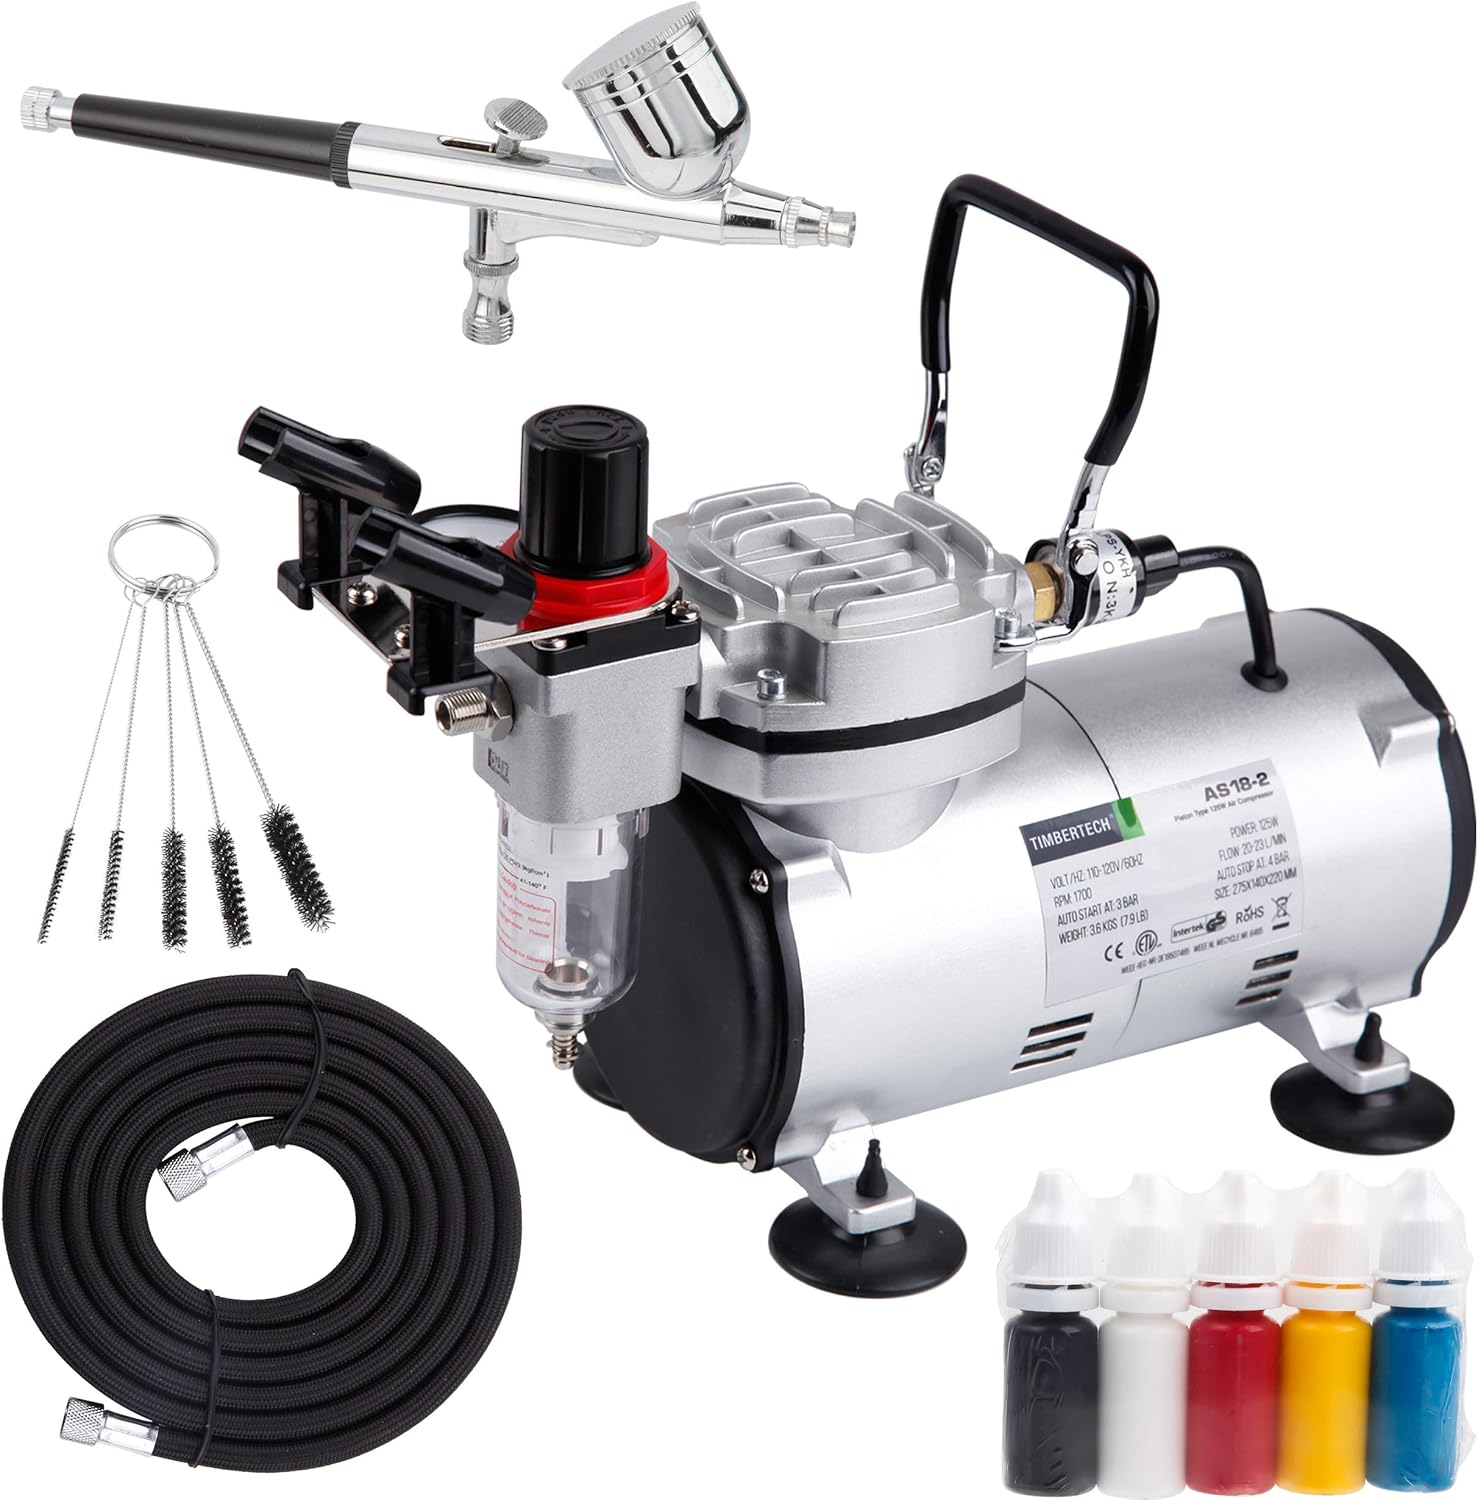
Figure 1.1: Complete TIMBERTECH Airbrush Kit AS18-2K, showing the compressor, airbrush, hose, cleaning brushes, and test paints.
2. Setup Instructions
Follow these steps to set up your TIMBERTECH Airbrush Kit for first use:
- Unpack Components: Carefully remove all components from the packaging. Verify that all parts listed in the packing list are present.
- Position the Compressor: Place the compressor on a stable, flat surface. Ensure there is adequate ventilation around the unit.
- Connect Air Hose:
- Locate the air outlet on the compressor, typically near the pressure regulator.
- Connect one end of the provided air hose to the compressor's air outlet. Tighten securely by hand.
- Connect the other end of the air hose to the airbrush's hose connection point. Ensure a snug fit to prevent air leaks.

Figure 2.1: The AS18-2K compressor with its pressure regulator and air outlet visible.
- Connect Power: Plug the compressor's power cord into a standard 120V electrical outlet.
- Initial Airbrush Check: Before adding paint, test the airbrush with clean water to ensure proper air flow and trigger function.
3. Operating Instructions
This section details how to operate your airbrush kit effectively.
3.1 Powering On and Pressure Adjustment
- Power On: Turn on the compressor using the power switch. The compressor will start running and build pressure.
- Automatic Stop Function: The compressor is designed with an auto-start (3 Bar / 43 PSI) and auto-stop (4 Bar / 58 PSI) feature. This means it will automatically turn off when the pressure reaches 58 PSI and turn back on when it drops to 43 PSI, maintaining consistent air pressure without constant running.

Figure 3.1: Compressor gauge illustrating the auto-start and auto-stop pressure settings.
- Adjusting Air Pressure:
- To adjust the output air pressure, first pull the black knob on top of the pressure regulator upwards (Step 1).
- Rotate the knob clockwise to increase pressure or counter-clockwise to decrease pressure (Step 2).
- Read the current pressure from the gauge.
- Once the desired pressure is set, push the knob back down to lock the setting.

Figure 3.2: Steps for adjusting and locking the air pressure setting on the compressor.
3.2 Airbrush Usage (Dual-Action)
The included airbrush is a dual-action gravity feed type, meaning it controls both air and paint flow independently with a single trigger.
- Prepare Paint: Ensure your paint is properly thinned for airbrushing. The consistency should be similar to milk. Pour the thinned paint into the airbrush's gravity cup.
- Air Flow: Press the trigger down to release air.
- Paint Flow: While holding the trigger down for air, pull the trigger back to release paint. The further back you pull, the more paint will be released.
- Spraying Technique: Practice on scrap material to get a feel for the airbrush. Maintain a consistent distance from your surface and move your hand smoothly.

Figure 3.3: Examples of airbrush applications including model painting, nail art, and body art.
3.3 Safety Precautions
- Always operate the compressor in a well-ventilated area.
- Wear appropriate personal protective equipment (PPE), such as a respirator mask and safety glasses, especially when spraying paints or chemicals.
- Do not touch the compressor motor during or immediately after operation, as it may become hot.
- Ensure the power cord is not damaged and is properly plugged into a grounded outlet.
- This compressor is designed for airbrush use only. Do not connect it to spray guns or other high-demand air tools.
4. Maintenance
Regular maintenance ensures the longevity and optimal performance of your airbrush kit.
4.1 Airbrush Cleaning
Clean your airbrush thoroughly after each use, especially when changing colors or finishing a session.
- Flush with Cleaner: Empty any remaining paint from the cup. Add a few drops of appropriate airbrush cleaner or water (for water-based paints) to the cup. Spray through until the cleaner runs clear.
- Back-Flush: Cover the nozzle with your finger or a cap and press the trigger for air. This will force air back into the paint cup, creating bubbles that help clean the inside of the cup and siphon tube.
- Disassemble and Clean: For a deeper clean, disassemble the airbrush components (needle, nozzle, cap). Use the provided cleaning brushes and cleaner to remove all paint residue. Be gentle with the needle and nozzle as they are delicate.
- Reassemble: Carefully reassemble the airbrush, ensuring all parts are correctly seated.

Figure 4.1: The dual-action airbrush with its components and a cleaning tool.
4.2 Compressor Maintenance
- Drain Water Trap: The water trap (moisture filter) collects condensation. Regularly check and drain it by unscrewing the valve at the bottom of the trap. This prevents moisture from reaching your airbrush and paint.
- Clean Air Filter: Periodically check the air filter on the compressor. If it appears dirty, clean or replace it according to manufacturer guidelines to ensure optimal air flow.
- Storage: When not in use, store the compressor and airbrush in a clean, dry place away from direct sunlight and extreme temperatures.
5. Troubleshooting
This section addresses common issues you might encounter and their solutions.
| Problem | Possible Cause | Solution |
|---|---|---|
| No air from airbrush |
|
|
| Inconsistent spray or sputtering |
|
|
| Paint not flowing |
|
|
| Compressor gets hot |
|
|
6. Product Specifications
Key technical specifications for the TIMBERTECH Airbrush Kit with Compressor AS18-2K:
| Feature | Detail |
|---|---|
| Model Name | AS18 2K |
| Voltage | 120 Volts |
| Power Source | Corded Electric |
| Noise Level | 47 dB |
| Air Flow Capacity | 20-23 L/Min (LPM) |
| Maximum Operating Pressure | 58 PSI (4 Bar) |
| Auto-Start Pressure | 43 PSI (3 Bar) |
| Auto-Stop Pressure | 58 PSI (4 Bar) |
| Motor Horsepower | 0.17 Horsepower |
| Item Weight | 8.95 Pounds |
| Product Dimensions (L x W x H) | 12.6" x 5.5" x 12.2" |
| Material | Alloy Steel, Aluminum, Copper |
| Hose Length | 6 Feet |
| Airbrush Nozzle/Needle Size | 0.30mm |
| Special Features | Oil-less piston, Maintenance-free, Portable, Overheat protector, Regulator with gauge, Water trap |

Figure 6.1: Dimensional overview of the TIMBERTECH AS18-2K compressor.
7. Warranty and Support
7.1 Warranty Information
TIMBERTECH products are manufactured to high-quality standards. For specific warranty terms and conditions, please refer to the warranty card included with your product or visit the official TIMBERTECH website. Typically, products are covered against manufacturing defects for a specified period from the date of purchase.
7.2 Customer Support
Should you encounter any issues or have questions regarding your TIMBERTECH Airbrush Kit, please contact customer support. Have your model number (AS182K) and purchase details ready for faster assistance.
- Online Support: Visit the official TIMBERTECH website for FAQs, troubleshooting guides, and contact forms.
- Email Support: Refer to your product packaging or the official website for the customer service email address.