
1. Important Safety Instructions
Read all instructions before using this appliance. Failure to follow these instructions may result in electric shock, fire, or serious injury.
- Do not use outdoors or on wet surfaces.
- Do not allow to be used as a toy. Close attention is necessary when used by or near children.
- Use only as described in this manual. Use only manufacturer's recommended attachments.
- Do not use with damaged cord or plug. If appliance is not working as it should, has been dropped, damaged, left outdoors, or dropped into water, return it to a service center.
- Do not pull or carry by cord, use cord as a handle, close a door on cord, or pull cord around sharp edges or corners. Do not run appliance over cord. Keep cord away from heated surfaces.
- Do not unplug by pulling on cord. To unplug, grasp the plug, not the cord.
- Do not handle plug or appliance with wet hands.
- Do not put any object into openings. Do not use with any opening blocked; keep free of dust, lint, hair, and anything that may reduce airflow.
- Keep hair, loose clothing, fingers, and all parts of body away from openings and moving parts.
- Turn off all controls before unplugging.
- Use extra care when cleaning on stairs.
- Do not use to pick up flammable or combustible liquids, such as gasoline, or use in areas where they may be present.
- Do not pick up anything that is burning or smoking, such as cigarettes, matches, or hot ashes.
- Do not use without dust cup and/or filters in place.
- Prevent unintentional starting. Ensure the switch is in the off-position before connecting to battery pack, picking up or carrying the appliance.
- Recharge only with the charger specified by the manufacturer. A charger that is suitable for one type of battery pack may create a risk of fire when used with another battery pack.
- Use appliances only with specifically designated battery packs. Use of any other battery packs may create a risk of injury and fire.
- When battery pack is not in use, keep it away from other metal objects, like paper clips, coins, keys, nails, screws or other small metal objects, that can make a connection from one terminal to another. Shorting the battery terminals together may cause burns or a fire.
- Under abusive conditions, liquid may be ejected from the battery; avoid contact. If contact accidentally occurs, flush with water. If liquid contacts eyes, additionally seek medical help. Liquid ejected from the battery may cause irritation or burns.
- Do not use a battery pack or appliance that is damaged or modified. Damaged or modified batteries may exhibit unpredictable behavior resulting in fire, explosion or risk of injury.
- Do not expose a battery pack or appliance to fire or excessive temperature. Exposure to fire or temperature above 130°C (265°F) may cause explosion.
- Follow all charging instructions and do not charge the battery pack or appliance outside of the temperature range specified in the instructions. Charging improperly or at temperatures outside of the specified range may damage the battery and increase the risk of fire.
- Have servicing performed by a qualified repair person using only identical replacement parts. This will ensure that the safety of the product is maintained.
- Do not modify or attempt to repair the appliance or the battery pack (as applicable) except as indicated in the instructions for use and care.
2. Product Overview and Components
Familiarize yourself with the parts of your ANKO Cordless Stick Vacuum Cleaner before assembly and operation.

Figure 2.1: The ANKO Cordless Stick Vacuum Cleaner shown on its charging stand, ready for storage and charging. This image highlights the compact design and integrated charging solution.

Figure 2.2: Key components of the vacuum cleaner laid out: the main motor unit with handle, the transparent dustbin with filter assembly, and the detachable Li-ion power pack. This illustrates the modular design for easy maintenance.
Component List:
- Main Motor Unit (with handle and controls)
- Dustbin with Cartridge Filter
- Extension Wand/Tube
- Motorized Floor Brush Head
- Li-ion Power Pack (Battery)
- Charging Adapter
- Wall Mount/Charging Stand (Optional, if included)
- Crevice Tool
- 2-in-1 Brush Tool
3. Setup and Initial Use
Follow these steps to assemble your vacuum cleaner and prepare it for first use.
3.1 Assembly
- Attach the Dustbin: Align the dustbin with the main motor unit and push until it clicks securely into place.
- Insert the Battery: Slide the Li-ion Power Pack into the designated slot on the main motor unit until it locks.
- Connect the Extension Wand: Insert the extension wand into the main motor unit until it clicks.
- Attach the Floor Brush Head: Connect the motorized floor brush head to the other end of the extension wand, ensuring it clicks into place. For handheld use, you can attach accessories directly to the main motor unit.

Figure 3.1: The vacuum cleaner fully assembled in its stick configuration, ready for use. This view shows the main unit, extension wand, and floor brush head connected.
3.2 Initial Charging
Before first use, fully charge the battery. This typically takes 4-5 hours.
- Connect the charging adapter to the charging port on the main motor unit or the charging stand.
- Plug the adapter into a wall outlet.
- The battery indicator lights will illuminate during charging and turn off or change color when fully charged.

Figure 3.2: Close-up of the Li-ion Power Pack, showing the battery indicator lights. These lights provide a visual cue of the battery's charge level during use and charging.
4. Operating Instructions
Learn how to effectively use your ANKO Cordless Stick Vacuum Cleaner for various cleaning tasks.
4.1 Powering On/Off and Suction Modes
- To turn on the vacuum, press the power button located on the handle.
- Press the power button again to turn off the vacuum.
- Some models may feature multiple suction modes (e.g., Eco, Max). Press the mode selection button (if available) to switch between modes.
4.2 Using as a Stick Vacuum
For floor cleaning, use the vacuum in its stick configuration with the motorized floor brush head.

Figure 4.1: The vacuum cleaner standing upright, demonstrating its stick vacuum configuration suitable for cleaning floors. The slim design allows for easy maneuverability.
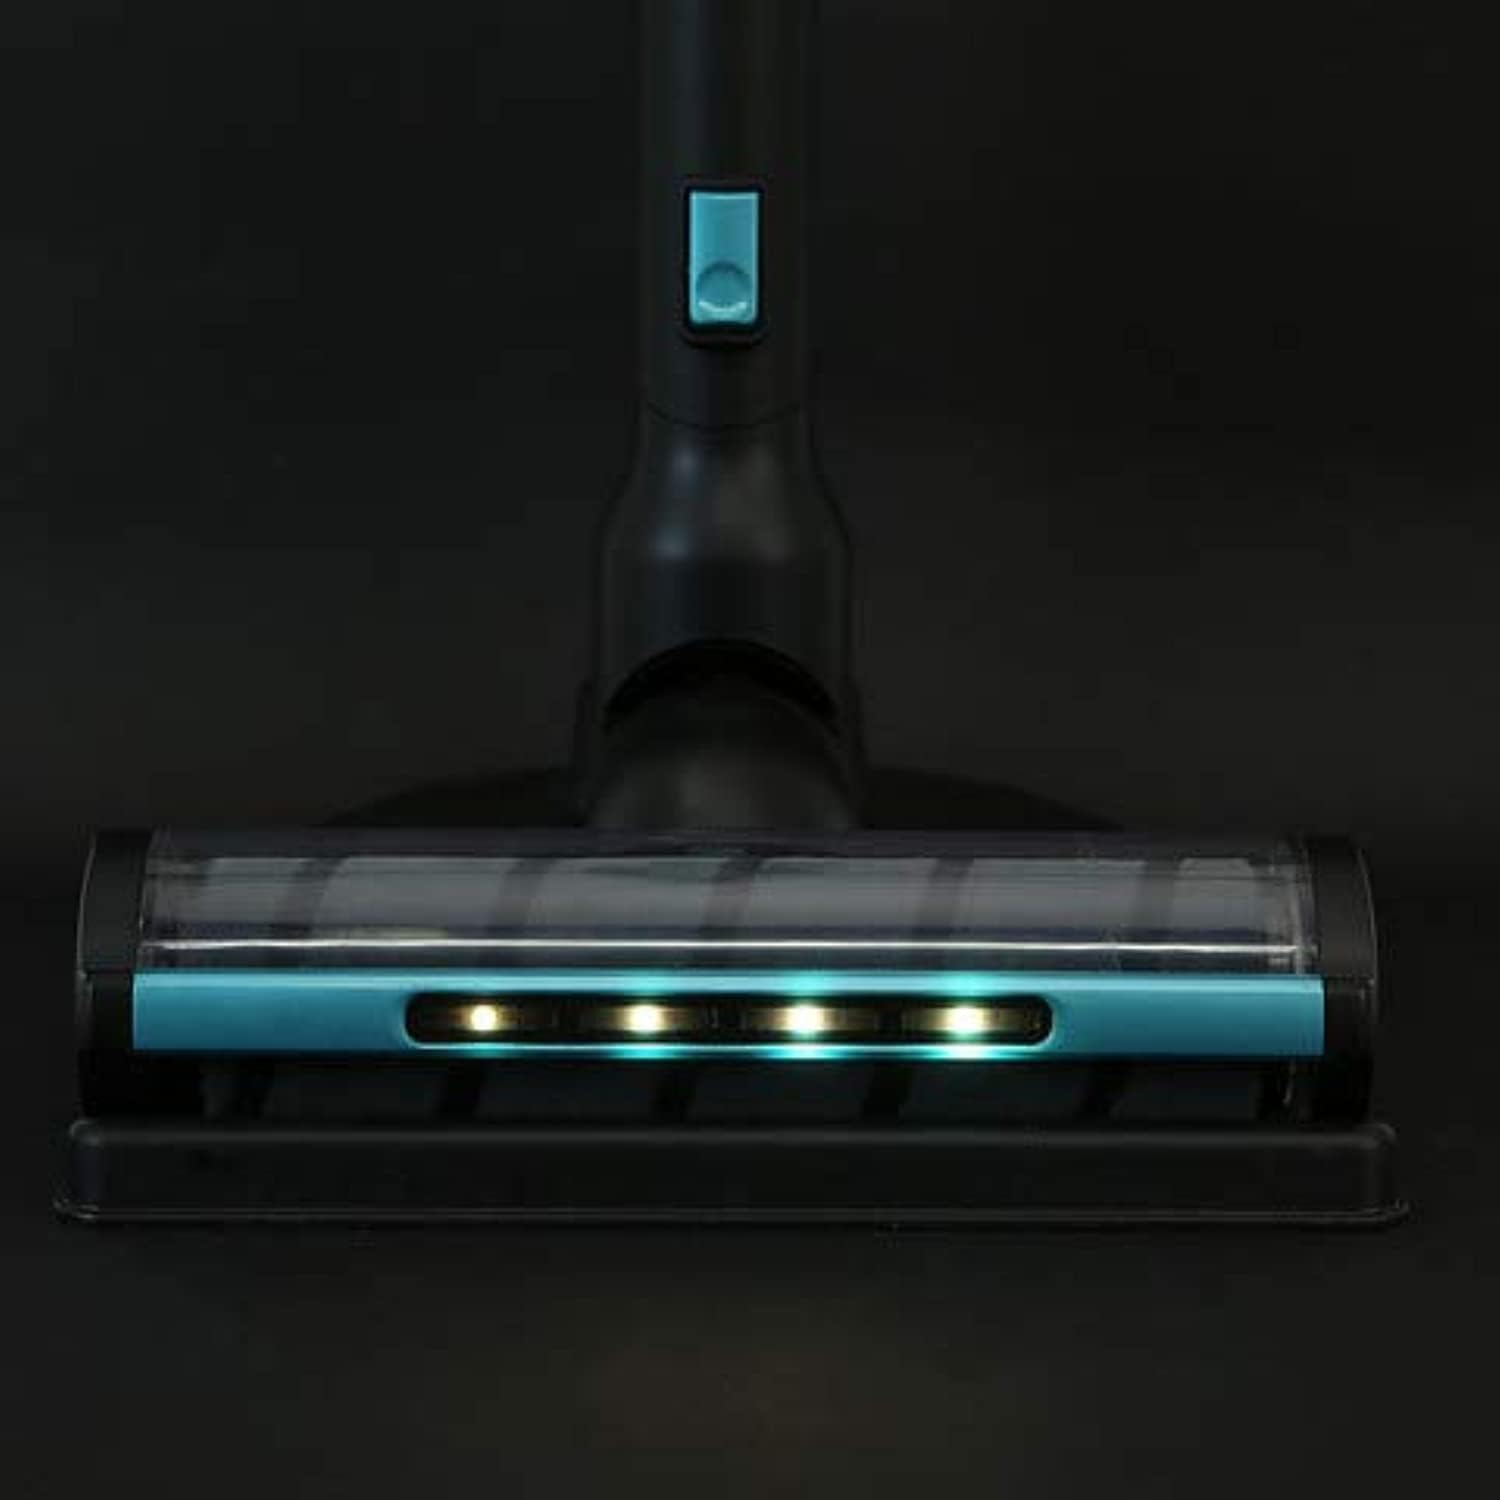
Figure 4.2: A close-up of the motorized floor brush head, highlighting the integrated LED lights. These lights illuminate dark areas, making hidden dust and debris visible for thorough cleaning.
4.3 Using as a Handheld Vacuum
Detach the extension wand and floor brush head to use the main motor unit as a handheld vacuum for furniture, car interiors, or tight spaces.
- Attach the crevice tool for narrow gaps and edges.
- Attach the 2-in-1 brush tool for upholstery and delicate surfaces.

Figure 4.3: The main motor unit configured for handheld use, with the dustbin clearly visible. This compact form factor is ideal for quick clean-ups and reaching elevated areas.

Figure 4.4: The crevice tool and a brush attachment, designed to be used with the handheld vacuum. These accessories enhance the versatility of the cleaner for various cleaning needs.
5. Maintenance and Cleaning
Regular maintenance ensures optimal performance and extends the lifespan of your vacuum cleaner.
5.1 Emptying the Dustbin
- Press the dustbin release button and detach the dustbin from the main motor unit.
- Hold the dustbin over a trash can and open the bottom flap to empty debris.
- Close the flap securely and reattach the dustbin to the main unit.
5.2 Cleaning the Cartridge Filter
The cartridge filter should be cleaned regularly, ideally after every few uses, or when suction power decreases.
- Twist and pull out the filter assembly from the dustbin.
- Tap the filter gently over a trash can to remove loose dust.
- For a deeper clean, rinse the filter under cold running water. Ensure it is completely dry (allow 24-48 hours) before reinserting to prevent damage to the motor.
- Do not use detergents or hot water.
5.3 Cleaning the Brush Roll
Periodically check the brush roll for tangled hair or debris.
- Turn off and unplug the vacuum.
- Locate the brush roll access cover on the bottom of the floor brush head.
- Open the cover and remove the brush roll.
- Use scissors to cut away any tangled hair or threads.
- Clean any debris from the brush roll housing.
- Reinsert the brush roll and close the cover securely.
6. Troubleshooting
Refer to this section for common issues and their solutions.
| Problem | Possible Cause | Solution |
|---|---|---|
| Vacuum does not turn on. | Battery is not charged or not properly inserted. | Ensure battery is fully charged and securely inserted. |
| Low suction power. | Dustbin is full; Filter is clogged; Brush roll is obstructed. | Empty dustbin; Clean or replace filter; Remove obstructions from brush roll. |
| Brush roll not spinning. | Obstruction in brush roll; Brush roll not properly installed. | Remove any obstructions; Ensure brush roll is correctly installed. |
| Vacuum stops suddenly during operation. | Battery is depleted; Overheating protection activated. | Recharge battery; Allow vacuum to cool down for at least 30 minutes. |
7. Specifications
Technical specifications for the ANKO Cordless Stick Vacuum Cleaner.
| Feature | Detail |
|---|---|
| Brand | ANKO |
| Model | Cordless Stick Vacuum Cleaner |
| Color | Multicolor |
| Capacity | 1 Liters |
| Voltage | 240 Volts |
| Noise Level | 75 dB |
| Special Features | Cordless |
| Filter Type | Cartridge |
| Surface Recommendation | Dual Action |
| Power Source | Battery Powered |
8. Warranty and Support
For warranty information and customer support, please refer to the documentation included with your purchase or visit the official ANKO website. Keep your proof of purchase for warranty claims.
For technical assistance or spare parts, contact ANKO customer service through their official channels.


