
1. Introduction
Thank you for choosing the KIDWILL 5-in-1 Wireless Bluetooth Karaoke Microphone. This device combines a wireless microphone, Bluetooth speaker, recorder, voice changer, and FM radio into one portable unit. This manual provides detailed instructions for safe and effective use of your new karaoke microphone.
2. Product Features
- 5-in-1 Functionality: Operates as a wireless microphone, Bluetooth speaker, recorder, voice changer, and FM radio.
- Dynamic LED Lights: Features integrated LED lights that flash with music rhythm, enhancing the user experience.
- Rechargeable Battery: Built-in 1800mAh lithium battery provides approximately 4 hours of continuous use after a 3-hour charge.
- Durable Construction: The microphone's shell is made of quality metal for enhanced durability and a premium feel.
- Exclusive Audio Sound: Equipped with a 3-layer noise filter head to reduce ambient noise and adjustable volume and remix (echo) for improved vocal performance.
- Voice Changer: Offers multiple voice effects for entertainment.
3. Package Contents
Please check the package for the following items:
- KIDWILL Wireless Bluetooth Karaoke Microphone (Model RXZER23)
- USB Charging Cable
- 3.5mm Audio Cable
- Instruction Manual
The microphone comes with a USB charging cable and a 3.5mm audio cable for versatile use and charging.
4. Controls and Ports Overview

A comprehensive diagram labeling all buttons and ports on the microphone, including REC, Play/Pause, Volume, Mode, Remix Vol, Mic Vol, USB Port, TF Card Port, Headphone Jack, and Charging/AUX Cable Port.
Button Functions:
- REC: Short press to change magic sounds (voice changer). Long press to turn LED lights ON/OFF.
- ◀◀ / V-: Short press for previous song. Long press to decrease volume.
- ▶▶ / V+: Short press for next song. Long press to increase volume.
- ►▮▮: Press to Play/Pause music.
- ⑂ / MODE: Long press for Power ON/OFF. Short press to switch connection modes (Bluetooth, FM, TF card).
- REMIX VOL: Slide switch to increase/decrease echo (remix) volume.
- MIC VOL: Slide switch to increase/decrease microphone volume.
Ports:
- USB Port: For connecting USB drives.
- TF Card Port: For inserting TF (MicroSD) cards.
- Headphone Jack (3.5mm): For private listening.
- Charging Port / AUX Cable Port: For charging the device or connecting via AUX cable.
5. Setup and Connectivity
5.1 Power On/Off
Long press the ⑂ / MODE button to power the microphone ON or OFF. A voice prompt will indicate the power status.
5.2 Bluetooth Pairing
- Ensure the microphone is powered on. It will automatically enter Bluetooth pairing mode, indicated by a voice prompt.
- On your mobile device (smartphone, tablet, etc.), enable Bluetooth and search for available devices.
- Select "WS-1818" from the list of devices.
- Once connected, a voice prompt will confirm successful pairing. You can now play music from your device through the microphone's speaker.
5.3 AUX Cable Connection
Connect one end of the 3.5mm audio cable to the microphone's AUX port and the other end to your audio device's headphone jack. The microphone will automatically switch to AUX mode.
5.4 TF Card / USB Drive Playback
Insert a TF card (MicroSD) or USB drive into the respective port. The microphone will automatically detect the storage device and begin playing supported audio files (MP3, WAV). Note: TF card is not included and supports max. 32GB.

The microphone offers multiple connectivity options including Bluetooth, AUX cable, TF card, U-disk, and FM radio for versatile music playback.

The microphone is compatible with a wide range of devices such as smartphones, tablets, and computers, and supports popular apps like YouTube and Smule.
6. Operating Instructions
6.1 Music Playback
- Play/Pause: Press the ►▮▮ button.
- Next Song: Short press the ▶▶ / V+ button.
- Previous Song: Short press the ◀◀ / V- button.
- Volume Adjustment: Long press ▶▶ / V+ to increase volume; long press ◀◀ / V- to decrease volume.
6.2 Microphone and Echo Adjustment
- Microphone Volume: Use the MIC VOL slide switch to adjust your voice volume.
- Echo (Remix) Volume: Use the REMIX VOL slide switch to adjust the echo effect on your voice.
6.3 Voice Changer
Short press the REC button to cycle through different voice effects (e.g., Child Voice, Original Voice, Male Voice, Doll Voice, Tough Voice).

This image shows the five voice-changing effects: Child Voice, Original Voice, Male Voice, Doll Voice, and Tough Voice, activated by pressing the 'REC' button.
6.4 Recording Function
To record your singing, connect the microphone to your smartphone via Bluetooth. Open a karaoke app or recording app on your phone and follow its instructions to record. The microphone acts as an input device.
6.5 FM Radio Mode
Short press the ⑂ / MODE button to switch to FM radio mode. Use the ◀◀ / V- and ▶▶ / V+ buttons to scan for radio stations.
6.6 LED Lights Control
Long press the REC button to turn the dynamic LED lights ON or OFF.

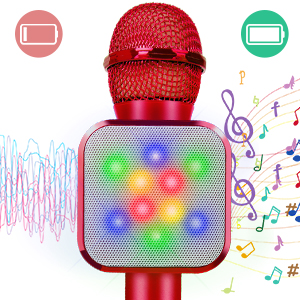
The microphone features dynamic LED lights that illuminate during use, enhancing the karaoke experience.

This image illustrates the microphone's powerful stereo speaker, 3-layer noise reduction, and adjustable volume/remix functions, along with its 4-hour continuous use battery life.
7. Charging and Battery
The microphone has a built-in 1800mAh rechargeable lithium battery. When the battery is low, the device may indicate this with a voice prompt or reduced performance.
- Connect the USB charging cable to the microphone's charging port.
- Connect the other end of the USB cable to a compatible USB power source (e.g., wall adapter, power bank, car charger, computer USB port).
- A full charge typically takes about 3 hours.
- Once fully charged, the microphone provides approximately 4 hours of continuous use.
Important: The maximum charging current should not exceed 2A.

The microphone can be charged using various methods, including a wall adapter, power bank, car charger, or laptop USB port. Maximum charging current should not exceed 2A.
8. Maintenance
- Clean the microphone with a soft, dry cloth. Do not use abrasive cleaners or solvents.
- Avoid exposing the microphone to water, moisture, or extreme temperatures.
- Store the microphone in a cool, dry place when not in use.
- Do not attempt to disassemble or repair the device yourself, as this will void the warranty.
9. Troubleshooting
| Problem | Possible Cause | Solution |
|---|---|---|
| Microphone does not power on. | Battery is depleted. | Charge the microphone for at least 3 hours. |
| Cannot connect via Bluetooth. | Bluetooth is not enabled on your device or microphone is not in pairing mode. | Ensure Bluetooth is enabled on both devices. Long press the MODE button to restart the microphone and enter pairing mode. |
| No sound from the speaker. | Volume is too low or muted. | Increase the main volume and MIC VOL. Check if the connected device's volume is also up. |
| Echo effect is too strong/weak. | REMIX VOL is not adjusted correctly. | Adjust the REMIX VOL slide switch to your preference. |
| Poor sound quality/feedback. | Microphone too close to speaker or high volume. | Reduce microphone volume or move the microphone further from the speaker. |
10. Specifications
| Feature | Detail |
|---|---|
| Model Number | RXZER23 |
| Item Weight | 14 Ounces |
| Microphone Form Factor | Handheld |
| Power Source | Battery Powered |
| Battery Type | 1 Lithium Polymer (included) |
| Material | Metal |
| Signal-to-Noise Ratio | 85 dB |
| Hardware Platform | Karaoke Machine |
| Number of Channels | 1 |
| Frequency Response | 10 KHz |
| Connectivity Technology | Bluetooth |
| Connector Type | 3.5 mm Jack, USB |
| Special Feature | Mute Function, Stand, Volume Control |
| Compatible Devices | Karaoke Machine, Radio, Speaker |
| Polar Pattern | Unidirectional |
| UPC | 740226071995 |
11. Safety Information
- Keep the microphone away from water and other liquids to prevent electric shock or damage.
- Do not expose the device to direct sunlight or high temperatures.
- Avoid dropping or subjecting the microphone to strong impacts.
- Keep out of reach of small children to prevent choking hazards from small parts.
- Use only the provided charging cable or a certified equivalent.
12. Warranty and Support
For warranty information and customer support, please refer to the product packaging or contact KIDWILL customer service directly. Keep your purchase receipt as proof of purchase.