1. Introduction
This manual provides detailed instructions for the safe and effective use of your VGR V-029 Professional Grooming Kit. Please read all instructions carefully before using the device and retain this manual for future reference. This kit is designed for personal grooming, offering versatility for various hair and beard styles.
2. Product Overview
The VGR V-029 Professional Grooming Kit is a 6-in-1 multi-functional device equipped with 13 different attachments to cater to various grooming needs. It features high-carbon self-sharpening ceramic titanium blades for precision and durability.
2.1 Kit Components
- Main Trimmer Unit
- Hair Clipper Head
- Beard Trimmer Head
- Detail Trimmer Head
- Ear & Nose Trimmer Head
- Micro Shaver Head
- Extra Wide Hair Trimmer Head
- 4 Hair Trimming Combs (3mm, 6mm, 9mm, 12mm)
- 1 Adjustable Comb (4mm, 4.5mm, 5mm, 5.5mm)
- 1 Adjustable Comb for Body Grooming
- Charging Cable (USB)
- Cleaning Brush
- Blade Oil
- Storage Stand

Image: All components of the VGR V-029 Professional Grooming Kit, including the main trimmer, various attachment heads, guide combs, charging cable, cleaning brush, and oil.
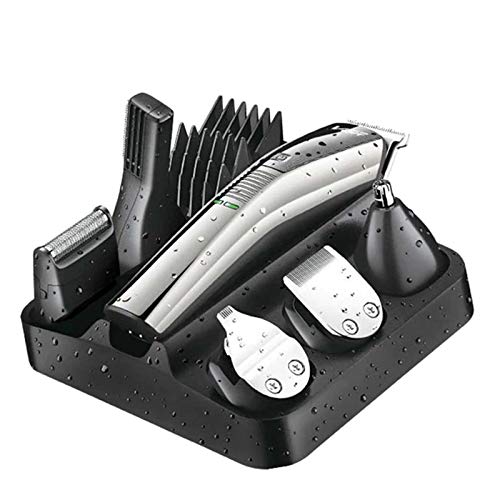
Image: The VGR V-029 Grooming Kit with its main trimmer and various heads neatly arranged on the included storage stand.
3. Setup
3.1 Initial Charging
- Before first use, fully charge the trimmer for approximately 60 minutes.
- Connect the charging cable to the trimmer and a suitable USB power adapter (not included).
- The indicator light will show the charging status. A blue light indicates charging or fully charged. If the battery is below 15%, the indicator will turn red.
- Once fully charged, the trimmer provides up to 100 minutes of cordless operation.
3.2 Attaching and Detaching Heads
- Ensure the trimmer is turned off before changing heads.
- To attach a head: Align the desired attachment head with the main trimmer unit and press it down until it clicks securely into place.
- To detach a head: Hold the main trimmer unit firmly and gently pull the attachment head upwards to remove it.
3.3 Attaching and Adjusting Guide Combs
- Ensure the desired trimming head is attached to the main unit.
- Align the guide comb with the teeth of the trimming head and slide it on until it locks.
- For adjustable combs, slide the adjustment lever to select the desired cutting length (e.g., 4mm, 4.5mm, 5mm, 5.5mm).
- To remove a guide comb, gently lift it off the trimming head.

Image: The VGR V-029 trimmer with a guide comb attached, demonstrating how to prepare for trimming.
4. Operating Instructions
4.1 Power On/Off
Press the power button located on the main unit to turn the trimmer on or off.
4.2 General Trimming Tips
- Ensure hair is clean and dry before trimming.
- Always start with a longer comb setting and gradually reduce the length if desired.
- Move the trimmer against the direction of hair growth for best results.
- Use slow, controlled movements.
4.3 Using Specific Attachments
- Hair Clipper Head: Use with the appropriate hair trimming combs (3/6/9/12mm) for cutting hair to desired lengths.
- Beard Trimmer Head: Ideal for shaping and trimming beards and mustaches. Use with the adjustable beard comb for various lengths.
- Detail Trimmer Head: For precise lines, edges, and intricate styling around the beard, sideburns, and neckline.
- Ear & Nose Trimmer Head: Gently insert the trimmer into the nostril or ear canal. Do not insert too deeply.
- Micro Shaver Head: For a close finish on small areas, such as cheeks or necklines, after trimming.
- Extra Wide Hair Trimmer Head: For faster and more efficient trimming of larger areas of hair.
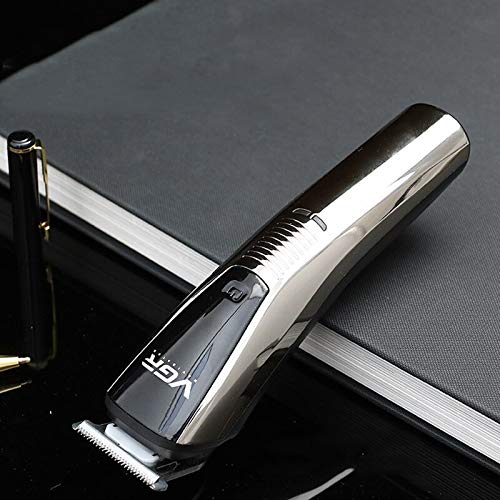
Image: The VGR V-029 trimmer being held, illustrating its ergonomic design during operation.
5. Maintenance and Cleaning
Regular cleaning and maintenance ensure optimal performance and extend the lifespan of your grooming kit.
5.1 Cleaning the Blades
- Turn off the trimmer and detach the trimming head.
- Use the provided cleaning brush to remove any loose hairs from the blades and the trimmer body.
- The trimming heads are washable. Rinse them under running water. Ensure they are completely dry before reattaching or storing. Do not rinse the main trimmer body.
5.2 Oiling the Blades
- After cleaning and drying, apply 1-2 drops of the provided blade oil onto the teeth of the trimming head.
- Turn on the trimmer for a few seconds to allow the oil to distribute evenly.
- Wipe off any excess oil with a soft cloth.
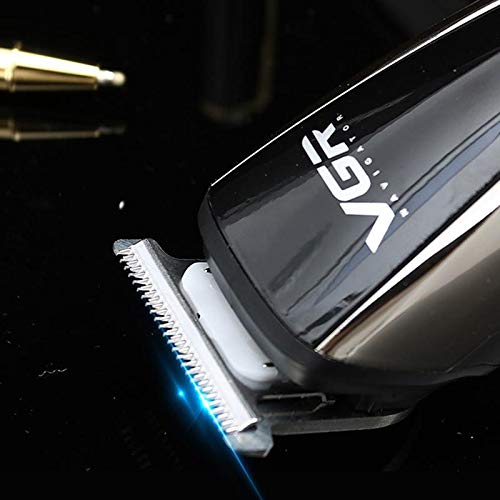
Image: A close-up view of the VGR V-029 trimmer blade, highlighting the ceramic titanium cutting edge for maintenance.
5.3 Storage
Store the trimmer and all its accessories in the provided stand or a dry, safe place, away from direct sunlight and extreme temperatures.
6. Troubleshooting
If you encounter any issues with your VGR V-029 Grooming Kit, please refer to the following common problems and solutions:
| Problem | Possible Cause | Solution |
|---|---|---|
| Trimmer does not turn on. | Battery is depleted. | Charge the trimmer fully. |
| Poor trimming performance. | Blades are dull or clogged with hair. | Clean and oil the blades. Ensure hair is dry before trimming. |
| Trimmer makes unusual noise. | Blades require oiling or are misaligned. | Oil the blades. Check if the attachment head is securely fastened. |
| Battery indicator light is red. | Battery level is below 15%. | Recharge the trimmer. |
If the problem persists after attempting these solutions, please contact customer support.
7. Specifications
| Feature | Specification |
|---|---|
| Model Number | V-029A |
| Blade Material | Ceramic, Titanium |
| Power Source | Battery Powered |
| Battery Type | Lithium-Ion |
| Charging Time | Approximately 60 minutes |
| Runtime | Up to 100 minutes |
| Product Dimensions | 26 x 19 x 9 cm |
| Item Weight | 450 g |
| Country of Origin | China |
8. Warranty and Support
The VGR V-029 Professional Grooming Kit comes with a 12-month quality warranty from the date of purchase. This warranty covers manufacturing defects under normal use.
For warranty claims, technical support, or any product-related inquiries, please contact VGR customer service. Keep your purchase receipt as proof of purchase.
9. Safety Information
- This appliance is not intended for use by persons (including children) with reduced physical, sensory, or mental capabilities, or lack of experience and knowledge, unless they have been given supervision or instruction concerning use of the appliance by a person responsible for their safety.
- Children should be supervised to ensure that they do not play with the appliance.
- Do not immerse the main trimmer unit in water or use it in the shower/bath. Only the attachment heads are washable.
- Do not use the appliance if the blades are damaged, as this may cause injury.
- Keep the appliance away from heat sources and direct sunlight.
- Use only the charging cable provided with the kit.
- Do not attempt to disassemble or repair the trimmer yourself. Contact qualified service personnel for repairs.
- Unplug the charger from the power outlet when not in use and before cleaning.


