
HELLER 250mm DYI Exhaust Ball Bearing Fan
Heller 250mm DIY Exhaust Fan Instruction Manual
Model: 250mm DYI Exhaust Ball Bearing Fan
Important Safety Information
Please read all instructions carefully before installation and operation. Retain this manual for future reference.
- Electrical Safety: Installation must be performed by a qualified electrician in accordance with all local and national electrical codes. Ensure power is disconnected at the main circuit breaker before any installation or maintenance.
- Ventilation: This fan is designed for exhaust ventilation. Ensure adequate make-up air is available in the room to prevent back-drafting of combustion appliances.
- Placement: Do not install this fan directly above a shower or bath unless specifically rated for such use and installed according to local regulations.
- Maintenance: Always disconnect power before cleaning or servicing the fan.
- Children and Pets: Keep packaging materials away from children. Do not allow children to operate or play with the fan.
Product Overview
The Heller 250mm DIY Exhaust Ball Bearing Fan is designed for efficient ventilation in bathrooms and kitchens. Its round, ceiling-mountable design ensures effective air extraction, helping to reduce humidity and odors.
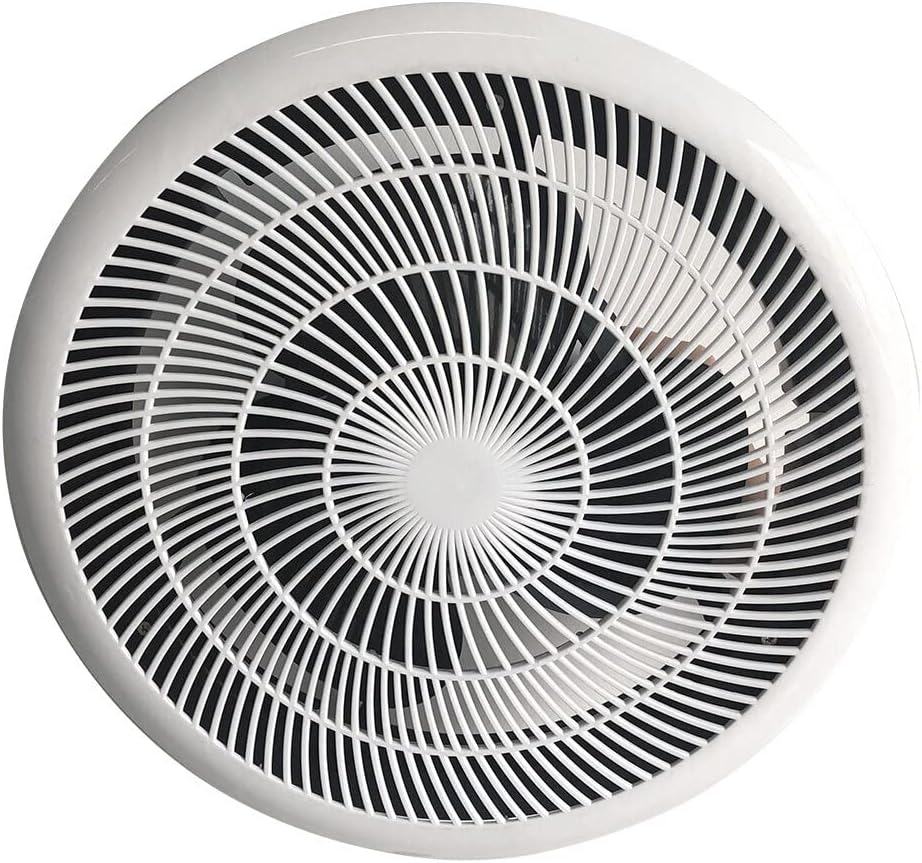
This image displays the Heller 250mm DIY Exhaust Fan, featuring its white circular design with a protective grille. The grille has numerous radial slats leading to a central hub, behind which the fan blades are visible, designed for efficient air extraction.
Specifications
| Feature | Value |
|---|---|
| Brand | HELLER |
| Model | 250mm DYI Exhaust Ball Bearing Fan |
| Power/Wattage | 35 watts |
| Voltage | 240 Volts |
| Noise Level | 50 dB |
| Item Weight | 1.39 kg |
| Package Dimensions | 36.7 x 35.9 x 13.7 cm |
| Electric Fan Design | Exhaust Fan |
| Power Source | Corded Electric |
| Room Type | Kitchen, Bathroom |
| Mounting Type | Ceiling Mount (Note: Product specifications may list "Window Mount", but the product title "Ceiling Round" indicates suitability for ceiling installation.) |
Installation (Setup)
Before You Begin
- Ensure you have all necessary tools: screwdriver, wire strippers, drill, measuring tape, safety glasses, gloves.
- Verify the fan's dimensions are suitable for your intended installation location.
- Confirm that the electrical supply matches the fan's voltage requirements (240V).
- Always disconnect power at the main circuit breaker before starting any electrical work.
Mounting Instructions (General Guide)
- Prepare Opening: Create a circular opening in the ceiling or wall that matches the fan's diameter. Ensure there is sufficient clearance above or behind the mounting surface for the fan body and ducting (if applicable).
- Wiring: Bring the electrical wiring to the fan's location. Connect the fan's wiring to the household electrical supply according to the wiring diagram provided with the product and local electrical codes. Ensure all connections are secure and insulated. It is highly recommended to have this step performed by a qualified electrician.
- Secure Fan: Insert the fan body into the prepared opening. Secure the fan to the ceiling joists or mounting frame using appropriate screws or fasteners. Ensure the fan is firmly seated and level.
- Connect Ducting (Optional): If connecting to ductwork for external venting, attach the ducting to the fan's exhaust port using duct tape or clamps to ensure an airtight seal.
- Install Grille: Once the fan is securely mounted and wired, attach the decorative grille to the fan body. This typically involves clips or screws.
- Restore Power: Once installation is complete and all connections are checked, restore power at the main circuit breaker and test the fan's operation.
Operation
The Heller 250mm DIY Exhaust Fan is operated via a standard wall switch connected to its electrical supply. Simply toggle the switch to turn the fan ON or OFF. For optimal performance, operate the fan during and after activities that generate moisture or odors, such as showering or cooking, to ensure proper ventilation of the area.
Maintenance
Regular maintenance will ensure the longevity and efficient operation of your exhaust fan.
Cleaning the Grille and Fan Blades
- Frequency: Clean the fan grille and blades every 3-6 months, or more frequently if located in a high-humidity or dusty environment.
- Disconnect Power: Always turn off the power to the fan at the main circuit breaker before cleaning.
- Remove Grille: Carefully remove the fan grille. This may involve unscrewing or unlatching it.
- Clean Grille: Wash the grille with warm, soapy water. Rinse thoroughly and allow it to dry completely before reattaching.
- Clean Fan Blades: Use a soft cloth or brush to gently wipe dust and debris from the fan blades and interior housing. A vacuum cleaner with a brush attachment can also be used. Do not use abrasive cleaners or solvents.
- Reassemble: Once clean and dry, reattach the grille securely.
- Restore Power: Restore power at the circuit breaker.
Inspection
Periodically inspect the fan for any signs of damage, loose connections, or unusual wear. If any issues are found, disconnect power and consult a qualified technician.
Troubleshooting
If you experience issues with your Heller exhaust fan, refer to the following common problems and solutions:
| Problem | Possible Cause | Solution |
|---|---|---|
| Fan does not turn on. | No power to the fan; tripped circuit breaker; loose wiring connection; faulty switch. | Check circuit breaker and reset if tripped. Ensure wall switch is ON. Verify wiring connections (consult electrician if unsure). Test switch. |
| Fan is unusually noisy. | Loose mounting; debris in fan blades; motor issue. | Ensure fan is securely mounted. Disconnect power and clean fan blades and housing. If noise persists, contact support. |
| Low airflow or poor ventilation. | Blocked grille or ducting; fan blades are dirty; insufficient make-up air. | Disconnect power and clean grille and fan blades. Check ducting for obstructions. Ensure room has adequate air intake. |
| Fan vibrates excessively. | Improper mounting; unbalanced fan blades (due to dirt buildup or damage). | Ensure fan is securely and evenly mounted. Disconnect power and clean fan blades thoroughly. If damage is suspected, contact support. |
If the problem persists after attempting these solutions, please contact Heller customer support or a qualified technician.
Warranty and Support
For warranty information, technical support, or service inquiries regarding your Heller 250mm DIY Exhaust Fan, please refer to the warranty card included with your purchase or visit the official HELLER website. Keep your proof of purchase for warranty claims.
Manufacturer: HELLER
For further assistance, please contact Heller customer service.
Related documents250mm DYI Exhaust Ball Bearing Fan


Ask a question about this manual
Ask about setup, troubleshooting, compatibility, parts, safety, or missing instructions. Manuals+ will review the question and use this page’s manual context to help answer it.