
TFCFL B08DNSQ2XV
TFCFL Modern Ceiling Fan with Lights User Manual
Model: B08DNSQ2XV
Brand: TFCFL
Introduction
This manual provides detailed instructions for the installation, operation, and maintenance of your TFCFL Modern Ceiling Fan with Lights. Please read this manual thoroughly before installation and use to ensure safe and efficient operation of the product. Keep this manual for future reference.
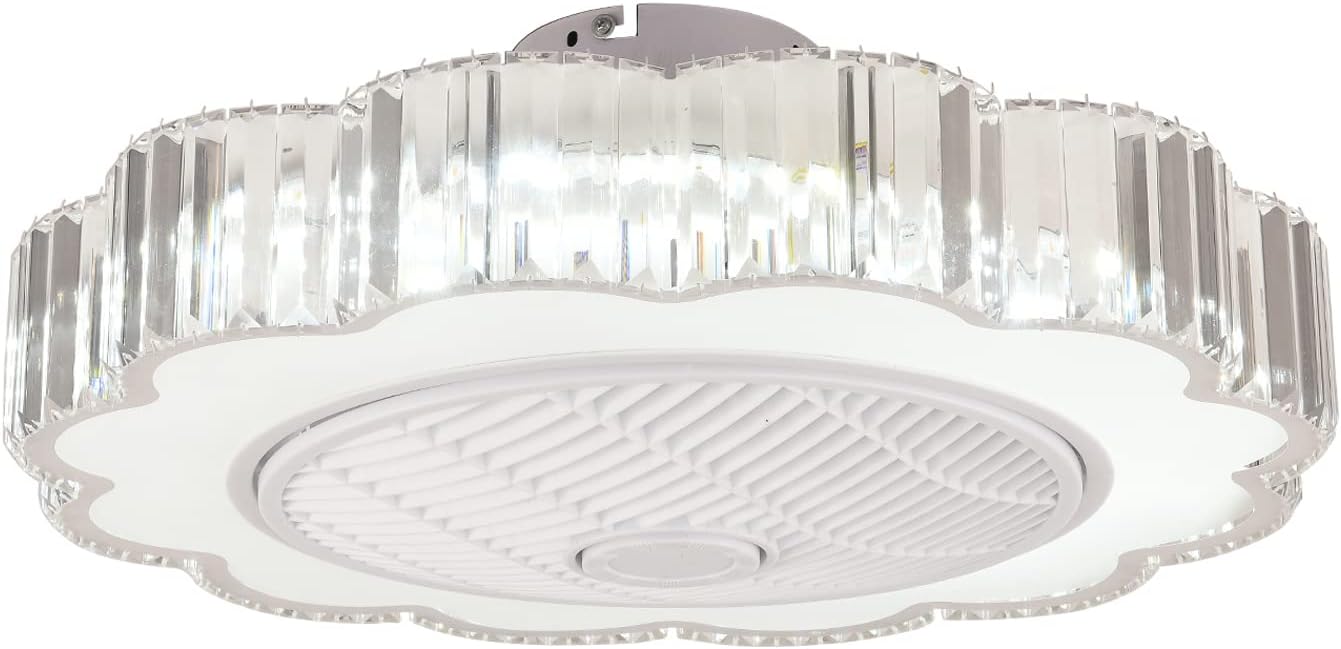
Figure 1: Front view of the TFCFL Modern Ceiling Fan with Lights, showcasing its crystal and acrylic design.
Safety Information
Always follow basic safety precautions when installing and operating electrical appliances to reduce the risk of fire, electric shock, and personal injury.
- Ensure the power is turned off at the circuit breaker before installation or maintenance.
- All electrical connections must be in accordance with local codes and ordinances, and the National Electric Code (NEC). If you are unfamiliar with proper electrical wiring, consult a qualified electrician.
- The mounting structure must be capable of supporting the weight of the fan (approximately 13 pounds).
- Do not connect the fan to a dimmer switch, as this may damage the motor.
- Ensure the fan blades are clear of any obstructions during operation.
- Do not insert objects into the fan blades while the fan is operating.
Package Contents
Verify that all components are present before beginning installation.
- Ceiling Fan Unit (with integrated LED light and acrylic lampshade)
- Remote Control (requires 2 x 12V batteries, included)
- Mounting Bracket
- Hardware Pack (screws, wire nuts, etc.)
- User Manual (this document)
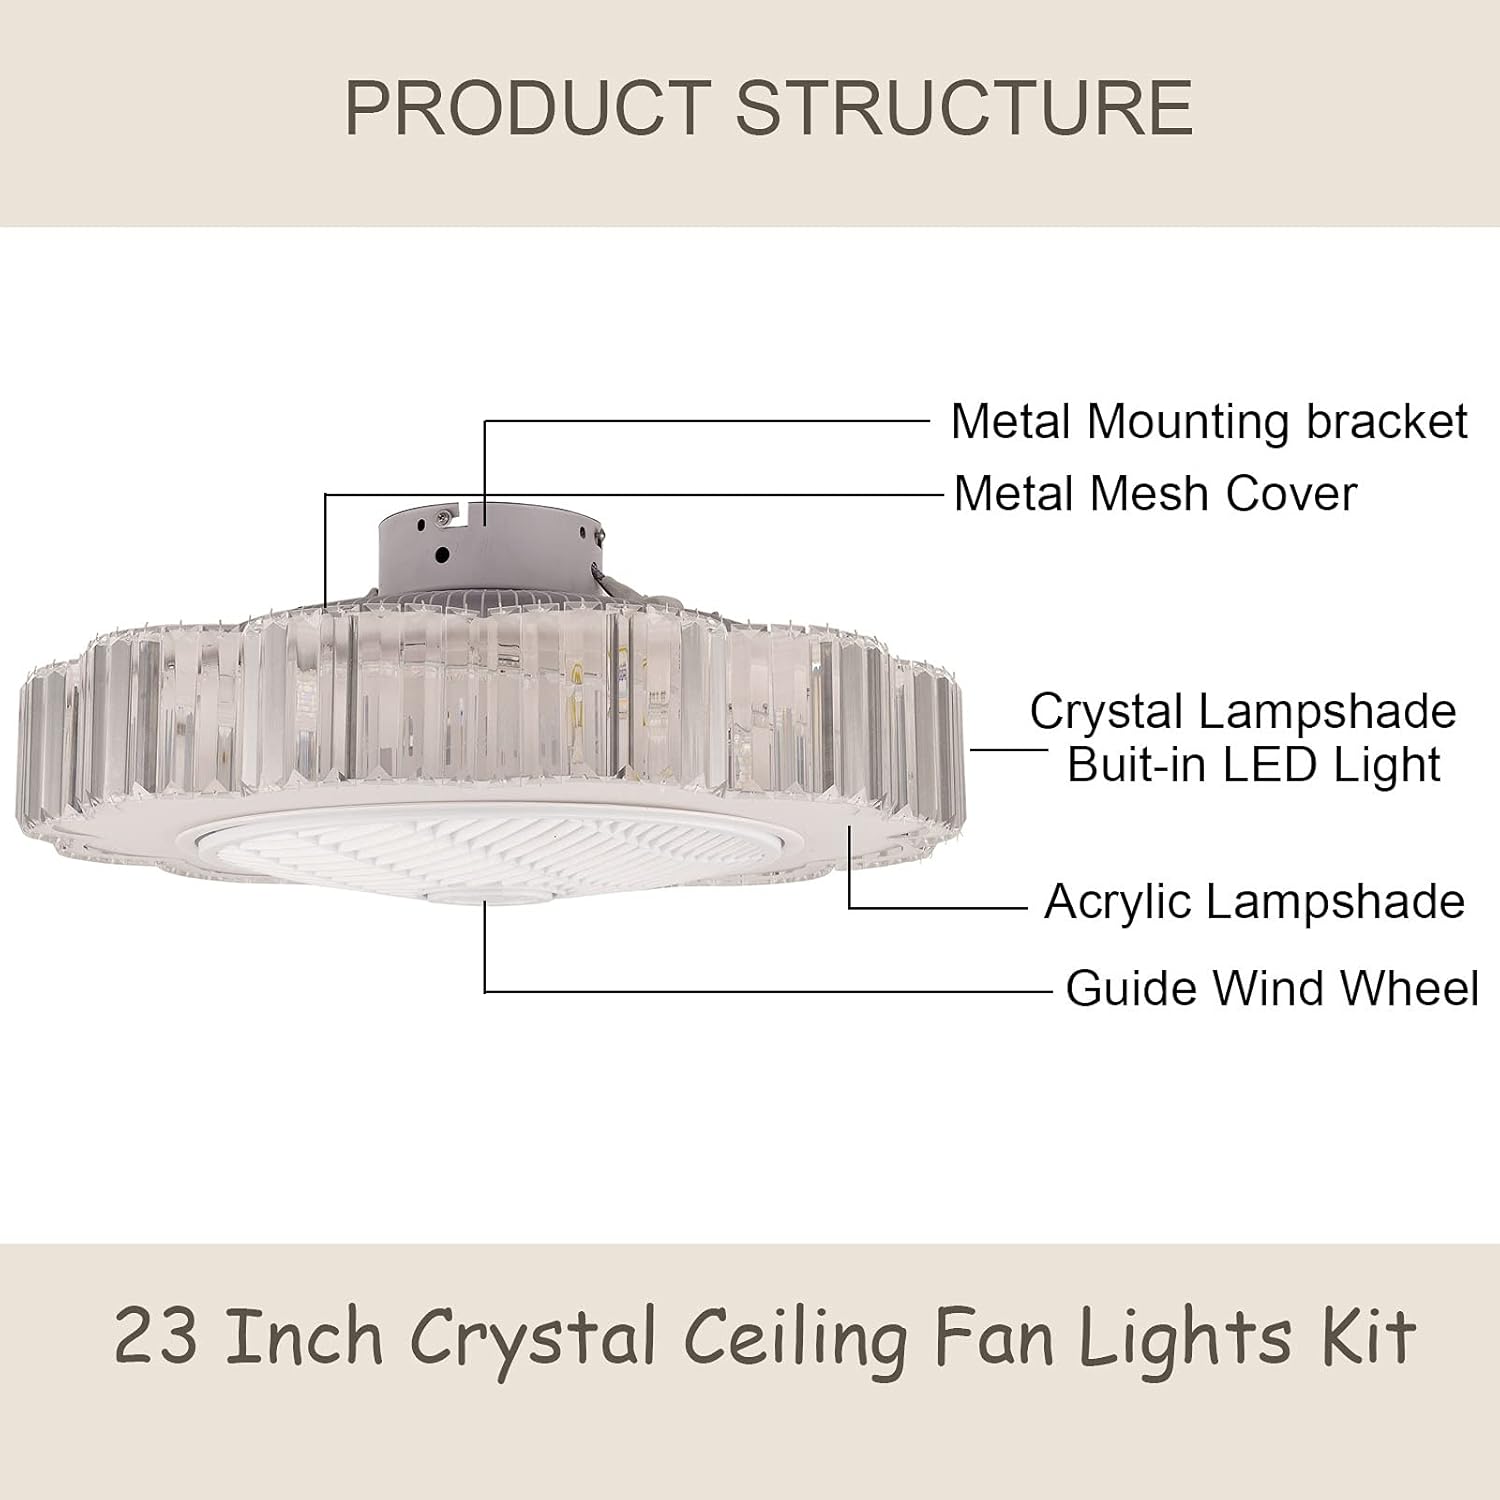
Figure 2: Diagram illustrating the main components of the ceiling fan, including the metal mounting bracket, metal mesh cover, crystal lampshade, built-in LED light, acrylic lampshade, and guide wind wheel.
Specifications
| Feature | Detail |
|---|---|
| Brand | TFCFL |
| Model | B08DNSQ2XV |
| Dimensions | 23"L x 23"W x 7.8"H |
| Material | Crystal, Acrylic, Metal |
| Light Source | Integrated LED |
| Light Colors | Warm, Neutral, White (3000K) |
| Brightness | 1800 Lumen (Dimmable) |
| Fan Speeds | 6 Speeds |
| Control Method | Remote Control |
| Voltage | 110 Volts |
| Wattage | 40 Watts |
| Item Weight | 13 Pounds |
| Special Features | Variable Speed, Remote Control, Retractable blades, 3 Color changes, Silent motor, Timing function (1h/2h/4h/8h), Reversible Motor |

Figure 3: Detailed dimensions of the ceiling fan, showing a diameter of 23 inches and a height of 7.8 inches.
Installation Guide
Professional installation is recommended. Ensure power is disconnected before proceeding.
- Prepare the Installation Site: Turn off power at the main circuit breaker. Ensure the ceiling junction box is securely mounted and capable of supporting the fan's weight.
- Install the Mounting Bracket: Attach the mounting bracket to the ceiling junction box using the provided screws. Ensure it is firmly secured.
- Wire the Fan: Connect the fan's electrical wires to the household wiring according to the wiring diagram. Typically, this involves connecting live, neutral, and ground wires. Use wire nuts to secure connections.
- Mount the Fan Unit: Carefully lift the fan unit and attach it to the mounting bracket. Secure it with the appropriate screws. Ensure all connections are tucked neatly into the canopy.
- Test the Fan: Restore power at the circuit breaker. Use the remote control to test the fan and light functions.
Operating Instructions
Your TFCFL ceiling fan is controlled by the included remote. Insert the two 12V batteries into the remote control before use.

Figure 4: Layout of the remote control, showing buttons for fan speed, light color, brightness, timing, and reverse function.
Remote Control Functions:
- Light On/Off: Press the light bulb icon to turn the light on or off.
- Color Temperature: Use the "Color Temperature+" and "Color Temperature-" buttons to cycle through Warm, Neutral, and White light settings.
- Brightness Adjustment: Use "Brightness+" and "Brightness-" buttons to adjust the light intensity.
- Fan Speed Setting (1-6): Buttons labeled 1 through 6 control the fan speed, with 6 being the highest.
- Fan Off: Press the "STOP" button to turn off the fan.
- Time Setting (1H/2H/4H/8H): Set a timer for the fan to automatically turn off after 1, 2, 4, or 8 hours.
- Reverse Function: The "Reverse Function" button (usually a circular arrow) changes the direction of the fan blades, useful for circulating air in different seasons.
- Air Guide Wheel: Controls the rotation of the outer ring for air direction.
- Resetting: The "SETUP" button is used for pairing the remote if needed.

Figure 5: The ceiling fan demonstrating its ability to switch between Warm Light, Neutral Light, and White Light settings.

Figure 6: An illustration of the ceiling fan installed in a room, with arrows indicating downward airflow for cooling.

Figure 7: Visual representation of the fan's features: Super air volume, 3 Colors lights, 3 Fan speeds, Negative ion, Timing function, Energy saving, Remote control, and Quiet operation.
Maintenance
Regular maintenance ensures the longevity and optimal performance of your ceiling fan.
- Cleaning: Before cleaning, ensure the power is turned off. Use a soft, damp cloth to wipe down the fan's exterior. Do not use abrasive cleaners or solvents, as they may damage the finish.
- Light Source: The LED light source has a life expectancy of up to 50,000 hours. The LED driver is replaceable for convenient and durable use.
- Motor: The copper motor is designed for powerful and quiet performance. It features a heat sink hole to reduce internal temperature and extend motor life. No specific user maintenance is required for the motor.

Figure 8: A detailed close-up of the crystal lampshade, highlighting its intricate design and clarity.
Troubleshooting
If you encounter issues with your ceiling fan, refer to the following common problems and solutions.
| Problem | Possible Cause | Solution |
|---|---|---|
| Fan does not operate | No power; Remote control not paired or batteries dead. | Check circuit breaker. Replace remote batteries. Re-pair remote control (refer to remote instructions). |
| Light does not turn on | No power; LED driver issue; Remote control issue. | Check power. Ensure remote batteries are good. If LED driver is faulty, contact support for replacement. |
| Fan makes noise | Loose screws; Obstruction; Motor issue. | Check and tighten all mounting screws. Ensure nothing is obstructing the fan blades. If noise persists, contact support. |
| Remote control not responding | Dead batteries; Remote not paired; Signal interference. | Replace batteries. Re-pair remote. Ensure no strong signal interference nearby. |
Warranty and Support
TFCFL products are designed for quality and durability. For warranty information or technical support, please contact the seller or visit the official TFCFL store on Amazon.
Contact Information:
- Amazon Store: Visit TFCFL Store
- Refer to your purchase documentation for specific warranty terms and conditions.
Official Product Videos
No official seller videos are available for this product at this time.
Ask a question about this manual
Ask about setup, troubleshooting, compatibility, parts, safety, or missing instructions. Manuals+ will review the question and use this page’s manual context to help answer it.