
Oasser HS-M901
Oasser Airbrush Kit Compressor AK1 User Manual
Model: HS-M901
1. Introduction
Thank you for purchasing the Oasser Airbrush Kit Compressor AK1. This intelligent coloring tool is designed for a wide range of spraying, painting, and airbrushing applications, including art painting, model coloring, crafts, DIY projects, make-up, cake decoration, and nail art. Its portable and user-friendly design makes it suitable for both beginners and experienced enthusiasts. This manual provides detailed instructions for setup, operation, maintenance, and troubleshooting to ensure optimal performance and longevity of your airbrush kit.

Figure 1: Oasser AK1 Airbrush Kit with Compressor and included accessories.
2. Safety Information
- Always read and understand all instructions before using the airbrush kit.
- Ensure proper ventilation when working with paints and cleaning agents.
- Wear appropriate personal protective equipment (PPE), such as gloves and a mask, to prevent inhalation of fumes or contact with skin.
- Keep the device away from children and pets.
- Do not use the product for food applications if it has previously been used with chemical spraying agents.
- Avoid dropping the airbrush or compressor, as components are delicate.
- Disconnect the power adapter when not in use or during cleaning.
3. Package Contents
The Oasser Airbrush Kit Compressor AK1 includes the following components:
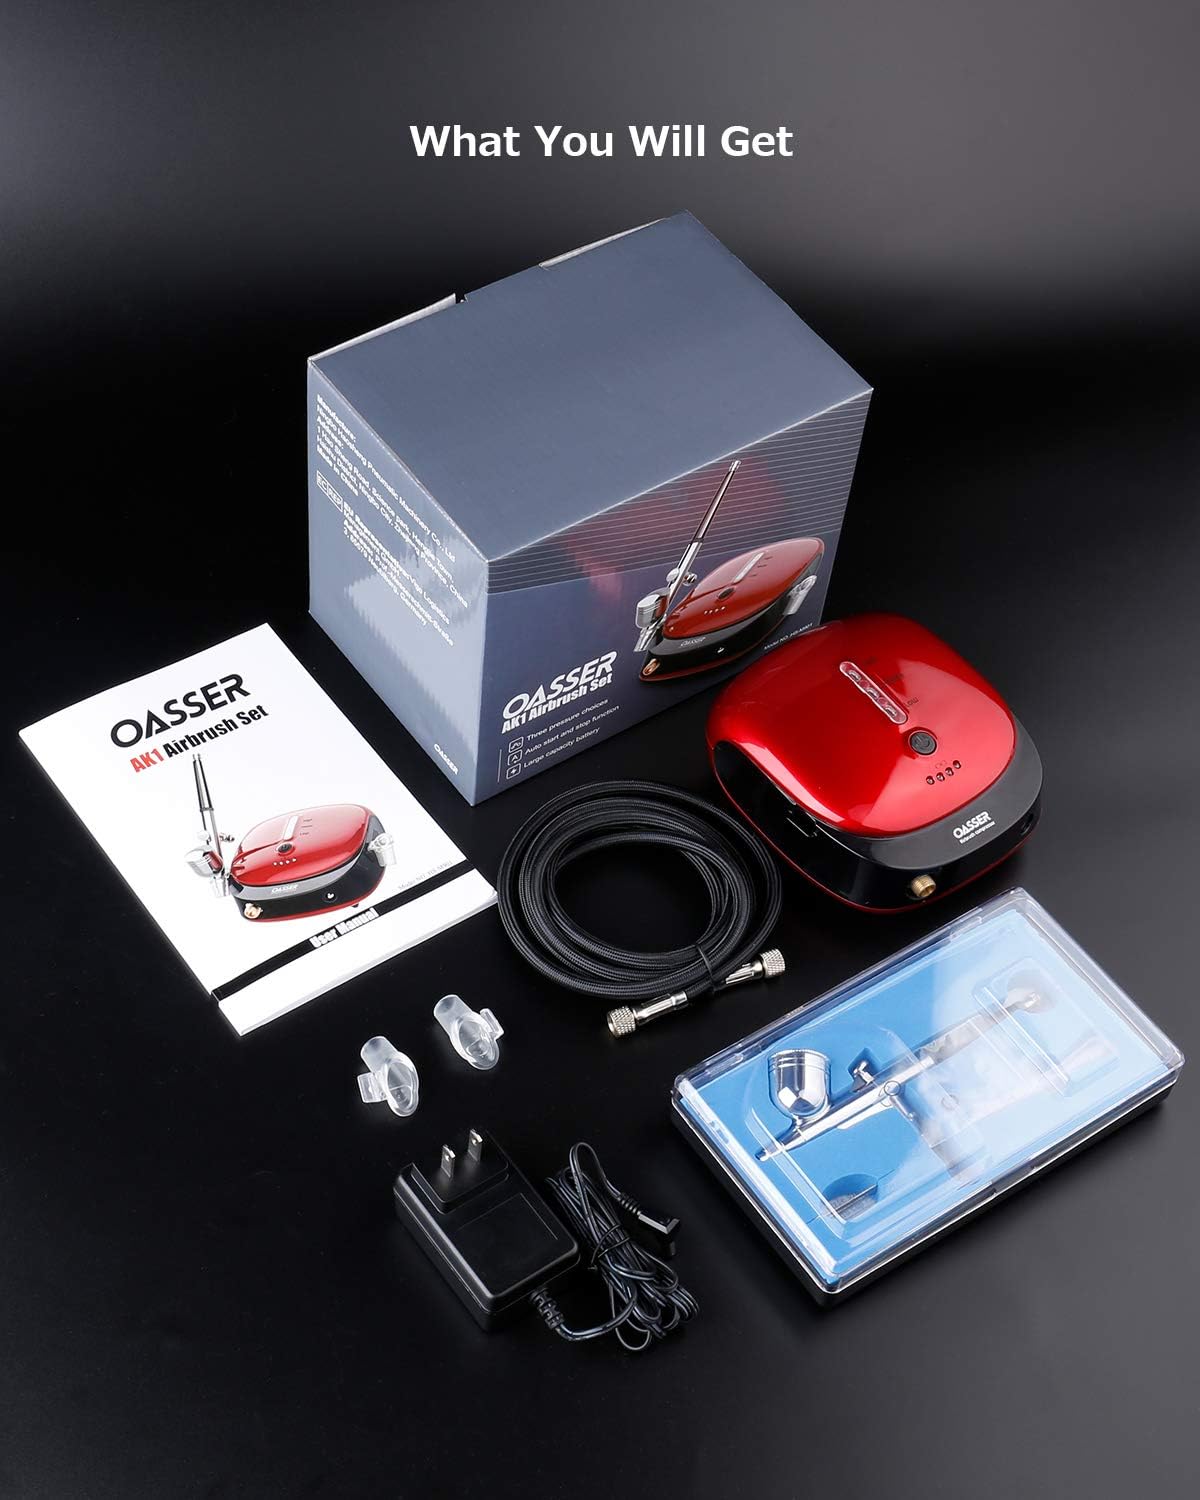
Figure 2: All components included in the Oasser AK1 Airbrush Kit package.
- 1 x Air Compressor (Red)
- 1 x Dual Action Airbrush Kit (with Spanner & Dropper & Sealing Ring)
- 1 x Storage Box
- 1 x AC Adapter (1.74m)
- 1 x Braided Air Hose (1.84m)
- 2 x Removable Airbrush Holders
4. Product Overview
The Oasser AK1 Airbrush Kit features a compact and portable design with an intelligent pressure regulation system. The airbrush itself is lightweight and designed for precise control.

Figure 3: Key features of the Oasser AK1 Airbrush Kit, including electronic pressure regulation, rechargeable lithium battery, and light airbrush design.
Key Features:
- Mini Portable & Super Capacity: Built-in 12V large capacity rechargeable battery, detachable and rechargeable. Provides stable pressure for airbrushing for up to 70 minutes on a full charge.
- Intelligent Pressure Regulation: Working air pressure (with airbrush) is 2 to 15psi. Features 3 switchable modes (low/middle/high) for adjusting pressure, indicated by LED lights. Auto start/stop function: compressor stops at 21psi (Max) and restarts at 15psi.
- Excellent Painting Performance: Precision components ensure exceptional atomization and prevent color differences. Dual action trigger controls both air and color, allowing for precise spraying control by rotating the adjustable screw at the tail.
5. Setup
Follow these steps to set up your Oasser Airbrush Kit for first use:
- Charge the Compressor: Ensure the compressor is fully charged before initial use. Connect the AC adapter to the compressor and a power outlet. The LED indicators will show charging status.
- Attach Air Hose: Connect one end of the braided air hose to the air outlet on the compressor.
- Connect Airbrush: Connect the other end of the air hose to the airbrush. Ensure all connections are secure to prevent air leaks.
- Power On: Locate the ON/OFF switch on the bottom of the compressor and switch it to 'ON'.
Video 1: Demonstrates the easy installation steps for the Oasser Airbrush Kit.
The compressor can be used while charging for indoor operation, or wirelessly for outdoor use once fully charged.

Figure 4: Illustrates the flexibility of using the airbrush kit both indoors while charging and outdoors with its rechargeable battery.
6. Operating Instructions
Operating the Oasser AK1 Airbrush involves controlling both air and paint flow for desired effects.
6.1. Pressure Adjustment
The compressor offers three pressure modes: Low, Middle, and High. Press the power button to cycle through these modes. The LED lights indicate the current pressure setting.
- Low Pressure: Suitable for fine details, nail art, and small parts.
- Middle Pressure: Ideal for models and general painting.
- High Pressure: Best for large area spraying and quick coverage.

Figure 5: Visual representation of the three pressure modes and their recommended uses.
6.2. Dual Action Trigger Control
The airbrush features a dual-action trigger for precise control over air and paint flow:
- For Air: Press down the trigger to release air.
- For Paint: Press down the trigger, then pull it back to release paint. The further you pull back, the more paint is released.
- Adjusting Spray Thickness: Rotate the adjustable screw at the tail of the airbrush to change the width of the line and the amount sprayed.

Figure 6: Detailed view of the dual-action trigger, showing how to control air and paint flow.
Video 2: Demonstrates how to achieve accurate spraying control using the airbrush's dual-action trigger and tail adjustment.
6.3. Paint Compatibility
The Oasser AK1 Airbrush is compatible with water-based paint, acrylic paint, oil-based pre-mixed paint, and colored metallic paint. It is not suitable for acrylic coating.
Tips for Beginners: After receiving the airbrush, practice with clean water to familiarize yourself with the operating techniques. Paint should be diluted to a consistency similar to red wine for optimal flow.
7. Maintenance
Proper cleaning and maintenance are crucial for the longevity and performance of your airbrush kit. Always clean thoroughly after each use to prevent clogging.
7.1. Cleaning After Use
- Empty any remaining paint from the paint cup.
- Add a small amount of appropriate cleaning agent (e.g., water for water-based paints, thinner for others) to the paint cup.
- Loosen the nozzle and press down the air valve button. This will cause bubbles in the paint cup, rinsing the internal components.
- Spray the cleaning liquid onto a paper towel until clear.
- Wipe the paint cup clean with a cotton swab or soft cloth.
Video 3: Demonstrates the wash operation steps for cleaning the airbrush.
7.2. Disassembly and Deep Cleaning
For thorough cleaning or if clogging occurs, the airbrush can be disassembled. Follow the reverse steps of disassembly for reassembly.
Video 4: Shows how to disassemble the airbrush for deep cleaning.
Important Notes for Reassembly:
- When installing, please follow the reverse steps of disassembly and wash.
- When reinstalling the needle, please confirm whether the operation lever is linked with the needle. If it is not linked, please make sure that the needle passes through the operation lever and the lever guide.
- When reinstalling the needle, you can put it in through the nozzle end to see if it is smooth to avoid damage to the needle.
8. Troubleshooting
| Problem | Possible Cause | Solution |
|---|---|---|
| No spray or weak spray | Clogged nozzle/needle; Insufficient paint dilution; Low compressor pressure; Air leak. | Clean nozzle/needle thoroughly; Dilute paint to proper consistency; Check compressor charge/mode; Ensure all connections are tight. |
| Bubbling in paint cup | Clogged nozzle; Loose nozzle/air cap. | Clean nozzle; Tighten nozzle/air cap. |
| Compressor not turning on | Battery depleted; Power switch off. | Recharge compressor; Ensure ON/OFF switch is in 'ON' position. |
| Inconsistent spray pattern | Partially clogged nozzle; Bent needle tip; Improper paint consistency. | Perform deep clean; Inspect needle for damage and replace if necessary; Adjust paint dilution. |
9. Specifications
Detailed specifications for the Oasser Airbrush Kit Compressor AK1:

Figure 7: Dimensions and components of the Oasser AK1 Airbrush Kit.
| Feature | Detail |
|---|---|
| Brand | Oasser |
| Model Number | HS-M901 |
| Color | Red |
| Product Dimensions | 13.5 x 12 x 5 cm |
| Item Weight | 1.1 kg |
| Voltage | 12 Volts |
| Noise Level | 40 dB |
| Special Features | Portable, Lightweight, Cordless |
| Power Source | Battery Powered & Corded Electric |
| Recommended Uses | Spraying |
10. Warranty and Support
Oasser products are manufactured to high-quality standards. For warranty information, technical support, or service inquiries, please refer to the contact information provided with your product packaging or visit the official Oasser website. Please retain your proof of purchase for warranty claims.
Related documentsHS-M901

Ask a question about this manual
Ask about setup, troubleshooting, compatibility, parts, safety, or missing instructions. Manuals+ will review the question and use this page’s manual context to help answer it.