1. Introduction
This user manual provides essential information for the safe and efficient operation of your new Hisense WF1G6021BW front load washing machine. Please read this manual thoroughly before using the appliance and keep it for future reference. Proper installation, usage, and maintenance will ensure optimal performance and extend the lifespan of your washing machine.
2. Safety Information
Always follow basic safety precautions when using electrical appliances to reduce the risk of fire, electric shock, or injury to persons.
- Ensure the appliance is properly grounded.
- Do not allow children to play with or operate the washing machine.
- Do not touch the appliance with wet hands.
- Unplug the appliance before cleaning or performing any maintenance.
- Do not wash items that have been cleaned in, washed in, soaked in, or spotted with combustible or explosive substances.
- Keep the area around the washing machine clear of flammable materials.
3. Product Overview
The Hisense WF1G6021BW is a slim, front-loading washing machine designed for efficient and gentle laundry care. It features a 6 kg capacity, 1200 rpm spin speed, and a user-friendly LED display.

Figure 3.1: Front view of the Hisense WF1G6021BW washing machine. This image shows the main body, the control panel at the top, the detergent dispenser on the left, and the large circular door for loading laundry.
Key Features:
- 6 kg Capacity: Ideal for small to medium households.
- 1200 rpm Spin Speed: High spin speed helps reduce drying time.
- 15 Automatic Programs: A variety of programs for different fabric types and soil levels.
- LED Display: Provides clear information on program status, time remaining, and selected options.
- Quick Wash Program: Cleans clothes in as little as 15 minutes.
- Delayed Start Function: Allows you to set the wash cycle to start at a later time.
- Snowflake Drum Design: Hisense's unique drum design for gentle washing and protection of delicate fabrics.
- Steam Programs: Includes Anti-Allergy and Baby Care steam options for enhanced hygiene.

Figure 3.2: Visual representation of key features including 6kg capacity, Energy Class B, Steam Programs, Quick Wash, Allergy Care Program, and 15 automatic wash programs.
Control Panel:
The control panel consists of a program selector knob, an LED display, and touch buttons for various functions.

Figure 3.3: Close-up of the control panel, showing the program selector dial, LED display, and touch controls for temperature, spin speed, quick wash, and start/pause functions.
4. Setup and Installation
Proper installation is crucial for the safe and efficient operation of your washing machine. It is recommended to have the appliance installed by a qualified technician.
4.1 Unpacking
- Remove all packaging materials, including the polystyrene base and any protective film.
- Remove the transport bolts located at the rear of the machine. Keep these bolts for future transport.
4.2 Location Requirements
- Place the washing machine on a firm, level floor.
- Ensure there is adequate space around the machine for ventilation and maintenance.
- Avoid direct sunlight or extreme temperatures.
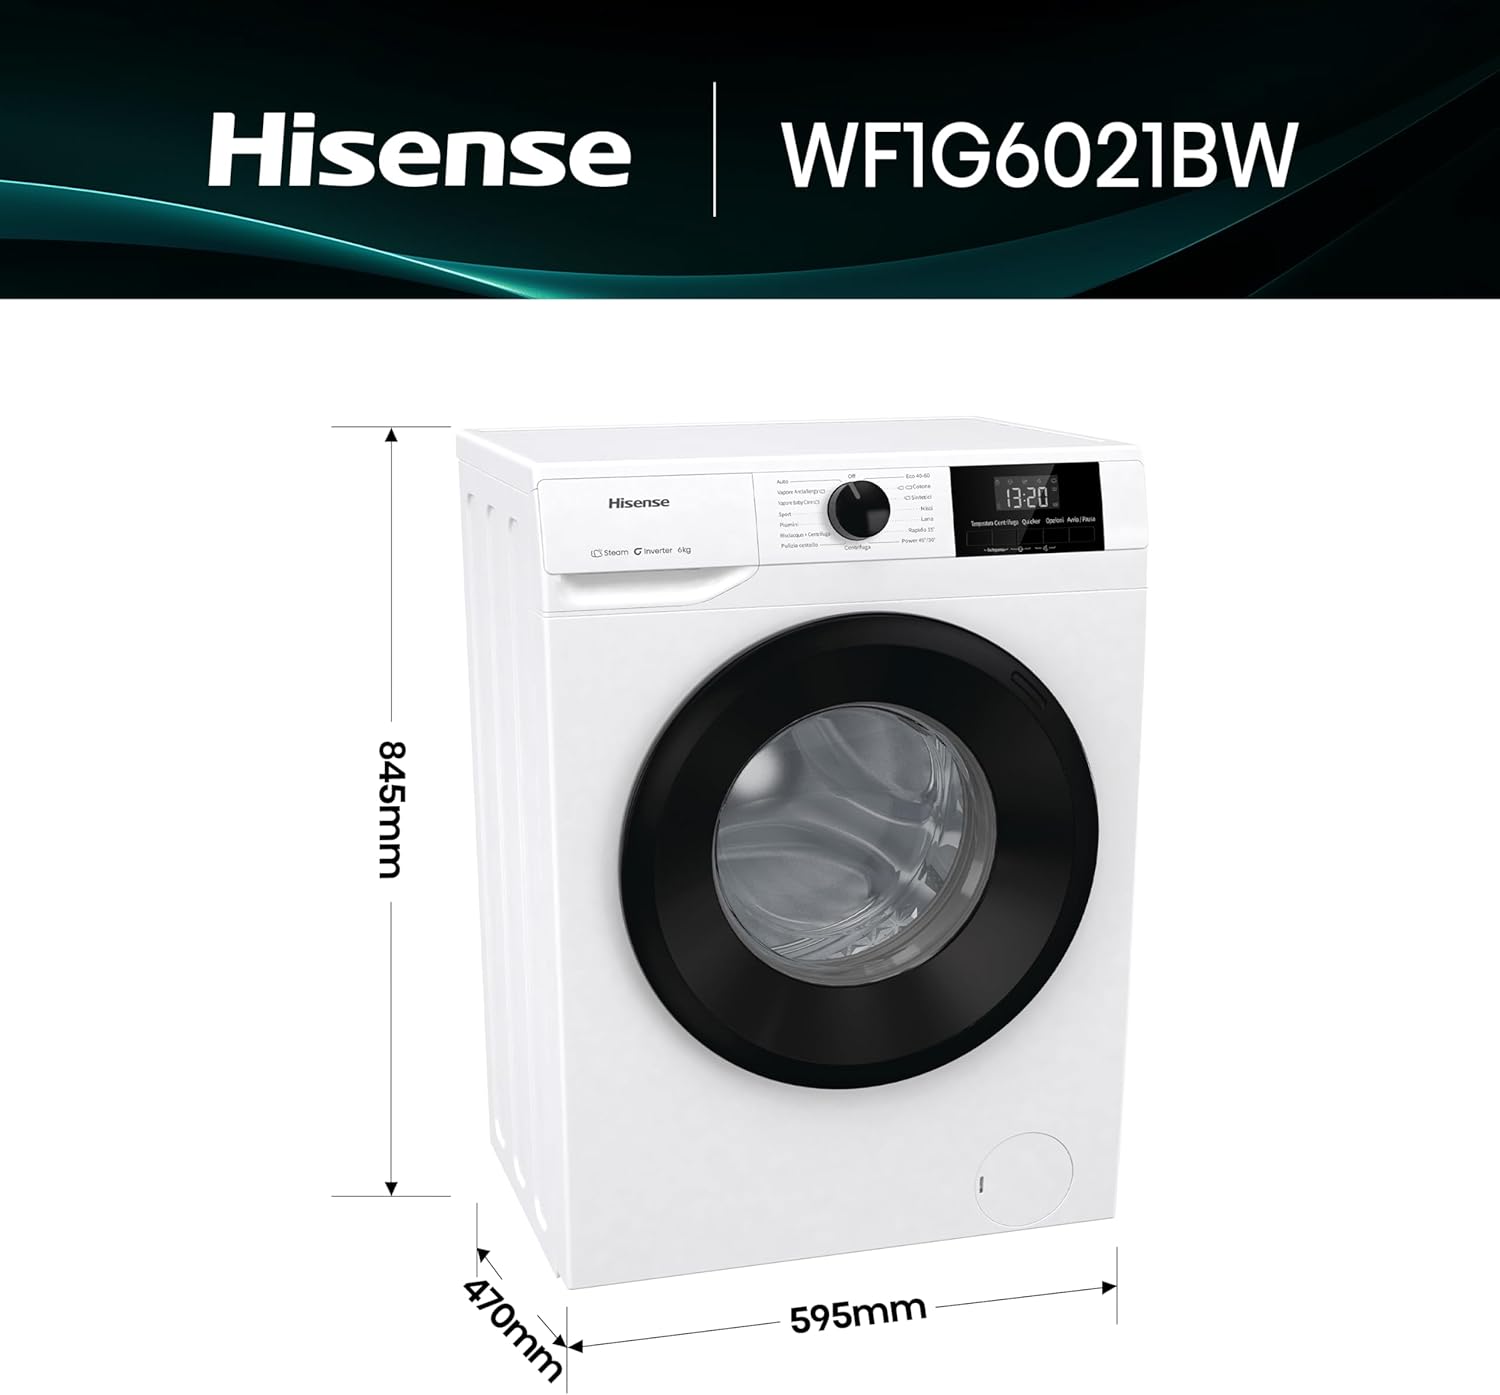
Figure 4.1: Diagram showing the dimensions of the Hisense WF1G6021BW washing machine: 85cm height, 60cm width, and 47cm depth.
4.3 Water Connection
- Connect the inlet hose to a cold water tap with a 3/4-inch thread.
- Ensure all connections are tight to prevent leaks.
4.4 Drainage Connection
- The drain hose can be placed into a standpipe or hooked over the edge of a sink.
- Ensure the drain hose is securely fastened to prevent it from dislodging during operation.
4.5 Leveling
- Adjust the adjustable feet at the bottom of the machine until it is perfectly level.
- A level machine reduces vibration and noise during operation.
4.6 Power Connection
- Plug the power cord into a grounded electrical outlet.
- Do not use extension cords or adapters.
5. Operating Instructions
5.1 Before First Use
- Run a short cycle without laundry and detergent to clean the drum.
5.2 Loading Laundry
- Open the door and load laundry loosely into the drum. Do not overload.
- Close the door firmly.
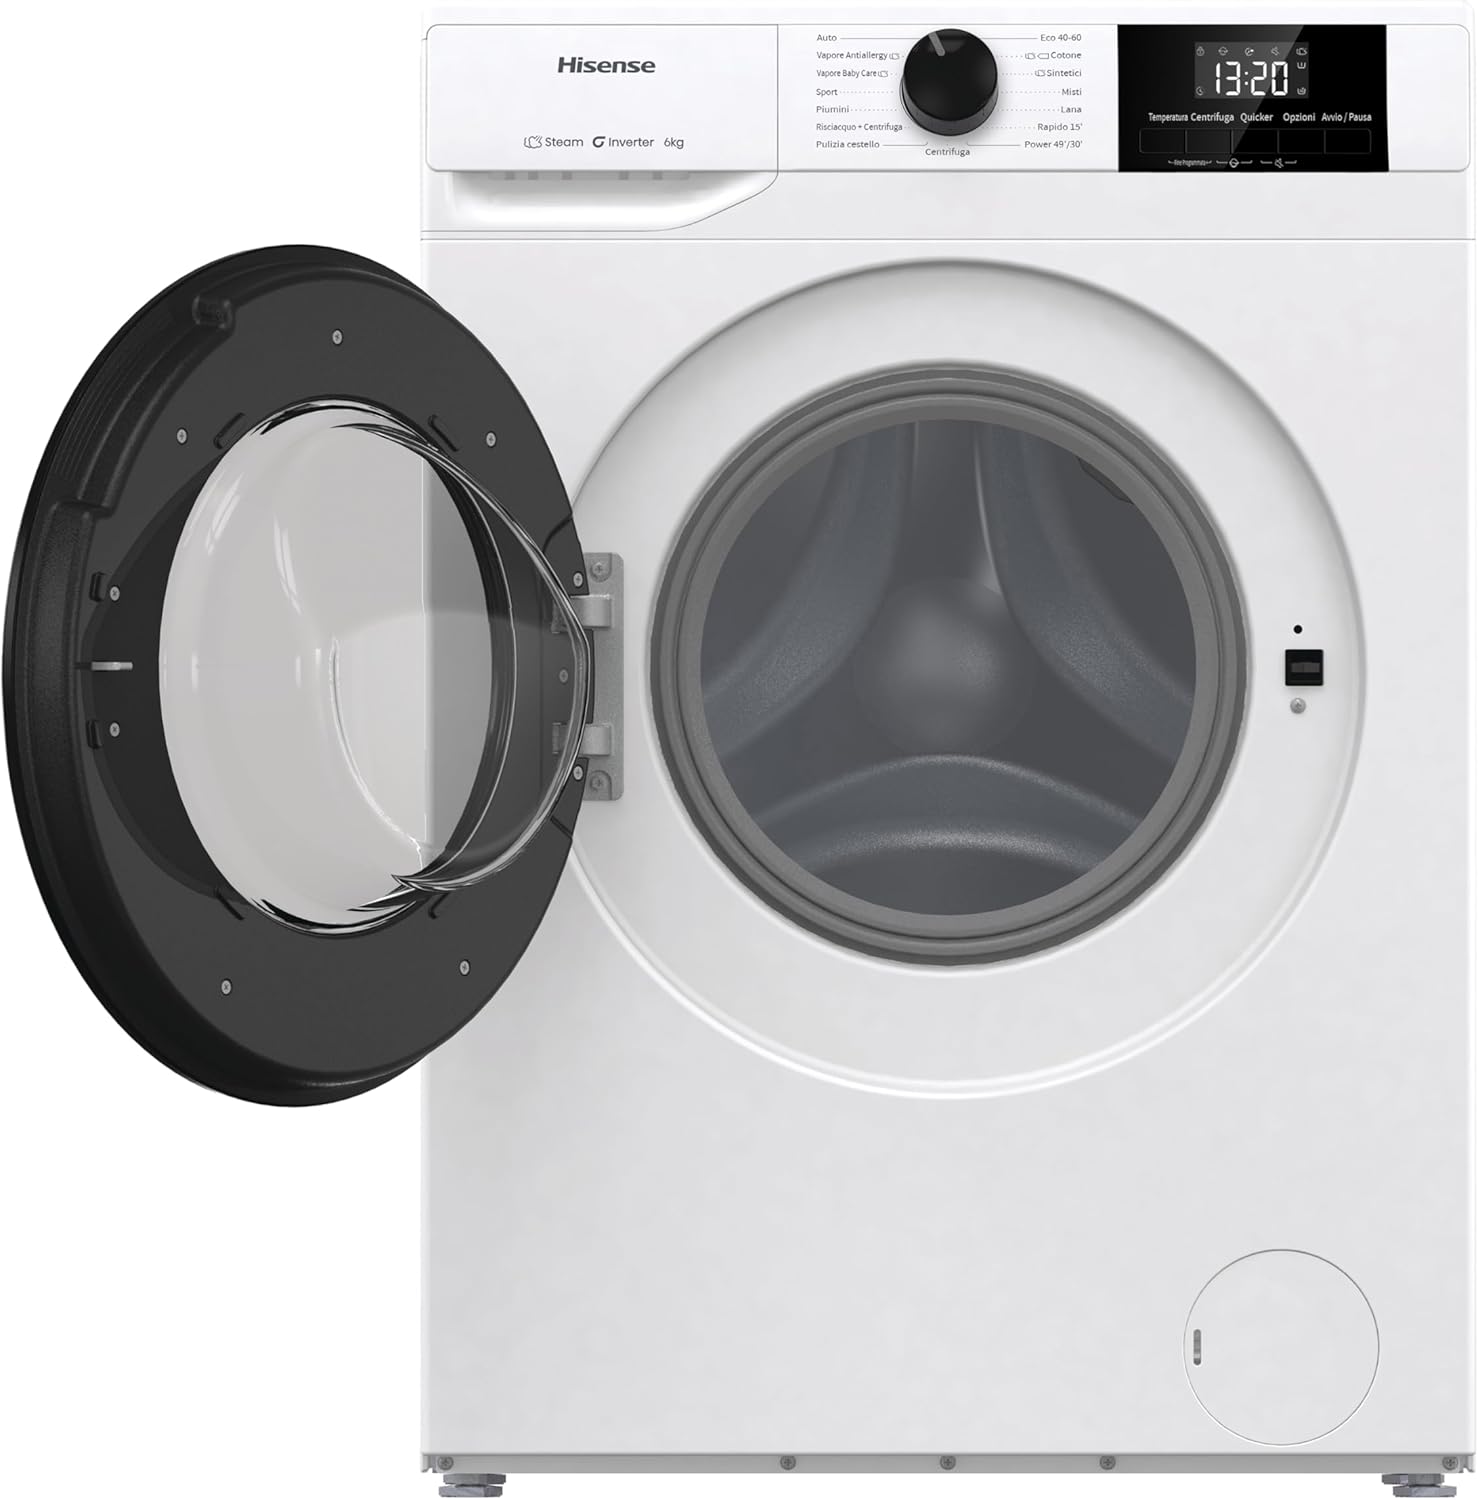
Figure 5.1: The washing machine with its door open, ready for loading laundry. The drum is visible inside.
5.3 Adding Detergent and Additives
- Pull out the detergent dispenser drawer.
- Add detergent to the main wash compartment and fabric softener to its designated compartment.
- Close the dispenser drawer gently.
5.4 Selecting a Program
- Turn the program selector knob to choose one of the 15 available wash programs.
- Available programs include: Auto, Anti-Allergy Steam, Baby Care Steam, Sport, Duvets, Rinse + Spin, Drum Clean, Eco 40-60, Cotton, Synthetics, Mixed, Wool, Rapid 15', Power 30'/49', Spin.
5.5 Adjusting Settings
- Use the touch buttons on the control panel to adjust temperature, spin speed, or activate functions like Quick Wash or Delayed Start.
- The LED display will show the selected settings and remaining time.
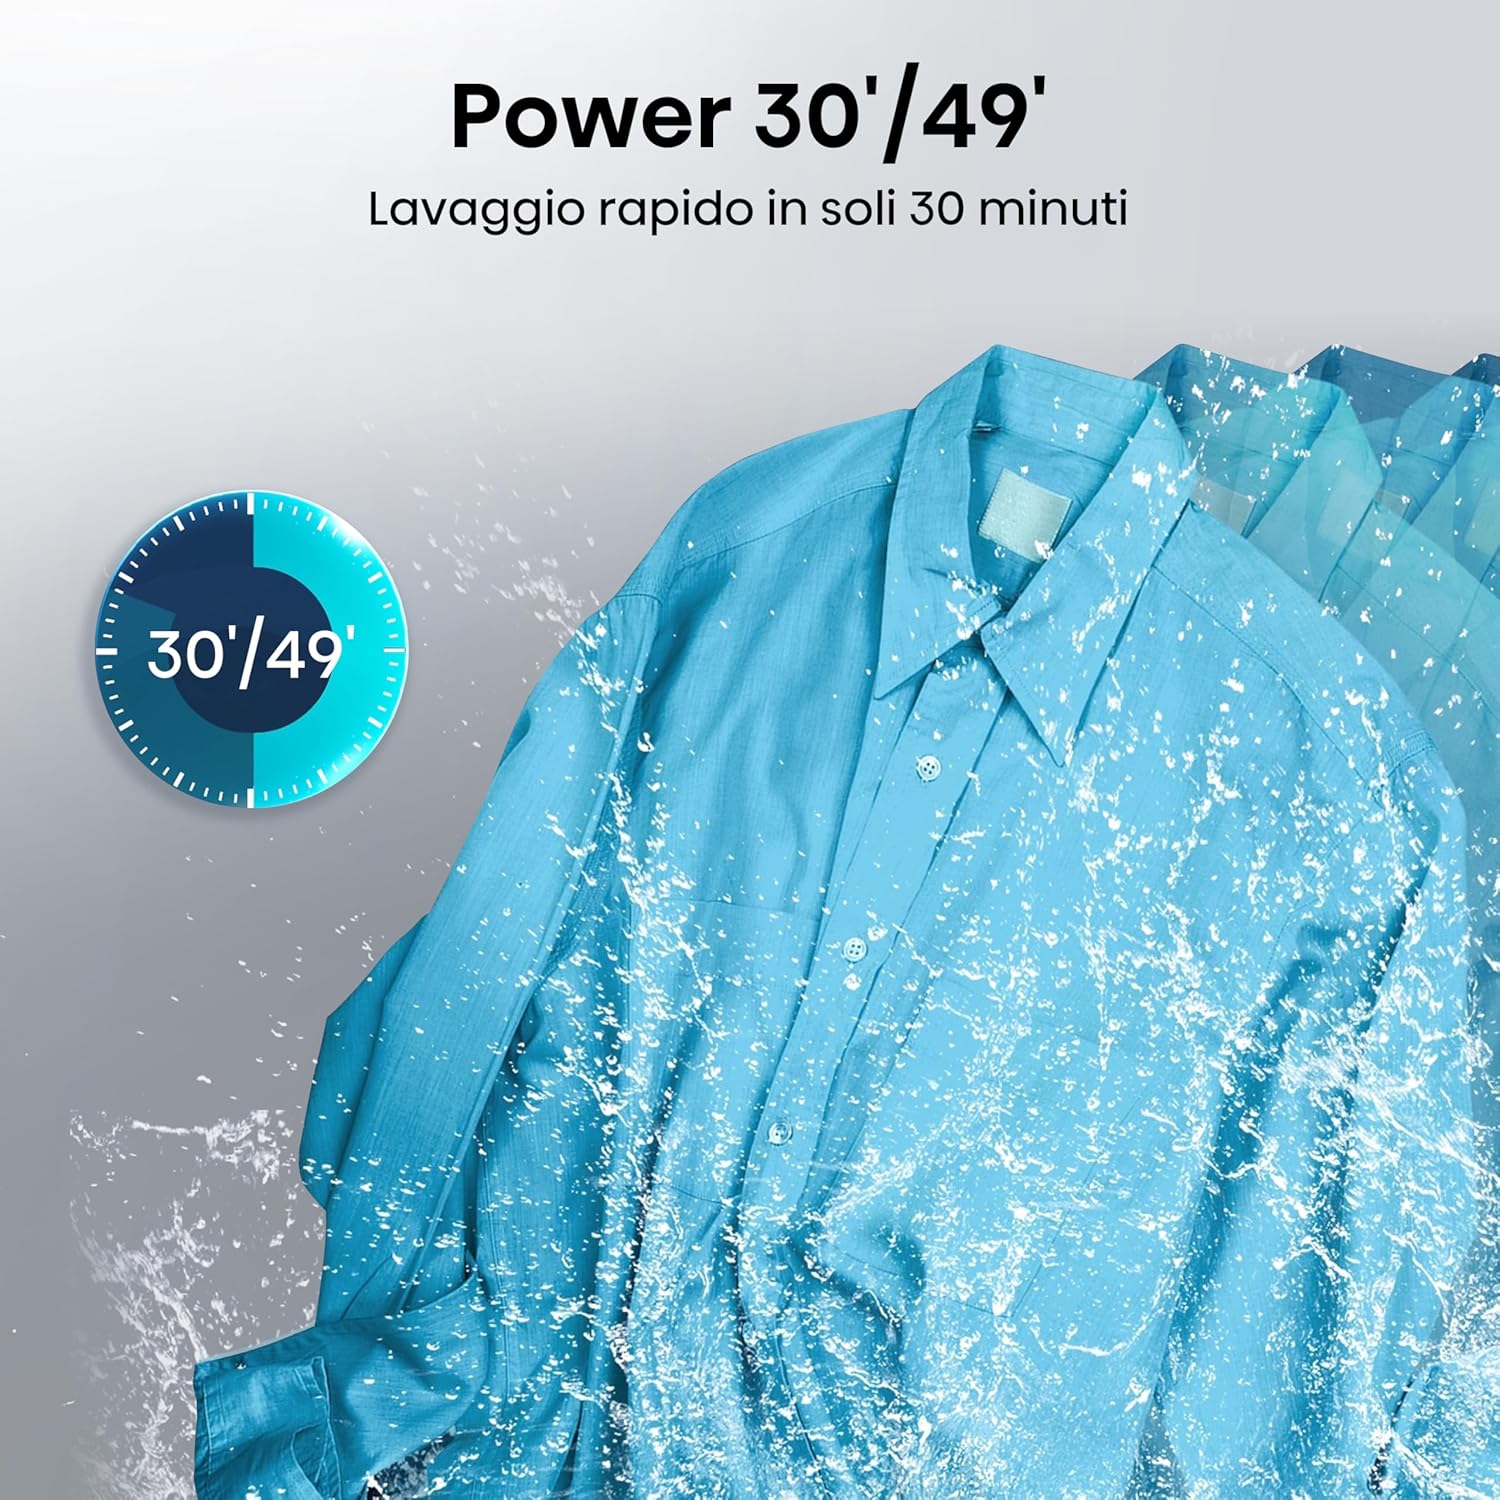
Figure 5.2: Illustration of the "Power 30'/49'" quick wash program, highlighting its ability to wash clothes rapidly.
5.6 Starting and Ending a Cycle
- Press the Start/Pause button to begin the wash cycle.
- The machine will automatically stop when the cycle is complete. An audible signal may sound.
- Open the door and remove your laundry.
6. Maintenance
Regular maintenance ensures the longevity and optimal performance of your washing machine.
6.1 Cleaning the Detergent Dispenser
- Remove the dispenser drawer and rinse it under running water to remove any detergent residue.
- Clean the housing of the dispenser with a brush.
6.2 Cleaning the Drum
- Use the "Drum Clean" program periodically to prevent odors and maintain hygiene.
6.3 Cleaning the Door Seal
- Wipe the rubber door seal after each wash to remove lint and moisture, preventing mold and odors.
6.4 Cleaning the Drain Pump Filter
- Locate the drain pump filter at the bottom front of the machine.
- Open the cover, drain any residual water, and unscrew the filter.
- Clean the filter of any lint or foreign objects and reassemble.
7. Troubleshooting
Before contacting service, please check the following common issues and solutions:
| Problem | Possible Cause | Solution |
|---|---|---|
| Machine does not start | Power cord unplugged, door not closed, program not selected, Start/Pause not pressed. | Check power, ensure door is closed, select program, press Start/Pause. |
| No water intake | Water tap closed, inlet hose kinked, water supply cut off. | Open water tap, straighten hose, check water supply. |
| Water not draining | Drain hose kinked, drain pump filter blocked. | Straighten drain hose, clean drain pump filter. |
| Excessive vibration/noise | Machine not level, transport bolts not removed, uneven load. | Adjust feet to level, remove transport bolts, redistribute laundry. |
8. Specifications
| Parameter | Value |
|---|---|
| Model Name | WF1G6021BW |
| Brand | Hisense |
| Capacity | 6 kg |
| Maximum Spin Speed | 1200 rpm |
| Energy Efficiency Class | B |
| Product Dimensions (D x W x H) | 47 cm x 60 cm x 85 cm |
| Access Position | Front Load |
| Color | White |
| Control Type | Touch |
| Operating Mode | Automatic |

Figure 8.1: The EU Energy Label for the Hisense WF1G6021BW, indicating its energy efficiency class B, 6.0 kg capacity, and other energy consumption details. For more details, refer to the official EPREL database via the QR code or link.
Official EPREL Product Information: https://eprel.ec.europa.eu/qr/0
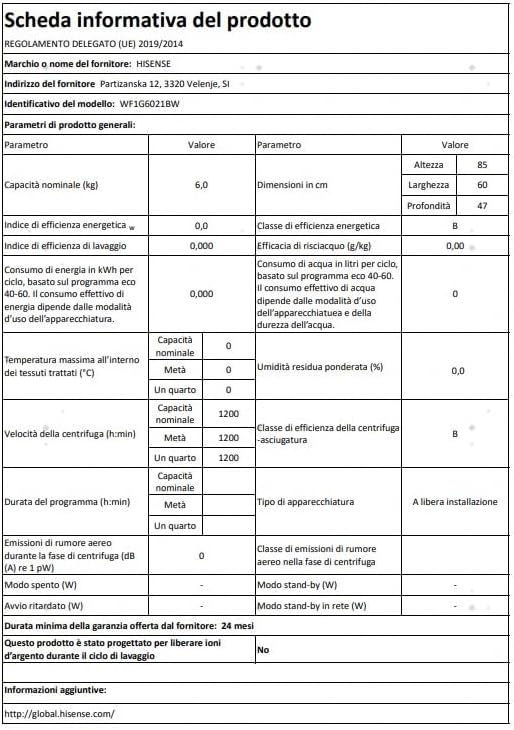
Figure 8.2: Detailed product data sheet for the Hisense WF1G6021BW, providing comprehensive technical specifications and compliance information.
9. Warranty and Support
9.1 Warranty Information
This Hisense WF1G6021BW washing machine comes with a minimum manufacturer's warranty of 24 months from the date of purchase. Please retain your proof of purchase for warranty claims. The warranty covers manufacturing defects under normal use conditions.
9.2 Customer Support
For technical assistance, spare parts, or warranty service, please contact Hisense customer support. You can find more information and contact details on the official Hisense global website:


