
Super General KSGW822
Super General 8 kg Twin-tub Semi-Automatic Washing Machine User Manual
Model: KSGW822
1. Introduction
This manual provides essential information for the safe and efficient operation, installation, and maintenance of your Super General 8 kg Twin-tub Semi-Automatic Washing Machine, Model KSGW822. Please read this manual thoroughly before using the appliance and retain it for future reference.
The Super General KSGW822 is a top-loading, semi-automatic washing machine designed for household use. It features an 8 kg capacity, a durable plastic lid, and is equipped with a lint filter and a drain pump for efficient washing and spin-drying.
2. Safety Instructions
Always adhere to the following safety precautions to prevent electric shock, fire, injury, or damage to the appliance.
- Ensure the power supply matches the voltage specified on the rating label of the washing machine.
- Do not operate the washing machine if the power cord or plug is damaged. Contact qualified service personnel for repair.
- Keep children and pets away from the washing machine during operation. This appliance is equipped with a child lock function for safety.
- Do not wash items that are soiled with flammable substances such as gasoline, kerosene, or paint.
- Always unplug the washing machine before cleaning, performing maintenance, or if it will not be used for an extended period.
- Do not immerse the appliance, power cord, or plug in water or other liquids.
- Ensure the washing machine is placed on a stable, level surface to prevent vibration and noise during operation.
- Do not open the lid of the spin tub until the drum has completely stopped.
3. Product Components
Familiarize yourself with the main parts of your washing machine:
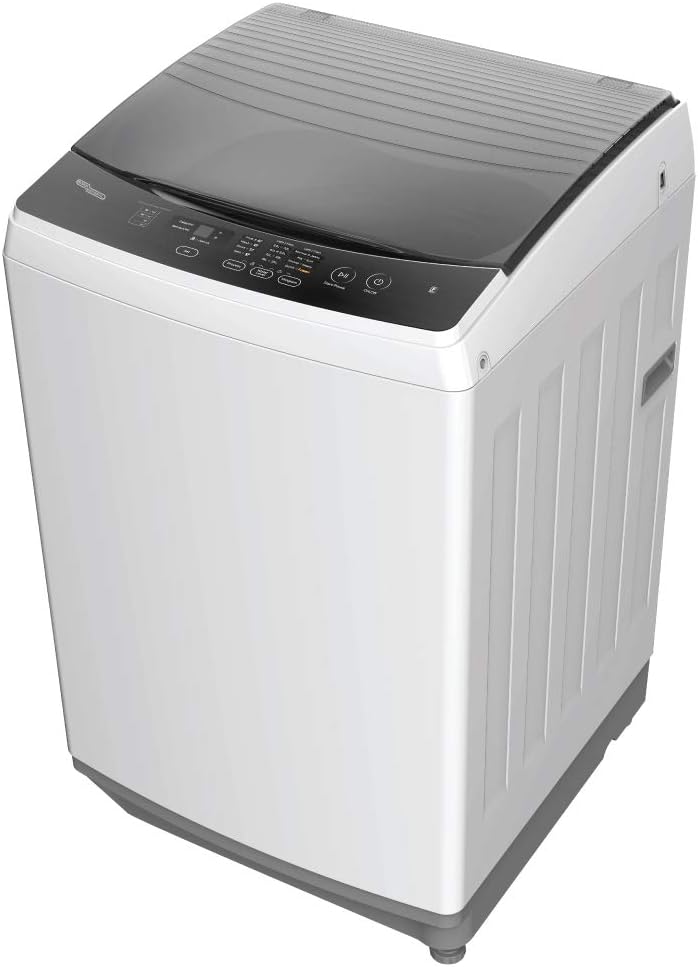
Figure 3.1: Overall view of the Super General 8 kg Twin-tub Semi-Automatic Washing Machine.
- Wash Tub: Where clothes are washed.
- Spin Tub: For drying clothes by spinning.
- Control Panel: Contains knobs and buttons for operation.
- Lid: Covers the wash and spin tubs.
- Water Inlet: For connecting the water supply hose.
- Drain Hose: For draining water from the machine.
- Lint Filter: Collects lint during the wash cycle.
4. Setup and Installation
Proper installation ensures optimal performance and safety.
4.1 Unpacking
- Carefully remove the washing machine from its packaging.
- Check for any damage during transit. If damaged, do not use and contact your retailer.
- Remove all packing materials, including the base packaging.
4.2 Location
- Place the washing machine on a firm, level surface. Uneven surfaces can cause excessive vibration and noise.
- Ensure there is adequate space around the machine for ventilation and access.
- Avoid direct sunlight or placing the machine in areas with high humidity or freezing temperatures.
4.3 Water Supply Connection
- Connect the water inlet hose to the water tap and the water inlet on the washing machine.
- Ensure all connections are tight to prevent leaks.
- The machine has a double inlet for convenience.
4.4 Drain Hose Setup
- Position the drain hose to allow for proper water drainage. It can be placed over a sink or connected to a standpipe.
- Ensure the drain hose is not kinked or blocked.
- The machine is equipped with a drain pump for efficient water removal.
4.5 Power Connection
- Plug the power cord into a grounded electrical outlet.
- Do not use extension cords or adapters.
5. Operating Instructions
Follow these steps for effective washing and spin-drying.

Figure 5.1: Top view of the washing machine showing the control panel.
5.1 Preparing Laundry
- Sort laundry by fabric type, color, and degree of soiling.
- Empty pockets and close zippers and hooks.
- For heavily soiled items, pre-soak if necessary.
5.2 Washing Procedure
- Load Clothes: Place sorted laundry into the wash tub. Do not overload the machine beyond its 8 kg capacity.
- Add Detergent: Add the appropriate amount of detergent to the wash tub.
- Fill with Water: Fill the wash tub with water to the desired level using the water inlet.
- Select Wash Program: The machine offers 8 standard cycles. Use the control panel to select the desired wash program (e.g., Gentle, Normal, Heavy).
- Set Wash Timer: Turn the wash timer knob to the desired washing duration.
- Start Washing: The machine will begin the wash cycle.
- Drain Water: Once the wash cycle is complete, select the "Drain" option to remove the water.
- Rinse (Optional): For rinsing, fill the tub with clean water and run a short wash cycle, then drain. Repeat if necessary.
5.3 Spin-Drying Procedure
- Transfer Clothes: Carefully transfer the washed and rinsed clothes from the wash tub to the spin tub. Distribute them evenly.
- Close Lid: Close the spin tub lid securely.
- Set Spin Timer: Turn the spin timer knob to the desired spin duration.
- Start Spin: The spin tub will begin to rotate. Do not open the lid until the tub has completely stopped.
- Remove Clothes: Once the spin cycle is complete and the tub has stopped, remove the clothes.
6. Care and Maintenance
Regular cleaning and maintenance will prolong the life of your washing machine.
6.1 Cleaning the Exterior
- Wipe the exterior of the machine with a soft, damp cloth.
- Do not use abrasive cleaners, solvents, or harsh chemicals.
6.2 Cleaning the Lint Filter
- The lint filter should be cleaned after every few washes to ensure efficient operation.
- Remove the lint filter from the wash tub.
- Remove accumulated lint and rinse the filter under running water.
- Reinsert the lint filter into its position.
6.3 Cleaning the Wash Tub
- Periodically clean the inside of the wash tub to prevent detergent residue buildup.
- You can run a wash cycle with hot water and a cup of white vinegar or a washing machine cleaner (without clothes).
6.4 Winterization (If applicable)
- If the machine is stored in an area where temperatures may drop below freezing, drain all water from the hoses and tubs to prevent damage.
7. Troubleshooting
Before contacting service, refer to the following table for common issues and their solutions.
| Problem | Possible Cause | Solution |
|---|---|---|
| Machine does not start | Power cord not plugged in; Power outage; Lid not closed properly. | Check power connection; Check circuit breaker; Ensure lids are fully closed. |
| No water filling | Water tap closed; Water inlet hose kinked or blocked. | Open water tap; Straighten hose; Check for blockages. |
| Machine vibrates excessively | Machine not level; Laundry unevenly distributed in spin tub. | Adjust leveling feet; Redistribute laundry evenly. |
| Water not draining | Drain hose kinked or blocked; Drain pump issue. | Straighten hose; Clear blockages; If problem persists, contact service. |
| Spin tub not spinning | Lid not closed; Overloaded spin tub. | Ensure lid is closed; Reduce laundry load. |
8. Specifications
Technical specifications for the Super General 8 kg Twin-tub Semi-Automatic Washing Machine (Model KSGW822).
| Brand | Super General |
| Model Number | KSGW822 |
| Capacity | 8 Kilograms |
| Product Dimensions (L x W x H) | 56.5 x 55 x 93.5 cm |
| Item Weight | 40 Kilograms |
| Installation Type | Freestanding |
| Material Type | Plastic, Stainless Steel |
| Special Features | LED Display, Stainless Steel/Metal, Top Load |
| Standard Cycles | 8 |
| Access Location | Top Load |
| Operation Mode | Semi Automatic |
| Included Components | Main unit |
9. Warranty and Support
Your Super General 8 kg Twin-tub Semi-Automatic Washing Machine comes with a 2-year warranty from the date of purchase. This warranty covers manufacturing defects and faulty materials under normal household use.
For warranty claims, technical support, or service inquiries, please contact Super General customer service. Keep your purchase receipt as proof of purchase.
For more information, you may visit the official Super General store on Amazon: Super General Store
Ask a question about this manual
Ask about setup, troubleshooting, compatibility, parts, safety, or missing instructions. Manuals+ will review the question and use this page’s manual context to help answer it.