1. Introduction
The ORICO M2P2 Dual-Bay M.2 NVMe SSD Cloner and Docking Station is designed for efficient data management, offering both offline cloning capabilities and high-speed data transfer when connected to a computer. This device supports M-Key PCIe NVMe SSDs and provides a convenient solution for data backup, migration, and storage expansion.
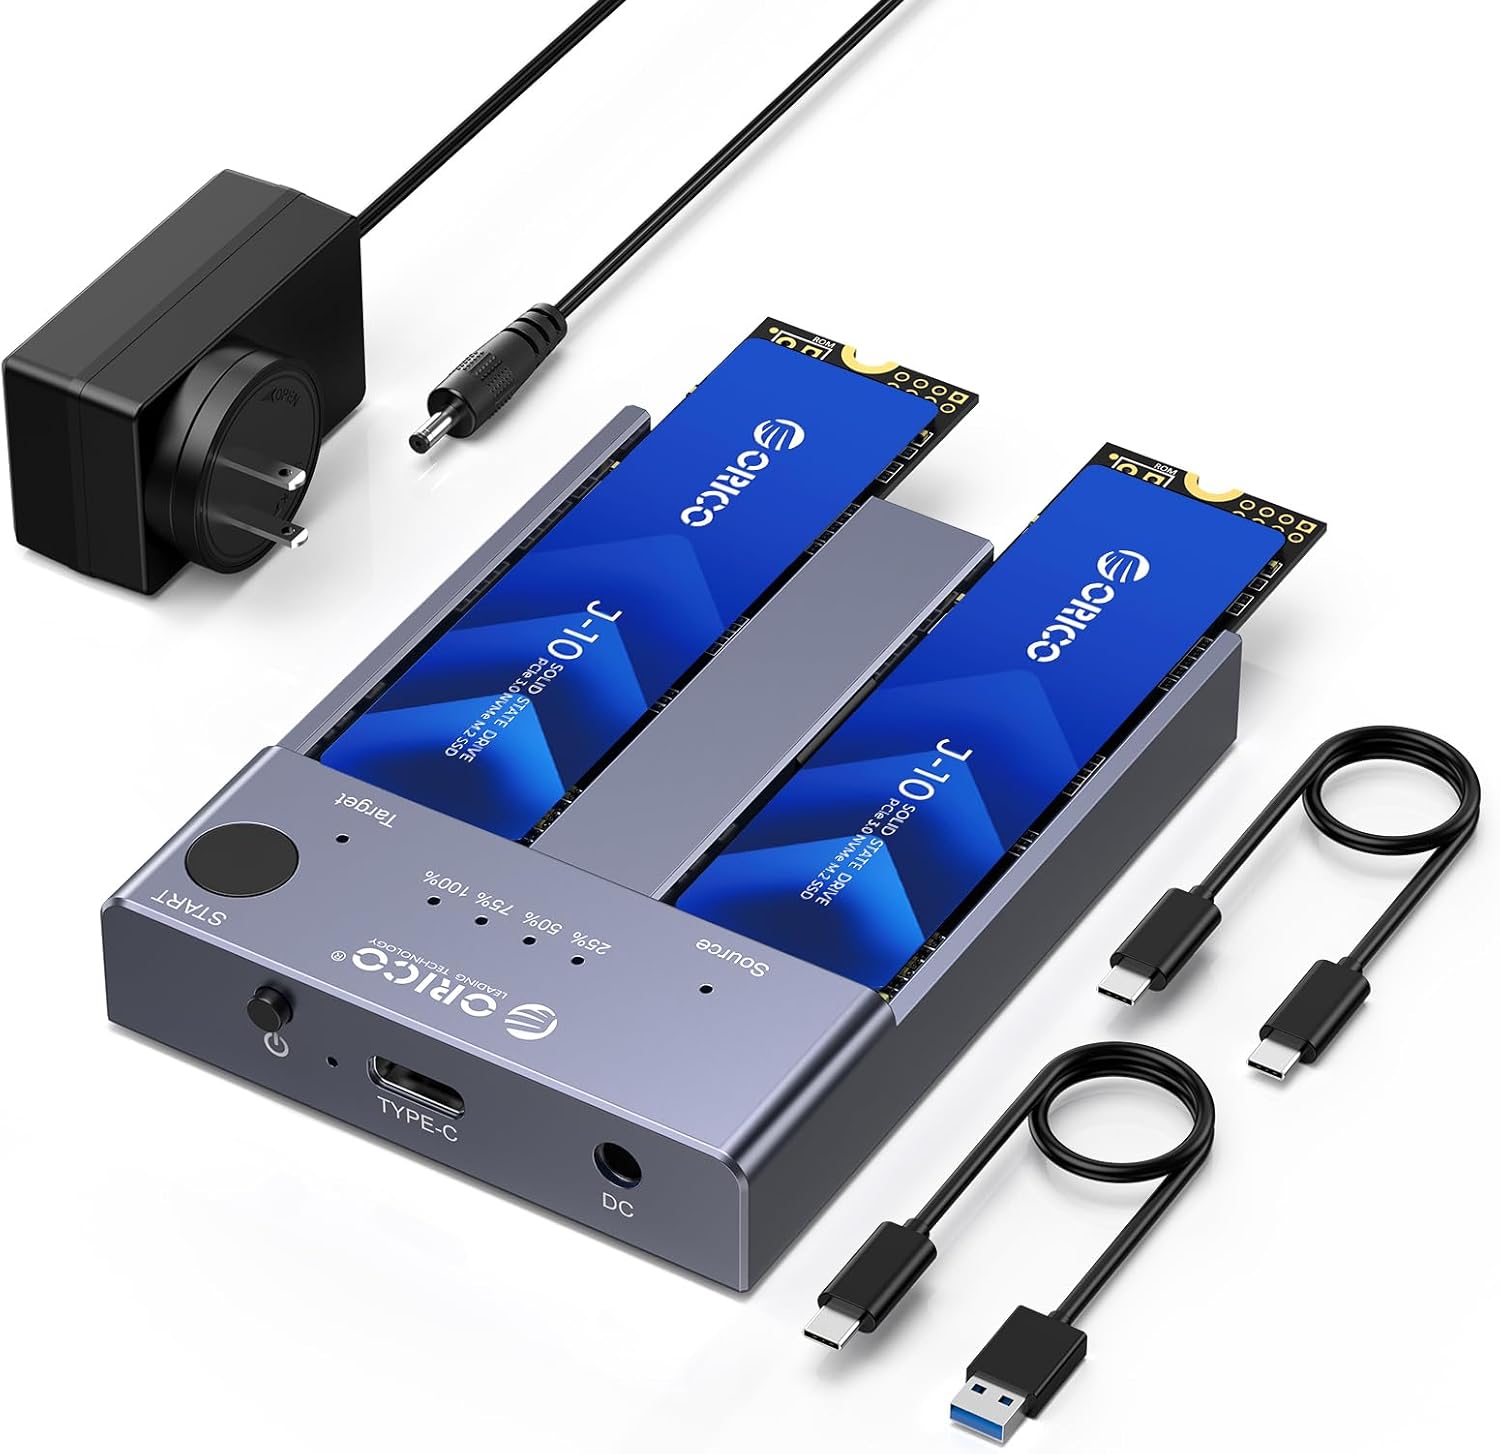
Image 1: ORICO M2P2 Dual-Bay M.2 NVMe SSD Cloner and Docking Station with included accessories.
2. Package Contents
Please verify that all items are present in the package:
- M.2 NVMe Cloner
- C to A Data Cable
- C to C Data Cable
- 5V/4A Power Adapter
3. Product Overview
The ORICO M2P2 features two M.2 NVMe slots, a power input, a USB-C data port, a START button for cloning, and LED indicators for cloning progress. The aluminum alloy construction aids in heat dissipation.
4. Setup Instructions
4.1. Installing M.2 NVMe SSDs
- Ensure the device is powered off and disconnected from any computer.
- Gently insert your M.2 NVMe SSDs into the designated slots. The slot labeled 'Source' is for the drive you wish to clone from, and the slot labeled 'Target' is for the drive you wish to clone to. Ensure the SSDs are fully seated.

Image 2: Proper insertion of Source and Target M.2 NVMe SSDs.
4.2. Connecting Power
- Connect the provided 5V/4A power adapter to the DC input port on the ORICO M2P2.
- Plug the power adapter into a wall outlet. The power indicator light on the device will illuminate.

Image 3: Connecting the power adapter to the device.
5. Operating Instructions
5.1. Offline Cloning (PC-Free Duplication)
The offline cloning function allows you to duplicate an SSD without connecting the device to a computer.
Important Notes:- Ensure the target SSD has a capacity equal to or greater than the source SSD.
- All data on the target SSD will be erased during the cloning process. Back up any important data on the target SSD before proceeding.
- Do not connect the cloner to a PC when performing an offline clone.
- Insert the source SSD into the 'Source' slot and the target SSD into the 'Target' slot.
- Connect the power adapter to the device and a power outlet.
- Press and hold the 'START' button for approximately 3-5 seconds until the LED indicators begin to flash. This confirms the cloning process has started.
- Monitor the cloning progress using the LED indicators (25%, 50%, 75%, 100%).
- Once all four LEDs (25%, 50%, 75%, 100%) are solid, the cloning process is complete.
- Safely remove the SSDs after the cloning is finished and the device is powered off.
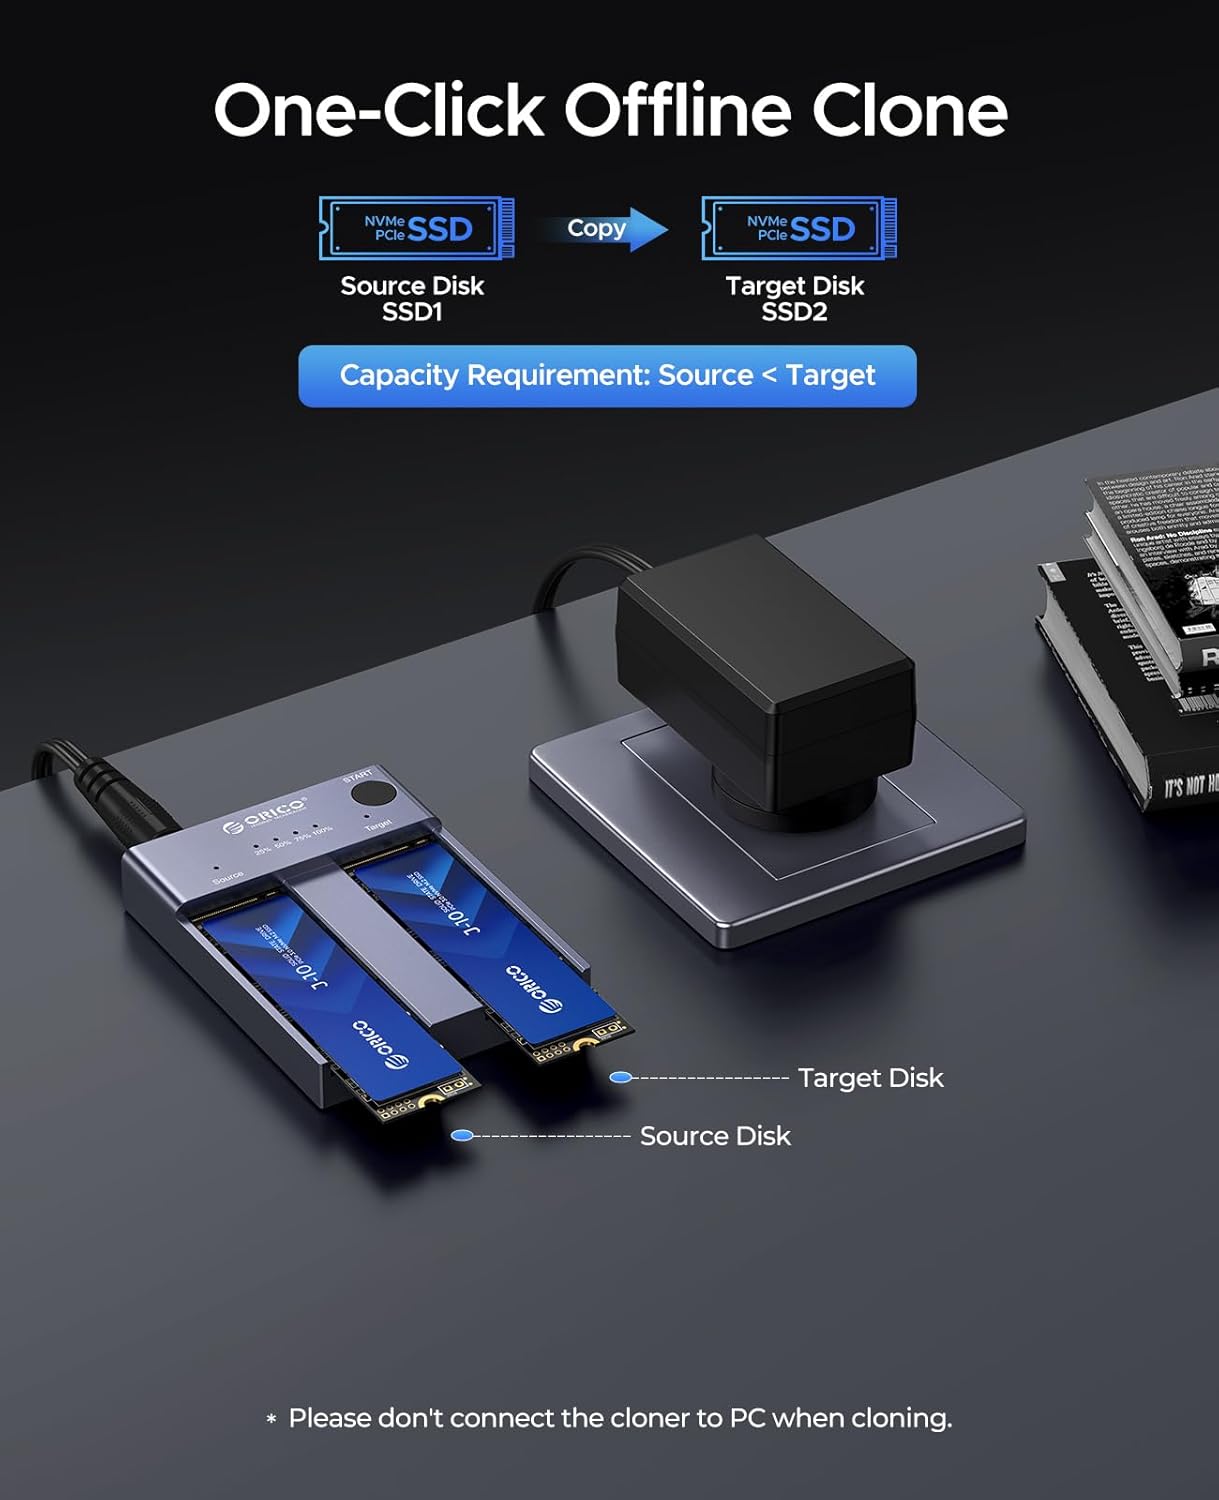
Image 4: Diagram illustrating the offline cloning process from Source to Target SSD.

Image 5: The device showing the START button and LED indicators for cloning progress.
5.2. Connecting to a Computer (Docking Mode)
The device can function as an external dual-bay M.2 NVMe enclosure, allowing high-speed data transfer to and from your computer.
- Insert your M.2 NVMe SSDs into the slots.
- Connect the power adapter to the device and a power outlet.
- Use the provided USB-C to USB-C or USB-C to USB-A cable to connect the device's USB-C port to your computer's USB port.
- Your computer should detect the SSDs as external storage devices. You may need to initialize and format new SSDs before use.
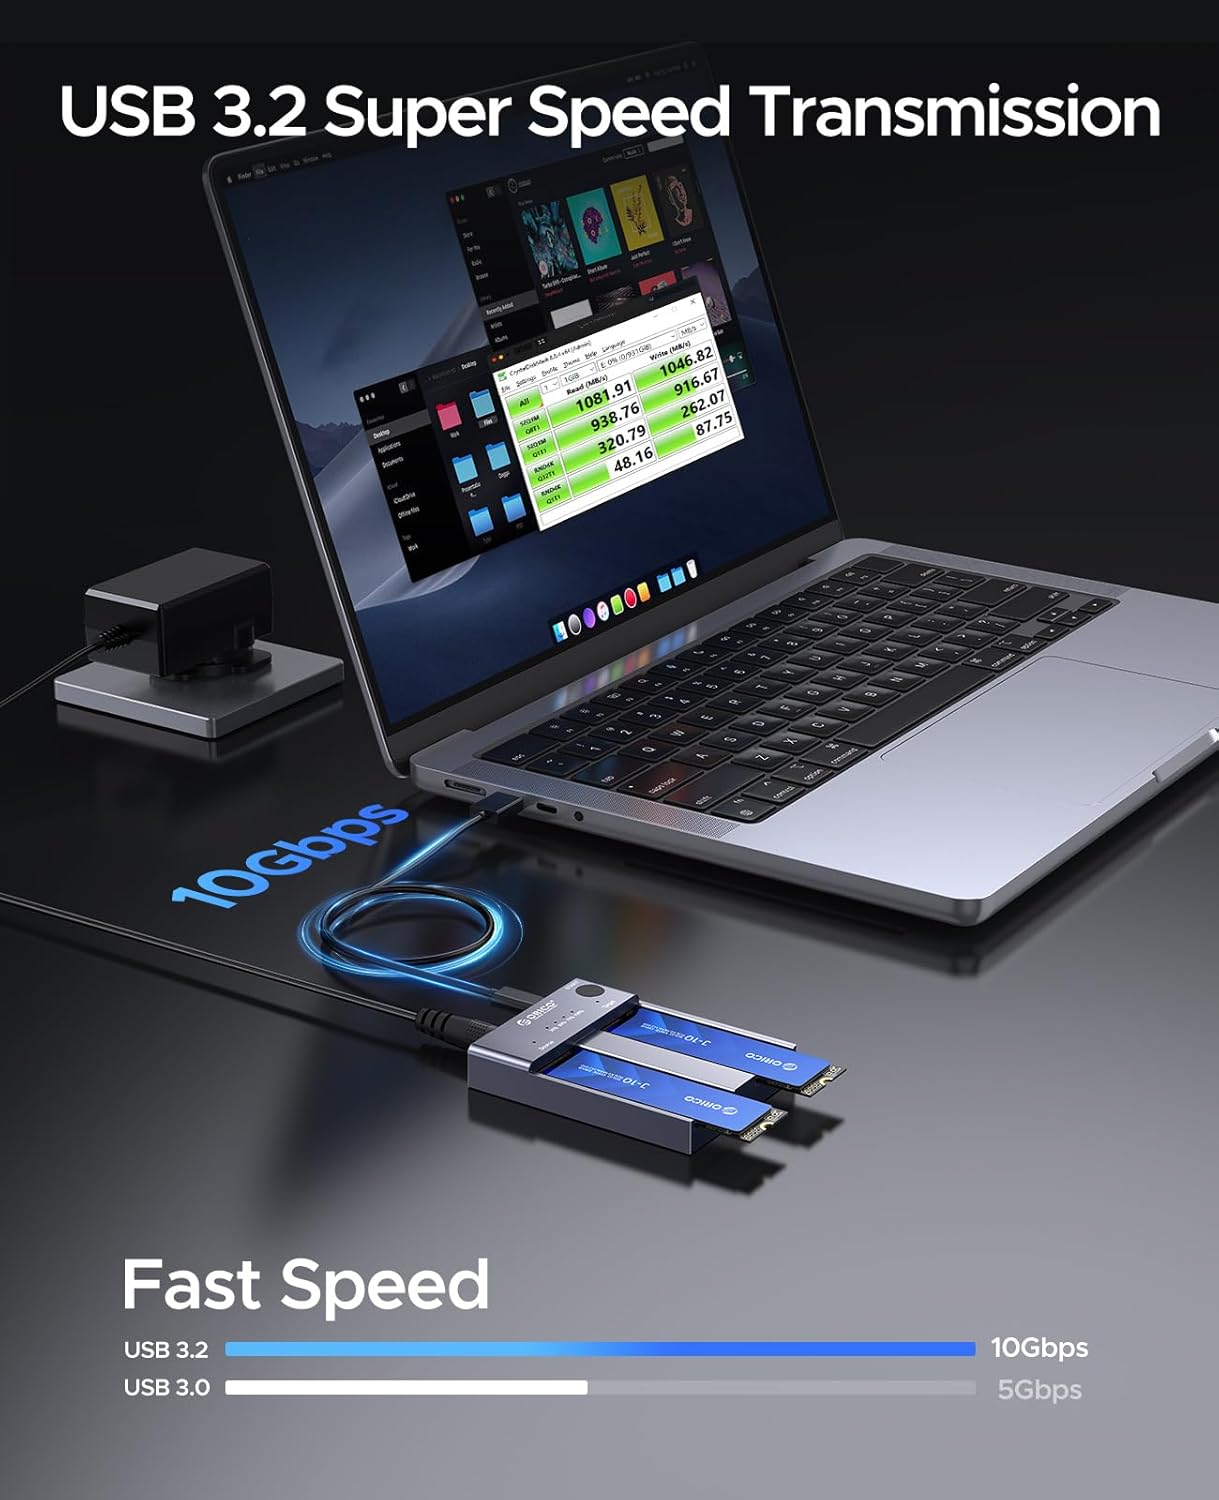
Image 6: The ORICO M2P2 connected to a laptop, demonstrating high-speed data transmission.
6. Compatibility
The ORICO M2P2 is designed for broad compatibility with M.2 NVMe SSDs.
- Supported SSD Type: M-Key NVMe PCIe SSDs.
- Supported SSD Sizes: 22110, 2280, 2260, 2242.
- Maximum Capacity: Up to 8TB per slot (total 16TB).
- Operating Systems: Compatible with Windows, macOS, and Linux.
- Incompatible: SATA M.2 AHCI SSDs and NVMe M.2 SSDs with integrated heat sinks are not compatible.
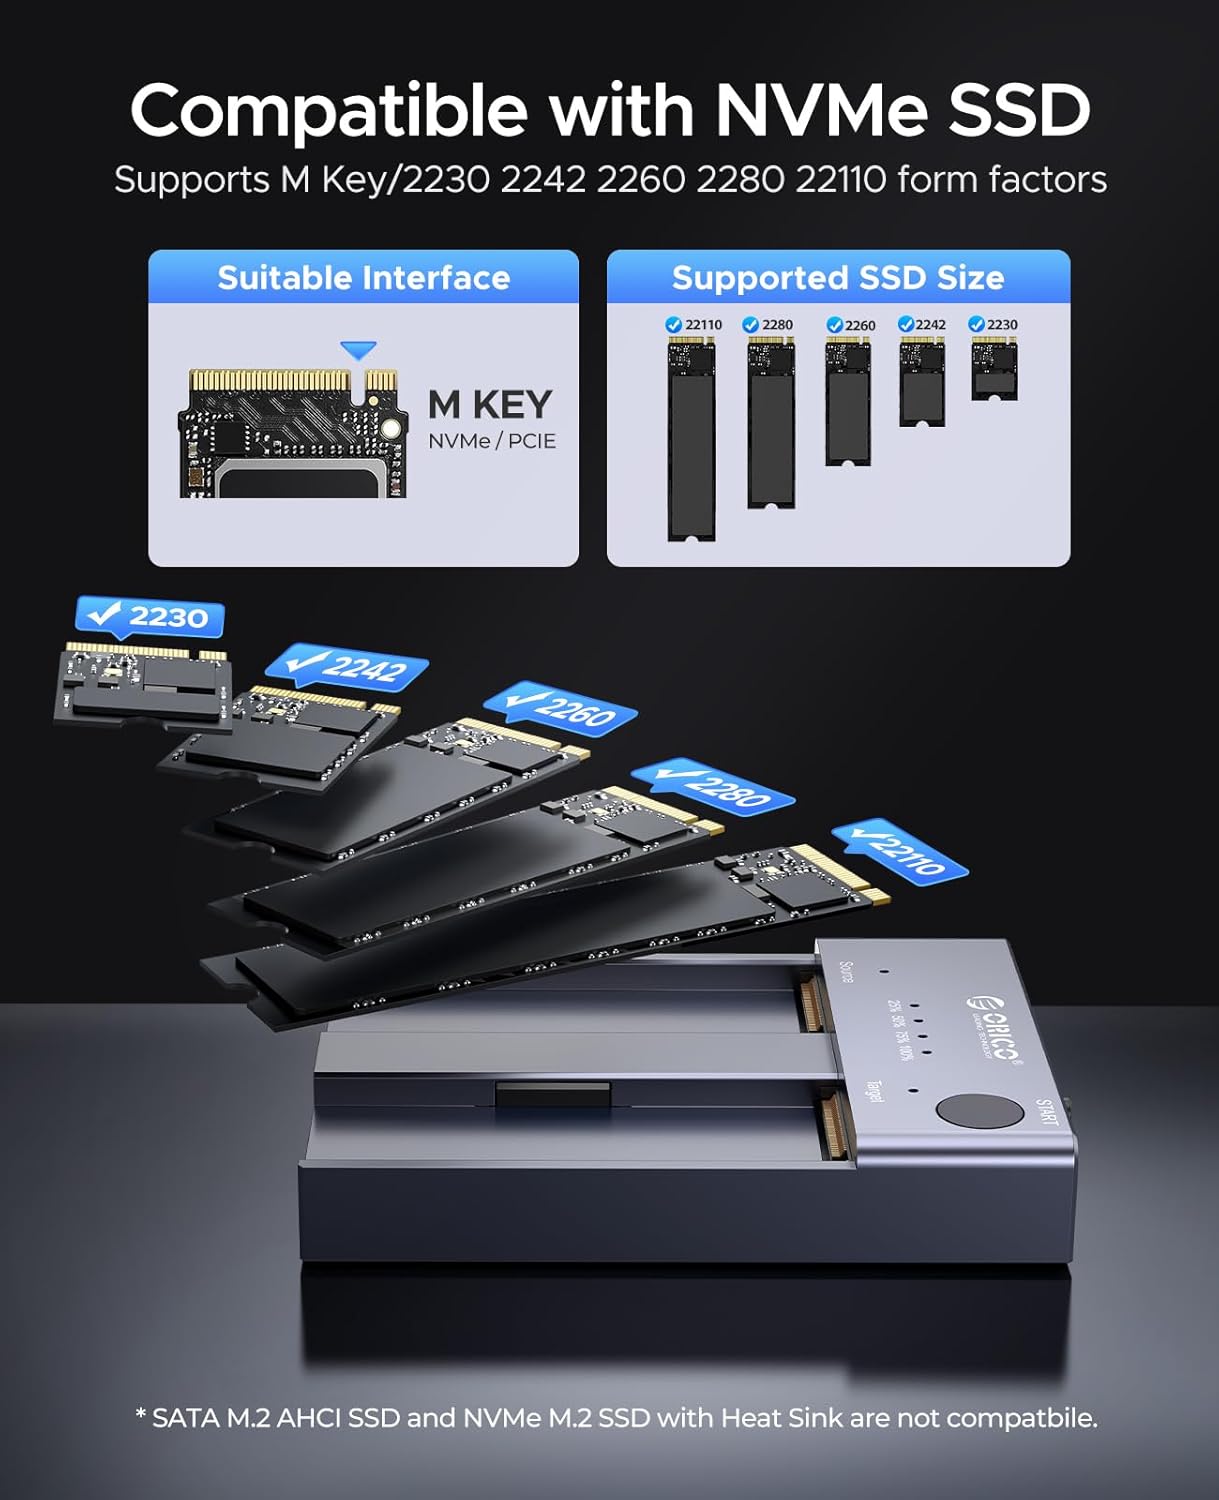
Image 7: Visual guide to compatible M-Key NVMe SSD interfaces and sizes.
7. Specifications
| Feature | Specification |
|---|---|
| Model Number | US M2P2 |
| Brand | ORICO |
| Hardware Interface | USB 3.2 Gen 2 |
| Data Transfer Rate | 10 Gigabits Per Second |
| Max Number of Supported Devices | 2 |
| Memory Storage Capacity | 8 TB (per slot) |
| Product Dimensions | 3.23 x 2.44 x 0.54 inches |
| Item Weight | 0.01 Ounces |
| Material | Metal (Aluminum) |
| Power Supply | 5V/4A Power Adapter |
8. Maintenance
To ensure the longevity and optimal performance of your ORICO M2P2, follow these maintenance guidelines:
- Keep the device clean and free from dust. Use a soft, dry cloth for cleaning.
- Avoid exposing the device to extreme temperatures, humidity, or direct sunlight.
- Do not drop or subject the device to strong impacts.
- Ensure proper ventilation during operation, especially during long cloning tasks, to aid in heat dissipation.
9. Troubleshooting
If you encounter issues with your ORICO M2P2, refer to the following common problems and solutions:
- Device Not Detected by Computer:
- Ensure the USB data cable is securely connected to both the device and the computer.
- Try a different USB port on your computer or a different USB cable.
- Verify that the power adapter is correctly connected and the device is powered on.
- For new SSDs, check Disk Management (Windows) or Disk Utility (macOS) to ensure they are initialized and formatted.
- Offline Cloning Fails or Does Not Start:
- Confirm that the target SSD's capacity is equal to or larger than the source SSD's capacity.
- Ensure the device is NOT connected to a computer during the cloning process.
- Press and hold the 'START' button for the required 3-5 seconds until LEDs flash.
- Check that both SSDs are properly seated in their respective slots.
- If the cloning process appears stuck, try restarting the process.
- Device Becomes Very Hot During Operation:
- It is normal for NVMe SSDs and the device to generate heat during high-speed operations like cloning or large data transfers. The aluminum casing is designed to dissipate this heat.
- Ensure the device is placed on a stable, heat-resistant surface with adequate airflow.
- Avoid touching the device during intense operations.
- The device has an auto-sleep function after 10 minutes of inactivity to help prolong SSD lifespan and manage temperature.
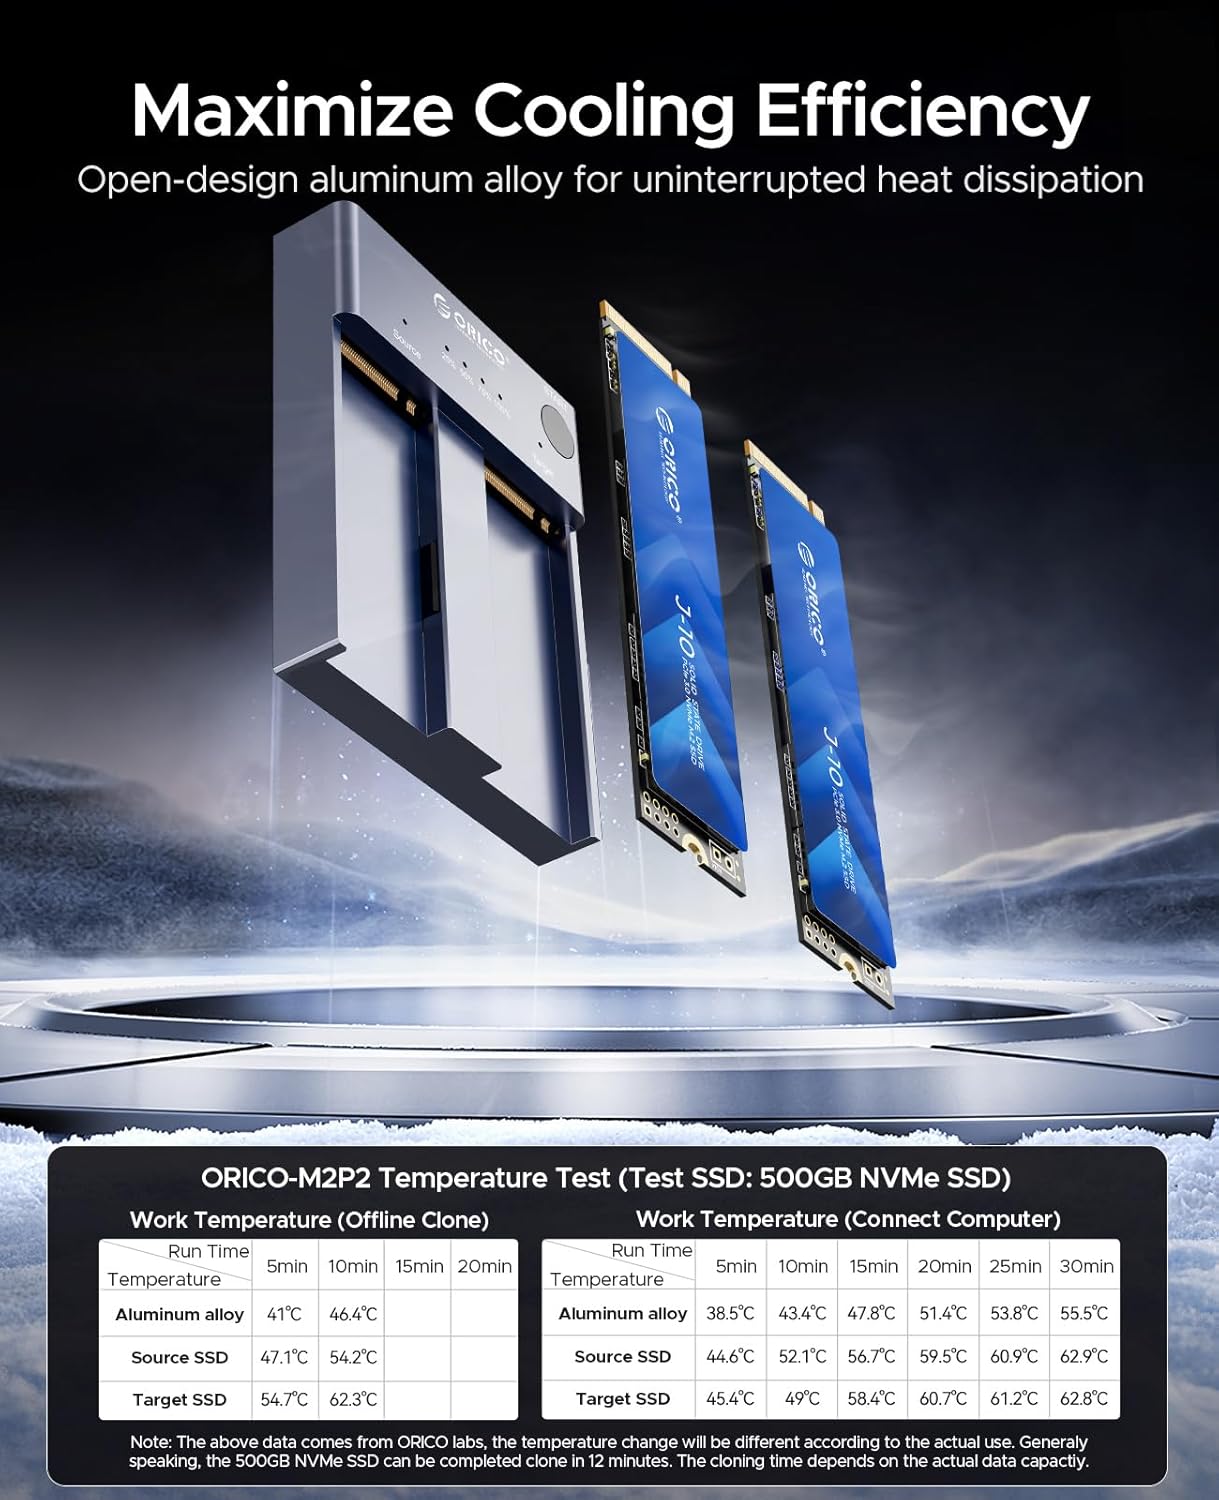
Image 8: Temperature test results for the ORICO M2P2 during offline cloning and computer connection, demonstrating heat generation during operation.
10. Safety Information
- Do not disassemble or attempt to repair the device yourself. This may void the warranty and pose safety risks.
- Use only the provided power adapter. Using unauthorized adapters may damage the device or cause fire.
- Keep the device away from water, liquids, and flammable materials.
- Due to the heat generated by NVMe SSDs, the device's casing can become hot during operation. Exercise caution when handling.
11. Warranty and Support
ORICO products typically come with a standard manufacturer's warranty. For specific warranty details, technical support, or service inquiries, please refer to the warranty card included with your product or visit the official ORICO website. Please retain your proof of purchase for warranty claims.


