
Leeleberd 132LED-closet lights
Leeleberd 132LED Motion Sensor Closet Light User Manual
Model: 132LED-closet lights
Introduction
Thank you for choosing the Leeleberd 132LED Motion Sensor Closet Light. This versatile, USB rechargeable light is designed to provide convenient illumination in various indoor spaces such as closets, cabinets, hallways, and kitchens. Featuring intelligent motion sensing, adjustable brightness, and multiple color temperature options, this light enhances visibility and energy efficiency. Please read this manual carefully to ensure proper installation, operation, and maintenance of your device.
What's in the Box
Your Leeleberd 132LED Motion Sensor Closet Light package includes the following items:
- 1 x Leeleberd 132LED Motion Sensor Closet Light
- 1 x USB Charging Cable
- 2 x Magnetic Adhesive Strips
- 1 x Remote Control (if included with your specific model)
- 1 x User Manual
Specifications
| Feature | Detail |
|---|---|
| Brand | Leeleberd |
| Model Number | 132LED-closet lights |
| Light Source | LED (132 LEDs) |
| Brightness | Up to 800 lumens |
| Color Temperature | 3000K, 4500K, 6500K (Adjustable) |
| Power Source | Battery Powered (USB Rechargeable) |
| Battery Capacity | 2500mAh (Built-in) |
| Motion Sensor Range | 120 degrees |
| Mounting Type | Magnetic Mount, Adhesive, Under Cabinet |
| Indoor/Outdoor Usage | Indoor |
| Material | Plastic |
Setup and Installation
The Leeleberd 132LED Closet Light is designed for easy installation using its magnetic adhesive strips. No tools are required for most installations.
- Prepare the Surface: Choose a clean, dry, and smooth surface for mounting. Ensure the area is free from dust, grease, or moisture.
- Attach Magnetic Strips: Peel off the protective film from one side of the magnetic adhesive strip. Firmly press this side onto the desired mounting surface. Repeat for the second strip, ensuring they are aligned with the magnets on the light fixture.
- Mount the Light: Align the metal back of the Leeleberd light with the magnetic strips on the surface. The light will securely attach magnetically. This allows for easy removal for charging or repositioning.
The light can be installed in various locations such as under cabinets, inside wardrobes, along bed edges, or in hallways.

Figure 1: Examples of Leeleberd light applications in different areas.
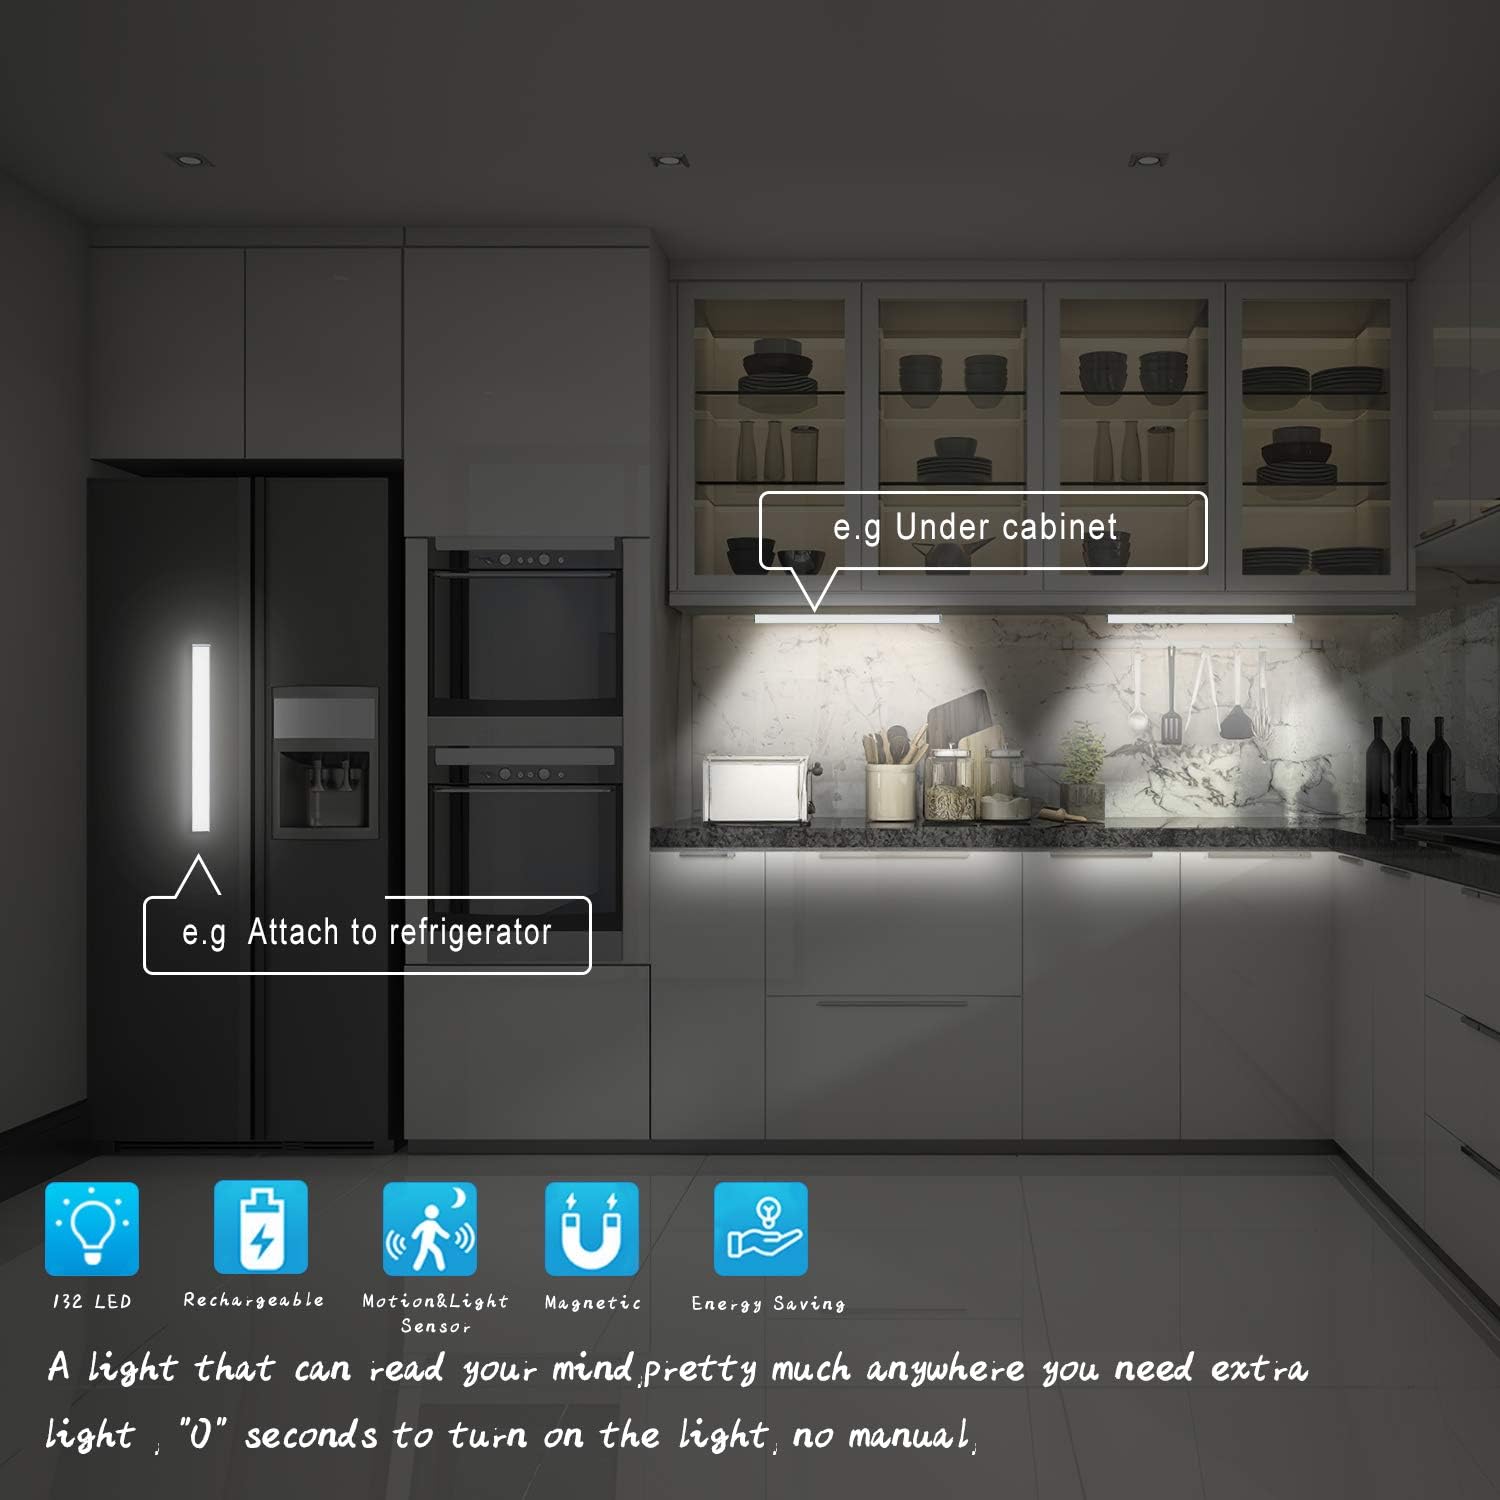
Figure 2: Leeleberd light installed under a kitchen cabinet and on a refrigerator.
Operating Instructions
Your Leeleberd light offers multiple operating modes and customization options.
Power Switch (USB ON/OFF/AUTO)
Locate the slide switch on the side of the light fixture. This switch controls the main operating mode:
- ON: The light will remain continuously on.
- OFF: The light will be turned off.
- AUTO: Activates the motion sensor mode. The light will turn on automatically when motion is detected in a dark environment. It will not activate in bright conditions to conserve energy.
Motion Sensor Functionality (AUTO Mode)
In AUTO mode, the integrated motion sensor detects movement within a 120-degree range. The light will only activate if the ambient light is insufficient (i.e., it's dark enough). After approximately 15-20 seconds of no motion, the light will automatically turn off.

Figure 3: Motion sensor detection range and activation in dark conditions.
Brightness Adjustment
The light offers three levels of brightness: 50%, 75%, and 100%. Use the dedicated button or remote control (if applicable) to cycle through these settings and select your preferred intensity.

Figure 4: Adjustable brightness levels.
Color Temperature Adjustment
You can choose from three color temperature options to suit your environment or mood: 3000K (Warm White), 4500K (Natural White), and 6500K (Cool White). Use the dedicated button or remote control to switch between these settings.

Figure 5: Three color temperature options.
Remote Control (If Applicable)
If your model includes a remote control, it can be used to conveniently adjust brightness, color temperature, and switch between ON/OFF/AUTO modes from a distance. Refer to the remote control's specific instructions for button functions.
Charging
The Leeleberd 132LED Closet Light features a built-in 2500mAh rechargeable battery, providing cordless operation.
- Connect the Cable: Plug the small end of the provided USB charging cable into the charging port on the light fixture.
- Connect to Power: Plug the larger end of the USB cable into a compatible USB power source, such as a computer, laptop, USB wall charger, or power bank.
- Charging Indicator: A red indicator light will illuminate during charging. Once the battery is fully charged, the indicator light will turn green.
- Charging Time: A full charge typically takes approximately 3 hours.
- Battery Life: The light can operate for 4-6 hours in continuous ON mode or up to 2 months in motion sensor mode (based on 10 activations per day) on a full charge.
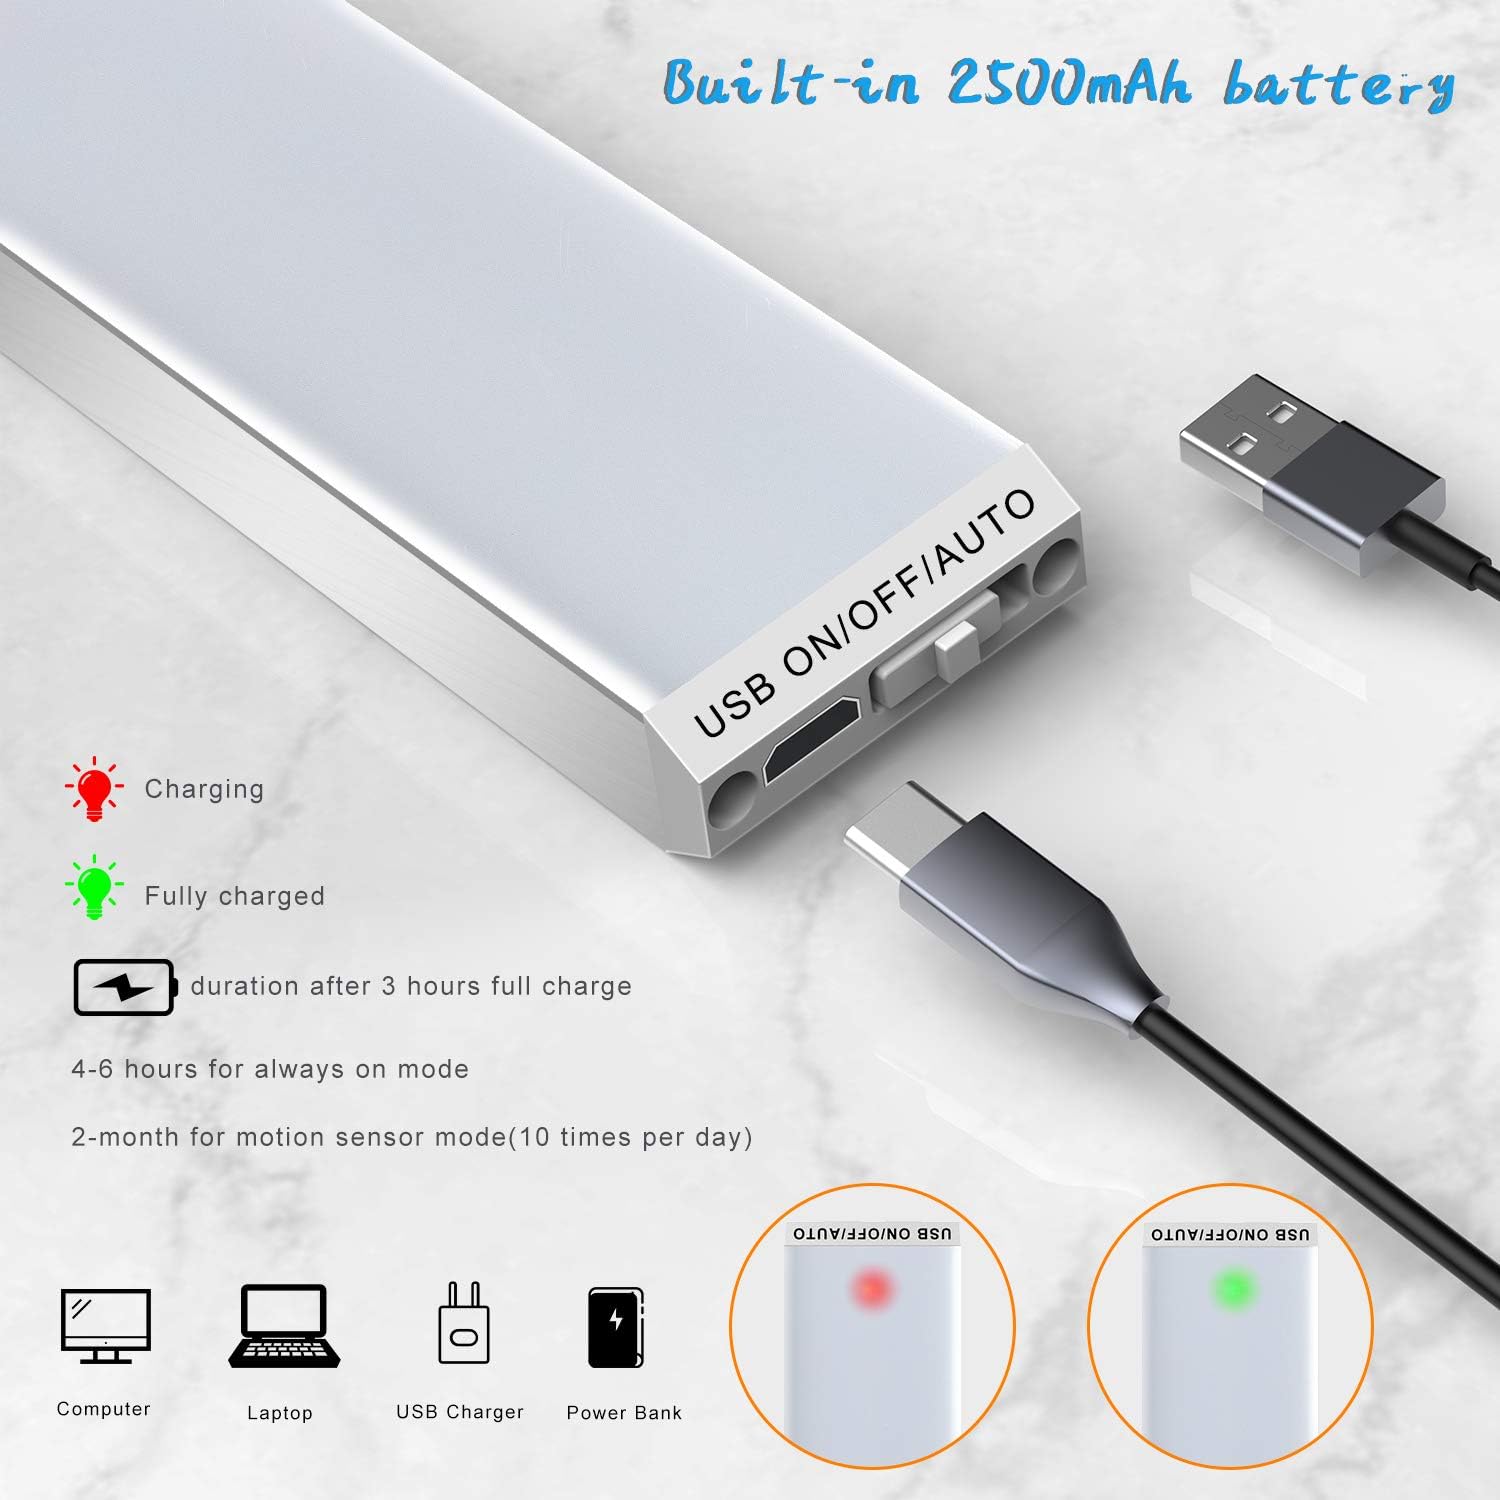
Figure 6: USB charging details and battery status indicators.
Maintenance
To ensure the longevity and optimal performance of your Leeleberd light, follow these maintenance guidelines:
- Cleaning: Wipe the light fixture with a soft, dry cloth. Do not use abrasive cleaners, solvents, or immerse the light in water.
- Battery Care: For best battery life, avoid completely draining the battery frequently. Recharge the light when the brightness noticeably diminishes. If storing the light for an extended period, charge it fully every 3-6 months.
- Environment: Use the light in indoor environments only. Avoid exposure to extreme temperatures, high humidity, or direct sunlight.
Troubleshooting
If you encounter issues with your Leeleberd 132LED Closet Light, refer to the following common problems and solutions:
| Problem | Possible Cause | Solution |
|---|---|---|
| Light does not turn on in AUTO mode. | Ambient light is too bright; battery is low; motion sensor is obstructed. | Ensure the environment is dark enough for activation. Charge the battery fully. Clear any obstructions from the motion sensor. |
| Light falls from mounting surface. | Adhesive strips are not strong enough or surface was not clean. | Clean the mounting surface thoroughly before applying new adhesive strips. Consider using stronger double-sided tape or additional adhesive if needed. |
| Light does not charge. | USB cable is faulty; power source is not working; charging port is damaged. | Try a different USB cable and power source. Ensure the cable is securely connected to both the light and the power source. |
| Light turns off too quickly in AUTO mode. | No continuous motion detected within the sensor range. | Ensure the light is positioned where it can consistently detect motion in the desired area. |
Warranty and Support
For warranty information or technical support, please refer to the product packaging or contact the manufacturer directly through their official website or customer service channels. Keep your purchase receipt as proof of purchase.
Ask a question about this manual
Ask about setup, troubleshooting, compatibility, parts, safety, or missing instructions. Manuals+ will review the question and use this page’s manual context to help answer it.