
Introduction
Thank you for choosing the Miseno MNO240C3 Santi Two-Piece High-Efficiency Toilet. This manual provides detailed instructions for the proper installation, operation, maintenance, and troubleshooting of your new toilet. Please read all instructions carefully before beginning installation and retain this manual for future reference.
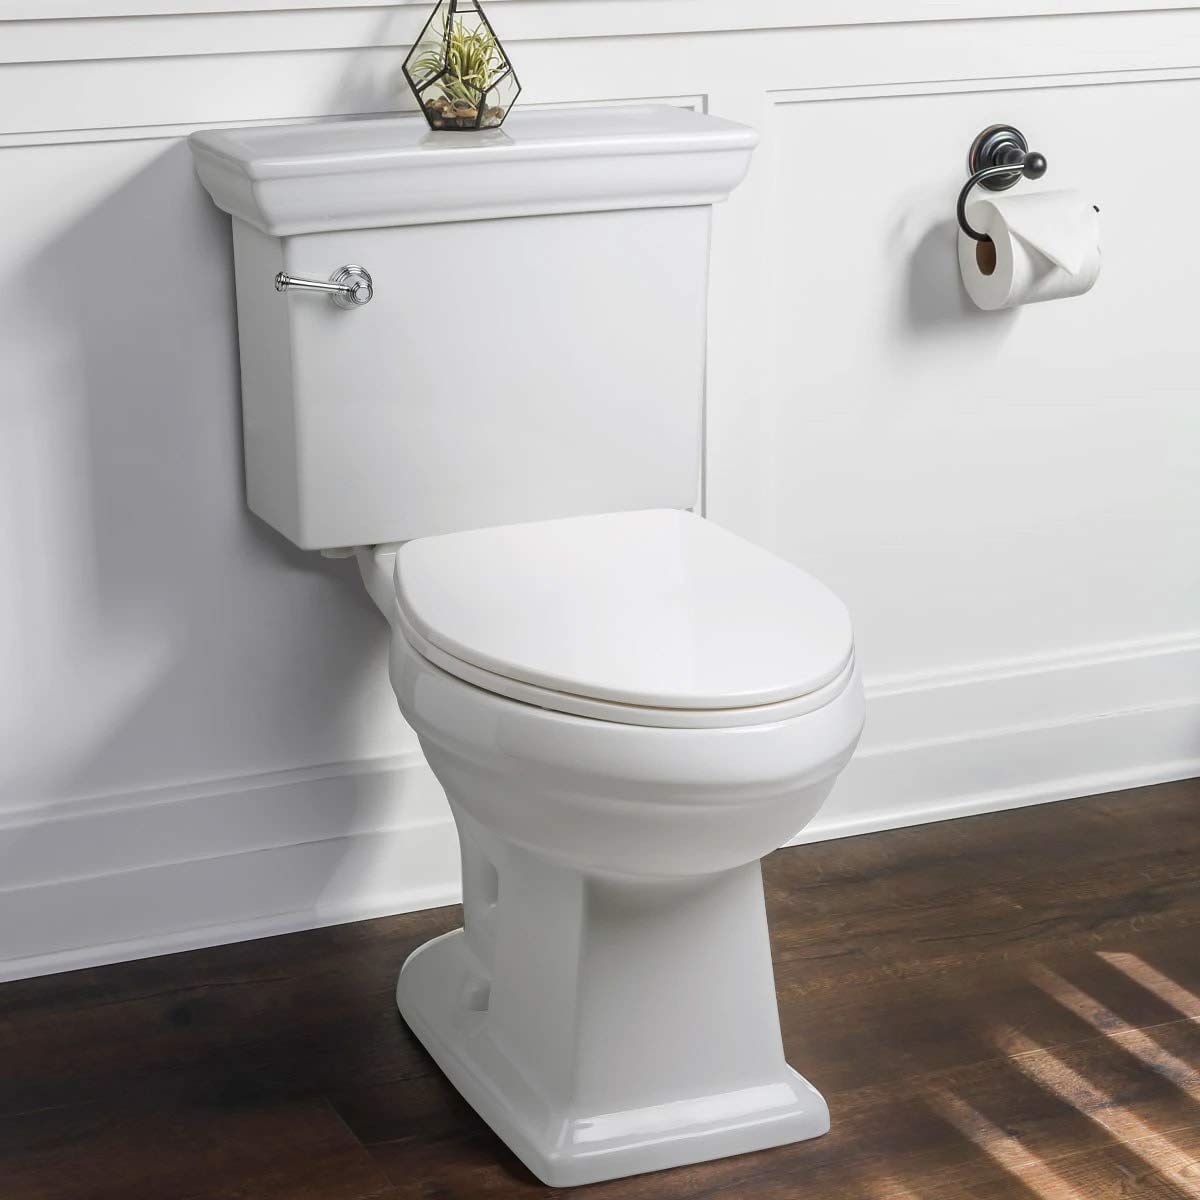
Image: The Miseno MNO240C3 Santi Two-Piece High-Efficiency Toilet in a bathroom setting.
Safety Information
- Always wear appropriate personal protective equipment (PPE) such as safety glasses and gloves during installation.
- Ensure the water supply to the toilet area is turned off before beginning any installation or maintenance.
- Handle ceramic components with care to avoid chipping or breakage.
- Do not overtighten bolts or connections, as this may cause damage to the toilet or plumbing.
- If you are unsure about any part of the installation process, consult a qualified plumber.
Package Contents
Verify that all components are present and undamaged before beginning installation:
- Toilet Bowl (Elongated, Chair Height)
- Toilet Tank (Mesa Style Tank Lid included)
- Soft Close Toilet Seat
- Wax Ring Kit with Flange Bolts
- Tank-to-Bowl Hardware
- Installation Instructions (this manual)
Specifications
| Model Number | MNO240C3 |
| Type | Two-Piece Toilet |
| Bowl Shape | Elongated |
| Bowl Height | Chair Height |
| Flush Type | Single Flush, High-Efficiency (1.28 GPF) |
| Material | Vitreous China (Toilet), Polypropylene (Seat) |
| Dimensions (D x W x H) | 28.13" x 17.75" x 31.25" |
| Item Weight | 110 lbs |
| Installation Type | Floor Mounted |

Image: Diagram showing the dimensions of the Miseno MNO240C3 toilet.
Setup and Installation
Tools and Materials Required (Not Included):
- Adjustable Wrench
- Screwdriver (Phillips and Flathead)
- Putty Knife
- Measuring Tape
- Level
- Pencil
- Rag/Sponge
Pre-Installation Steps:
- Turn off Water Supply: Locate the main water shut-off valve for your bathroom or entire home and turn it off. Flush the old toilet to drain the tank and bowl.
- Remove Old Toilet: Disconnect the water supply line from the old toilet. Remove the nuts from the closet bolts at the base of the toilet. Carefully lift and remove the old toilet.
- Clean Flange Area: Scrape away any old wax or sealant from the closet flange on the floor using a putty knife. Ensure the area is clean and dry.
Installation Procedure:
- Install Closet Bolts: Insert the new closet bolts into the flange slots and secure them with washers and nuts, ensuring they are parallel to the wall.
- Apply Wax Ring: Place the wax ring onto the horn of the toilet bowl or directly onto the closet flange, ensuring it is centered.
- Set the Bowl: Carefully align the bolt holes in the toilet bowl base with the closet bolts. Lower the bowl straight down onto the wax ring and press firmly to create a seal. Do not rock the bowl.
- Secure the Bowl: Place washers and nuts onto the closet bolts. Hand-tighten the nuts, then use a wrench to tighten them an additional half-turn. Alternate tightening each nut to ensure even pressure. Do not overtighten.
- Attach the Tank to the Bowl: Place the rubber gasket onto the flush valve opening on the bottom of the tank. Align the tank with the bolt holes on the back of the toilet bowl. Insert the tank-to-bowl bolts with rubber washers from inside the tank, through the bowl, and secure with metal washers and nuts from underneath the bowl. Tighten evenly until the tank is snug and stable.
- Connect Water Supply: Attach the flexible water supply line (not included) from the shut-off valve to the fill valve inlet on the bottom of the toilet tank. Hand-tighten, then use a wrench for a final quarter-turn. Do not overtighten.
- Turn on Water Supply: Slowly turn the water supply valve back on. Check for leaks around all connections. The tank will begin to fill.
- Install Toilet Seat: Follow the instructions provided with the soft-close toilet seat for proper attachment to the bowl.
- Test Flush: Once the tank is full, perform a test flush to ensure proper operation and check for any leaks.

Image: Internal view of the toilet tank showing the fill valve and flush valve assembly.
Operating Instructions
The Miseno MNO240C3 toilet features a simple and efficient flushing mechanism.
- Flushing: To flush the toilet, press down firmly on the chrome flush lever located on the front left side of the tank. Hold the lever down briefly until the flush cycle begins.
- WaterSense Certified: This toilet is WaterSense certified, using 1.28 gallons per flush (GPF) to conserve water while maintaining powerful performance.
- Soft-Close Seat: The included toilet seat features a soft-close mechanism. Gently push the seat or lid down, and it will close slowly and quietly on its own, preventing slamming.

Image: Close-up view of the chrome flush lever on the Miseno toilet tank.
Maintenance
Regular maintenance will ensure the longevity and optimal performance of your Miseno toilet.
- Cleaning: Clean the toilet regularly with a soft cloth, mild soap, and water. Avoid abrasive cleaners, scouring pads, or harsh chemicals (e.g., bleach, acid-based cleaners) as these can damage the vitreous china finish and internal components.
- Inspect for Leaks: Periodically check the base of the toilet, the tank-to-bowl connection, and the water supply line for any signs of leaks. Address any leaks promptly to prevent water damage.
- Internal Components: Annually inspect the fill valve and flush valve flapper inside the tank for wear and tear. Replace components if they appear damaged or are causing issues like continuous running water.
- Seat Care: Clean the soft-close seat with mild soap and water. Do not use harsh chemicals, as they can degrade the plastic material and soft-close mechanism.
Troubleshooting
Refer to the following table for common issues and their solutions.
| Problem | Possible Cause | Solution |
|---|---|---|
| Toilet runs continuously | Flapper not sealing properly; Fill valve set too high; Flush lever linkage caught. | Adjust or replace flapper; Adjust fill valve water level; Ensure flush lever operates freely. |
| Weak flush | Low water level in tank; Clogged siphon jet or rim holes; Partial clog in drain. | Adjust fill valve to increase water level; Clean siphon jet/rim holes; Use a plunger or auger to clear drain. |
| Leaking at base of toilet | Wax ring not sealed; Loose closet bolts; Cracked bowl. | Tighten closet bolts (do not overtighten); Replace wax ring; If cracked, replace toilet. |
| Leaking from tank-to-bowl connection | Loose tank bolts; Worn tank-to-bowl gasket. | Tighten tank bolts evenly; Replace tank-to-bowl gasket. |
Warranty Information
Miseno products are manufactured to high-quality standards and are backed by a manufacturer's warranty. For specific warranty terms and conditions, please refer to the warranty card included with your product or visit the official Miseno website. Keep your proof of purchase for warranty claims.
Support
If you require further assistance, have questions about installation, or need to order replacement parts, please contact Miseno customer service. Our dedicated support team is available to help you.
- Website: www.miseno.com
- Phone: Refer to the Miseno website for current contact numbers.
- Email: Refer to the Miseno website for customer support email addresses.