
U-Turn Audio R200BK-V2
U-Turn Audio Pluto 2 Phono Preamp Instruction Manual
Model: R200BK-V2
1. Introduction and Overview
The U-Turn Audio Pluto 2 Phono Preamp is designed to amplify the delicate signal from your turntable's moving magnet (MM) cartridge to a line-level signal, suitable for your amplifier or receiver. This device ensures optimal audio performance by providing clear and accurate amplification.
Key features include:
- Low-noise design for all MM cartridges.
- High-quality components such as WIMA film capacitors and precision resistors.
- Active subsonic filter to remove low-frequency noise.
- Dual high-performance gain stages for low total harmonic distortion (THD).
- Compact aluminum enclosure to shield sensitive electronic components from interference.
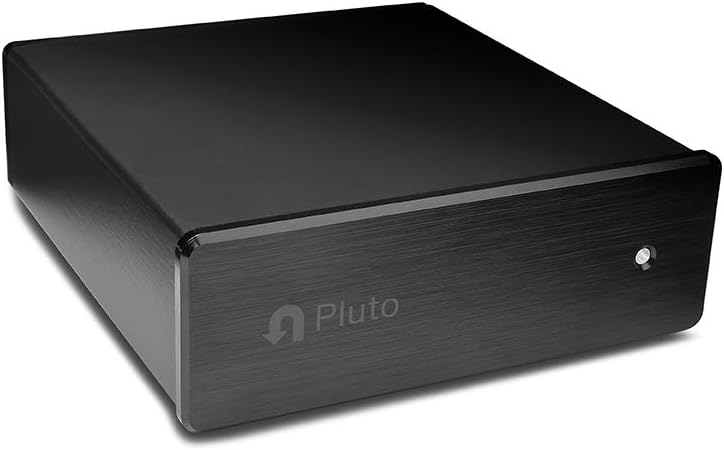
Image 1.1: Front view of the U-Turn Audio Pluto 2 Phono Preamp in black aluminum.

Image 1.2: Detailed view of the Pluto 2's black brushed aluminum finish.
2. Setup Instructions
Follow these steps to correctly set up your U-Turn Audio Pluto 2 Phono Preamp:
- Placement: Place the Pluto 2 on a stable, flat surface near your turntable and amplifier/receiver. Ensure it is away from sources of electromagnetic interference.
- Connect Turntable to Pluto 2: Connect your turntable's RCA output cables to the PHONO IN RCA jacks on the rear of the Pluto 2. Ensure the left (white) and right (red) channels are correctly matched.
- Connect Ground Wire: Connect your turntable's ground wire to the GROUND terminal on the Pluto 2. This is crucial for minimizing hum and static.
- Connect Pluto 2 to Amplifier/Receiver: Connect the LINE OUT RCA jacks on the Pluto 2 to a line-level input (e.g., AUX, CD, TUNER) on your amplifier or receiver. Do not connect to a PHONO input on your amplifier/receiver, as this will result in over-amplification and distorted sound.
- Connect Power: Plug the included power adapter into the POWER input on the Pluto 2, then plug the adapter into a wall outlet. The Pluto 2 does not have an on/off switch and will power on automatically.
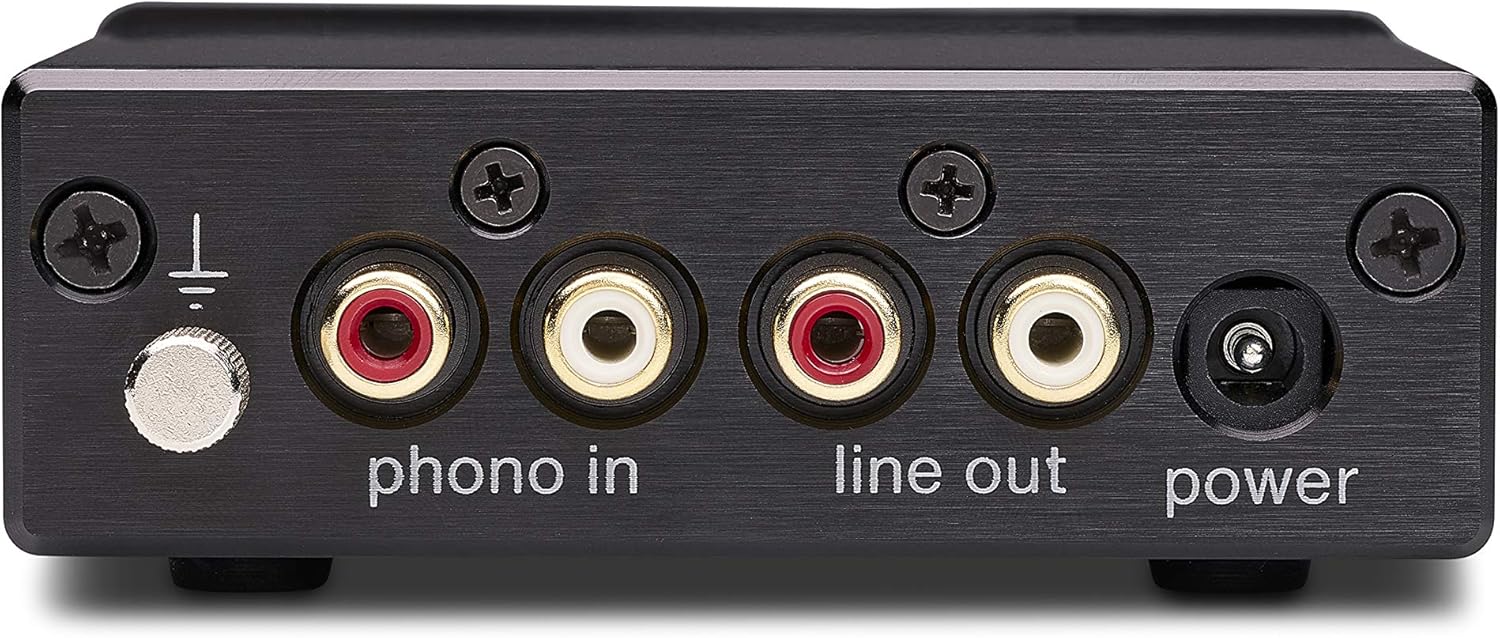
Image 2.1: Rear panel connections of the Pluto 2, illustrating PHONO IN, LINE OUT, GROUND, and POWER ports.

Image 2.2: The Pluto 2 Phono Preamp positioned within a complete audio system setup.
3. Operating Instructions
The U-Turn Audio Pluto 2 Phono Preamp is designed for straightforward operation:
- Once connected to power, the Pluto 2 is active and ready for use. There is no manual on/off switch.
- Ensure your amplifier/receiver is set to the correct line-level input where the Pluto 2 is connected.
- Begin playing your vinyl record on the turntable. The Pluto 2 will automatically amplify the signal.
- Adjust the volume using your amplifier or receiver's volume control.
4. Maintenance
To ensure the longevity and optimal performance of your Pluto 2 Phono Preamp, follow these simple maintenance guidelines:
- Cleaning: Use a soft, dry cloth to wipe the exterior of the unit. Avoid using liquid cleaners, solvents, or abrasive materials, as these can damage the finish.
- Ventilation: Ensure the unit has adequate ventilation. Do not block any vents or place the unit in an enclosed space that could lead to overheating.
- Storage: If storing the unit for an extended period, disconnect it from power and store it in a cool, dry place.
- Cable Connections: Periodically check all cable connections to ensure they are secure. Loose connections can lead to signal loss or interference.
5. Troubleshooting
If you encounter issues with your Pluto 2 Phono Preamp, refer to the following common problems and solutions:
| Problem | Possible Cause | Solution |
|---|---|---|
| No sound or very low sound | Incorrect input selection on receiver; loose cables; Pluto 2 connected to PHONO input on receiver. | Ensure receiver is set to the correct line-level input (e.g., AUX, CD). Check all RCA connections. Ensure Pluto 2 is connected to a line-level input, not a PHONO input. |
| Humming or buzzing noise | Improper grounding; interference from other electronics; faulty cables. | Ensure the turntable's ground wire is securely connected to the Pluto 2's ground terminal. Try moving the Pluto 2 away from other electronic devices. Replace RCA cables if suspected faulty. |
| Distorted sound | Pluto 2 connected to PHONO input on receiver; damaged cartridge/stylus; incorrect cartridge type. | Verify Pluto 2 is connected to a line-level input. Inspect your turntable's cartridge and stylus for damage. The Pluto 2 is designed for Moving Magnet (MM) cartridges only. |
| Power indicator light is off | No power supply; faulty power adapter. | Check if the power adapter is securely plugged into the Pluto 2 and a working wall outlet. Try a different outlet. If the issue persists, contact support. |
If these steps do not resolve your issue, please refer to the Warranty and Support section for further assistance.
6. Specifications
Detailed specifications for the U-Turn Audio Pluto 2 Phono Preamp (Model R200BK-V2):
- Model: R200BK-V2
- Item Dimensions (L x W x H): 1.4 x 4.5 x 3.85 inches (3.56 x 11.43 x 9.78 cm)
- Item Weight: 10 Ounces (0.28 kg)
- Material Type: Aluminum
- Number of Channels: 1 (Stereo output from a single phono input)
- Cartridge Compatibility: Moving Magnet (MM)
- Manufacturer: U-Turn Audio
- Global Trade Identification Number (GTIN): 00860003574317
- UPC: 860003574317

Image 6.1: Internal view of the Pluto 2 circuit board, highlighting component quality.
7. Warranty and Support
The U-Turn Audio Pluto 2 Phono Preamp comes with a 3-year warranty from the date of purchase, covering defects in materials and workmanship under normal use. U-Turn Audio also provides lifetime product support for this device.
For warranty claims, technical assistance, or any questions regarding your Pluto 2 Phono Preamp, please contact U-Turn Audio directly through their official website or customer service channels. Please have your purchase information and product model number (R200BK-V2) available when contacting support.
U-Turn Audio Contact Information:
- Website: uturnaudio.com
- Support Page: Refer to the support section on the official website for contact details and FAQs.
Related documentsR200BK-V2

Ask a question about this manual
Ask about setup, troubleshooting, compatibility, parts, safety, or missing instructions. Manuals+ will review the question and use this page’s manual context to help answer it.