
1. Introduction
This manual provides detailed instructions for the installation, operation, and maintenance of your Faria Beede F22014 Multifunction Gauge. Please read this manual thoroughly before installation and use to ensure proper function and safety. Keep this manual for future reference.
2. Product Overview
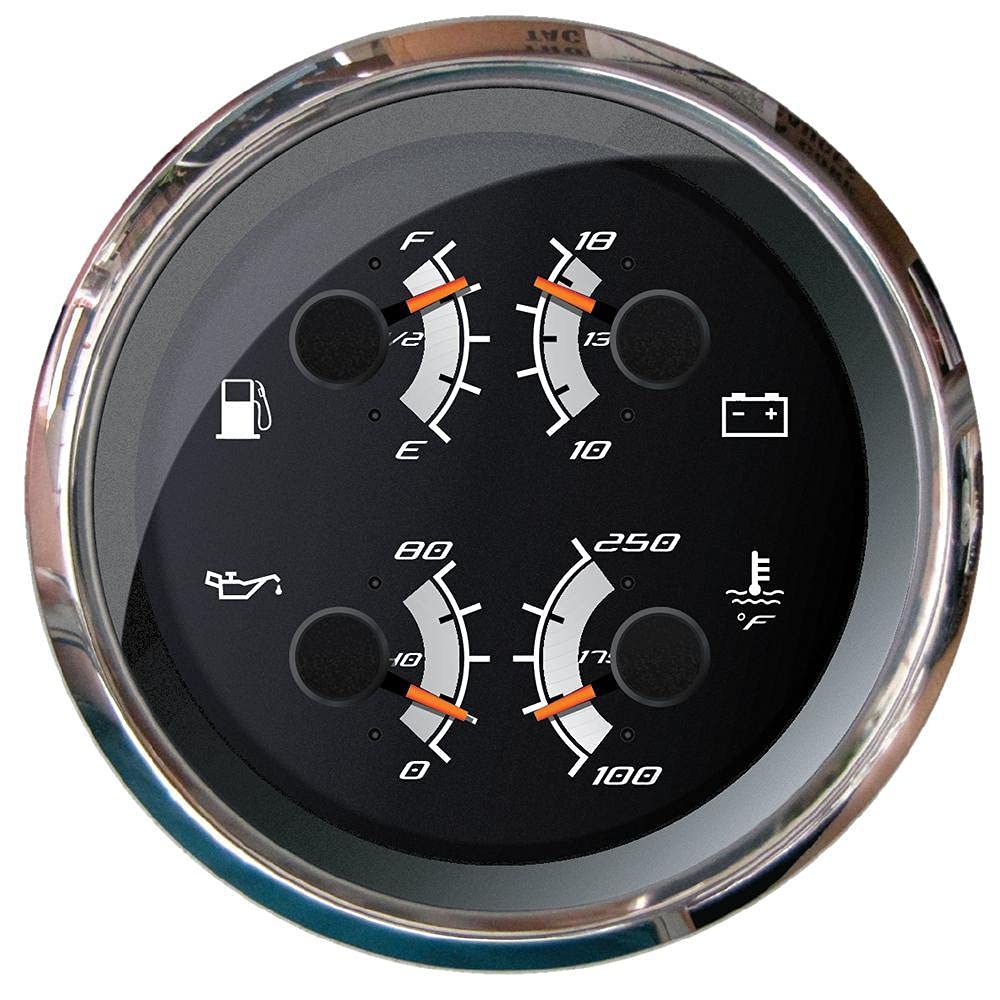
Image: Front view of the Faria Beede F22014 Multifunction Gauge, displaying four integrated gauges: Fuel Level, Voltmeter, Oil Pressure, and Water Temperature, all within a single 4-inch dial with a chrome bezel.
2.1 Key Features
- Integrated Fuel Level Gauge
- Integrated Oil Pressure Gauge (0-80 PSI)
- Integrated Water Temperature Gauge (120-220°F)
- Integrated Voltmeter (10-18 VDC)
- 4-inch (101.6 mm) dial for clear readability
- Durable plastic construction
2.2 Package Contents
The package typically includes:
- Faria Beede F22014 Multifunction Gauge
- Mounting Hardware (e.g., U-bracket, nuts, washers)
- Wiring Harness/Connector (may vary)
- Installation Instructions (this manual)
3. Installation Guide
3.1 Safety Precautions
- Always disconnect the battery before beginning any electrical work.
- Ensure all wiring connections are secure and properly insulated to prevent short circuits.
- Consult a qualified marine or automotive technician if you are unsure about any installation steps.
- Wear appropriate personal protective equipment (PPE) during installation.
3.2 Mounting the Gauge
- Select a suitable location on your dashboard or panel that allows for clear visibility and access to the rear of the gauge for wiring.
- Cut a mounting hole of approximately 4 inches (101.6 mm) diameter. Ensure the hole is clean and free of burrs.
- Insert the gauge into the mounting hole from the front of the panel.
- From the rear of the panel, slide the U-bracket over the mounting studs and secure it with the provided nuts. Tighten firmly but do not overtighten.
3.3 Wiring Connections
The F22014 multifunction gauge requires connections for power, ground, illumination, and individual sensor inputs. Refer to the specific wiring diagram provided with your gauge or consult the manufacturer's website for detailed instructions. General connections include:
- Power (Ignition Switched +12V): Connect to a circuit that is active when the ignition is on.
- Ground (-): Connect to a reliable chassis or battery ground point.
- Illumination (+12V): Connect to a switched lighting circuit for backlight operation.
- Fuel Level Sensor Input: Connect to the output of your fuel tank level sender.
- Oil Pressure Sensor Input: Connect to the output of your oil pressure sender.
- Water Temperature Sensor Input: Connect to the output of your water temperature sender.
Ensure all connections are crimped securely and insulated with heat shrink tubing or electrical tape.
4. Operating Instructions
4.1 Understanding the Display
The F22014 gauge combines four essential readings into one clear display:
- Fuel Level: Indicates the amount of fuel in your tank, typically from Empty (E) to Full (F).
- Oil Pressure: Displays the engine's oil pressure in Pounds per Square Inch (PSI), ranging from 0 to 80 PSI.
- Water Temperature: Shows the engine coolant temperature in degrees Fahrenheit (°F), ranging from 120°F to 220°F.
- Voltmeter: Monitors the vehicle's electrical system voltage, typically from 10 to 18 Volts DC (VDC).
4.2 Initial Power-Up
Once installed and wired, reconnect the battery. Turn the ignition to the 'ON' position. The gauge needles should sweep to their maximum readings and then settle to their current values. The backlight should illuminate if connected to a lighting circuit. Monitor the readings to ensure they are within normal operating parameters for your vehicle or vessel.
5. Maintenance
The Faria Beede F22014 Multifunction Gauge is designed for durability and requires minimal maintenance.
- Cleaning: Clean the gauge face with a soft, damp cloth. Do not use abrasive cleaners or solvents, as they may damage the lens or bezel.
- Inspection: Periodically check all wiring connections for corrosion or looseness. Ensure the mounting is secure.
- Sensor Check: If a reading appears inaccurate, inspect the corresponding sensor and its wiring for damage or faulty connections.
6. Troubleshooting
| Issue | Possible Cause | Solution |
|---|---|---|
| Gauge not powering on / No readings | No power to gauge; Blown fuse; Loose ground connection. | Check power supply and fuse; Verify ground connection; Ensure ignition is on. |
| Inaccurate or erratic readings | Faulty sensor; Loose or corroded sensor wiring; Incorrect sensor type. | Inspect sensor and wiring; Replace faulty sensor; Ensure sensor matches gauge requirements. |
| Backlight not working | No power to illumination wire; Blown fuse; Faulty bulb/LED. | Check illumination power source and fuse; Verify wiring connection. |
| Gauge needle stuck or not moving | Mechanical obstruction; Internal gauge fault. | Check for physical obstructions; Contact Faria Beede support if issue persists. |
7. Technical Specifications
| Attribute | Specification |
|---|---|
| Model Number | F22014 |
| Product Type | Electromechanical Multifunction Gauge |
| Display Size (Dial) | 4 inches (101.6 mm) |
| Overall Dimensions (L x W x H) | 6 x 6 x 5 inches (15.24 x 15.24 x 12.7 cm) |
| Item Weight | 0.65 pounds (0.29 kg) |
| Material | Plastic |
| Fuel Level Range | Empty (E) to Full (F) |
| Oil Pressure Range | 0 - 80 PSI |
| Water Temperature Range | 120 - 220°F |
| Voltmeter Range | 10 - 18 VDC |
| Manufacturer | Faria Beede Instruments |
| UPC | 759266220140 |
8. Warranty and Support
8.1 Product Warranty
The Faria Beede F22014 Multifunction Gauge comes with a manufacturer's warranty. Please refer to the warranty information provided with your purchase documentation or visit the official Faria Beede website for specific terms and conditions regarding coverage, duration, and claims procedures.
8.2 Customer Support
For technical assistance, troubleshooting, or warranty claims, please contact Faria Beede Instruments customer support. Contact details can typically be found on their official website or on the product packaging.
Thank you for choosing Faria Beede.


