
TC Electronic DITTO+ LOOPER
TC Electronic DITTO+ LOOPER Next Generation 60-Minute Multi-session Looper Pedal
User Instruction Manual
Introduction
The TC Electronic DITTO+ LOOPER is a compact and powerful looper pedal designed for musicians. It allows you to record, overdub, and playback musical phrases with ease. With its advanced features, including multi-session storage and extended loop modes, the DITTO+ LOOPER provides unparalleled flexibility for practice, performance, and creative exploration. This manual will guide you through the setup, operation, and maintenance of your new looper pedal.

Figure 1: Front view of the DITTO+ LOOPER pedal, highlighting its intuitive interface.
Setup
Before using your DITTO+ LOOPER, ensure it is properly connected to your audio setup and power supply.
- Power Connection: Connect a standard 9V DC power supply (not included) to the power input jack on the pedal. Ensure the power supply meets the pedal's voltage and current requirements.
- Audio Input: Connect your instrument (e.g., guitar) to the INPUT jack on the side of the pedal using a standard 1/4-inch instrument cable.
- Audio Output: Connect the OUTPUT jack of the pedal to your amplifier, audio interface, or next pedal in your signal chain using another 1/4-inch instrument cable.
- USB Connection (Optional): For firmware updates or transferring loops, connect the mini-USB port on the pedal to your computer using a USB cable.

Figure 2: Angled view of the DITTO+ LOOPER, illustrating the placement of input/output jacks and power input.
Operating Instructions
The DITTO+ LOOPER offers intuitive controls for recording, playback, and managing your loops.
Basic Looping (DITTO Mode)
- Record: Press the footswitch once to start recording. The display will show recording progress.
- Play/Overdub: Press the footswitch again to stop recording and start playback. While playing, press the footswitch once more to begin overdubbing.
- Stop: Double-tap the footswitch to stop playback.
- Clear: While stopped, press and hold the footswitch to clear the current loop.
- Undo/Redo: While playing or overdubbing, press and hold the footswitch to undo the last overdub. Repeat to redo.
Multi-Session Management
The DITTO+ LOOPER can store and recall up to 99 individual loop sessions, each with up to 60 minutes of recording time.
- Navigate Sessions: Use the UP and DOWN arrow buttons next to the display to scroll through stored loop sessions. The display shows the current session number.
- Load Session: Once you've selected a session number, press the footswitch to load it.
- Save Session: Loops are automatically saved when you switch sessions or power off the pedal.
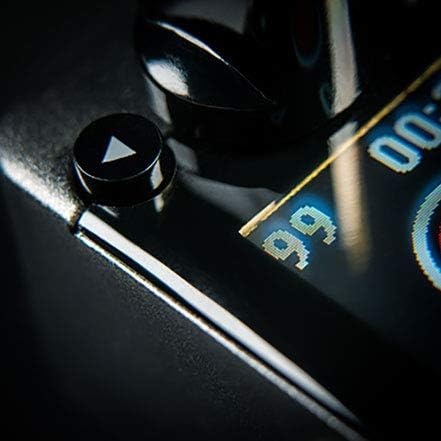
Figure 3: The DITTO+ LOOPER display indicating the ability to store up to 99 loop sessions.
Extend Loop Mode and Auto Cue
The Extend Loop Mode allows you to lay down longer overdubbed phrases over shorter base loops, while Auto Cue assists with timing.
- Activate Extend Loop Mode: Refer to the pedal's advanced settings (usually accessed via a combination of button presses or software) to enable this mode.
- Using Auto Cue: When enabled, Auto Cue helps synchronize your overdub with the start of the loop, ensuring seamless transitions.
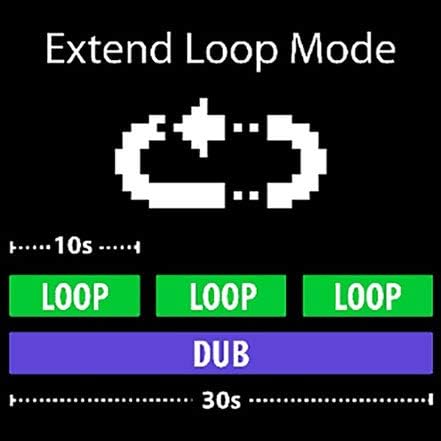
Figure 4: Visual representation of Extend Loop Mode, showing how longer dubs can wrap around shorter loops.
Maintenance
To ensure the longevity and optimal performance of your DITTO+ LOOPER, follow these maintenance guidelines:
- Cleaning: Use a soft, dry cloth to wipe down the pedal. Avoid abrasive cleaners or solvents, which can damage the finish or internal components.
- Storage: Store the pedal in a cool, dry place away from direct sunlight and extreme temperatures.
- Power Supply: Always use a compatible power supply to prevent damage. Disconnect power when not in use for extended periods.
- Firmware Updates: Periodically check the TC Electronic website for firmware updates to ensure your pedal has the latest features and bug fixes.
Troubleshooting
If you encounter issues with your DITTO+ LOOPER, try the following solutions:
| Problem | Possible Solution |
|---|---|
| No power/Pedal not turning on |
|
| No sound output |
|
| Loop sounds distorted or noisy |
|
| Cannot save or recall loops |
|
Specifications
- Model: DITTO+ LOOPER
- Brand: TC Electronic
- Recording Time: Up to 60 minutes
- Loop Sessions: Up to 99
- Dimensions (L x W x H): Approximately 1.44" x 0.79" x 0.78" (36.6 x 20.1 x 19.8 mm)
- Weight: Approximately 7.1 ounces (200 grams)
- Power Supply: 9V DC, center-negative (not included)
- Connectivity: 1/4" TS Input, 1/4" TS Output, Mini-USB port
- Material: Plastic
Warranty and Support
TC Electronic products are covered by a limited warranty. For detailed warranty information, product registration, and technical support, please visit the official TC Electronic website or contact their customer service department.
Official Website: www.tcelectronic.com
Please retain your proof of purchase for warranty claims.
Related documentsDITTO+ LOOPER


Ask a question about this manual
Ask about setup, troubleshooting, compatibility, parts, safety, or missing instructions. Manuals+ will review the question and use this page’s manual context to help answer it.