1. Introduction
The Harvest X-5000 is a high-performance tri-band base antenna designed for amateur radio enthusiasts. It operates on the 144MHz (2m), 440MHz (70cm), and 1200MHz (23cm) bands, providing reliable communication for various applications. This manual provides essential information for the safe and correct installation, operation, and maintenance of your antenna.
2. Safety Information
Always prioritize safety during antenna installation and operation. Failure to follow safety guidelines can result in serious injury or property damage.
- Power Lines: Never install the antenna near power lines. Maintain a safe distance from all electrical wires.
- Weather Conditions: Avoid installation during lightning storms, strong winds, or other adverse weather conditions.
- Mounting Stability: Ensure the mounting structure is robust and capable of supporting the antenna's weight and wind load.
- Grounding: Properly ground the antenna and mast according to local electrical codes to protect against lightning and static discharge.
- Personal Protective Equipment: Wear appropriate safety gear, including gloves and eye protection, during installation.
3. Package Contents
Before beginning installation, verify that all components are present in the package:
- Antenna main sections
- Radial elements (if applicable)
- Mounting hardware (U-bolts, clamps, nuts, washers)
- Top cap

Figure 3.1: Overview of the Harvest X-5000 antenna components as received in packaging.

Figure 3.2: Detailed view of the mounting hardware, including U-bolts, clamps, nuts, and washers.
4. Setup (Installation)
Follow these steps for proper assembly and installation of your Harvest X-5000 antenna.
4.1 Antenna Assembly
- Carefully unpack all components and inspect for any damage.
- Connect the antenna sections as indicated by the manufacturer's markings. Ensure all connections are secure.
- Attach any radial elements to the base section if they are separate components.
- Secure the top cap onto the uppermost section of the antenna.
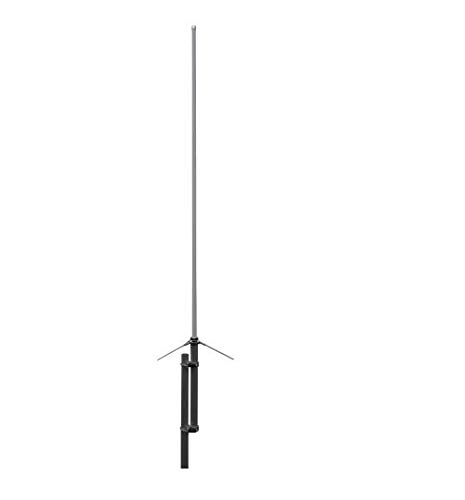
Figure 4.1: The Harvest X-5000 antenna fully assembled and ready for mounting.
4.2 Mounting the Antenna
The Harvest X-5000 is designed for mast mounting. Select a sturdy mast or pole that can withstand environmental conditions.
- Attach the provided mounting brackets to the antenna's base section.
- Position the antenna on the mast at the desired height, ensuring it is vertical and clear of obstructions.
- Use the U-bolts and clamps to securely fasten the antenna to the mast. Tighten all nuts firmly, but do not overtighten to avoid damaging the antenna or mast.
4.3 Coaxial Cable Connection
The antenna features an N-series female connector.
- Connect a high-quality 50-ohm coaxial cable with an N-series male connector to the antenna's base.
- Ensure the connection is tight and weatherproofed using appropriate sealing tape or compounds to prevent moisture ingress.
- Route the coaxial cable away from the mast and secure it to prevent strain or damage.

Figure 4.2: Detail of the N-series female connector at the base of the antenna for coaxial cable attachment.
5. Operating Instructions
Once the antenna is installed and connected, follow these guidelines for operation:
- Transceiver Connection: Connect the other end of the coaxial cable to your amateur radio transceiver's antenna port.
- Frequency Bands: The X-5000 operates on 144MHz, 440MHz, and 1200MHz. Ensure your transceiver is set to the correct frequency band for communication.
- Power Limit: Do not exceed the maximum power rating of 100W (total) for this antenna. Exceeding this limit can damage the antenna and your radio equipment.
- SWR Check: Before transmitting, always check the Standing Wave Ratio (SWR) using an SWR meter. An SWR reading above 2:1 indicates a potential issue that should be resolved before transmitting to prevent damage to your transceiver.
6. Maintenance
Regular maintenance helps ensure optimal performance and longevity of your antenna.
- Visual Inspection: Periodically inspect the antenna for any physical damage, loose connections, or corrosion. Check the mast and mounting hardware for stability.
- Weatherproofing: Re-check the coaxial cable connection for proper weatherproofing, especially after severe weather. Reapply sealing tape or compound as needed.
- Cleaning: Gently clean the antenna elements with a soft cloth and mild soap and water if dirt or grime accumulates. Avoid abrasive cleaners.
7. Troubleshooting
If you experience issues with your Harvest X-5000 antenna, consider the following troubleshooting steps:
- High SWR:
- Check all coaxial cable connections for tightness and proper seating.
- Inspect the coaxial cable for kinks, cuts, or damage.
- Ensure the antenna elements are fully assembled and not damaged.
- Verify that the antenna is mounted clear of any metallic obstructions that could affect its radiation pattern.
- Poor Reception/Transmission:
- Confirm your transceiver is set to the correct frequency and mode.
- Check the SWR. High SWR can significantly reduce performance.
- Ensure the antenna is mounted at an adequate height and clear of local interference sources.
- Test with a known good coaxial cable if possible.
8. Specifications
| Feature | Specification |
|---|---|
| Frequency | 144/430/1200MHz (2m/70cm/23cm) |
| Max. Power Rating | 100W (Total) |
| Gain | 4.5dB (144MHz), 8.3dB (430MHz), 11.7dB (1200MHz) |
| Length | 1.8 meters |
| Connector | N-series female |
| Item Weight | 2 pounds |
| Number of Channels | 3 |
9. Warranty and Support
For warranty information and technical support, please refer to the documentation provided at the time of purchase or contact your retailer. Specific warranty terms may vary by region and seller.


