
1. Product Overview
The HOMCOM Model 837-061 shoe cabinet is designed for efficient shoe storage and organization in entryways or hallways. It features three tilt-out compartments for shoes and a side cabinet with a hanging bar for umbrellas or small bags. The top surface can be used for keys, phones, or decorative items.
- Spacious Shoe Storage: Three tilt-out compartments, each accommodating up to 4 pairs of shoes, for a total capacity of 6-12 pairs (depending on shoe size and type).
- Adjustable Dividers: Each shoe compartment includes a removable and adjustable divider with two positions to customize storage space.
- Side Cabinet: A dedicated side cabinet with a door and hanging bar, suitable for umbrellas, small bags, or other accessories.
- Durable Construction: Made from resistant engineered wood (MDF) for long-lasting use.
- Anti-Tip Safety: Includes an anti-tip safety system to secure the cabinet to the wall, preventing accidental tipping.

Image 1.1: The HOMCOM shoe cabinet, Model 837-061, shown in a typical home entryway with decorative items on top.
2. Safety Information
Please read and understand all safety instructions before assembly and use. Failure to follow these instructions may result in injury or damage to the product.
- Anti-Tip Device: It is mandatory to install the included anti-tip device to secure the cabinet to a wall. This prevents the cabinet from tipping over, especially if children or pets attempt to climb it.
- Weight Capacity: Do not exceed the maximum supported weight of 15 kg (33 lbs) on the top surface. Overloading can compromise stability.
- Assembly: Assemble the product on a soft, clean surface to prevent scratches. Ensure all screws and fasteners are tightened securely before use.
- Placement: Place the cabinet on a flat, level surface to ensure stability.
- Children Safety: Keep small parts and packaging materials away from children during assembly.

Image 2.1: Illustration of the anti-tip design, showing how to secure the cabinet to the wall for enhanced stability and safety.
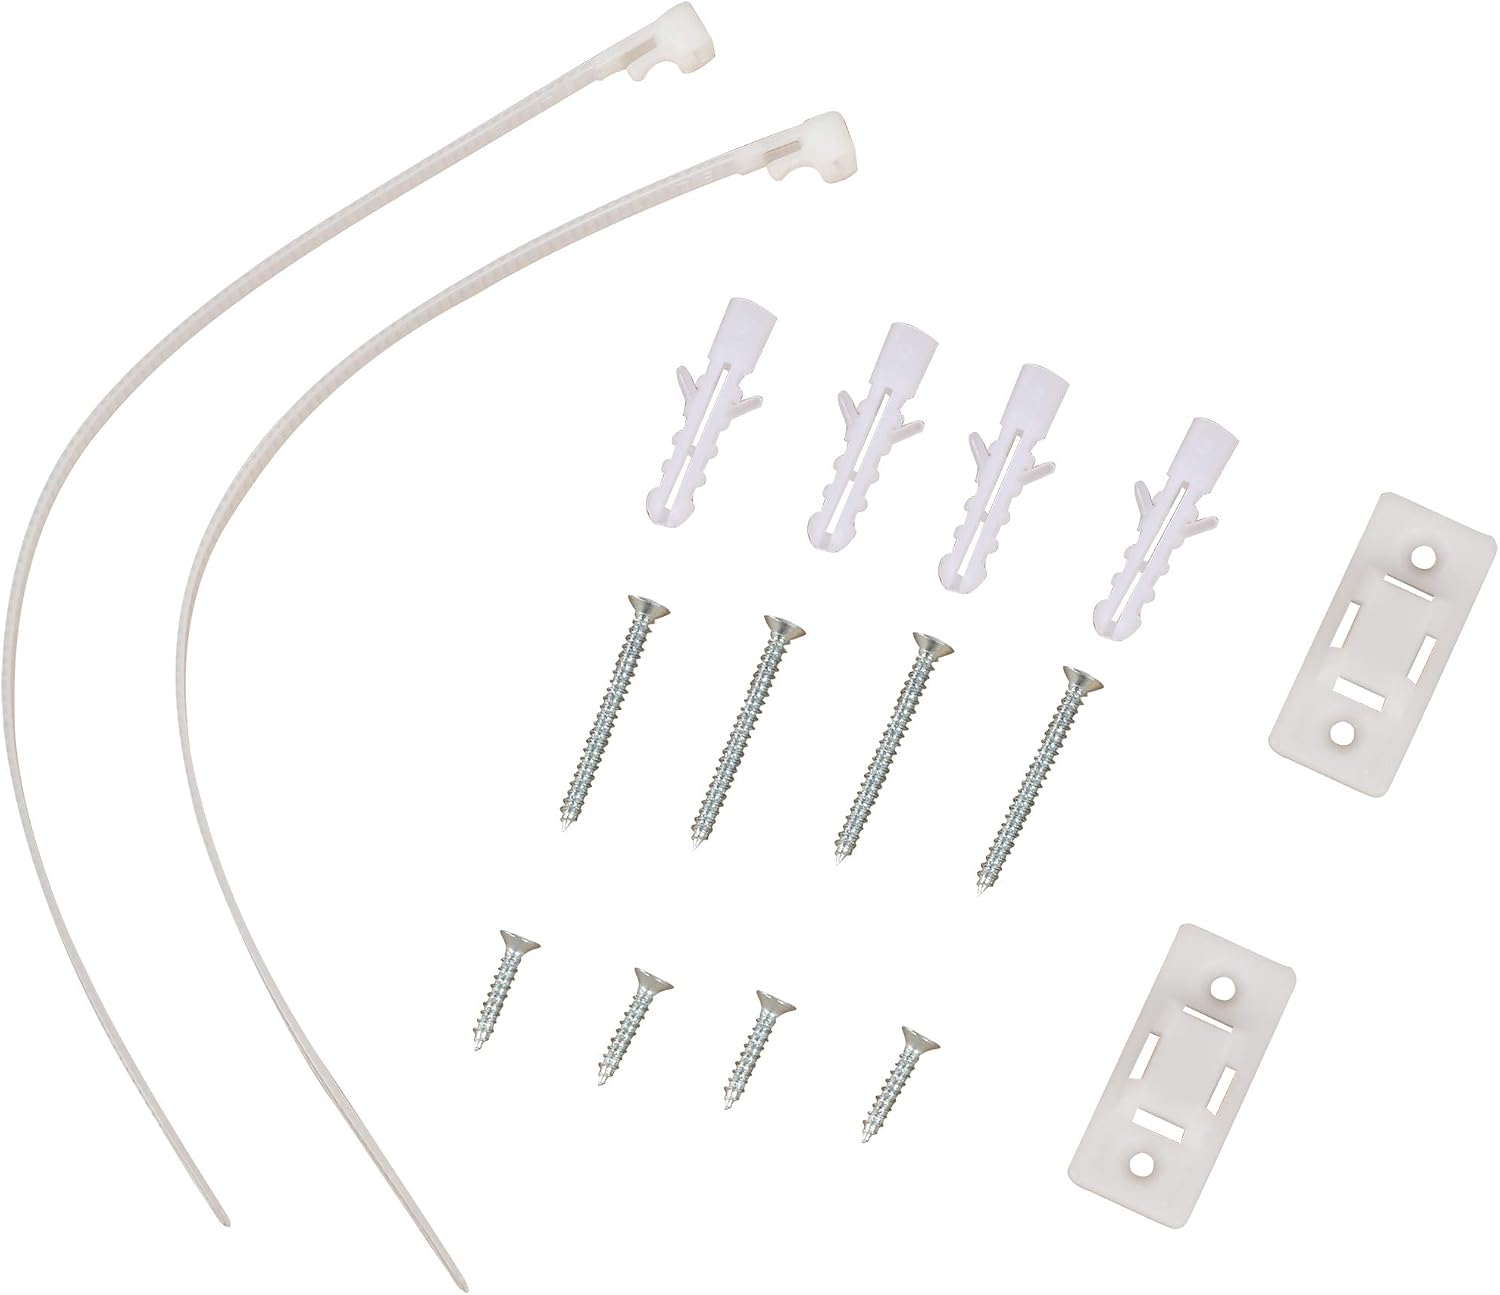
Image 2.2: Detail of the anti-tip bracket installed on the rear panel of the shoe cabinet.
3. Setup and Assembly
This product requires assembly. It is recommended to have two people for assembly. Please ensure all parts are present before beginning.
3.1. Package Contents
Verify that all components and hardware are included in the package. Refer to the parts list in your physical instruction manual for detailed identification.

Image 3.1: All screws, wall anchors, and anti-tip straps included for assembly and secure installation.
3.2. Assembly Steps (General Guidelines)
- Unpack and Identify: Carefully unpack all components and lay them out on a soft, clean surface. Identify each part using the provided labels or diagrams.
- Assemble Main Frame: Begin by connecting the main side panels and base using the designated screws and dowels. Ensure connections are snug but do not overtighten initially.
- Install Shoe Compartments: Attach the mechanisms for the tilt-out shoe compartments to the interior of the cabinet. Insert the adjustable dividers into the desired positions.
- Attach Doors: Secure the three tilt-out doors to their respective mechanisms. Attach the side cabinet door using hinges.
- Install Side Cabinet Bar: Place the hanging bar inside the side cabinet.
- Final Tightening: Once all components are in place, carefully tighten all screws to ensure structural integrity.
- Install Anti-Tip Device: Attach the anti-tip brackets to the top rear of the cabinet. Secure the straps to a wall stud or use appropriate wall anchors (provided) to prevent tipping.
Note: For detailed, step-by-step assembly instructions, please refer to the printed manual included with your product.
4. Operating Instructions
4.1. Storing Shoes
To store shoes, gently pull the handle of a tilt-out compartment. The door will tilt forward, revealing the internal shelves. Place shoes on the shelves, ensuring they fit within the compartment's depth and height. Push the door back until it closes securely.

Image 4.1: The shoe cabinet with all three tilt-out compartments open, demonstrating the three-level hanging shelves and capacity for up to 12 pairs of regular-sized shoes.
4.2. Adjusting Dividers
Each tilt-out compartment features an adjustable divider. To adjust, open the compartment door. The divider can be moved between two positions or removed entirely to accommodate different shoe sizes or types (e.g., boots, high heels). Carefully lift and reposition the divider as needed.

Image 4.2: A close-up view illustrating the adjustable divider mechanism within a shoe compartment, allowing for flexible storage configurations.
4.3. Using the Side Cabinet
The side cabinet provides additional storage. Open the door to access the interior, which includes a hanging bar. This space is ideal for storing umbrellas, small bags, or other entryway essentials.
5. Maintenance
Proper maintenance will ensure the longevity and appearance of your HOMCOM shoe cabinet.
- Cleaning: Wipe surfaces with a soft, damp cloth. Avoid using harsh chemicals, abrasive cleaners, or excessive moisture, as these can damage the engineered wood finish.
- Dusting: Regularly dust the cabinet with a dry, soft cloth to prevent dust buildup.
- Spills: Immediately wipe up any spills to prevent moisture damage or staining.
- Hardware Check: Periodically check all screws and fasteners to ensure they remain tight. Retighten if necessary.
- Avoid Direct Sunlight: Prolonged exposure to direct sunlight can cause fading or discoloration of the wood finish.
- Humidity Control: Maintain a stable room temperature and humidity level to prevent warping or cracking of the wood.

Image 5.1: A close-up showing the layers of engineered wood (MDF) used in the construction of the cabinet, highlighting its natural and resistant properties.
6. Troubleshooting
If you encounter any issues with your shoe cabinet, refer to the following common problems and solutions:
- Cabinet feels unstable:
- Ensure the cabinet is placed on a flat, level surface.
- Verify that all assembly screws are securely tightened.
- Confirm the anti-tip device is correctly installed and anchored to the wall.
- Tilt-out doors do not close properly:
- Check if shoes are obstructing the closing mechanism.
- Ensure the internal dividers are correctly positioned and not interfering with the door.
- Verify that the door hinges and mechanisms are properly aligned and tightened.
- Side cabinet door is misaligned:
- Adjust the hinges if they are adjustable.
- Ensure the cabinet is level.
- Missing parts or damaged components:
- Contact HOMCOM customer service with your model number and a description of the issue.
7. Specifications
| Brand | HOMCOM |
| Model Number | 837-061 |
| Material | Engineered Wood (MDF) |
| Color | Natural |
| Overall Dimensions (L x W x H) | 79 cm x 26 cm x 120 cm (31.1" x 10.2" x 47.2") |
| Max. Weight Capacity (Top Surface) | 15 kg (33 lbs) |
| Shoe Capacity | 6-12 pairs (depending on shoe size/type) |
| Assembly Required | Yes |

Image 7.1: Detailed dimensions of the shoe cabinet: 79 cm width, 26 cm depth, and 120 cm height.
8. Warranty and Support
For warranty information, product support, or to order replacement parts, please contact HOMCOM customer service. Refer to your purchase documentation or the HOMCOM official website for contact details.
Please have your model number (837-061) and purchase date ready when contacting support.


