1. Introduction
This manual provides essential information for the safe and effective operation, setup, and maintenance of your Reboot Multi-process 6-in-1 MIG Welder 250Amp (MIG2500). Please read this manual thoroughly before using the welding machine to ensure proper functionality and to prevent injury or damage.
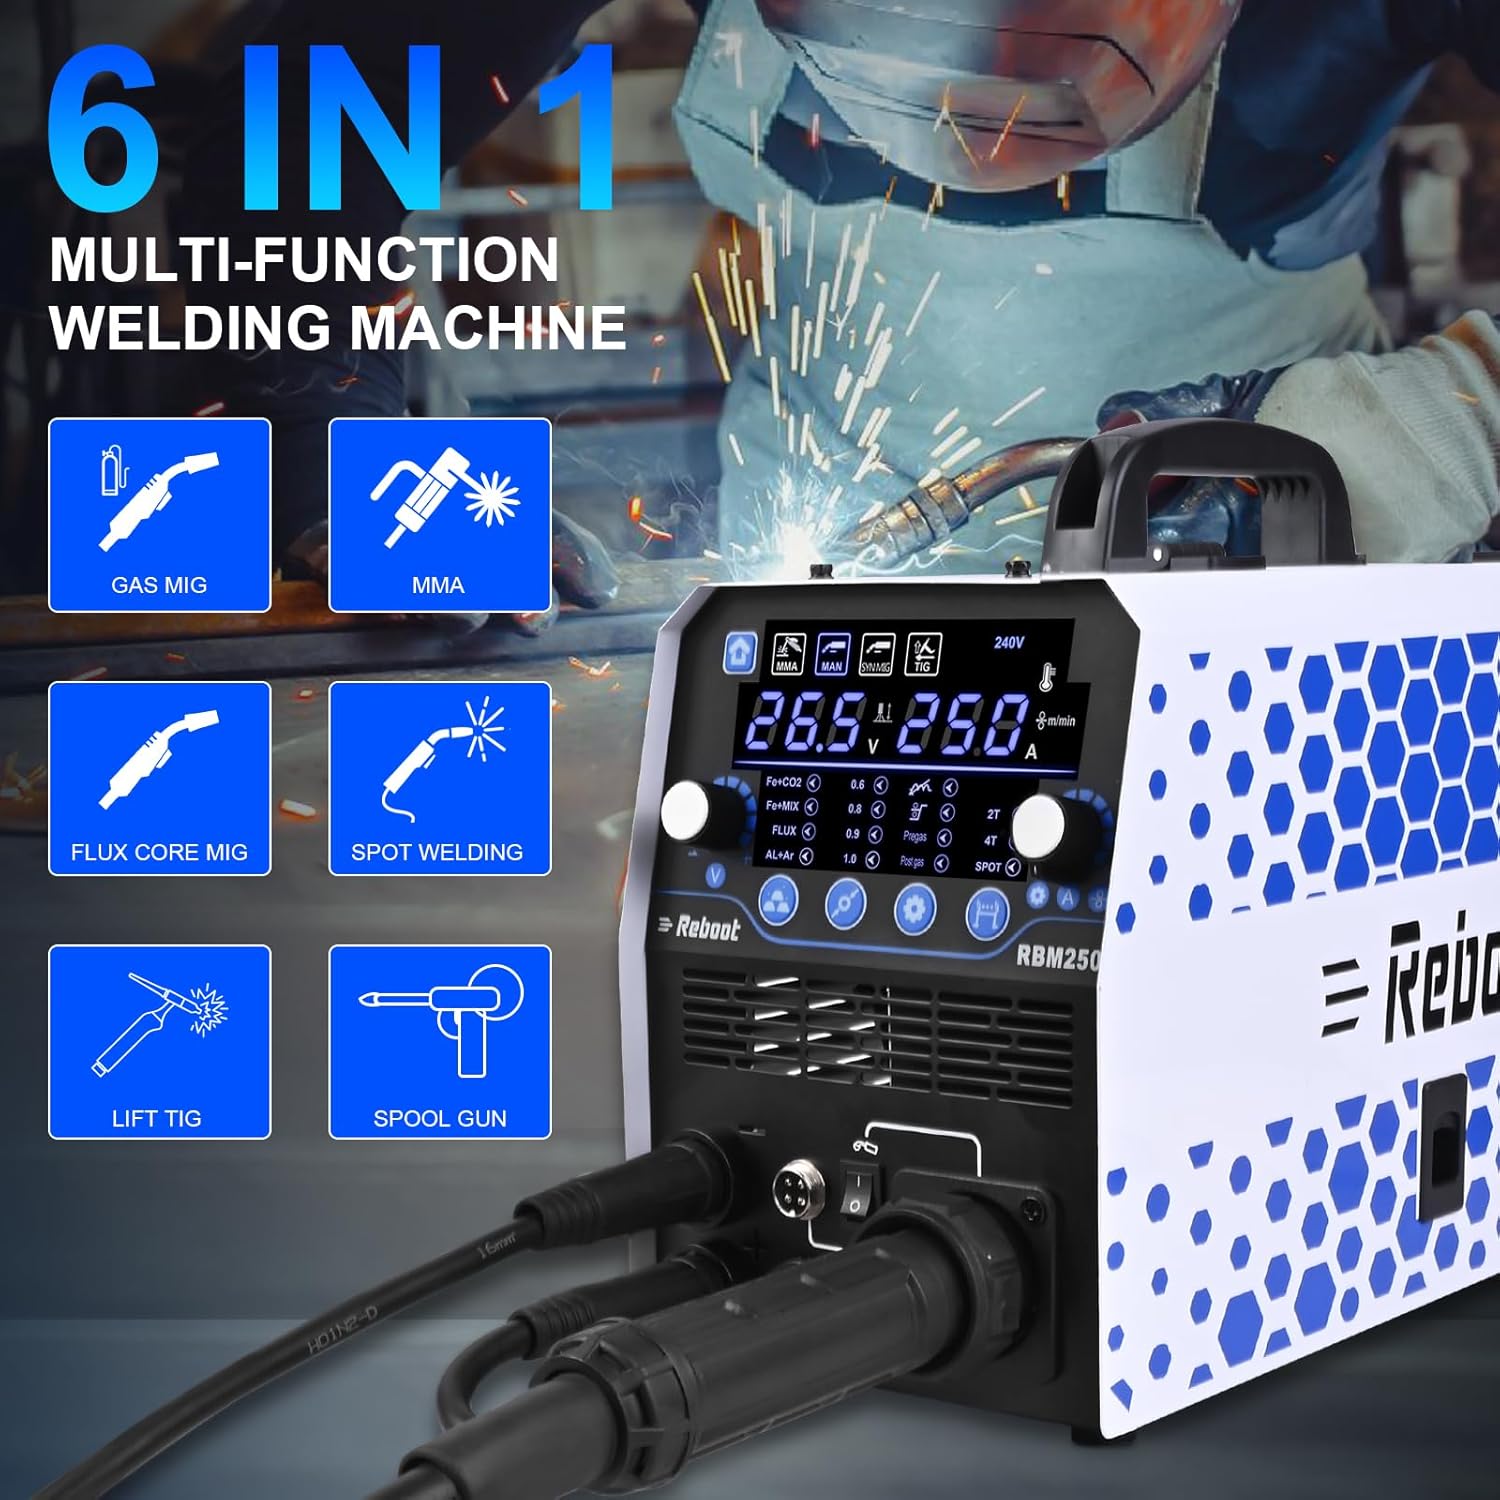
The Reboot MIG2500 is a versatile welding machine designed for various welding processes, including Gas MIG (GMAW), Gasless Flux Core MIG (FCAW), Stick (MMA), Lift TIG, Spot Welding, and optional Spool Gun welding for aluminum.
2. Safety Information
WARNING: Welding can be dangerous. Always follow safety precautions to prevent serious injury or death.
- Electric Shock Can Kill: Do not touch live electrical parts. Wear dry welding gloves and protective clothing. Ensure the welding machine is properly grounded.
- Fumes and Gases Can Be Hazardous: Keep your head out of the fumes. Use enough ventilation or exhaust at the arc to keep fumes and gases away from the breathing zone.
- Arc Rays Can Burn Eyes and Skin: Wear a welding helmet with a proper shade of filter to protect your face and eyes. Wear appropriate protective clothing to protect your skin.
- Fire and Explosion Hazard: Remove all flammable materials from the welding area. Have a fire extinguisher nearby.
- Hot Parts Can Cause Severe Burns: Allow equipment to cool before touching. Wear heavy, insulated welding gloves.
- Magnetic Fields: Pacemaker wearers should consult their doctor before operating.
- Always ensure the machine is turned off and unplugged before performing any maintenance or adjustments.
3. Product Overview
Key Features
- 6-in-1 Multi-Process Welding: Supports Gas MIG (GMAW), Gasless Flux Core MIG (FCAW), Stick (MMA), Lift TIG, Spot Welding, and optional Spool Gun for aluminum.
- Synergic & Manual MIG Control: Digital control with automatic recommended current and wire feed speed settings, adjustable to user habits.
- Large LED Display: Provides clear and accurate data display for easy reading.
- Advanced Functions: Includes inductance adjustment, fast/slow wire feed adjustment, pre-flow/post-flow, and 2T/4T welding modes.
- Aluminum Welding Capability: Can weld aluminum using a Teflon liner in the MIG gun or an optional spool gun.


4. Setup
4.1 Power Connection
Connect the welding machine to a 230V power supply. Ensure the power outlet is properly grounded and can handle the machine's maximum current draw (250Amp).
4.2 Wire Installation
The MIG2500 supports 1KG/5KG welding wire spools. Follow these steps to install the wire:
- Open the wire spool compartment.
- Place the welding wire spool onto the spindle.
- Thread the wire through the wire pressing wheel and into the automatic wire feed mechanism.
- Ensure the wire feeding wheel is correctly tensioned for the wire diameter.

4.3 Gas Connection (for Gas MIG)
For Gas MIG welding, connect your shielding gas cylinder (e.g., Argon, CO2, or Argon/CO2 mix) to the gas inlet on the rear of the machine using a regulator and gas hose. Ensure all connections are secure and leak-free.
4.4 Aluminum Welding Setup
The MIG2500 offers two methods for welding aluminum:
- Teflon Liner: Install the included Teflon liner into your MIG 15AK torch. This helps prevent soft aluminum wire from kinking.
- Spool Gun (Optional): For optimal aluminum welding, a spool gun (not included) can be connected to the machine. This provides a direct, short path for the aluminum wire, reducing feeding issues.

4.5 Adapter Wire Compatibility
The machine is compatible with various wire types and sizes:
- Solid Wire: .023" / .030" / .035"
- Flux Core Wire: .030" / .035" / .040"
- Aluminum Wire: .040"
- Copper Wire: .040"

5. Operating Instructions
5.1 Control Panel Overview
The MIG2500 features a large LED display and intuitive controls for selecting welding modes and adjusting parameters.

5.2 Welding Modes
Select the desired welding mode using the control panel. Each mode has specific settings and applications.

- MIG (Gas/Gasless Flux Core):
Select MIG mode. Choose between Synergic (automatic parameter matching based on wire diameter and material/gas) or Manual mode. Adjust current/wire feed speed and voltage as needed. Use 2T for standard trigger operation or 4T for continuous welding without holding the trigger. - Stick / MMA:
Select MMA mode. Connect the electrode holder and ground clamp. Adjust the current according to the electrode type and size. - Lift TIG:
Select TIG mode. Connect the TIG torch and ground clamp. Ensure a shielding gas (e.g., Argon) is connected. Initiate the arc by gently touching the tungsten electrode to the workpiece and lifting it slightly. - Spot Welding:
Select SPOT mode. This function is suitable for welding automobile body and carriage repairs. - Spool Gun (Optional):
If using an optional spool gun for aluminum welding, select the appropriate MIG mode and ensure the spool gun is connected. It is recommended to use Manual MIG mode with a spool gun.


6. Maintenance
Regular maintenance ensures the longevity and optimal performance of your welding machine.
- Cleaning: Periodically clean the machine's exterior with a dry cloth. Use compressed air to clear dust from internal components, ensuring the machine is unplugged first.
- Wire Feed Mechanism: Inspect the wire feed rollers and liner for wear or debris. Clean or replace as necessary to ensure smooth wire feeding.
- Consumables: Regularly check and replace MIG nozzles, contact tips, TIG collets, and electrodes as they wear out.
- Cables and Connections: Inspect all welding cables, power cords, and gas hoses for damage. Replace any damaged components immediately.
- Ventilation: Ensure the cooling fan and ventilation openings are clear of obstructions to prevent overheating.
7. Troubleshooting
This section addresses common issues you might encounter during operation.
| Problem | Possible Cause | Solution |
|---|---|---|
| No arc / Poor arc starting | Improper grounding, incorrect settings, worn consumables, power issue. | Check ground clamp connection. Verify welding parameters. Replace contact tip/electrode. Ensure power supply is stable. |
| Wire feeding issues (kinking, irregular feed) | Incorrect tension on wire feed rollers, clogged liner, wrong size contact tip, damaged wire. | Adjust wire feed tension. Clean or replace liner. Use correct contact tip for wire size. Inspect wire for damage. |
| Overheating / Machine shuts down | Exceeding duty cycle, blocked ventilation, internal fault. | Allow machine to cool down. Ensure ventilation openings are clear. If persistent, contact support. |
| Porosity in weld | Insufficient shielding gas, contaminated workpiece, incorrect gas flow, draft in welding area. | Check gas cylinder level and connections. Clean workpiece thoroughly. Adjust gas flow rate. Shield welding area from drafts. |
8. Specifications
| Feature | Detail |
|---|---|
| Model | MIG2500 (RBM2500 TIG) |
| Input Voltage | 230V |
| Max Amperage | 250 Amp |
| Welding Processes | Gas MIG (GMAW), Gasless Flux Core MIG (FCAW), Stick (MMA), Lift TIG, Spot Welding, Spool Gun (optional) |
| Wire Compatibility | Solid Wire: .023"/.030"/.035"; Flux Core Wire: .030"/.035"/.040"; Aluminum Wire: .040"; Copper Wire: .040" |
| Wire Spool Size | 1KG / 5KG |
| Dimensions (L x W x H) | 43 x 18.5 x 30 cm (16.9 x 7.3 x 11.8 inches) |
| Weight | 13 kg (28.7 lbs) |
| Power Type | Electric with wire |

9. Warranty and Support
9.1 Warranty
The Reboot MIG2500 welding machine comes with a 1-Year Warranty from the date of purchase. This warranty covers manufacturing defects and ensures reliable operation under normal use. Please retain your proof of purchase for warranty claims.
9.2 Customer Support
For any questions, technical assistance, or support regarding your Reboot welding machine, please contact Reboot customer service. Timely support is available to assist with setup, operation, troubleshooting, and parts inquiries.
Refer to the contact information provided with your product packaging or visit the official Reboot website for support details.


