
1. Product Overview
The LIDER LTS-2H Countdown Timer Switch is designed to automate the control of lighting fixtures, ceiling fans, bathroom fans, or space heaters. It features six preset countdown options and a manual ON/OFF button, ensuring connected appliances automatically turn off after a set duration. This helps conserve energy and enhances safety by preventing appliances from being left on unintentionally. This product includes two timer switches and two matching wall plates (LWP-31M-W).

Image 1.1: The LIDER LTS-2H Countdown Timer Switch seamlessly integrates into various home environments, providing convenient control for lighting and fans.
2. Package Contents
- 2 x LIDER LTS-2H Countdown Timer Switches
- 2 x LIDER Wall Plates (Model: LWP-31M-W)
- Installation Screws
3. Safety Information
WARNING: To avoid fire, shock, or death, turn off power at the circuit breaker or fuse box and test that the power is off before wiring. Installation should be performed by a qualified electrician or in accordance with local electrical codes. This device requires a neutral wire for proper operation. Ensure all wire connections are secure.
4. Installation (Setup)
- Turn Off Power: Locate the circuit breaker or fuse that supplies power to the switch location and turn it OFF. Verify power is off using a voltage tester.
- Remove Old Switch: Carefully remove the existing wall plate and switch from the wall box. Disconnect the wires from the old switch.
- Identify Wires: Identify the LINE (Hot), LOAD, NEUTRAL, and GROUND wires in the wall box. A neutral wire is required for this timer switch.
- Wire the Timer Switch: Connect the wires to the LIDER LTS-2H switch terminals as follows:
- Connect the LINE (Hot) wire to the terminal labeled 'HOT'.
- Connect the LOAD wire to the terminal labeled 'LOAD'.
- Connect the NEUTRAL wire to the terminal labeled 'NEUTRAL'.
- Connect the GROUND wire to the terminal labeled 'GROUND'.
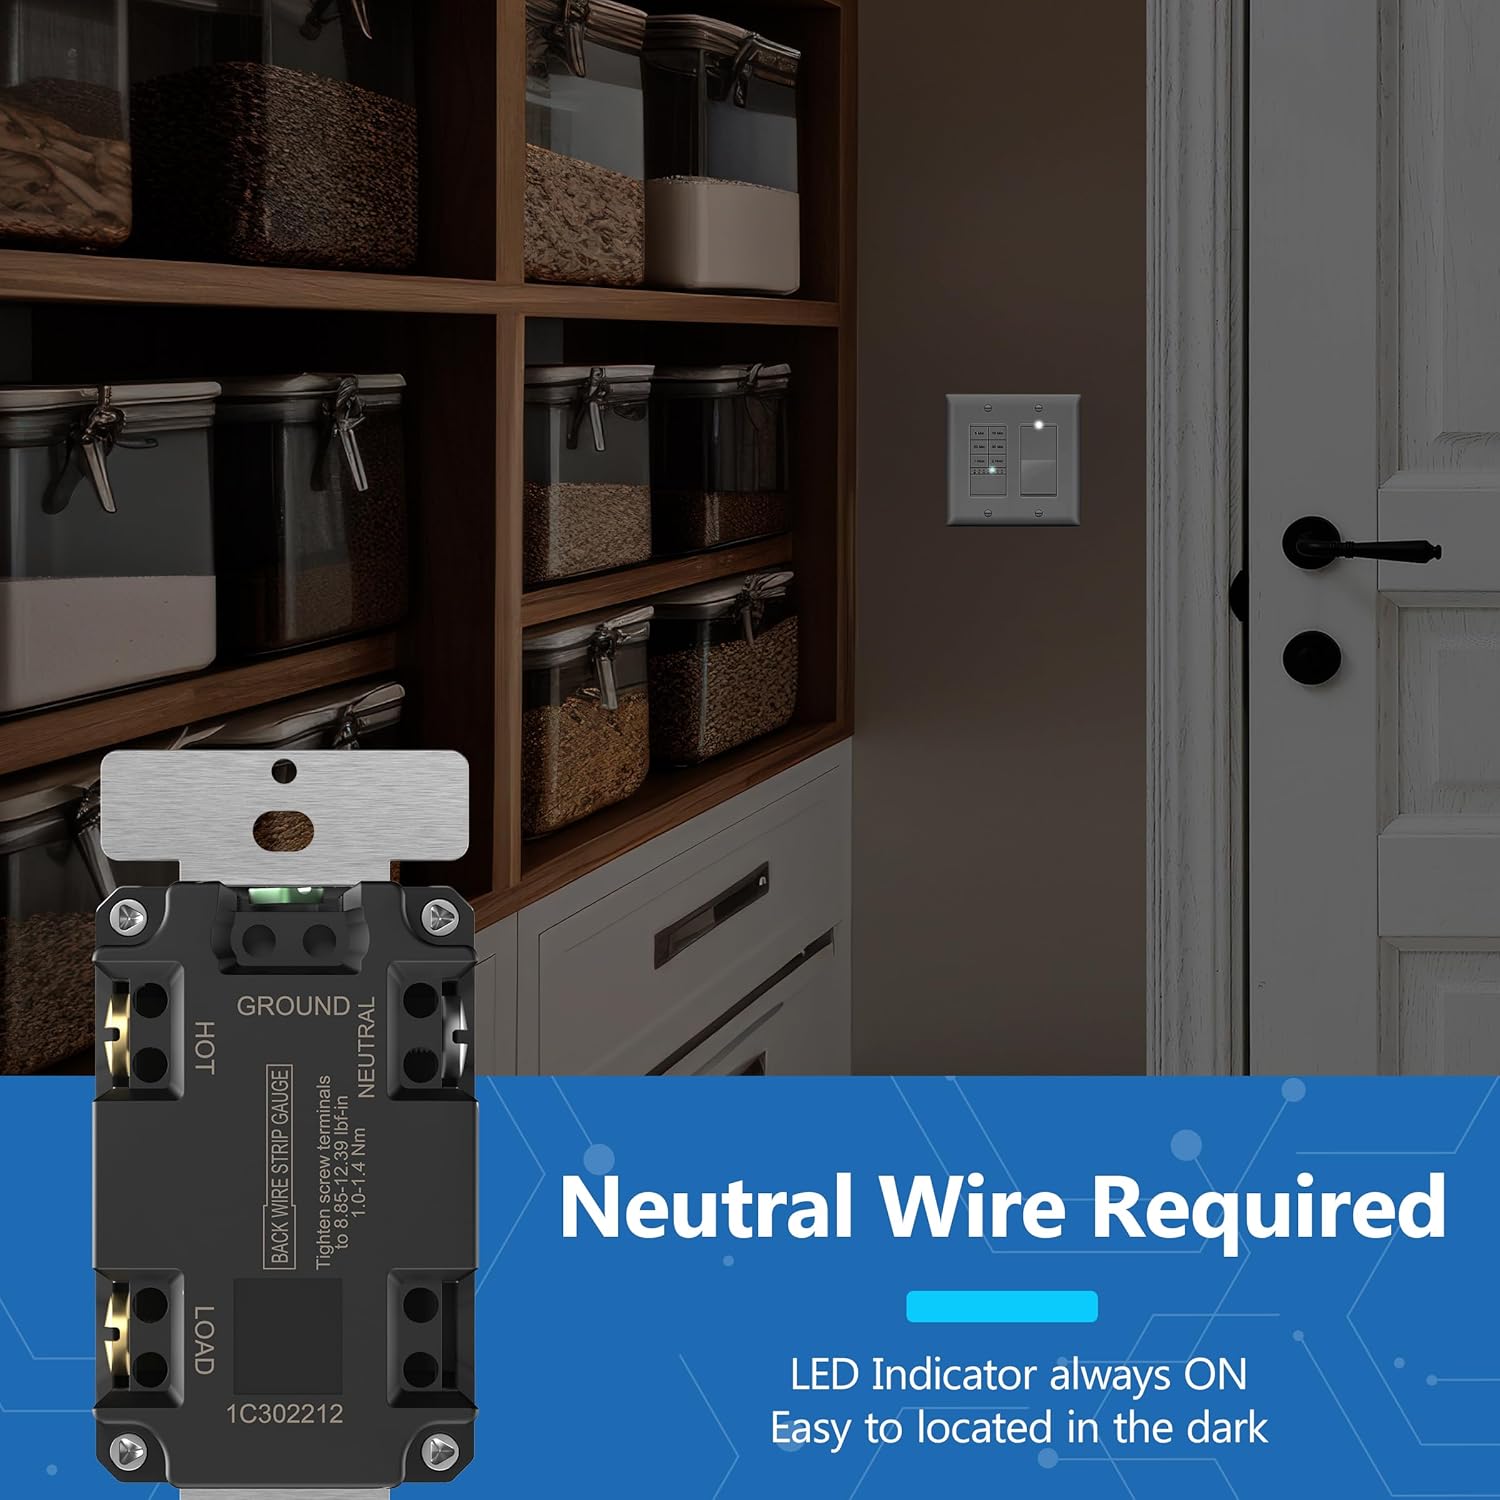
Image 4.1: Wiring diagram on the back of the LIDER LTS-2H switch, indicating connections for Hot, Ground, Load, and Neutral wires. A neutral wire is essential for installation.
- Mount the Switch: Carefully push the wired switch into the wall box and secure it with the provided screws.
- Install Wall Plate: Attach the LIDER wall plate over the switch.
- Restore Power: Turn the power back ON at the circuit breaker.
5. Operation
5.1 Setting the Timer
The LIDER LTS-2H switch features six preset buttons for countdown timing:
- 5 Minutes
- 10 Minutes
- 20 Minutes
- 30 Minutes
- 1 Hour
- 2 Hours
To activate a timer, simply press the desired time button. The connected load will turn ON and automatically turn OFF once the selected time expires.
5.2 Manual ON/OFF
The switch includes a manual ON/OFF button located at the bottom. Press this button once to turn the load ON or OFF, overriding any active timer setting.
5.3 LED Indicator Modes
The blue LED indicators on the switch have two operating modes:
- Mode 1 (Default): After a timer is set, the LED flashes twice to confirm the setting, then turns OFF.
- Mode 2: The LED remains ON during the entire selected time delay and turns OFF when the timer expires.
To switch between LED modes, ensure the switch is ON, then press and hold the top two timer buttons simultaneously for 7 seconds. The LED indicator will flash three times to confirm the mode change.
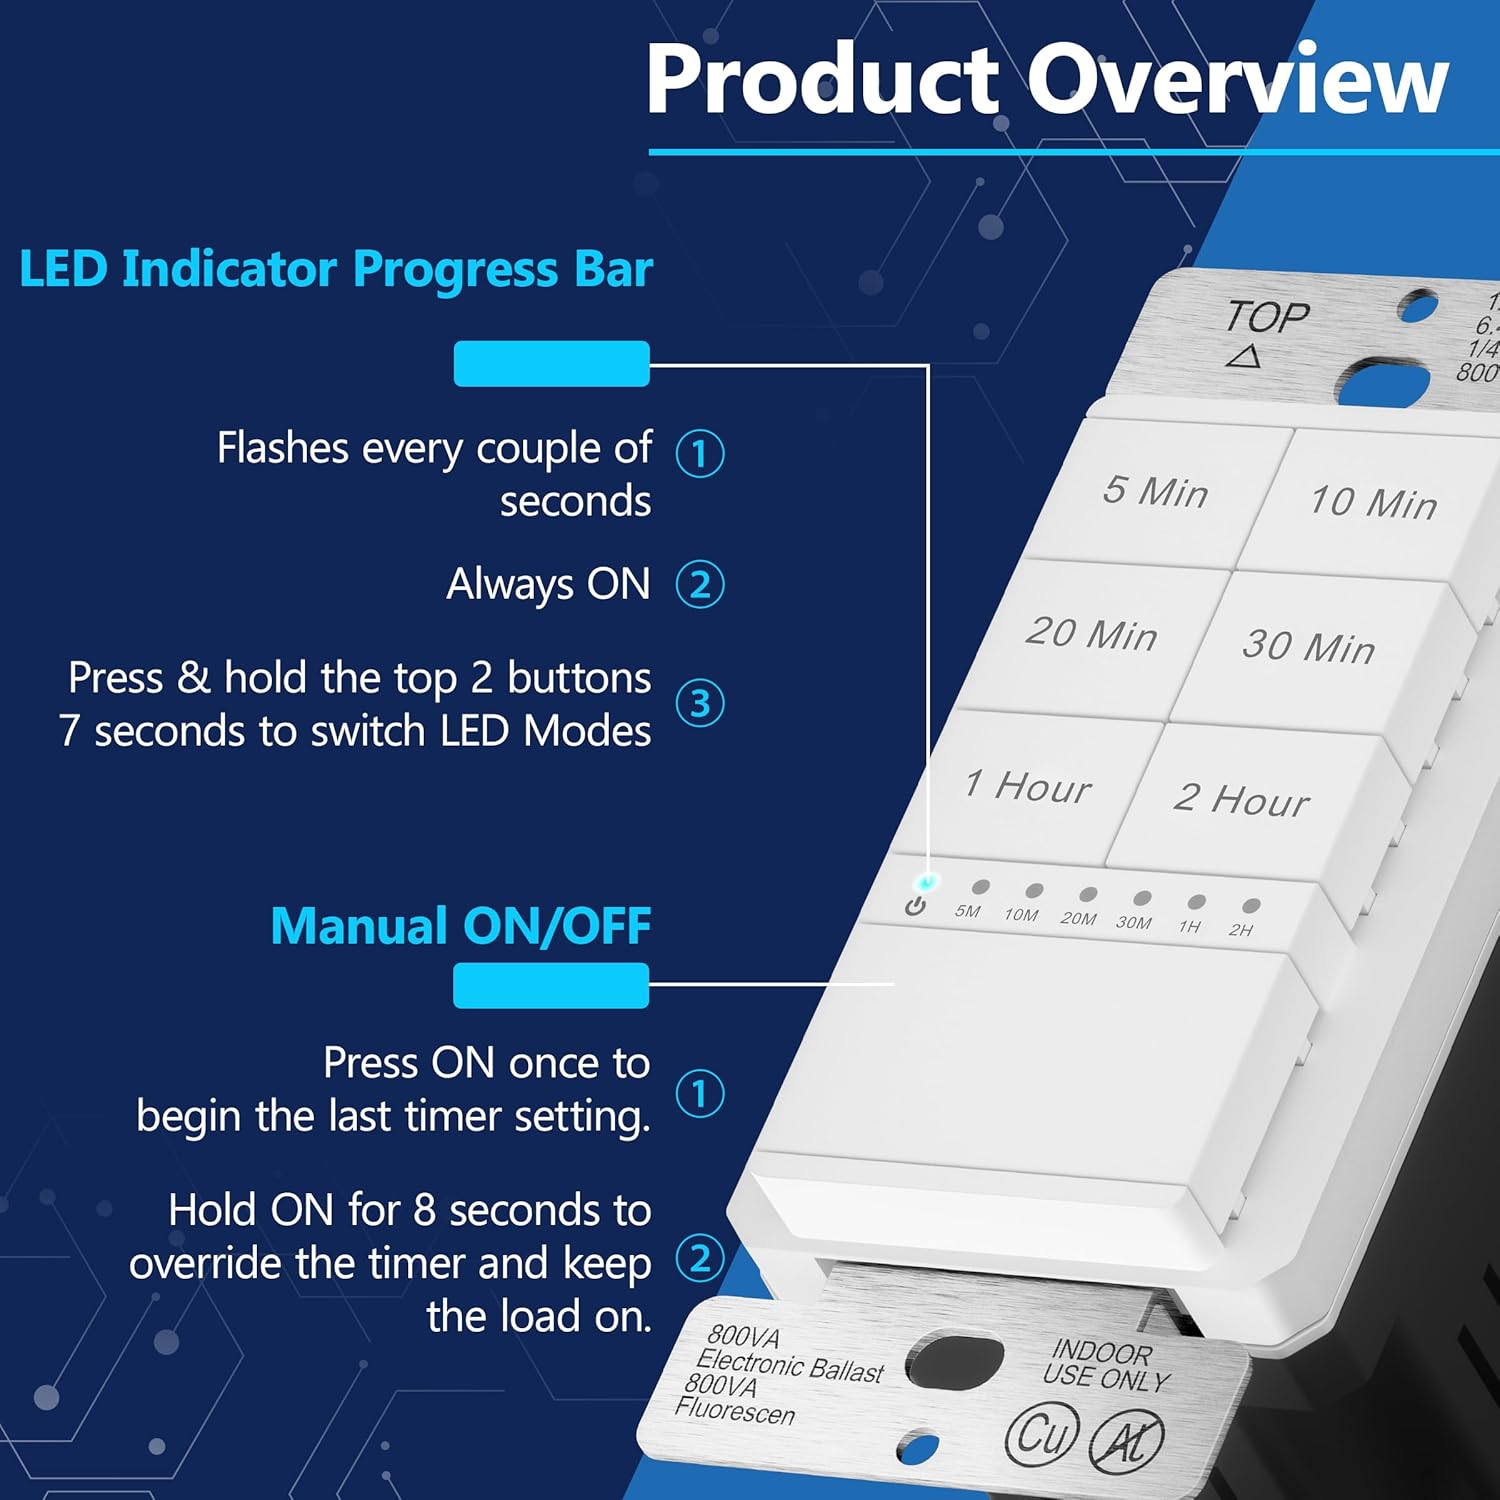
Image 5.1: Detailed view of the LIDER LTS-2H switch, highlighting the timer buttons, manual control, and LED indicator functionality.

Image 5.2: Illustration of the LED indicator progress bar, demonstrating how the blue LEDs illuminate to show the active timer duration or setting confirmation.
6. Maintenance
To clean the timer switch, ensure power is turned off at the circuit breaker. Use a soft, damp cloth to wipe the surface. Avoid using abrasive cleaners or solvents, as these may damage the finish or internal components.
7. Troubleshooting
- Switch Not Responding:
- Check if the circuit breaker is ON.
- Verify all wiring connections are secure, especially the neutral wire.
- Ensure the load (light/fan) is functioning correctly.
- LED Indicator Not Behaving as Expected:
- Review Section 5.3 on LED Indicator Modes.
- Attempt to switch LED modes by holding the top two buttons for 7 seconds to reset the display behavior.
- Load Does Not Turn Off After Timer:
- Ensure the correct timer button was pressed and the LED indicator confirmed the setting.
- If the manual ON/OFF button was used to override the timer, the load will remain on until manually turned off.
8. Specifications
| Feature | Specification |
|---|---|
| Model Number | LTS-2H-WWP2P |
| Operation Mode | ON-OFF |
| Current Rating | 15 Amps |
| Voltage | 120VAC, 60Hz |
| Wattage | 1200 Watts |
| Motor Horsepower | 1/2 HP |
| Circuit Type | 1-way |
| Mounting Type | Wall Mount |
| Actuator Type | Push Button |
| Material | Plastic |
| Color | White (with blue LED indicators) |
| Operating Temperature | 32°F to 131°F (0°C to 55°C) |
| Certifications | UL Listed |
| UPC | 883951850326 |
9. Warranty and Support
9.1 Warranty Information
The LIDER LTS-2H Countdown Timer Switch comes with a 1-year limited warranty from the date of purchase. This warranty covers defects in materials and workmanship under normal use. It does not cover damage resulting from improper installation, misuse, abuse, or unauthorized modifications.
9.2 Customer Support
For technical assistance, troubleshooting, or warranty claims, please contact LIDER customer support. Refer to the product packaging or the LIDER official website for the most current contact information.