
Introduction
This manual provides detailed instructions for the assembly, operation, and maintenance of your HOMCOM 3-Tier Industrial Console Table. Designed for versatility, this table offers ample storage with its three-tier structure and robust construction, suitable for various rooms such as living rooms, study rooms, or offices. Please read this manual thoroughly before assembly and use to ensure proper setup and longevity of your product.

Image: The HOMCOM 3-Tier Industrial Console Table, fully assembled and styled in a room.
Safety Information
- Read all instructions carefully before beginning assembly and retain this manual for future reference.
- Keep all small parts and packaging materials away from children and pets to prevent choking hazards.
- Assemble the product on a soft, clean surface (e.g., carpet or cardboard) to prevent scratches or damage.
- Do not overtighten screws during assembly, as this may damage the threads or components.
- Ensure all connections are securely fastened before placing any items on the table or using it.
- Do not exceed the maximum weight capacity of 132 pounds (60 kg) for the entire table. Distribute weight evenly across the shelves.
- This product is intended for indoor use only.
Package Contents
Please verify that all components listed below are present before starting assembly. If any parts are missing or damaged, please contact customer service.
- Main Frame Components (Metal bars)
- Shelf Panels (3 - Melamine-coated particleboard)
- Adjustable Feet (4)
- Assembly Hardware (Screws, Allen Wrench)
Setup and Assembly
Follow these steps carefully to assemble your console table.
- Unpack and Identify Parts: Carefully remove all components from the packaging. Lay them out and compare them with the parts list to ensure everything is present and undamaged.
- Attach Adjustable Feet: Screw the four adjustable feet into the pre-drilled holes at the bottom of the main frame's vertical supports. Do not overtighten initially.
- Assemble Main Frame: Connect the metal frame components using the provided screws and Allen wrench. Ensure the frame is stable and aligned before proceeding.
- Install Shelf Panels: Place the three shelf panels onto the assembled frame. The top shelf sits directly on the frame. The two lower shelves feature a metal mesh backing; ensure these are oriented correctly and securely fastened to the frame using the designated screws. Note: Some users find attaching the mesh backing challenging; a power screwdriver may assist, but be careful not to strip screws. Do not fully tighten all screws until the entire unit is assembled.
- Final Tightening: Once all shelves are in place and the table is fully assembled, go back and securely tighten all screws. Ensure the table is stable and does not wobble.
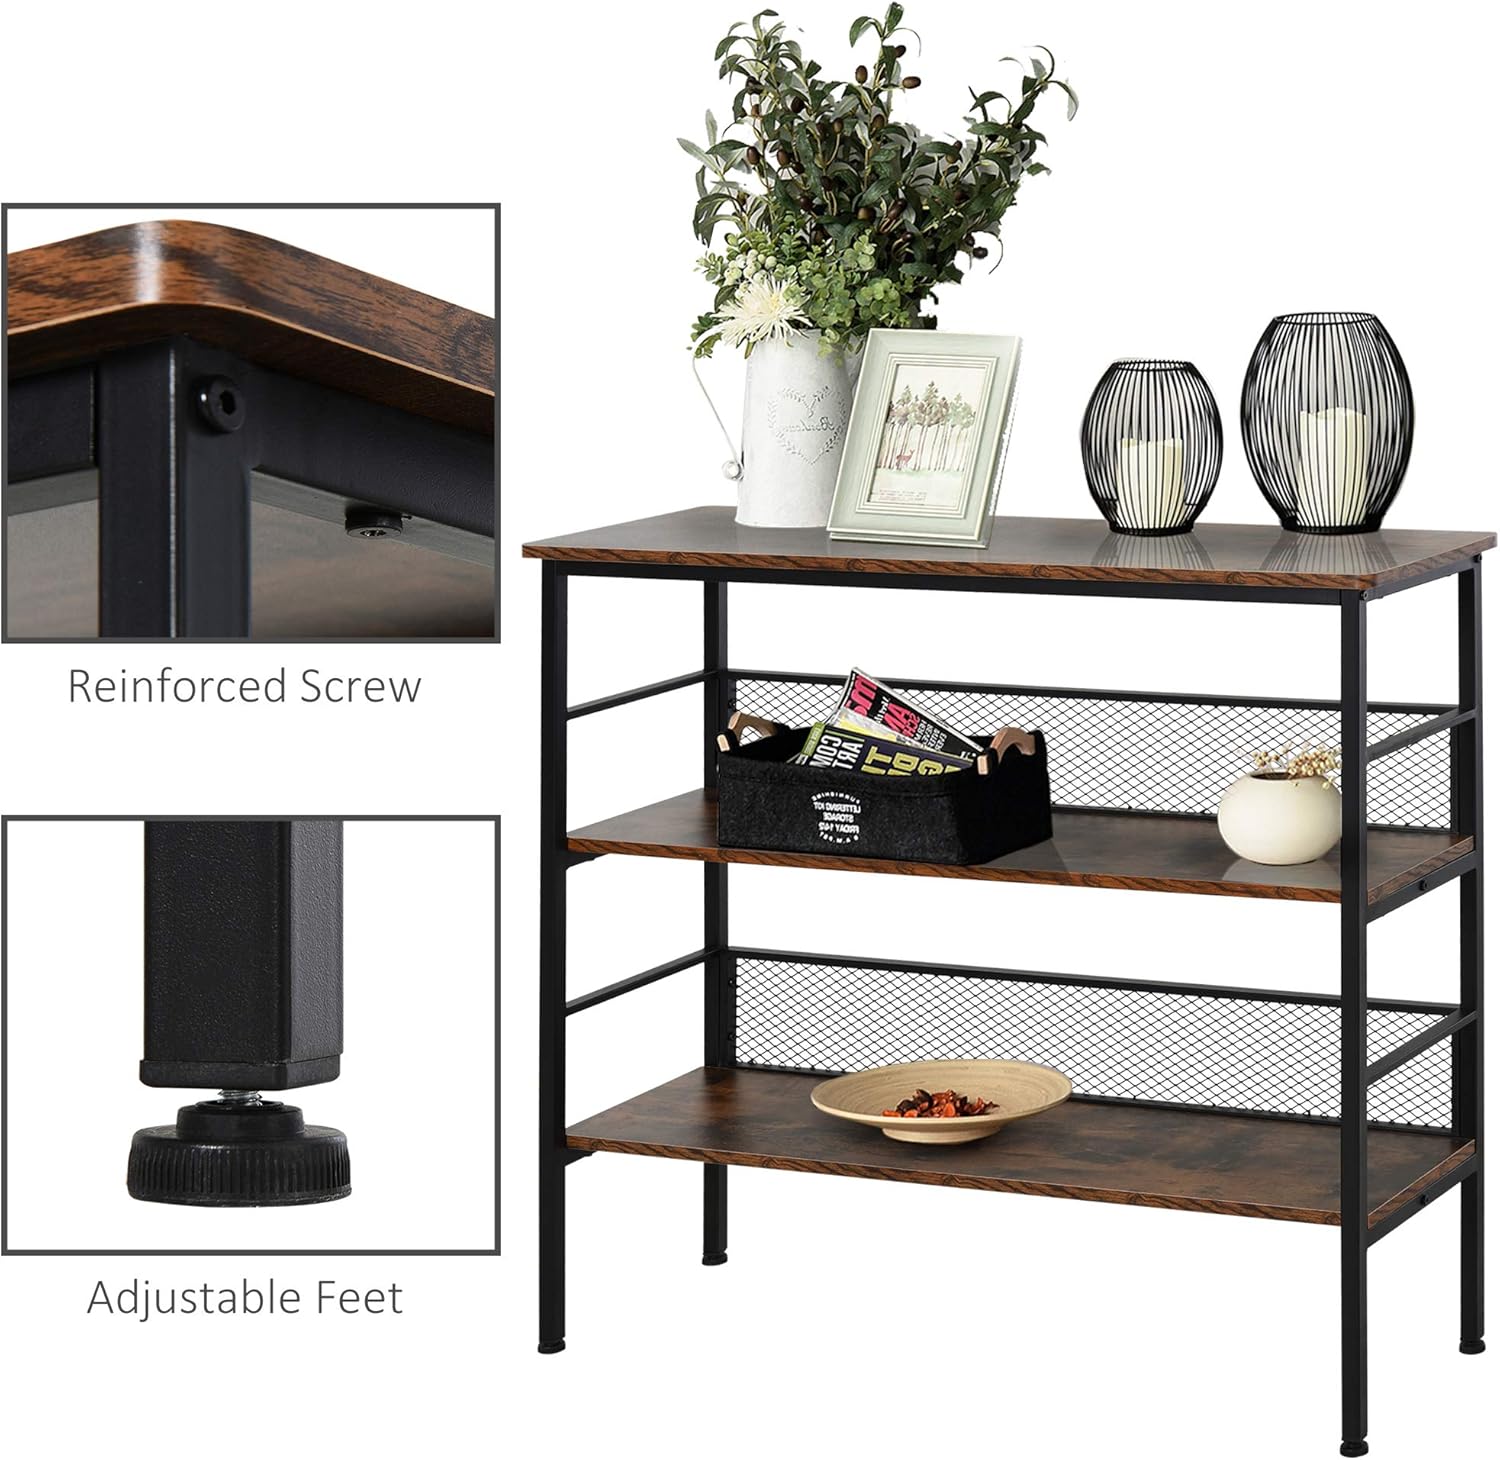
Image: Detail showing the reinforced screw connection and adjustable foot.
Operating Instructions
- Placement: Position the console table on a flat, stable surface in your desired room.
- Leveling: Use the adjustable feet to fine-tune the table's height and ensure it is level on uneven floors. Turn the feet clockwise to lower and counter-clockwise to raise.
- Weight Distribution: Distribute items evenly across the three shelves. Avoid placing heavy objects on one side or concentrating weight in a single area to maintain stability and prevent damage.
- Intended Use: This table is designed for general storage and display of household items, books, and decor. It is not intended for climbing or standing on.
Maintenance
- Cleaning: Wipe the surfaces of the table with a soft, damp cloth. For stubborn marks, a mild soap solution can be used, followed by drying with a clean cloth. Avoid abrasive cleaners, harsh chemicals, or solvents, as these can damage the finish.
- Regular Checks: Periodically inspect all screws and connections to ensure they remain tight. Retighten if necessary to maintain the table's stability and structural integrity.
- Avoid Moisture: Protect the table from excessive moisture and direct sunlight to prevent warping or fading of the wood finish.
Troubleshooting
| Problem | Possible Cause | Solution |
|---|---|---|
| Table is wobbly or uneven. | Uneven floor; loose screws. | Adjust the leveling feet until the table is stable. Check and tighten all assembly screws. |
| Parts do not fit together. | Incorrect orientation; manufacturing defect. | Review assembly steps and ensure parts are oriented correctly. Do not force parts. If still an issue, contact customer service. |
| Missing or damaged parts. | Packaging error; shipping damage. | Do not proceed with assembly. Contact HOMCOM customer service immediately for replacement parts. |
Specifications
| Feature | Detail |
|---|---|
| Model Number | 801-139V80BK |
| Overall Dimensions | 39.25" W x 12.5" D x 36.25" H |
| Material | Alloy Steel, Engineered Wood (Melamine finish) |
| Number of Shelves | 3 |
| Weight Capacity | 132 lbs (60 kg) |
| Item Weight | 31.9 lbs (14.47 kg) |
| Color | Rustic Brown |
| Special Features | Adjustable Feet, Metal Mesh Backing (lower shelves) |
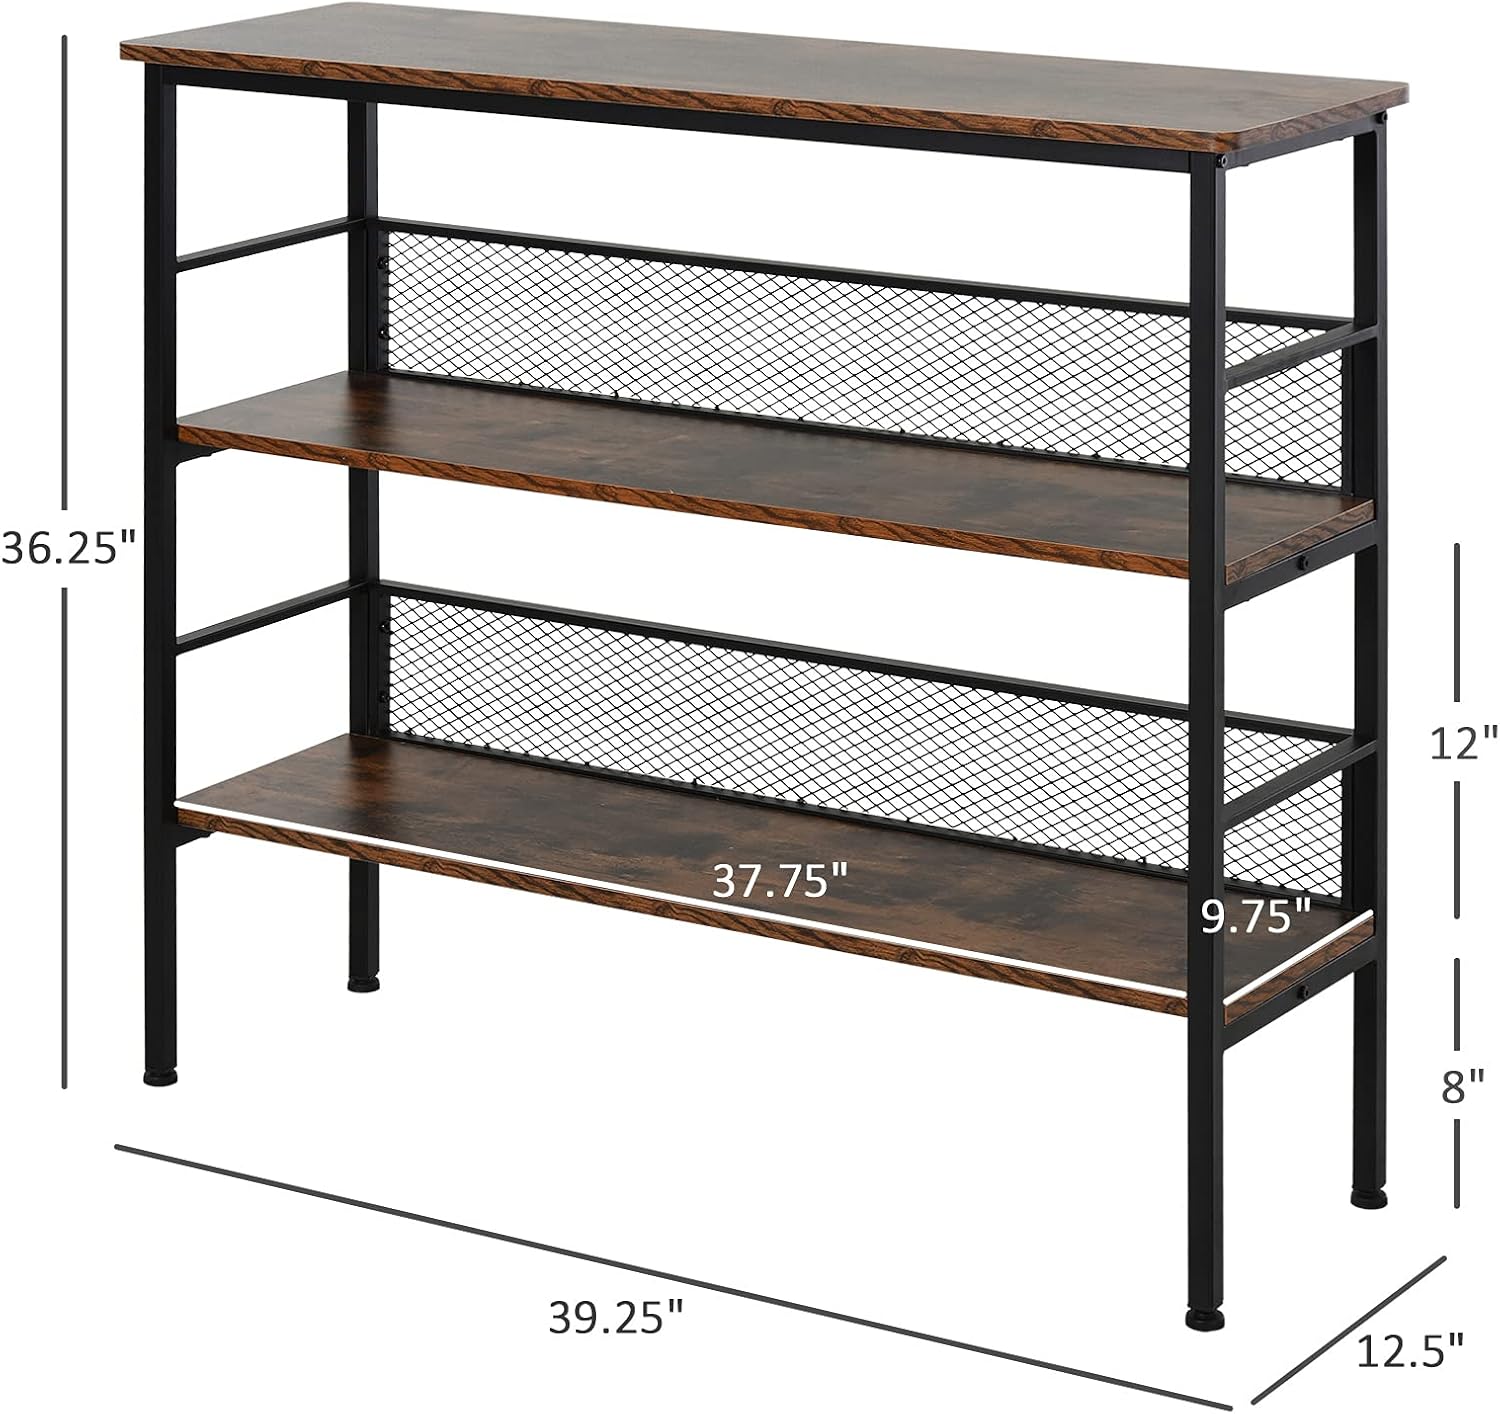
Image: Dimensional diagram of the console table.
Warranty and Support
For detailed warranty information, product support, or to order replacement parts, please contact HOMCOM customer service directly. Refer to your purchase documentation for specific contact details or visit the official HOMCOM website.
Manufacturer: Aosom LLC