Introduction
This manual provides comprehensive instructions for the installation, operation, and maintenance of your ASUS Prime B550M-A AMD B550 Socket AM4 Micro ATX DDR4-SDRAM Motherboard. Please read this manual thoroughly before beginning installation to ensure proper setup and optimal performance.
The ASUS Prime B550M-A is designed to unleash the full potential of AMD Ryzen™ 3rd Generation processors. Boasting a robust power design, comprehensive cooling solutions, and intelligent tuning options, Prime B550 series motherboards provide daily users and DIY PC builders a range of performance tuning options via intuitive software and firmware features.
Package Contents
Before you begin, ensure all items are present in your motherboard package:
- ASUS Prime B550M-A Motherboard
- User Manual
- I/O Shield
- SATA 6Gb/s cables
- M.2 screws and standoffs
- Support DVD (drivers and utilities)

Image: The ASUS Prime B550M-A motherboard alongside its retail packaging, illustrating the product as it appears when unboxed.
Setup and Installation
1. Safety Precautions
- Always disconnect the power cord from the wall outlet before touching any component.
- Wear an anti-static wrist strap or frequently touch a grounded metal object (like the computer case) to discharge static electricity.
- Handle components by their edges, avoiding contact with pins or circuitry.
2. Motherboard Layout
Familiarize yourself with the various components and connectors on the motherboard.
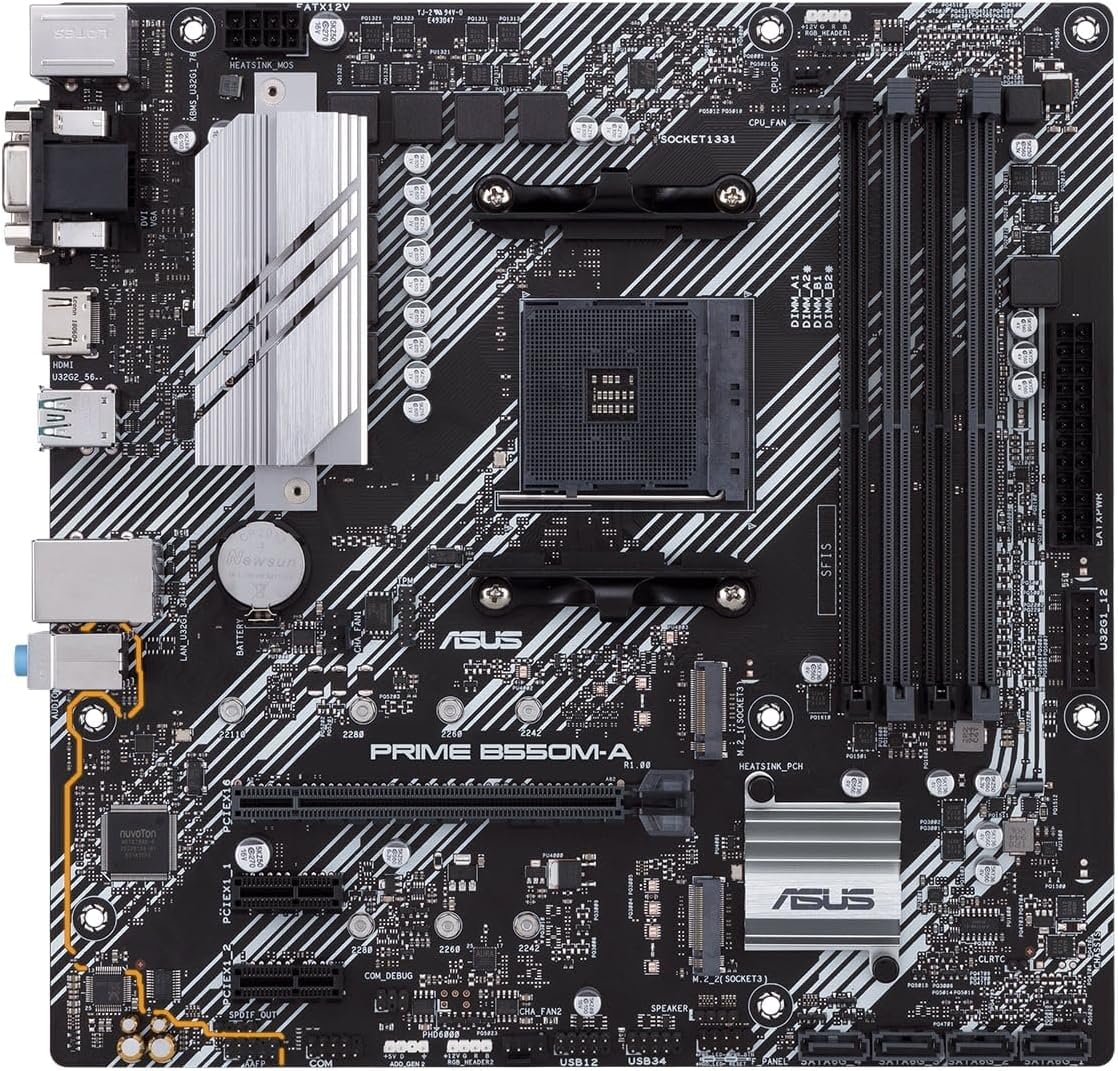
Image: A top-down view of the ASUS Prime B550M-A motherboard, highlighting the CPU socket, RAM slots, PCIe slots, and various headers.

Image: An angled perspective of the ASUS Prime B550M-A motherboard, showing the heatsinks and general component layout.
3. Component Installation Order
- Install CPU: Carefully align the CPU with the socket and gently place it. Secure the retention arm.
- Install CPU Cooler: Attach the appropriate CPU cooler according to its manufacturer's instructions.
- Install RAM: Open the DIMM slot clips, align the RAM modules, and press firmly until they click into place. This motherboard supports DDR4-SDRAM.
- Install M.2 SSD (if applicable): Insert the M.2 drive into the M.2 slot and secure it with the provided screw.
- Install Motherboard into Case: Place the I/O shield into the case's rear opening. Carefully align the motherboard with the standoffs in your PC case and secure it with screws.
- Connect Power Supply: Connect the 24-pin ATX power connector and the 8-pin CPU power connector from your power supply to the motherboard.
- Connect Storage Drives: Connect SATA data cables from your storage drives (HDDs/SSDs) to the SATA ports on the motherboard. Connect power cables from the PSU to the drives.
- Install Graphics Card (if applicable): Insert your graphics card into the primary PCIe x16 slot and secure it. Connect any necessary PCIe power cables from the PSU.
- Connect Front Panel Headers: Connect the power button, reset button, HDD LED, power LED, and USB/audio headers from your case to the corresponding pins on the motherboard. Refer to the motherboard's silkscreen labels for correct orientation.
- Connect Peripherals: Connect your monitor, keyboard, mouse, and other peripherals to the rear I/O ports.
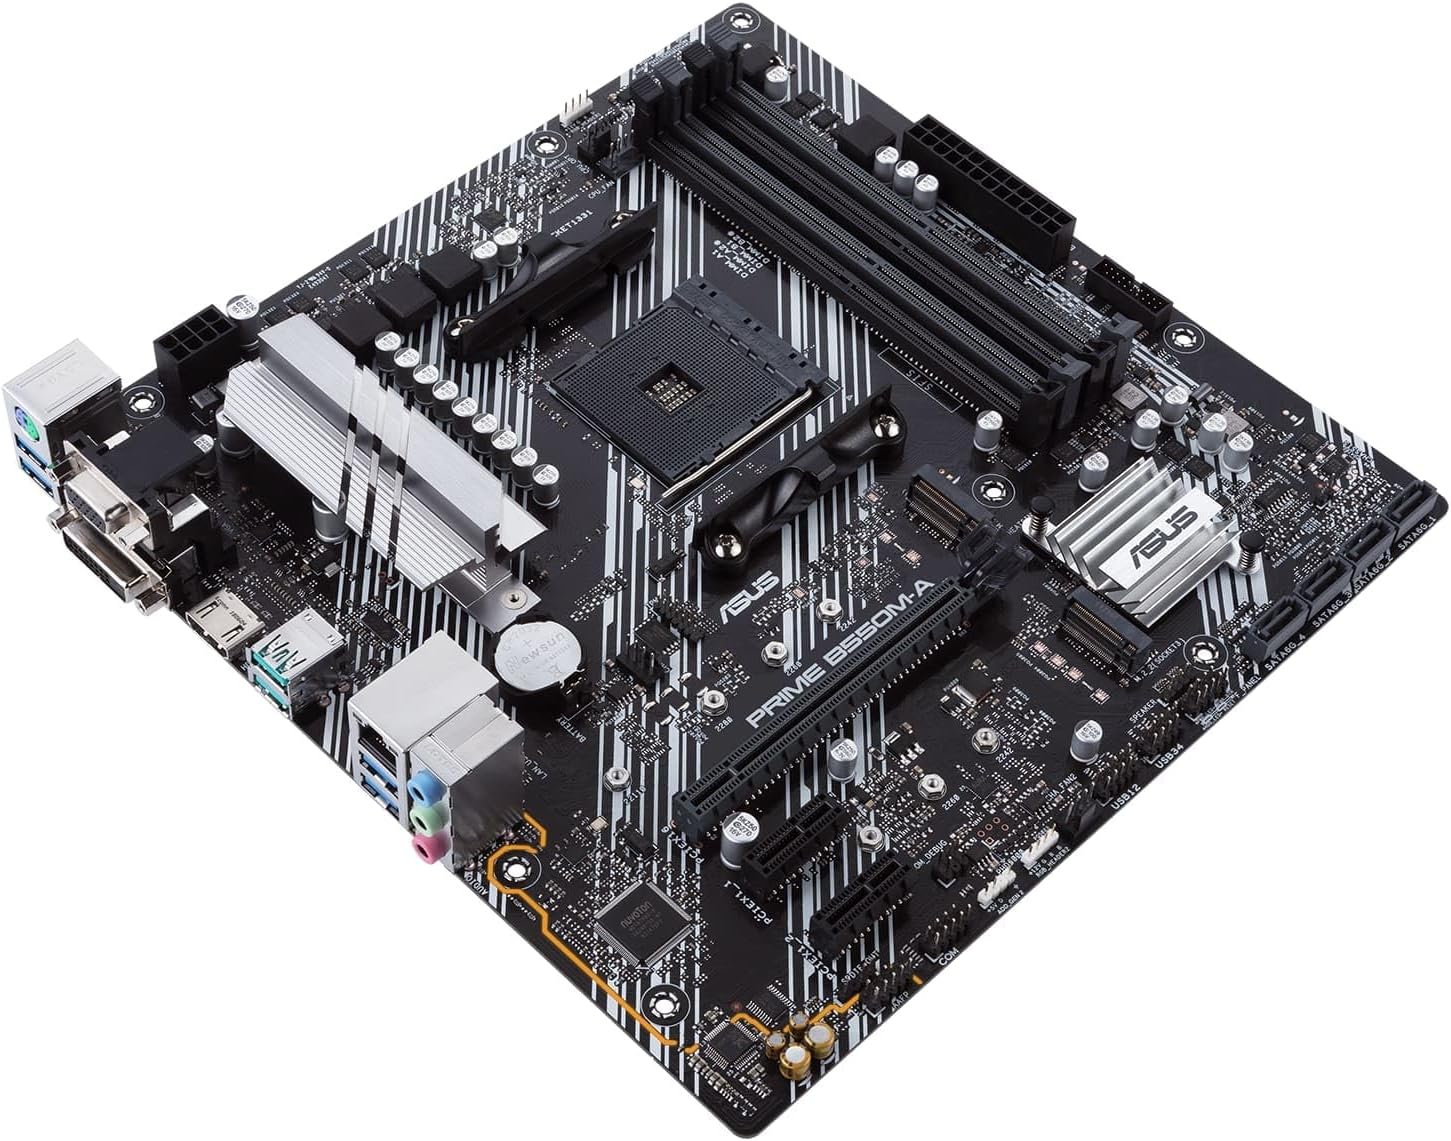
Image: An angled view of the ASUS Prime B550M-A motherboard, illustrating the placement of key components like the CPU socket and RAM slots.

Image: A close-up of the rear input/output (I/O) panel of the ASUS Prime B550M-A motherboard, showing various ports including USB, HDMI, LAN, and audio jacks.
Operating Instructions
1. First Boot and BIOS Setup
After assembling your system, power it on. You may need to enter the BIOS/UEFI setup utility to configure settings or install your operating system.
- Entering BIOS: Press the DEL key or F2 key repeatedly during the boot process to enter the BIOS/UEFI setup.
- Boot Order: Configure the boot order to prioritize your operating system installation media (USB drive or DVD).
- Save and Exit: After making changes, save them and exit the BIOS. The system will restart.
2. Driver Installation
For optimal performance and stability, install the latest drivers for your motherboard components. These can typically be found on the included support DVD or downloaded from the official ASUS website.
- Chipset Drivers
- LAN Drivers
- Audio Drivers
- USB Drivers
- Graphics Drivers (for integrated graphics or discrete GPU)
3. ASUS Software Utilities
ASUS provides various software utilities to enhance your experience, such as:
- Armoury Crate: For system monitoring, RGB lighting control (Aura Sync), and driver updates.
- AI Suite 3: For system tuning, fan control, and power management.
Maintenance
Proper maintenance ensures the longevity and stable operation of your motherboard and PC system.
- Dust Removal: Regularly clean dust from inside your PC case, especially from fans and heatsinks, using compressed air. Ensure the system is powered off and unplugged.
- BIOS/UEFI Updates: Periodically check the ASUS support website for BIOS/UEFI updates. These can improve compatibility, stability, and performance. Follow the update instructions carefully.
- Driver Updates: Keep your drivers updated to ensure optimal performance and compatibility with new software and hardware.
- Cable Management: Ensure internal cables are neatly routed to improve airflow and prevent interference.
Troubleshooting
This section addresses common issues you might encounter.
| Problem | Possible Cause | Solution |
|---|---|---|
| System does not power on. | Loose power connections, faulty PSU, case power button issue. | Check 24-pin and 8-pin power connectors. Ensure PSU switch is ON. Verify front panel header connections. Test PSU. |
| No display on monitor. | Incorrect display cable connection, faulty GPU/integrated graphics, RAM issue. | Ensure monitor cable is securely connected to the correct port (GPU or motherboard). Reseat RAM modules. Test with a different GPU if available. |
| System reboots unexpectedly. | Overheating, unstable power, faulty RAM, driver issues. | Check CPU/GPU temperatures. Ensure all power connections are secure. Run memory diagnostic. Update drivers. |
| USB devices not recognized. | Outdated USB drivers, faulty USB port, device incompatibility. | Install/update USB drivers. Try a different USB port. Test the device on another PC. |
Specifications
Key technical specifications for the ASUS Prime B550M-A Motherboard:
| Feature | Detail |
|---|---|
| Model Name | PRIME B550M-A |
| CPU Socket | AM4 (Supports AMD 3rd Gen Ryzen™ Processors) |
| Chipset | AMD B550 |
| Form Factor | Micro ATX |
| RAM Type | DDR4 SDRAM |
| Max RAM Capacity | Up to 128GB |
| Memory Speed | 2133 MHz (and higher via OC) |
| USB Ports | 2 x USB 3.2 Gen 2 Type-A, 4 x USB 3.2 Gen 1 Type-A, 4 x USB 2.0 |
| LAN | 1 x RJ-45 |
| Video Output | HDMI, DVI-D, D-Sub (VGA) |
| Storage | M.2 slot, SATA 6Gb/s ports |
| Dimensions (LxWxH) | 9.61 x 1.18 x 9.61 inches |
| Item Weight | 1.32 pounds |
Warranty and Support
The ASUS Prime B550M-A Motherboard is backed by a 3-year manufacturer's warranty.
For technical support, driver downloads, BIOS updates, and further information, please visit the official ASUS support website:
When contacting support, please have your motherboard's model number (PRIME B550M-A) and serial number ready.


