1. Introduction
This manual provides detailed instructions for the installation, operation, and maintenance of your hygger 957 LED Aquarium Light. Designed for freshwater planted tanks, this light features programmable 24-hour light cycles, adjustable brightness, and multiple color options to create an optimal environment for aquatic life.
Please read this manual carefully before use to ensure proper function and longevity of your product.
2. Product Features
- Programmable 24-Hour Light Cycle: Simulates natural sunrise, midday, sunset, and night conditions.
- Built-in Timer: Customizable intensity and colors, daytime to nighttime schedules, color gradient loop, fine-tune lighting schedule, auto on/off, and memory function.
- Sunrise & Sunset Functions: LEDs gradually turn on or off over a 15-minute period to prevent light shock to fish.
- White Daylight Mode: Blends white, red, green, and blue LEDs for bright illumination.
- Moonlight Mode: Offers 6 single-colored options (red, purple, blue, cyan, green, yellow) with 10 dimmable levels.
- IP68 Water-Resistant Rating: Protects against splashes and accidental water exposure.
- Durable Construction: Premium fully encased 1.2mm thick aluminum shell for effective heat transfer and protection from humidity.
- Energy Efficient: Low voltage DC adapter for safe use and reduced electricity consumption.
- Adjustable Mounting Legs: Extendable metal legs fit aquariums with widths between 48 and 55 inches.
3. What's in the Box
- hygger 957 LED Aquarium Light Fixture
- External Controller with Dimmer
- Power Adapter
- Adjustable Mounting Legs
- User Manual
4. Setup
Before installation, ensure all components are present and undamaged. The light fixture is designed for placement on top of your aquarium using the adjustable mounting legs.
- Attach Mounting Legs: Securely attach the adjustable metal mounting legs to both ends of the light fixture.
- Position the Light: Place the light fixture on top of your aquarium. Adjust the extendable legs to fit the width of your tank (48-55 inches).
- Connect Power: Plug the light fixture into the external controller, then connect the power adapter to the controller and a power outlet.

Figure 1: Hygger 957 LED Aquarium Light installed on top of a planted aquarium.

Figure 2: Close-up of the integrated timer control panel with labels for buttons and display elements.
5. Operating Instructions
5.1 Setting Current Time
- Connect the light to the controller and plug it in. The display will show the current time (e.g., 12:02).
- To change the current time, long press the 'SET' button until the hour digit starts flashing.
- Use the 'Up' or 'Down' buttons to adjust the hour. Press 'SET' to confirm.
- The minute digit will then flash. Use the 'Up' or 'Down' buttons to adjust the minute. Press 'SET' to confirm and save.
5.2 Modes of Operation
The hygger 957 light offers two main modes: Default Auto Cycle (24/7) and DIY Cycle, along with manual control.
5.2.1 Default Auto Cycle (24/7 Mode)
This mode simulates a natural 24-hour light cycle with gradual sunrise, midday, sunset, and night. The default setting is auto light on at 6:30 AM and auto off at 11:30 PM.
- To activate, ensure the light is plugged in. It will typically start in auto cycle.
- To adjust the start/end times for the 24/7 cycle:
- Long press the '24/7' button until the start time (e.g., 08:00 AM) flashes.
- Use the '+' or '-' buttons to set the desired start time. Press '24/7' to save.
- The end time (e.g., 02:00 PM) will then flash. Use the '+' or '-' buttons to set the desired end time. Press '24/7' to save and exit.
- The light will now run according to your set 24/7 schedule.
Video 1: Instructions on how to set the 24/7 mode for the hygger aquarium light.
Video 2: Detailed guide on setting the 24/7 Cycle Mode for the hygger aquarium light.
5.2.2 DIY Cycle (Custom Light Cycle)
This advanced function allows you to customize your own light cycle with up to 8 separated light stages (L1-L8), setting specific begin/end times, light intensity, and color spectrum for each stage.
- Long press the 'SET' button until the display shows 'L1' and the hour digit flashes.
- Use 'Up'/'Down' to set the start hour for L1. Press 'SET' to confirm.
- Set the start minute for L1. Press 'SET' to confirm.
- Set the end hour for L1. Press 'SET' to confirm.
- Set the end minute for L1. Press 'SET' to confirm.
- Adjust the intensity for white, red, green, and blue LEDs using 'Up'/'Down' and 'ON/OFF' buttons. Press 'SET' after each color's intensity is set.
- Repeat steps for L2 through L8. To turn off a stage, set its intensity to 0%.
- After setting all desired stages, press 'SET' to save and exit.
Video 3: Comprehensive instruction video for the hygger HG129 Aquarium Light, including DIY mode setup.
5.2.3 Manual Mode
In Manual Mode, you can directly select desired colors and intensity. The light will not automatically turn on or off.
- Press the 'ON/OFF' button to cycle through different colors (white, red, green, blue, etc.).
- Use the 'Up' or 'Down' buttons to adjust the intensity of the selected color.
- Double-click the 'ON/OFF' button to activate the color-changing loop function, where the light slowly transitions between various colors.
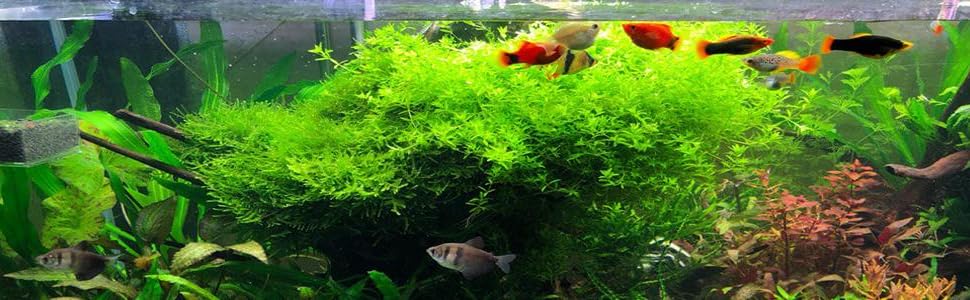
Figure 3: Standard Mode with full spectrum daylight and moonlight options.
Figure 4: Various color options for the aquarium light.
6. Maintenance
- Cleaning: Use a soft, dry towel to wipe the light fixture. Do not use abrasive cleaners or solvents.
- Water Resistance: The light has an IP68 rating, meaning it is protected against dust and can withstand immersion in water up to 1.5 meters for 30 minutes. However, it is recommended to keep the controller and power adapter dry.
- Heat Dissipation: The aluminum housing is designed for effective heat transfer. Ensure the heat sink fins are not obstructed to maintain optimal performance.
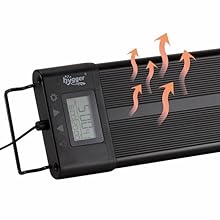
Figure 5: Heat dissipation from the aluminum light fixture.

Figure 6: Light fixture submerged in water, demonstrating its waterproof capability.
7. Troubleshooting
- Light does not turn on: Check if the power adapter is securely connected to the outlet and the controller. Ensure the light is properly connected to the controller.
- Timer settings are lost after power outage: The light has a memory function for programmed settings. However, if the current time is not displayed on the clock after a power interruption, re-enter the 24/7 mode and select the nearest local time. The light will then run according to the time you set.
- Light is not dimming or changing colors: Ensure you are in the correct operating mode (e.g., Manual Mode for direct control, or DIY Mode for custom settings). Refer to section 5.2 for mode-specific instructions.
- Algae growth: Excessive light intensity or duration can contribute to algae. Consider reducing the brightness or shortening the light cycle in DIY mode.
8. Specifications
| Specification | Detail |
|---|---|
| Model Number | 957 |
| Product Dimensions | 9.45"L x 3.54"W x 2.76"H |
| Item Weight | 4.39 pounds |
| Material | Aluminum |
| Light Source Type | LED |
| Number of Light Sources | 248 (140x 6500K White, 23x 450-455nm Blue, 12x 620-625nm Red, 11x 520-525nm Green, 62x RGB) |
| Brightness | 3346 Lumens |
| Color Temperature | 6500-10000K |
| Wattage | 72 Watt-hours (Light Source Wattage: 20 Watts) |
| Voltage | 20 Volts (DC) |
| Water-Resistant Rating | IP68 |
| Mounting Type | Adjustable/Extendable Metal Leg Mount |

Figure 7: Hygger 957 LED Aquarium Light size chart.
9. Warranty & Support
For any product inquiries, technical support, or warranty claims, please contact the seller directly. Protection plans may be available for extended coverage.


