1. Introduction
Thank you for choosing the tectake Gaming Chair Model 403209. This ergonomic office and computer chair is designed to provide comfort and support for both focused work and intense gaming sessions. Featuring a robust construction, thick padding, adjustable armrests, and a continuously adjustable gas lift, this chair ensures a comfortable seating experience. The five smooth-rolling double casters are floor-friendly and highly wear-resistant. This manual provides essential information for assembly, operation, maintenance, and troubleshooting to ensure optimal use and longevity of your chair.

Image 1.1: The tectake Gaming Chair Model 403209 in a typical usage environment.
2. Safety Instructions
- Read all instructions carefully before assembly and use.
- Keep all packaging materials away from children to prevent choking hazards.
- Ensure all screws and bolts are securely tightened before use. Periodically check and re-tighten as necessary.
- Do not stand on the chair. Use it only for seating.
- Do not use the chair if any parts are damaged or missing. Contact customer support for replacement parts.
- Avoid exposing the chair to direct sunlight or extreme temperatures to prevent material degradation.
- Maximum weight capacity: 120 kg (264 lbs). Do not exceed this limit.
- Use the chair on a level surface to prevent tipping.
3. Package Contents
Before assembly, please ensure all components are present and undamaged. If any parts are missing or damaged, do not proceed with assembly. Contact tectake customer service for assistance.
- Backrest
- Seat
- Armrests (2x)
- Star base
- Casters (5x)
- Gas lift cylinder
- Gas lift cover
- Mechanism plate
- Lumbar support cushion
- Neck cushion
- Hardware kit (screws, washers, Allen key)
- Assembly Instructions (this manual)

Image 3.1: Front view of the chair, illustrating the main components.
4. Assembly Instructions
Follow these steps carefully for proper assembly. It is recommended to assemble the chair on a soft, clean surface to prevent damage.
- Attach Casters to Star Base: Insert each of the five casters into the holes at the end of the star base until they click securely into place.
- Insert Gas Lift: Place the gas lift cylinder into the central hole of the star base. Cover the gas lift with the telescopic plastic cover.
- Attach Mechanism Plate to Seat: Align the mechanism plate with the pre-drilled holes on the underside of the seat. Ensure the front of the mechanism plate faces the front of the seat. Secure with screws provided in the hardware kit.
- Attach Armrests to Seat: Secure the armrests to the sides of the seat using the provided screws. Do not overtighten initially, allow for minor adjustments.
- Attach Backrest to Seat: Align the backrest with the mounting brackets on the seat. Secure with screws. Once all screws are in place, tighten all armrest and backrest screws firmly.
- Connect Seat Assembly to Gas Lift: Carefully place the assembled seat and backrest onto the gas lift cylinder, ensuring the central hole of the mechanism plate aligns with the top of the gas lift. Press down firmly to secure.
- Attach Cushions: Place the lumbar support cushion and neck cushion onto the chair. The lumbar cushion typically attaches with straps around the backrest, and the neck cushion can be positioned as desired.
5. Operating Instructions
Your tectake Gaming Chair offers several adjustment options for personalized comfort.
5.1. Height Adjustment
To adjust the chair height, locate the lever on the right side, beneath the seat (Image 5.1). While seated, pull the lever up to lower the chair. To raise the chair, stand up and pull the lever up. Release the lever to lock the height.

Image 5.1: Control levers for chair adjustments.
5.2. Backrest Recline
To recline the backrest, pull the lever on the left side of the chair (Image 5.1). Lean back to the desired angle (88-125 degrees) and release the lever to lock the position. To return the backrest to an upright position, pull the lever and lean forward slightly.

Image 5.2: Illustration of the backrest recline mechanism.
5.3. Armrest Adjustment
The armrests are height-adjustable. Locate the button or lever on the side of each armrest (Image 5.3). Press or lift it and move the armrest up or down to your preferred height. Release the button/lever to lock the armrest in place.

Image 5.3: Armrest height adjustment feature.
5.4. Lumbar and Neck Cushion Adjustment
The lumbar and neck cushions are removable and adjustable. The lumbar cushion can be moved up or down along the backrest to provide support where you need it most (Image 5.4). The neck cushion can be positioned for optimal head and neck support.

Image 5.4: Lumbar cushion adjustment for personalized support.
5.5. Swivel and Casters
The chair features a 360-degree swivel function for easy movement. The five double casters (Image 5.5) are designed for smooth gliding on various floor types, providing mobility within your workspace.
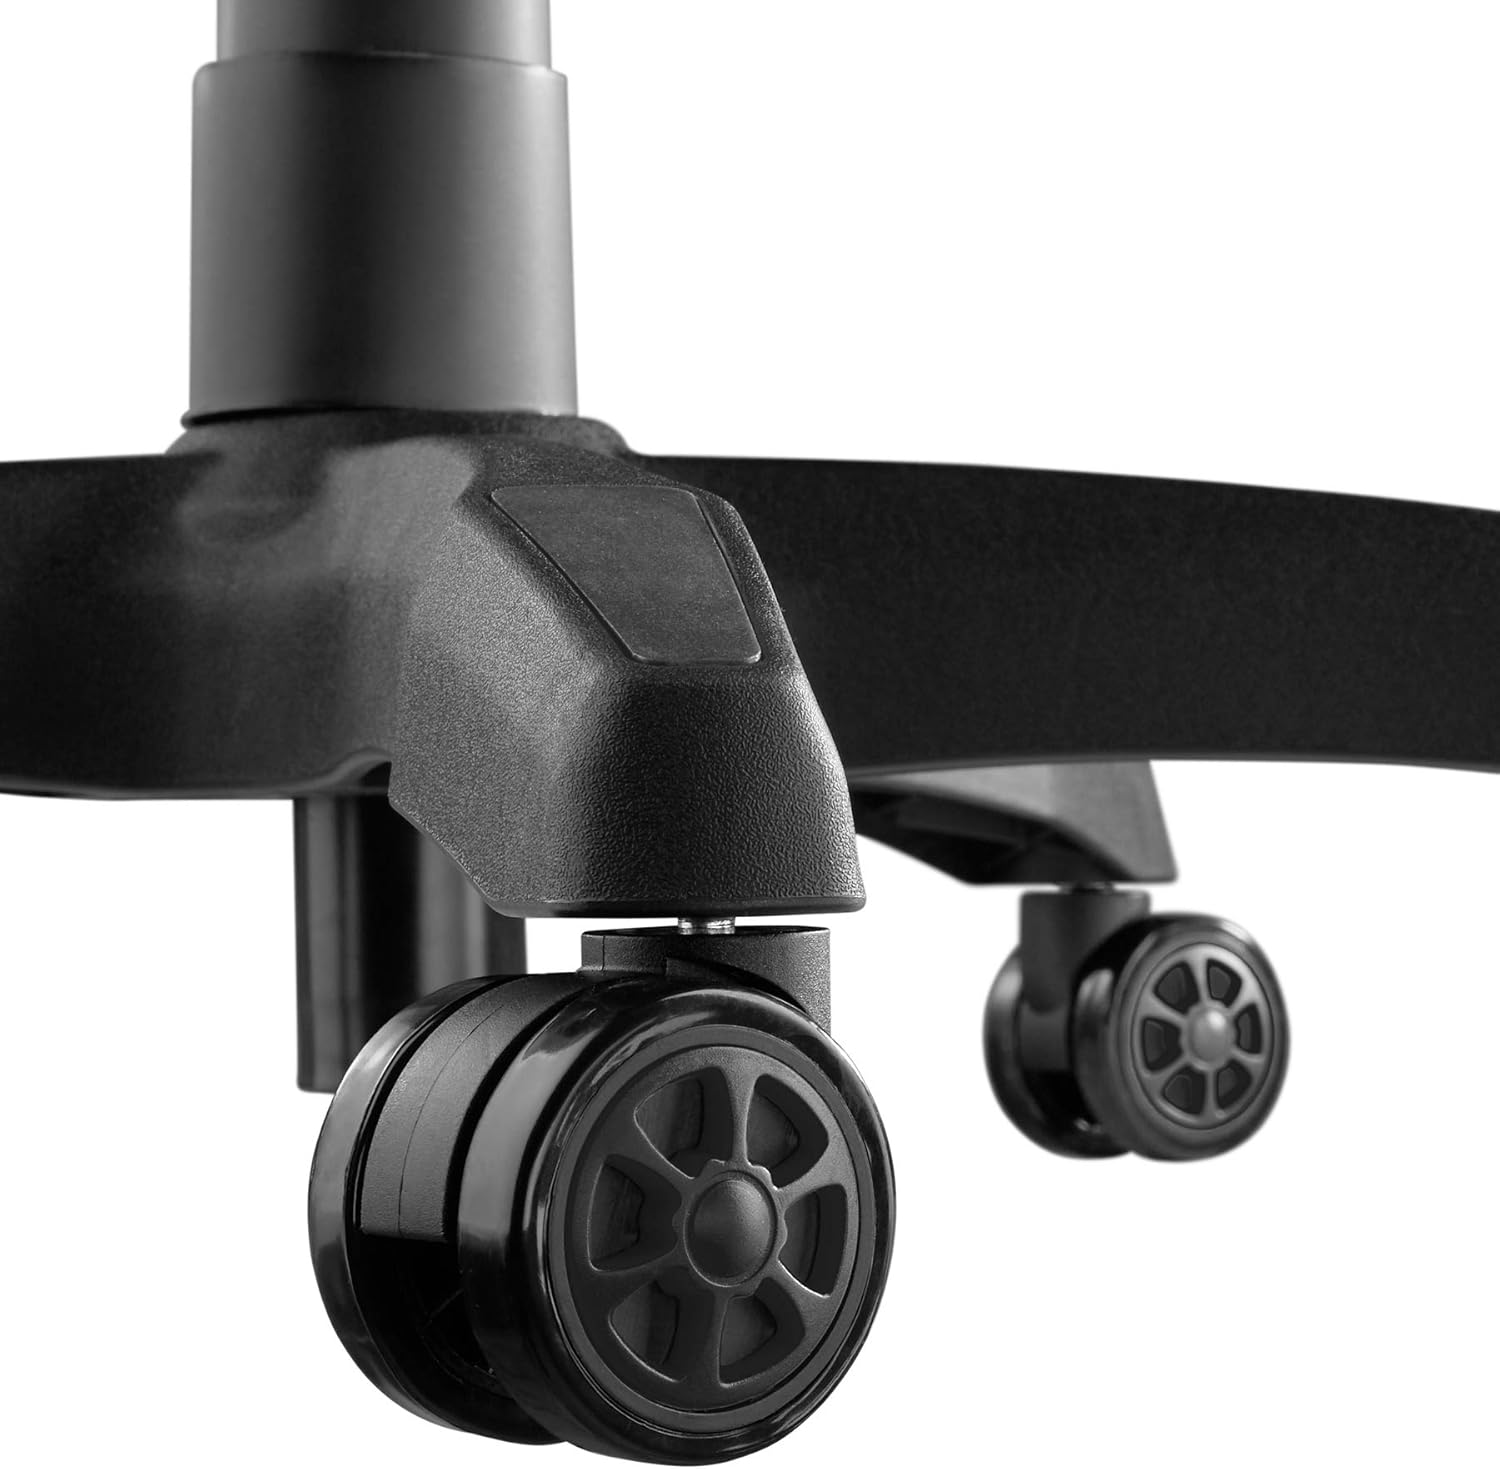
Image 5.5: Durable double casters for smooth mobility.
6. Maintenance
6.1. Cleaning
- Wipe the chair's surface with a soft, damp cloth.
- For stubborn stains, use a mild soap solution and wipe immediately with a clean, damp cloth, then dry thoroughly.
- Avoid using abrasive cleaners, solvents, or harsh chemicals, as these can damage the PU/PVC material.
- Regularly vacuum or wipe the casters to remove dust and debris that could hinder smooth movement.
6.2. General Care
- Periodically check all screws and bolts to ensure they are tight. Re-tighten if necessary to maintain stability and safety.
- Avoid placing heavy objects on the armrests or backrest when not seated.
- Keep the chair away from sharp objects that could puncture or tear the upholstery.
7. Troubleshooting
| Problem | Possible Cause | Solution |
|---|---|---|
| Chair wobbles or feels unstable. | Loose screws or uneven floor. | Check and tighten all assembly screws. Ensure the chair is on a flat, level surface. |
| Chair does not adjust height. | Gas lift lever not engaged or gas lift cylinder faulty. | Ensure the height adjustment lever is fully pulled. If the issue persists, the gas lift may need replacement. Contact support. |
| Casters do not roll smoothly. | Debris caught in casters or damaged casters. | Clean casters to remove hair, dust, or other debris. If damaged, replace casters. |
| Backrest does not recline or lock. | Recline lever not engaged or mechanism faulty. | Ensure the recline lever is fully pulled/released. Check for any obstructions in the mechanism. |
| Squeaking noises. | Loose connections or friction between parts. | Tighten all screws. Apply a small amount of silicone lubricant to moving parts if necessary, avoiding upholstery. |
8. Specifications

Image 8.1: Key dimensions of the tectake Gaming Chair.
| Feature | Detail |
|---|---|
| Model Number | 403209 |
| Overall Dimensions (W x D x H) | Approx. 68 x 69 x 117.5 - 125 cm (26.8 x 27.2 x 46.3 - 49.2 inches) |
| Seat Height | Approx. 42.5 - 50 cm (16.7 - 19.7 inches) |
| Seat Dimensions (W x D) | Approx. 51 x 50 cm (20.1 x 19.7 inches) |
| Seat Thickness | Approx. 8 cm (3.1 inches) |
| Lumbar Cushion Dimensions (W x D x H) | Approx. 29 x 7.5 x 19 cm (11.4 x 3.0 x 7.5 inches) |
| Neck Cushion Dimensions (W x D x H) | Approx. 26 x 10 x 17.5 cm (10.2 x 3.9 x 6.9 inches) |
| Backrest Height | Approx. 81 cm (31.9 inches) |
| Backrest Recline Angle | 88 - 125 degrees |
| Armrest Dimensions (W x D) | Approx. 7.5 x 28 cm (3.0 x 11.0 inches) |
| Armrest Height from Floor | Approx. 57 - 71.5 cm (22.4 - 28.1 inches) |
| Armrest Height Adjustment Range | Approx. 7 cm (2.8 inches) |
| Star Base Diameter | Approx. 70 cm (27.6 inches) |
| Caster Diameter/Width | Approx. 6 cm / 5.6 cm (2.4 inches / 2.2 inches) |
| Maximum Load Capacity | 120 kg (264 lbs) |
| Weight | Approx. 19 kg (41.9 lbs) |
| Material | Polyurethane (PU), Polyvinyl Chloride (PVC), Plastic |
| Color | Black |
9. Warranty and Support
For warranty information, replacement parts, or technical support, please refer to the purchase documentation or contact tectake customer service directly. Keep your proof of purchase for any warranty claims.
Contact information for tectake can typically be found on their official website or through the retailer where the product was purchased.


