
1. Introduction
This manual provides essential instructions for the assembly, operation, and maintenance of your tectake 401702 CD Cabinet. Please read this manual thoroughly before assembly and use to ensure safe and correct handling of the product. Keep this manual for future reference.
2. Safety Warnings
WARNING: Please do not exceed the weight limit and ensure correct installation to prevent accidents.
- Always follow the assembly instructions carefully.
- Ensure all fasteners are securely tightened before use.
- Do not overload the shelves. The maximum weight capacity per shelf is approximately 3 kg (6.6 lbs). The total maximum weight capacity is approximately 81 kg (178.6 lbs).
- Place the cabinet on a flat, stable surface to prevent tipping.
- Keep small parts away from children during assembly.
- This product is designed for indoor use only.
3. Package Contents
Before beginning assembly, verify that all parts listed below are present and undamaged.
- 1 x CD Cabinet (unassembled)
- Assembly hardware (screws, dowels, etc.)
- Assembly instructions
Note: Decorative materials shown in product images are not included.
4. Setup & Assembly
The tectake 401702 CD Cabinet is designed for quick and easy assembly. Follow these steps for proper installation.
4.1 Tools Required
- Screwdriver (Phillips head recommended)
- Hammer (optional, for dowels)
4.2 Assembly Steps
- Unpack Components: Carefully remove all parts from the packaging and lay them out on a clean, soft surface to prevent scratches.
- Identify Parts: Refer to the included assembly diagram to identify each panel and hardware piece.
- Assemble Base: Attach the side panels to the base plate using the provided screws and dowels. Ensure a stable connection.
- Install Shelves: Insert the intermediate shelves into the designated slots or attach them with hardware as per the diagram. The cabinet features 27 compartments.
- Attach Back Panel: Secure the back panel to the assembled frame. This adds stability to the structure.
- Attach Top Panel: Secure the top panel to complete the main structure.
- Wall Mounting (Optional but Recommended): For added stability and safety, especially in households with children or pets, it is highly recommended to secure the cabinet to a wall using appropriate wall anchors (not always included, check package contents).
- Final Check: Ensure all screws are tightened and the cabinet is stable.
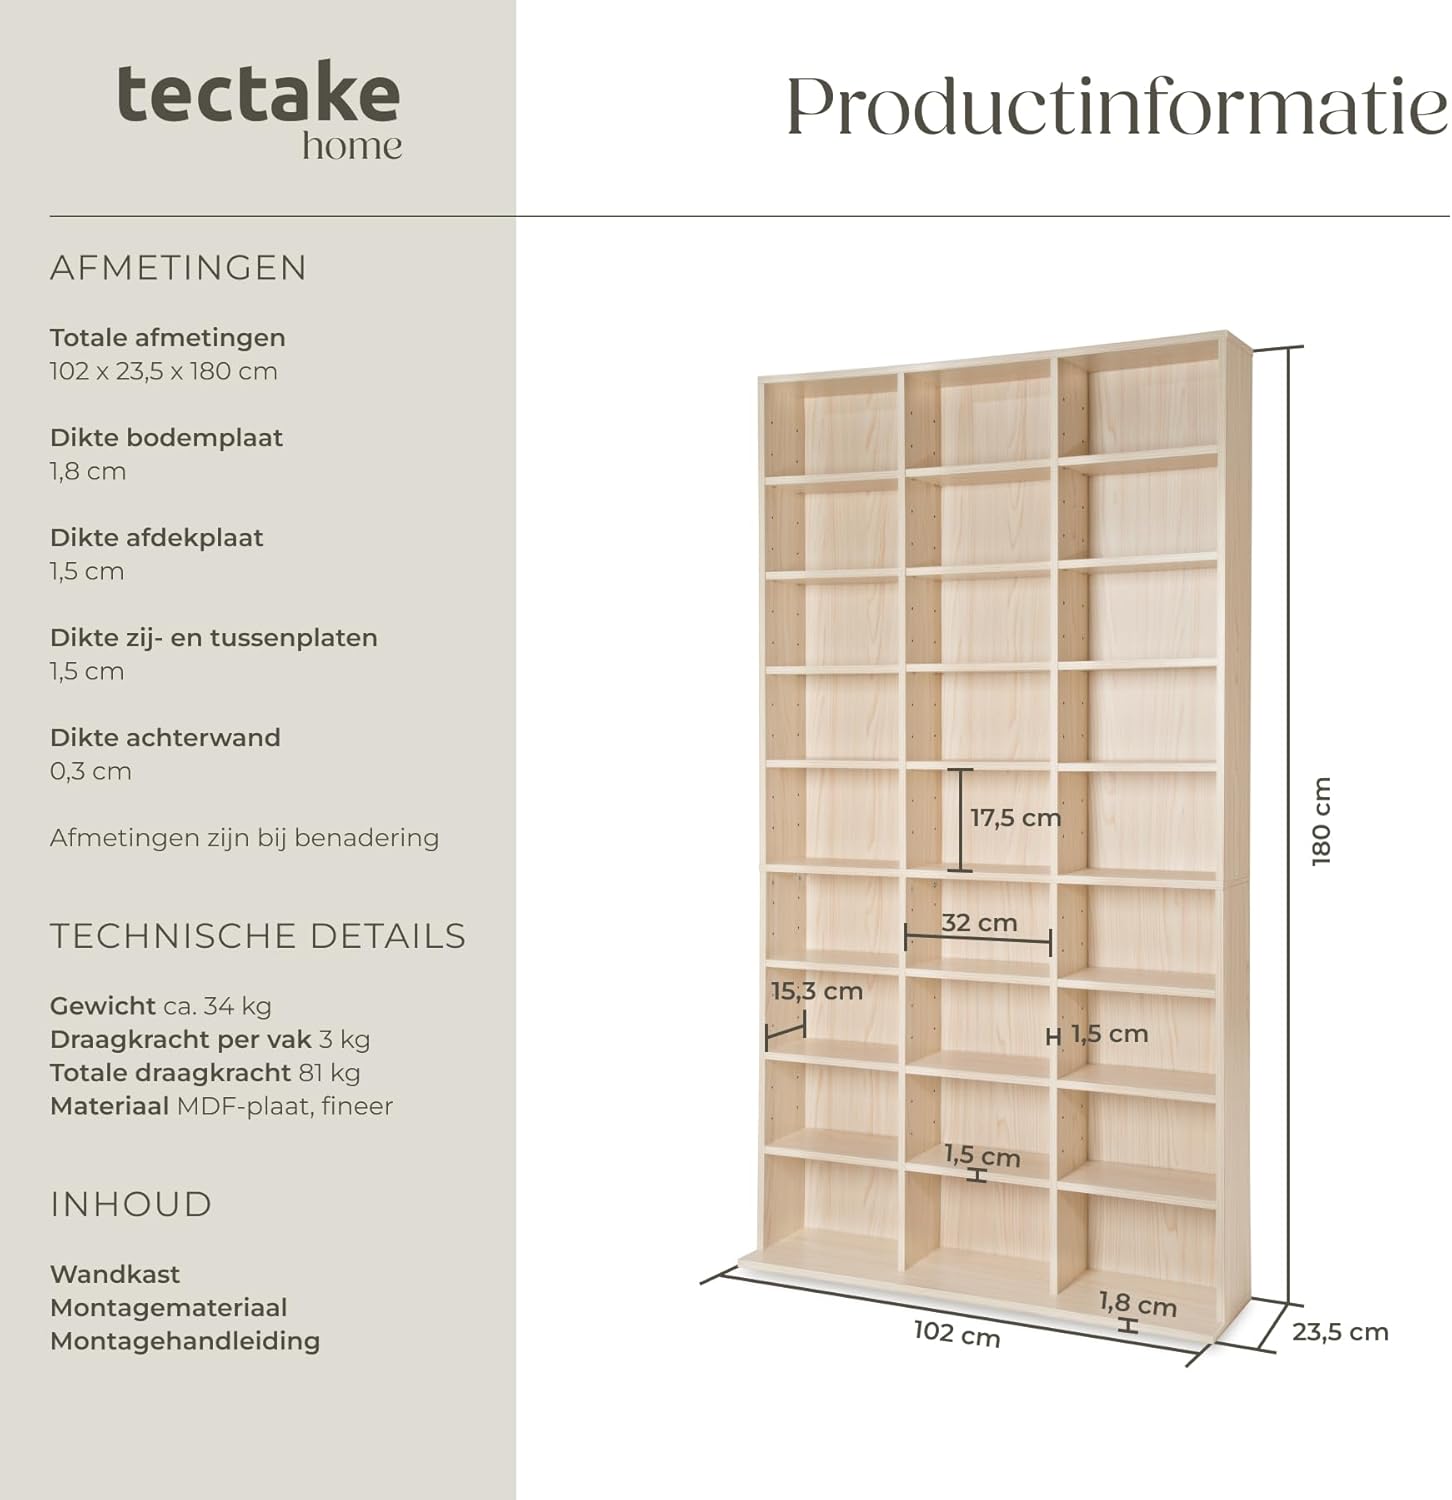
Image 1: Product information diagram showing dimensions and technical details. This image illustrates the overall dimensions (180 cm H x 102 cm W x 23.5 cm D) and material thicknesses, including the base plate (1.8 cm), top plate (1.5 cm), side and intermediate plates (1.5 cm), and back wall (0.3 cm). It also highlights the internal compartment dimensions.

Image 2: An assembled tectake CD cabinet in a living room, demonstrating its capacity for CDs and other media. The cabinet is shown against a light wall, next to a brown sofa and a plant, illustrating its integration into a home environment.
5. Operating Instructions
This section details how to effectively use your tectake 401702 CD Cabinet for storage.
5.1 Storing CDs and Media
- The cabinet features 27 compartments designed to hold CDs, DVDs, Blu-rays, or small books. It can store up to 1080 CDs.
- Organize your media by genre, artist, or any preferred method for easy access.
- Distribute the weight evenly across the shelves to maintain stability. Avoid concentrating heavy items on a single shelf or side.

Image 3: A close-up view of one of the shelves within the tectake CD cabinet, showcasing its capacity to hold multiple CDs. The image highlights the neat organization possible within the compartments.
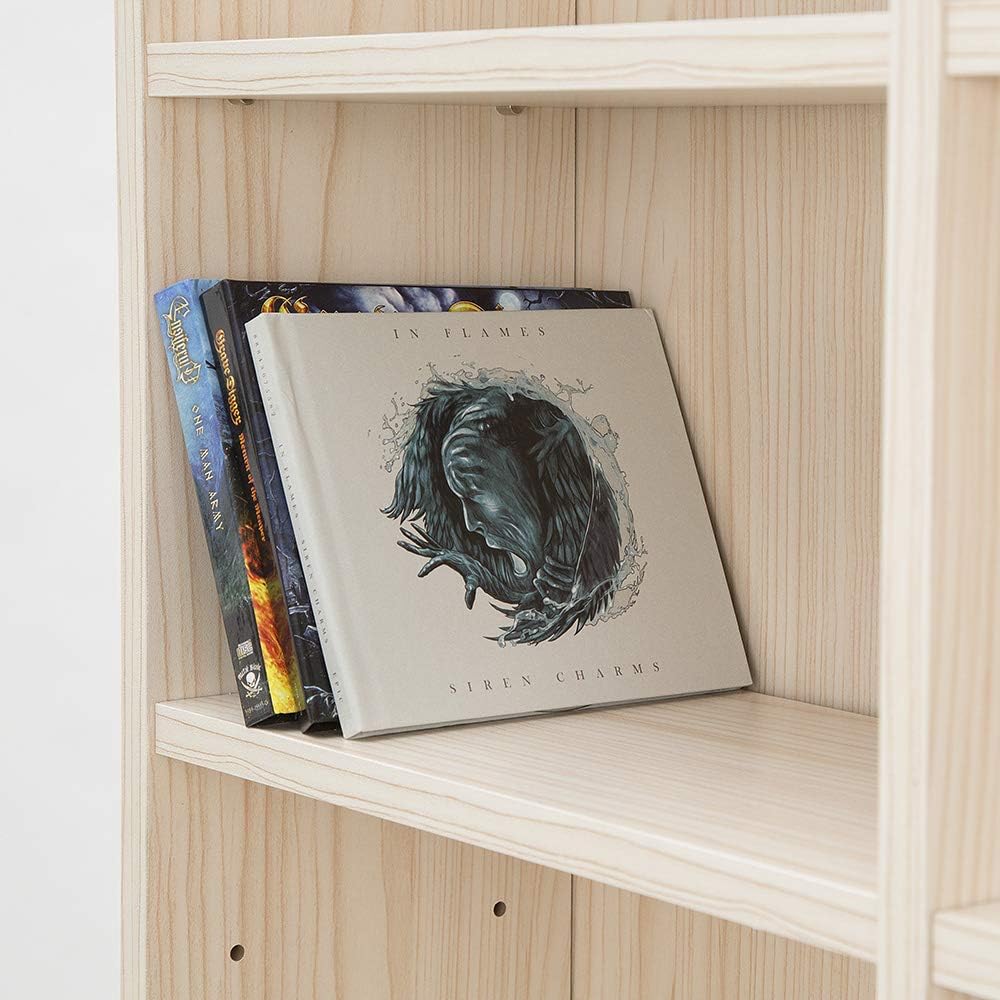
Image 4: A detailed view of a shelf in the tectake CD cabinet, displaying a combination of CDs and a book. This illustrates the versatility of the compartments for various media types.
6. Maintenance
Proper maintenance will extend the life and appearance of your CD cabinet.
- Cleaning: Wipe the surfaces with a soft, damp cloth. Avoid abrasive cleaners or harsh chemicals, as they may damage the MDF/veneer finish.
- Inspection: Periodically check all screws and fasteners to ensure they remain tight. Re-tighten if necessary.
- Placement: Avoid placing the cabinet in direct sunlight or near heat sources, which can cause material degradation or discoloration.
7. Troubleshooting
This section addresses common issues you might encounter.
- Issue: Cabinet feels wobbly after assembly.
- Solution: Ensure all screws are fully tightened. Verify that the cabinet is placed on a level surface. If necessary, use shims under the base to stabilize it. Consider wall mounting for enhanced stability.
- Issue: Difficulty fitting the top section onto the bottom section during assembly.
- Solution: As noted by some users, aligning the upper and lower parts can be challenging. It may be easier to assemble the unit vertically rather than horizontally, or to have a second person assist in aligning the parts. Ensure all connecting dowels and holes are perfectly aligned before applying pressure.
- Issue: Missing parts or damaged components.
- Solution: Contact tectake customer support with your purchase details and a description of the missing or damaged parts. Refer to the "Support & Warranty" section for contact information.
8. Specifications
| Feature | Detail |
|---|---|
| Brand | tectake |
| Model Number | 401702 |
| Overall Dimensions (H x W x D) | Approx. 180 x 102 x 23.5 cm (70.9 x 40.2 x 9.3 inches) |
| Weight | Approx. 34 kg (75 lbs) |
| Maximum Weight Capacity (Total) | Approx. 81 kg (178.6 lbs) |
| Maximum Weight Capacity (Per Shelf) | Approx. 3 kg (6.6 lbs) |
| Number of Compartments | 27 |
| Material | Engineered wood (MDF) / Veneer |
| Base Plate Thickness | Approx. 1.8 cm |
| Top Plate Thickness | Approx. 1.5 cm |
| Side & Intermediate Plate Thickness | Approx. 1.5 cm |
| Back Wall Thickness | Approx. 0.3 cm |
| Special Features | Detachable, Highly resistant |
| Type of Fixing | Wall mounting (recommended) |
9. Support & Warranty
For technical assistance, missing parts, or warranty inquiries, please contact tectake customer service.
- Manufacturer: tectake
- Seller: tectake nederland (as per product information)
- Warranty Information: Specific warranty details may vary by region and retailer. Please refer to your purchase documentation or contact the seller directly for warranty terms.
- Spare Parts: Information regarding spare parts availability is currently unavailable. Please contact customer support for assistance.
You can often find contact information on the official tectake website or through the retailer where you purchased the product.