
Creality Ender-3 V3 KE
Creality Ender-3 V3 KE 3D Printer User Manual
Model: Ender-3 V3 KE
1. Introduction
The Creality Ender-3 V3 KE is a high-speed FDM 3D printer designed for efficient and precise additive manufacturing. Featuring auto-leveling, a linear rail on the X-axis, and double fan cooling, it offers enhanced stability and print quality. This manual provides comprehensive instructions for setting up, operating, maintaining, and troubleshooting your Ender-3 V3 KE 3D printer.

Figure 1.1: The Creality Ender-3 V3 KE 3D Printer, showcasing its design and a sample print.
2. Safety Information
Always adhere to the following safety guidelines to prevent injury or damage to the printer:
- Do not touch the nozzle or heated bed during operation as they reach high temperatures.
- Ensure the printer is placed on a stable, level surface to prevent movement during printing.
- Keep the printer away from flammable materials and out of reach of children and pets.
- Use the correct power supply and ensure proper grounding.
- Do not attempt to modify the printer's electrical components.
- Always disconnect power before performing maintenance or cleaning.
- Operate the printer in a well-ventilated area.
For detailed safety information, refer to the Safety Information PDF provided by Creality.
3. Setup and Assembly
The Ender-3 V3 KE is designed for quick assembly. Follow these steps for initial setup:
- Unboxing: Carefully remove all components from the packaging. Verify all parts are present against the packing list.
- Base Assembly: Attach the gantry to the base unit using the provided screws.
- Cable Connections: Connect all motor, endstop, and hotend cables according to the labels. Ensure secure connections.
- Filament Holder Installation: Mount the filament holder on top of the gantry.
- Power Connection: Connect the power cable and switch on the printer.
- Auto-Leveling: The printer features automatic bed leveling. Follow the on-screen prompts to initiate the self-test and auto-leveling process. This ensures optimal first layer adhesion.
Video 3.1: A comprehensive guide on how to unbox and set up the Creality Ender-3 V3 KE 3D Printer.
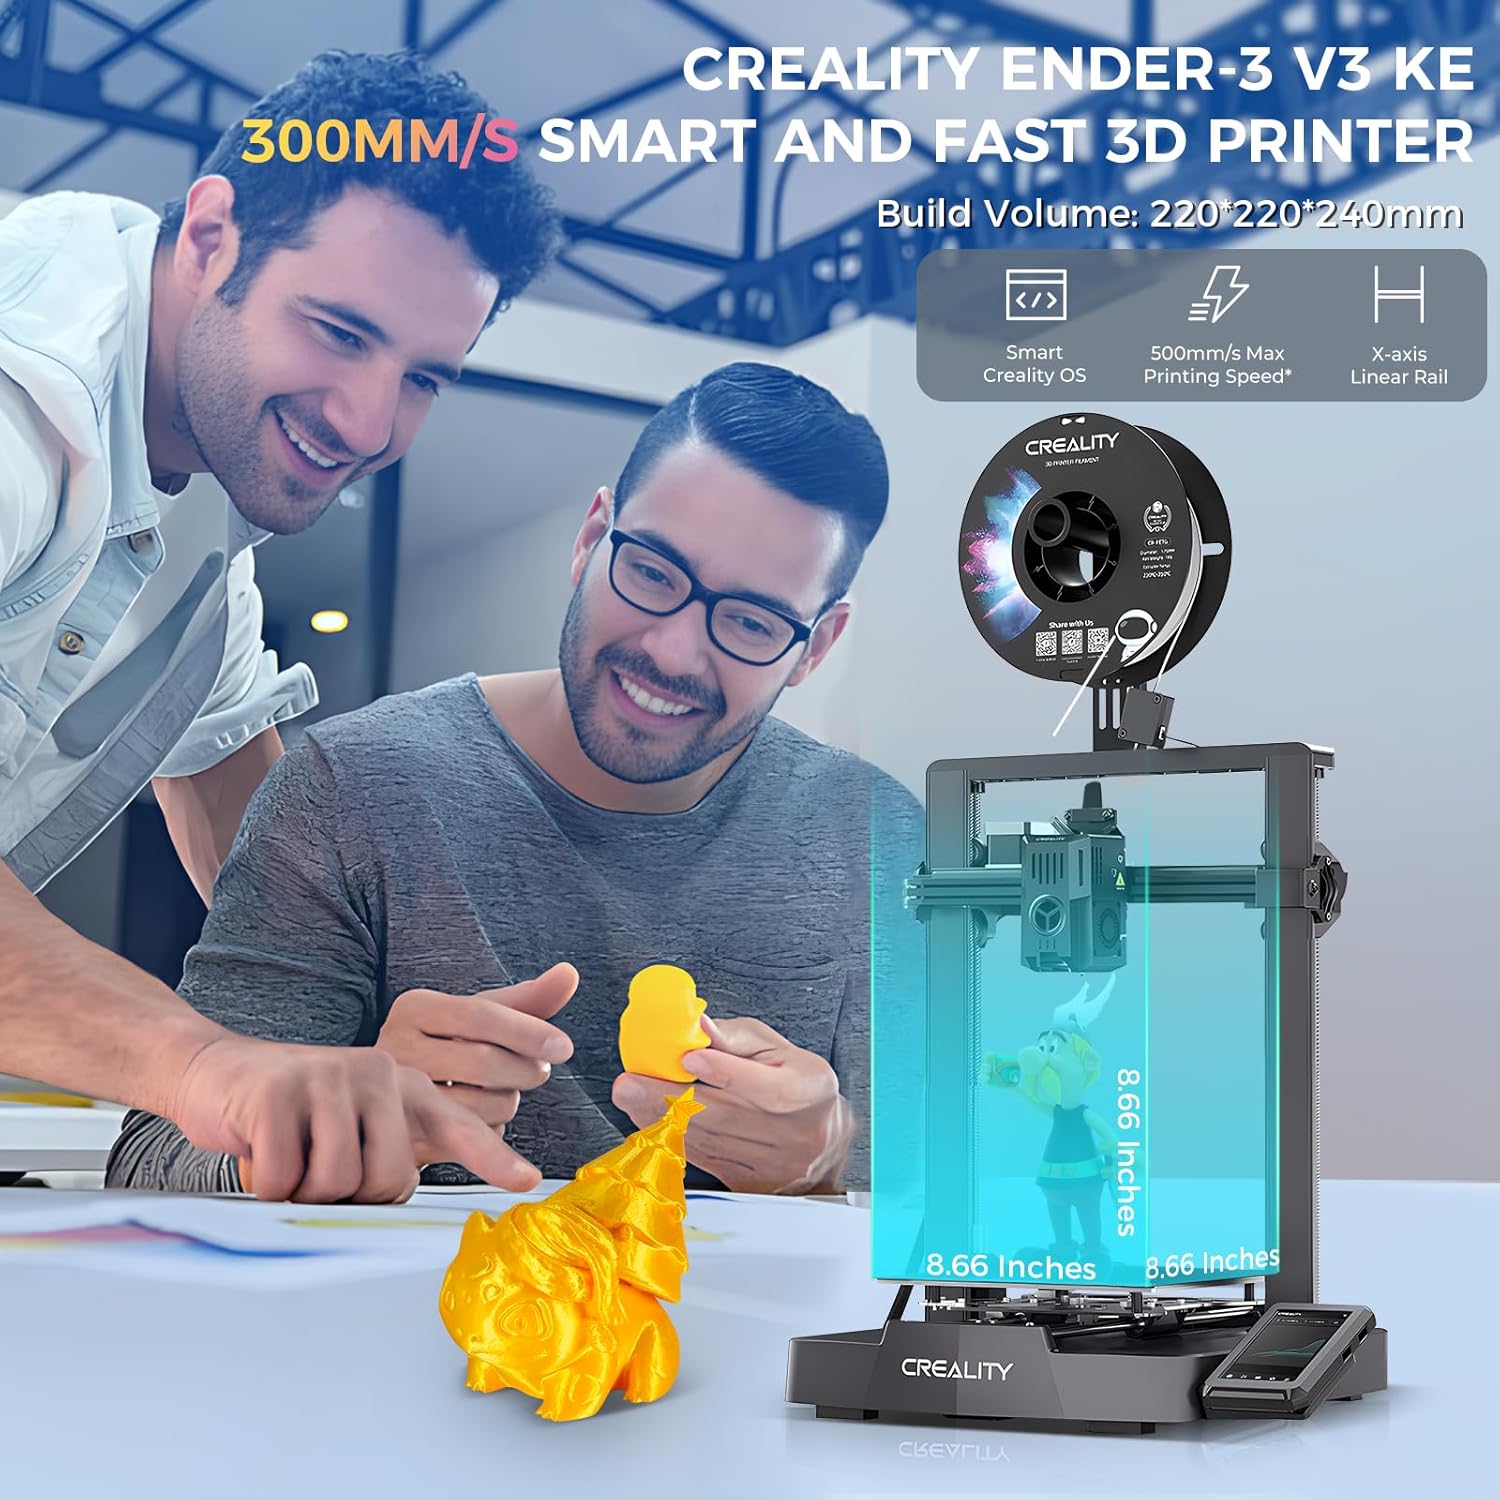
Figure 3.1: The Ender-3 V3 KE offers a build volume of 220x220x240mm, suitable for various print sizes.
4. Operation
4.1 Loading Filament
To load filament:
- Hang the filament spool on the holder.
- Feed the filament through the filament sensor and into the extruder.
- Preheat the nozzle to the appropriate temperature for your filament type (e.g., 200°C for PLA).
- Once heated, push the filament through the extruder until it emerges from the nozzle.

Figure 4.1: The Ender-3 V3 KE supports a wide range of filaments including Hyper PLA, PETG, ABS, TPU(95A), and ASA.
4.2 Printing Methods
The Ender-3 V3 KE offers multiple ways to initiate prints:
- USB Drive: Transfer G-code files to a USB drive and insert it into the printer's port. Select the file from the touchscreen interface.
- LAN Printing (with WiFi): Connect your printer to your local network. Use Creality Print software on your PC to send print jobs directly over LAN.
- Cloud Printing (with WiFi): Utilize the Creality Cloud APP on your smartphone to send print jobs remotely via the cloud.
Video 4.1: A comparison of print quality between Ender-3 and Ender-3 V3 KE, highlighting the improved results.
Video 4.2: Demonstrating LAN and Cloud printing capabilities for the Ender-3 V3 KE.
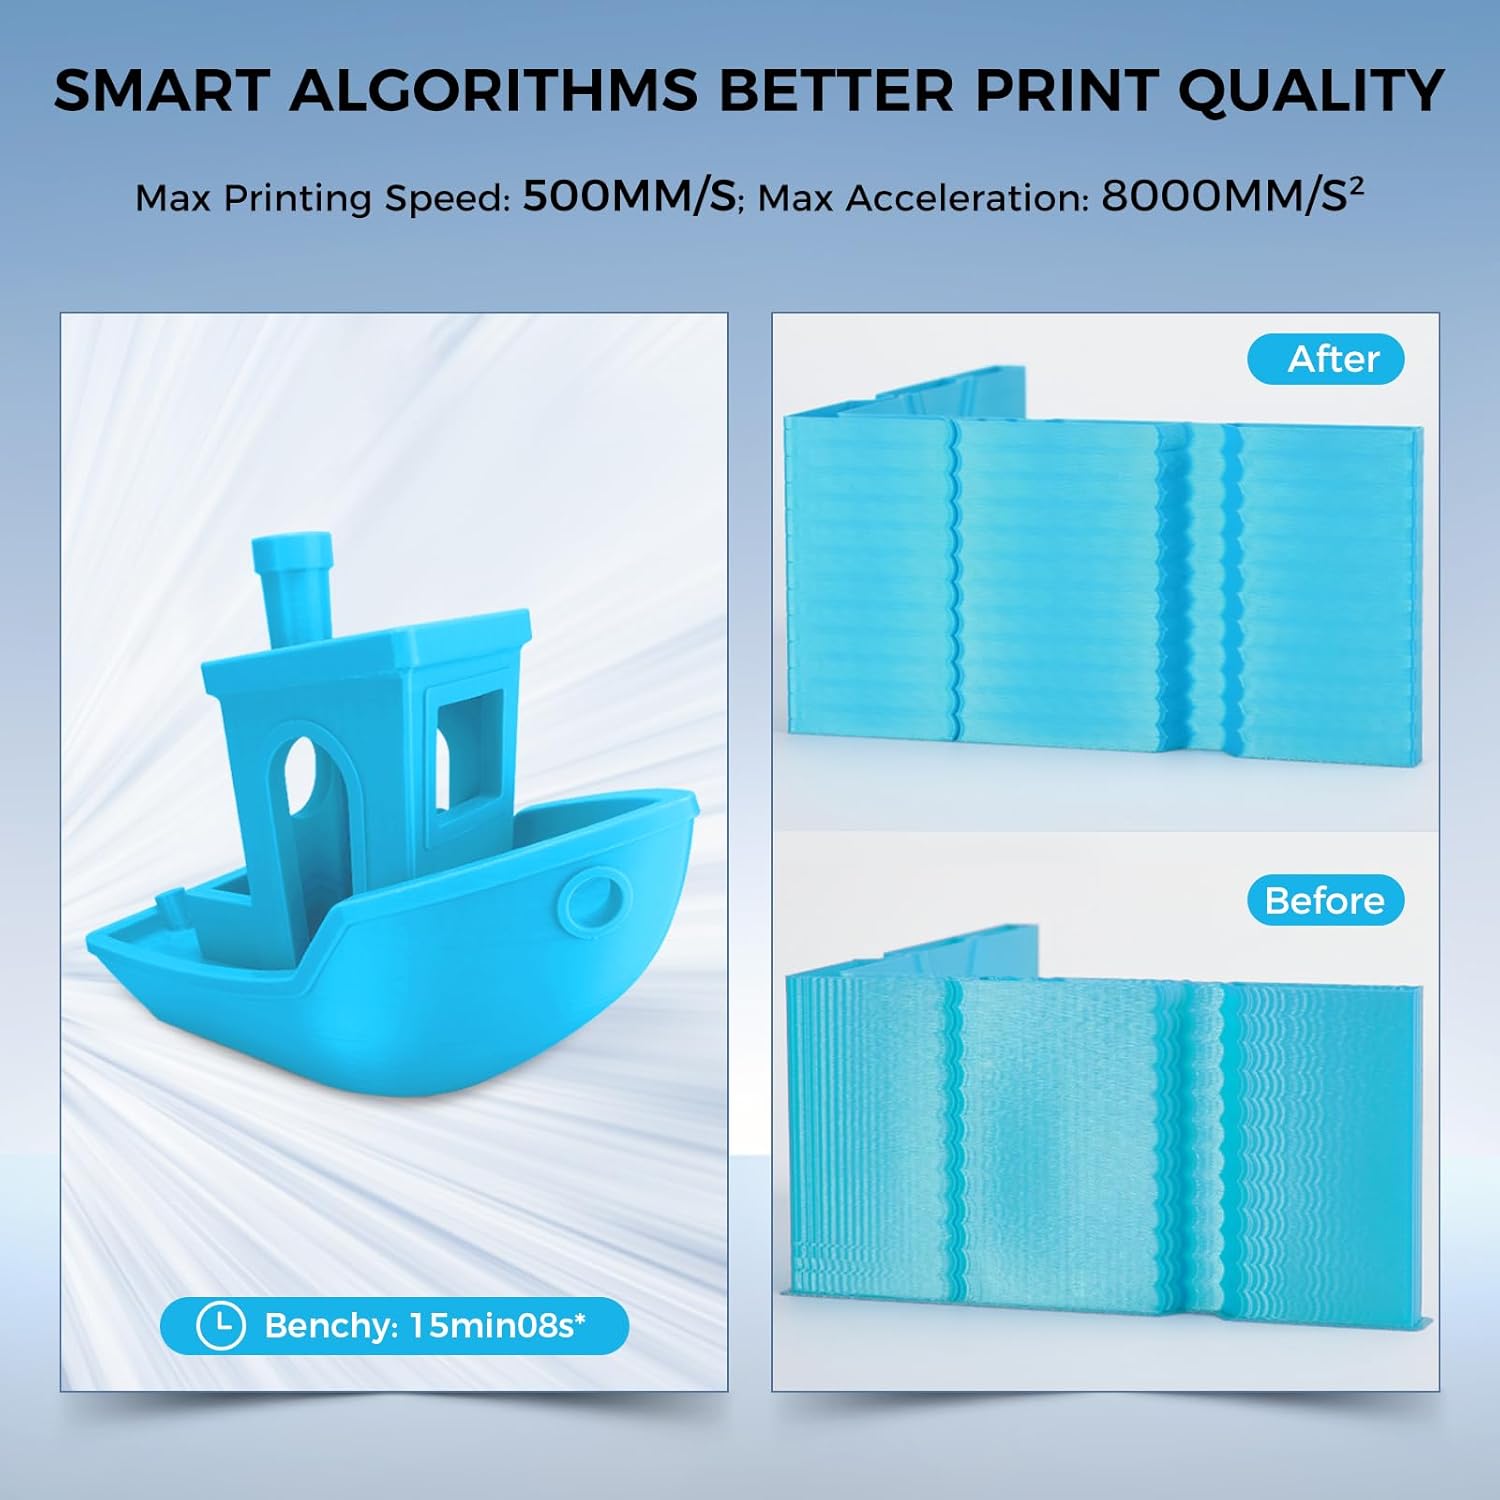
Figure 4.3: Smart algorithms contribute to better print quality and faster printing speeds, with a Benchy boat printed in approximately 15 minutes.
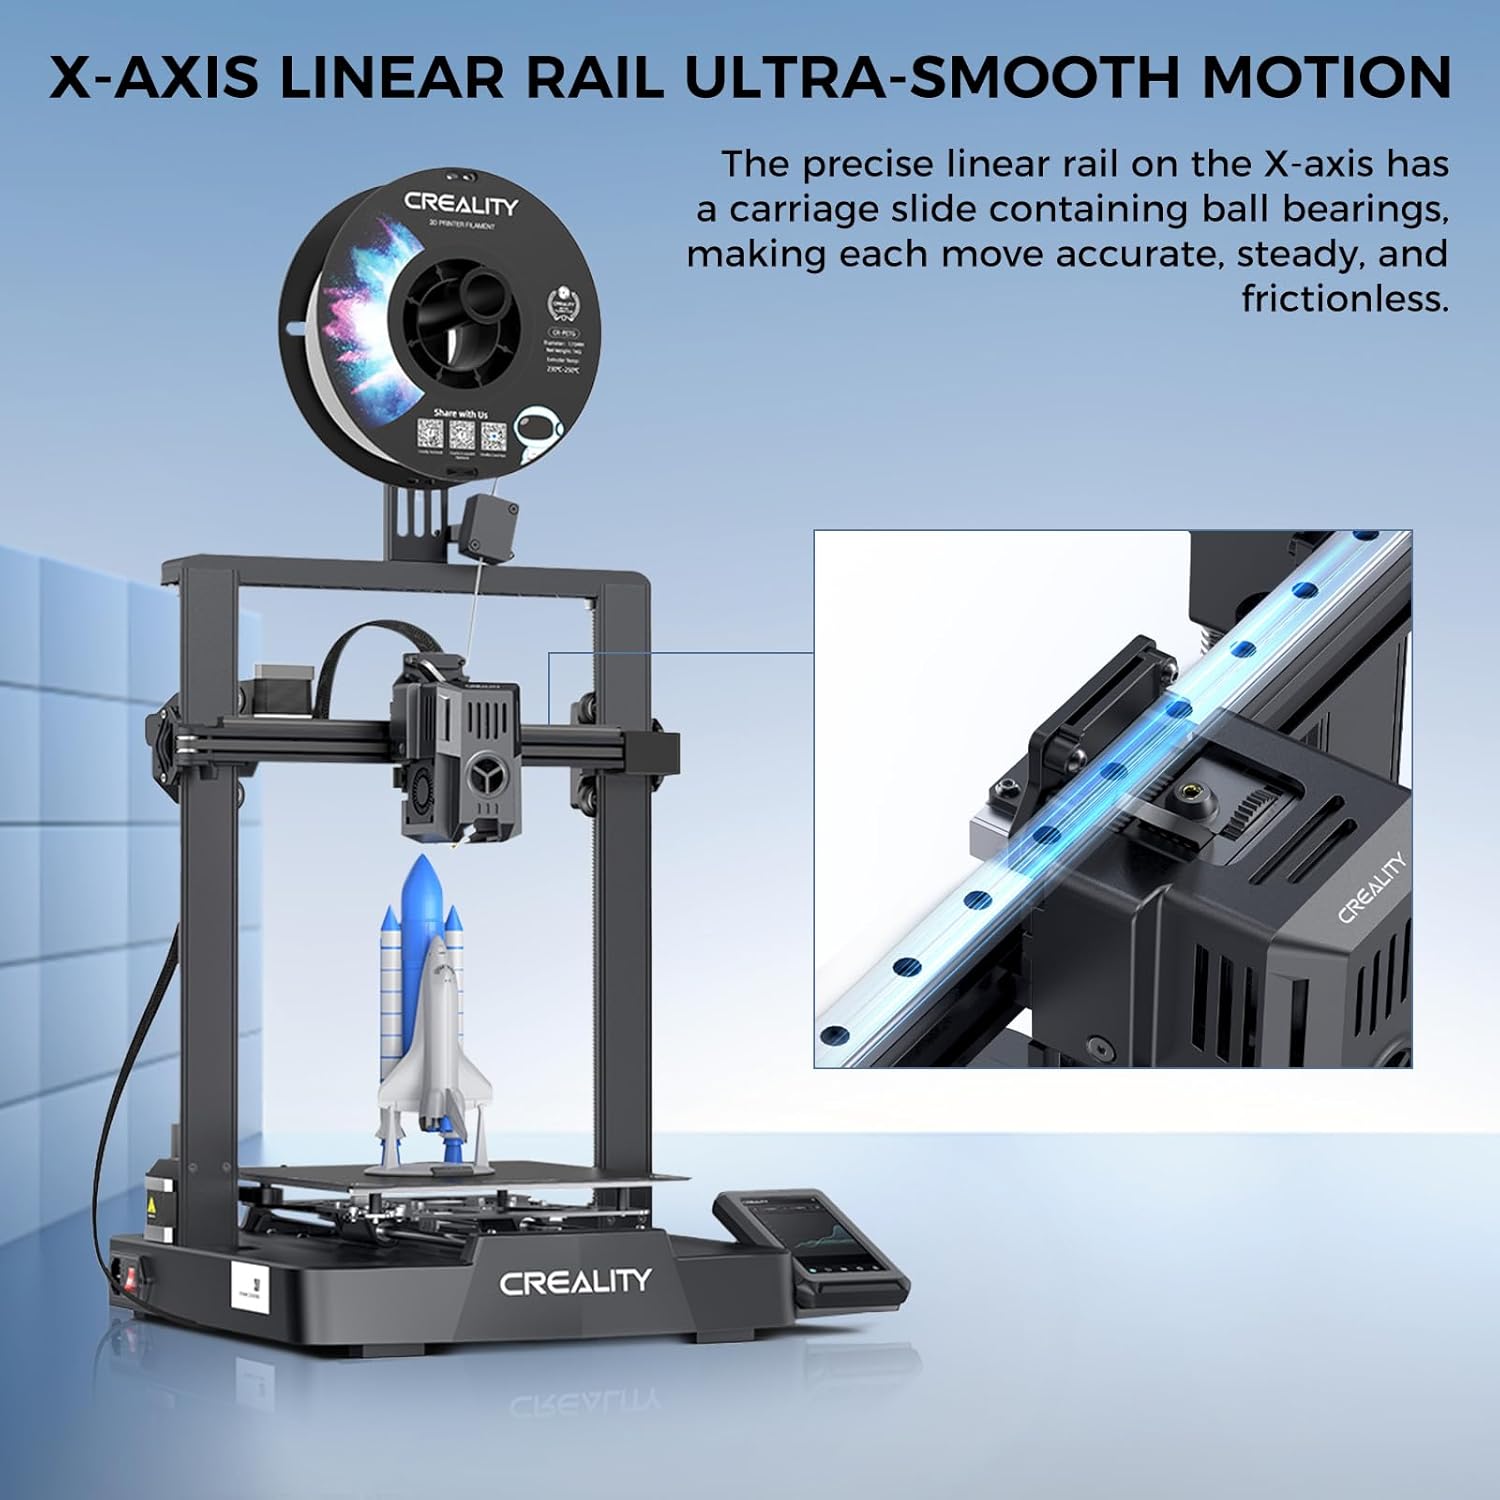
Figure 4.4: The precise linear rail on the X-axis ensures ultra-smooth and accurate motion during printing.
5. Maintenance
Regular maintenance ensures optimal performance and longevity of your 3D printer:
- Clean the Print Bed: After each print, allow the print bed to cool and carefully remove the printed object. Clean the surface with isopropyl alcohol to ensure good adhesion for future prints.
- Nozzle Cleaning: Periodically check the nozzle for clogs or debris. Use the provided needle or a brass brush to clean it.
- Lubricate Moving Parts: Apply a small amount of lithium grease to the linear rails and lead screws every few months to ensure smooth movement.
- Check Belt Tension: Ensure the X and Y-axis belts are properly tensioned. They should be taut but not overly tight.
- Firmware Updates: Check the official Creality website for the latest firmware updates to ensure your printer has the most current features and bug fixes.
6. Troubleshooting
Here are solutions to common issues you might encounter:
| Problem | Possible Cause | Solution |
|---|---|---|
| Print Not Sticking to Bed | Bed not level, dirty print surface, incorrect bed temperature, nozzle too far from bed. | Perform auto-leveling, clean the print surface with isopropyl alcohol, adjust bed temperature (e.g., 60°C for PLA), adjust Z-offset. |
| Filament Clogging | Dust in nozzle, heat creep, incorrect retraction settings, old/wet filament. | Clean nozzle with needle, ensure proper cooling, optimize retraction settings in slicer, dry filament or use fresh spool. |
| Poor Print Quality (Layer Shifts, Stringing) | Loose belts, unstable printer, incorrect print speed/temperature, excessive retraction. | Check and tighten belts, ensure printer is on a sturdy surface, adjust print settings in slicer, reduce retraction distance for direct drive. |
| Wi-Fi Connectivity Issues | Network interference, incorrect settings, router issues. | Ensure printer is within Wi-Fi range, restart printer and router, verify Wi-Fi settings on printer, try connecting via LAN or USB if persistent. |
7. Product Specifications
| Feature | Detail |
|---|---|
| Printing Technology | FDM (Fused Deposition Modeling) |
| Build Volume | 220 x 220 x 240 mm (8.66 x 8.66 x 9.44 inches) |
| Max Printing Speed | 500 mm/s (with Hyper PLA) |
| Max Acceleration | 8000 mm/s² |
| Nozzle Temperature | ≤ 300°C |
| Heated Bed Temperature | ≤ 100°C |
| Extruder | Upgraded "Sprite" direct drive extrusion |
| Leveling Mode | Hands-free auto leveling |
| Build Surface | PEI flexible build plate |
| Supported Filaments | PLA, PETG, ABS, TPU(95A), ASA |
| Filament Diameter | 1.75 mm |
| Nozzle Diameter | 0.4 mm (default) |
| Display Screen | 4.3" color touch screen |
| Connectivity | USB drive, LAN, Creality Cloud APP (WiFi) |
| Rated Power | 350W |
| On-mode Power Consumption | 60.0 watts |
| Product Dimensions | 433 x 366 x 490 mm (17.05 x 14.41 x 19.29 inches) |
| Item Weight | 8 kg (17.6 pounds) |
8. Warranty and Support
Creality provides warranty service for the Ender-3 V3 KE 3D printer in accordance with local laws and regulations. Please retain your proof of purchase for warranty claims.
8.1 Technical Support
For technical assistance, troubleshooting beyond this manual, or warranty inquiries, please contact Creality customer support through their official website or the contact information provided with your product packaging.
You can also refer to the official User Manual (PDF) for additional details.
Related documentsEnder-3 V3 KE


Ask a question about this manual
Ask about setup, troubleshooting, compatibility, parts, safety, or missing instructions. Manuals+ will review the question and use this page’s manual context to help answer it.