
EARISE T26 Pro
EARISE T26 PRO Karaoke Machine User Manual
Model: T26 Pro
Introduction
Thank you for choosing the EARISE T26 PRO Karaoke Machine. This portable Bluetooth PA speaker system is designed to provide high-quality audio and versatile entertainment options. It features two wireless microphones, vibrant LED lights, FM radio, audio recording capabilities, and supports multiple input sources including TF card, USB, and AUX. This manual provides detailed instructions for setting up, operating, and maintaining your device to ensure optimal performance and longevity.

Figure 1: EARISE T26 PRO Karaoke Machine, showing the main speaker unit, two wireless microphones, and the remote control.
Package Contents
Please check the package carefully to ensure all items are present and in good condition:
- EARISE T26 PRO Karaoke Machine (Main Unit)
- 2 x Wireless Microphones
- 1 x Remote Control
- 1 x USB Charging Cable
- 1 x AUX Cable
- User Manual (This document)
Product Features
- Portable PA System: Compact and lightweight design for easy transport.
- Dual Wireless Microphones: Enjoy singing with friends or for presentations.
- Bluetooth 5.0 Connectivity: Seamless wireless streaming from compatible devices.
- Multi-source Playback: Supports TF Card, USB flash drive, and AUX input.
- FM Radio: Built-in FM tuner for listening to your favorite stations.
- Audio Recording: Record your performances directly to a USB drive or TF card.
- Dynamic LED Lights: Colorful lights that sync with the music for an enhanced experience.
- Adjustable Controls: Independent volume controls for microphone and master output, plus bass and echo adjustments.
- Long Battery Life: Built-in 4400mAh battery for extended use.
- Remote Control: Convenient operation from a distance.
Controls and Interfaces
Familiarize yourself with the control panel and ports on your EARISE T26 PRO:

Figure 2: Top panel controls and rear ports diagram.
- Mic In: 6.35mm jack for wired microphone input (if desired).
- TF Card Slot: Insert a TF (MicroSD) card for music playback or recording.
- USB Flash Drive Slot: Insert a USB flash drive for music playback or recording.
- Aux In: 3.5mm audio input for connecting external devices.
- USB 5V Charging Port: Power input for charging the unit.
- Power On/Off: Main power switch for the unit.
- EQ: Equalizer button to cycle through preset sound modes.
- Play/Pause: Play or pause current audio track.
- Record: Start or stop audio recording.
- Repeat/Light: Repeat current track or toggle LED lights.
- Echo: Adjust the echo effect for microphones.
- Mode: Switch between Bluetooth, FM, AUX, USB, and TF card modes.
- Previous Track: Go to the previous audio track.
- Next Track: Go to the next audio track.
- Microphone Volume: Adjust the volume of the connected microphones.
- Bass: Adjust the bass level of the audio output.
- Master Volume: Adjust the overall master volume of the speaker.
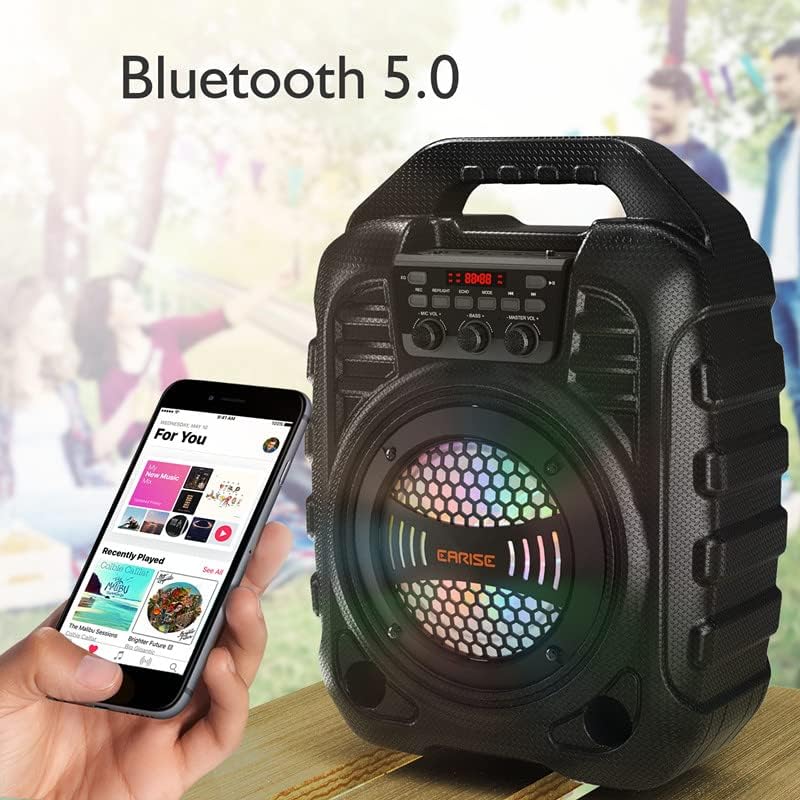
Figure 3: Detailed view of the main control knobs and buttons.
Setup Guide
1. Charging the Unit
Before first use, fully charge the karaoke machine. Connect the provided USB charging cable to the USB 5V Charging Port (5) on the unit and the other end to a standard USB power adapter (not included) or a computer USB port. The charging indicator will show the charging status. A full charge takes approximately 6 hours.

Figure 4: Battery capacity and charging time information.
2. Inserting Microphone Batteries
Each wireless microphone requires 2 x AA batteries (not included). Open the battery compartment at the bottom of the microphone and insert the batteries, ensuring correct polarity. Close the compartment securely.
3. Powering On
Flip the Power On/Off switch (6) to the "ON" position. The digital display will light up, indicating the unit is powered on.
Operating Instructions
Bluetooth Mode
- Turn on the EARISE T26 PRO. It will automatically enter Bluetooth pairing mode, indicated by a flashing "BLUE" on the display.
- On your mobile device (smartphone, tablet, etc.), enable Bluetooth and search for available devices.
- Select "EARISE T26 PRO" from the list. Once paired, the unit will emit a confirmation sound, and "BLUE" will stop flashing.
- You can now play audio from your device through the karaoke machine. Use the Play/Pause (8), Previous Track (13), and Next Track (14) buttons on the unit or remote, or control playback directly from your device.

Figure 5: Bluetooth 5.0 connectivity in action.
FM Radio Mode
- Press the Mode button (12) repeatedly until "FM" appears on the display.
- Press and hold the Play/Pause button (8) to initiate an automatic scan for FM stations. The unit will save all found stations.
- Use the Previous Track (13) and Next Track (14) buttons to navigate between saved FM stations.
USB/TF Card Playback
- Insert a USB flash drive into the USB Flash Drive Slot (3) or a TF card into the TF Card Slot (2).
- The unit will automatically switch to USB or TF card mode and begin playing audio files (MP3, WAV, etc.). If it doesn't, press the Mode button (12) to select the correct input.
- Use the Play/Pause (8), Previous Track (13), and Next Track (14) buttons to control playback.
AUX Input Mode
- Connect one end of the provided AUX cable to the Aux In port (4) on the karaoke machine and the other end to the audio output of your external device (e.g., laptop, MP3 player).
- Press the Mode button (12) until "AUX" appears on the display.
- Control audio playback directly from your external device.
Using Microphones
- Ensure batteries are inserted into the wireless microphones and they are powered on. They will automatically connect to the main unit.
- Adjust the Microphone Volume knob (15) to control the microphone's output level.
- Use the Echo knob (11) to add or reduce echo effect to your voice.
- For optimal sound, speak or sing directly into the microphone grille.

Figure 6: Enjoying karaoke with the wireless microphones.
Audio Recording
You can record your microphone input along with any background music playing from USB/TF card or AUX input.
- Ensure a USB flash drive or TF card is inserted into the unit.
- Press the Record button (9) to start recording. The display will indicate recording is active.
- Press the Record button (9) again to stop recording. The recorded file will be saved to the USB drive or TF card.
LED Lights Control
The speaker features dynamic LED lights that enhance the party atmosphere.
- Press the Repeat/Light button (10) to toggle the LED lights on or off.
- The lights will typically react to the rhythm of the music.

Figure 7: Colorful LED lights in operation.
Using the Remote Control
The included remote control allows for convenient operation from a distance. Ensure the remote has batteries and point it towards the front of the karaoke machine.

Figure 8: Remote control and its storage feature.
Maintenance
- Cleaning: Use a soft, dry cloth to clean the surface of the unit. Do not use abrasive cleaners or solvents.
- Storage: When not in use for extended periods, store the unit in a cool, dry place away from direct sunlight and extreme temperatures.
- Battery Care: If storing for a long time, it is recommended to charge the unit every 3 months to maintain battery health. Remove batteries from microphones if not used for extended periods to prevent leakage.
- Avoid Water: Keep the unit away from water and moisture to prevent damage.
Troubleshooting
| Problem | Possible Cause | Solution |
|---|---|---|
| Unit does not power on. | Battery is depleted. | Charge the unit using the USB charging cable. |
| No sound from speaker. | Master volume is too low; incorrect mode selected; device not connected properly. | Increase Master Volume (17). Press Mode (12) to select correct input. Reconnect Bluetooth/AUX cable. |
| Microphones not working. | Microphone batteries are low or inserted incorrectly; Microphone Volume (15) is too low. | Replace microphone batteries, ensuring correct polarity. Increase Microphone Volume (15). |
| Bluetooth pairing failed. | Unit is not in pairing mode; device is too far; interference. | Ensure unit is in Bluetooth mode (flashing "BLUE"). Move device closer. Turn off other Bluetooth devices. |
| USB/TF card not playing. | Unsupported file format; card/drive not inserted correctly; corrupted files. | Ensure files are MP3/WAV format. Reinsert card/drive. Try a different card/drive. |
Specifications
| Feature | Detail |
|---|---|
| Model Number | T26 Pro |
| Brand | EARISE |
| Mounting Type | Floor Standing |
| Power Source | Battery Powered |
| Connector Type | Aux |
| Item Weight | 2 Kilograms (4.4 pounds) |
| Output Wattage | 12 Watts |
| Number of Channels | 2 |
| Audio Input | Bluetooth, AUX-in, USB, TF Card |
| Product Dimensions (L x W x H) | 10.1 x 5.6 x 13.4 inches |
| Batteries | 2 Lithium Metal batteries (included, for unit) |
| Connectivity Technology | Bluetooth, USB, AUX |
| Color | Black |
| Compatible Devices | Bluetooth devices, AUX-compatible devices, TF card/USB-compatible devices |
Warranty and Support
EARISE products are designed and manufactured to the highest quality standards. For information regarding warranty coverage, please refer to the warranty card included with your purchase or visit the official EARISE website.
If you encounter any issues or have questions about your EARISE T26 PRO Karaoke Machine, please contact our customer support team:
- Online Support: Visit the EARISE official website for FAQs and support resources.
- Email Support: Refer to your product packaging or warranty card for contact email.
Please retain your proof of purchase for warranty claims.
Related documentsT26 Pro


Ask a question about this manual
Ask about setup, troubleshooting, compatibility, parts, safety, or missing instructions. Manuals+ will review the question and use this page’s manual context to help answer it.