
Important Safety Instructions
When using electrical appliances, basic safety precautions should always be followed to reduce the risk of fire, electric shock, and injury to persons. Read all instructions carefully before operating this appliance.
- Do not touch hot surfaces. Use handles or knobs.
- To protect against electric shock, do not immerse cord, plugs, or the main unit in water or other liquid.
- Close supervision is necessary when any appliance is used by or near children.
- Unplug from outlet when not in use and before cleaning. Allow to cool before putting on or taking off parts.
- Do not operate any appliance with a damaged cord or plug, or after the appliance malfunctions or has been damaged in any manner.
- The use of accessory attachments not recommended by the appliance manufacturer may cause injuries.
- Do not use outdoors.
- Do not let cord hang over edge of table or counter, or touch hot surfaces.
- Do not place on or near a hot gas or electric burner, or in a heated oven.
- Extreme caution must be used when moving an appliance containing hot oil or other hot liquids.
- Always attach plug to appliance first, then plug cord into the wall outlet. To disconnect, turn any control to "off", then remove plug from wall outlet.
- Do not use appliance for other than intended use.
- Ensure the appliance is placed on a stable, heat-resistant surface.
- Adequate air circulation is required around the appliance during operation.
Product Overview
Components and Accessories
The ZOKOP KAFO-1800A-D2 Air Fryer Oven comes with several accessories to enhance its versatility. Familiarize yourself with each component:

Image: Air Fryer Oven with included accessories. This image displays the main unit alongside the rotating basket, drip tray, chicken fork, skewer rack, and fry nets.
- Main Unit: The primary air fryer oven with digital control panel and viewing window.
- Fry Pan (Drip Tray): Catches crumbs and oil droplets. Can also be used as a baking tray for items like pizza.
- Fry Nets (3): Used for air frying various foods, allowing for multiple batches or different items simultaneously.
- Chicken Fork (Rotisserie Spit): For roasting whole chickens up to 3kg (6 pounds).
- Rotating Basket: Ideal for fries, nuts, and other small items that benefit from continuous tumbling.
- Skewer Rack: For preparing kebabs or other skewered foods.
- Fetch Rack (Extraction Bracket): Tool for safely removing hot accessories from the oven.
Key Features
- Large Capacity: 16.91 Quarts (16 Liters) cooking space.
- Multi-functionality: Air Fryer, Oven, Rotisserie, and Dehydrator in one appliance.
- Digital Control Panel: Easy-to-use interface with 8 preset quick menus.
- Internal Lighting: Provides a clear view of cooking progress through the double-layer window.
- Powerful Performance: 1800W heating element for efficient cooking.
- Temperature Control: Adjustable from 80-200°C (180-400°F) for most functions, and 30-80°C (90-170°F) for dehydration.
- Timer Function: Up to 24 hours for dehydrator, 0-60 minutes for other functions.
Setup
- Unpacking: Carefully remove the air fryer oven and all accessories from the packaging. Retain packaging for future storage or transport.
- Initial Cleaning: Before first use, wipe the exterior of the unit with a damp cloth. Wash all removable accessories (fry pan, fry nets, chicken fork, rotating basket, skewer rack, fetch rack) with warm, soapy water. Rinse thoroughly and dry completely.
- Placement: Place the air fryer oven on a stable, level, and heat-resistant surface. Ensure there is at least 6 inches (15 cm) of clear space on all sides and above the appliance for proper ventilation. Do not place near flammable materials.
- Power Connection: Ensure the voltage of your power outlet matches the appliance's requirements (120V/60Hz). Plug the power cord into a grounded wall outlet.
- First Use Burn-Off: It is recommended to run the air fryer empty for about 10-15 minutes at 180°C (350°F) before cooking food for the first time. This helps to burn off any manufacturing residues and odors. A slight odor or smoke may be present during this process; this is normal. Ensure the area is well-ventilated.
Operating Instructions
Control Panel Overview
The digital control panel allows for easy selection of cooking functions, temperature, and time. The panel features a display for temperature and time, along with various touch controls.
- Power Button: Turns the unit on/off.
- Temperature Controls (Up/Down Arrows): Adjust cooking temperature.
- Time Controls (Up/Down Arrows): Adjust cooking time.
- Preset Icons: 8 dedicated icons for common dishes (e.g., fries, chicken, fish, steak, pizza, cake, dehydrate, reheat).
- Rotisserie Button: Activates/deactivates the rotating function for the chicken fork or rotating basket.
- Light Button: Turns the internal oven light on/off.
General Operation
- Prepare Food: Place your food in the appropriate accessory (fry net, rotating basket, or on the chicken fork).
- Insert Accessory: Carefully slide the accessory into the oven. Ensure the drip tray is at the bottom to catch any drippings.
- Power On: Press the Power button to turn on the appliance.
- Select Function:
- Using Presets: Press the desired preset icon. The oven will automatically set the recommended temperature and time.
- Manual Setting: Use the Temperature Up/Down arrows to set the desired cooking temperature (80-200°C / 180-400°F). Use the Time Up/Down arrows to set the cooking time (0-60 minutes).
- Start Cooking: Once settings are confirmed, the oven will begin heating.
- Monitor Progress: Use the internal light to check food without opening the door.
- Remove Food: When cooking is complete, the oven will beep. Carefully open the door and use the fetch rack or oven mitts to remove the hot accessory and food.
Using the Rotisserie Function

Image: A whole chicken roasting on the rotisserie fork inside the air fryer oven. This demonstrates the rotisserie function in use.
- Prepare Chicken: Securely truss a whole chicken (up to 3kg/6lbs) or other roast onto the chicken fork. Ensure it is balanced.
- Insert Rotisserie: Carefully insert the chicken fork into the rotisserie slots inside the oven. Ensure it is properly seated.
- Set Cooking Parameters: Select a suitable preset for chicken or manually set temperature and time.
- Activate Rotation: Press the Rotisserie button on the control panel to start the rotation.
- Remove: Once cooked, use the fetch rack to carefully remove the hot rotisserie assembly.
Using the Dehydration Function

Image: Close-up view of the drip tray and dehydrating racks. The drip tray is shown catching crumbs, and the dehydrating racks are designed for air circulation.
The dehydration function allows you to dry fruits, vegetables, and make jerky. This function uses lower temperatures over longer periods.
- Prepare Food: Slice food thinly and arrange it on the fry nets, ensuring good air circulation.
- Insert Fry Nets: Place the loaded fry nets into the oven.
- Set Dehydration: Select the Dehydrate preset or manually set the temperature between 30-80°C (90-170°F) and the timer up to 24 hours.
- Start: The oven will begin the dehydration process.
Maintenance and Cleaning
Regular cleaning ensures optimal performance and extends the life of your air fryer oven.
- Unplug and Cool: Always unplug the appliance from the power outlet and allow it to cool completely before cleaning.
- Clean Main Unit: Wipe the exterior with a damp cloth. Do not immerse the main unit in water or any other liquid.
- Clean Interior: Wipe the interior walls with a damp cloth and mild detergent. For stubborn food residue, a non-abrasive sponge can be used. Ensure the interior is dry before next use.
- Clean Accessories: All removable accessories (fry pan, fry nets, chicken fork, rotating basket, skewer rack, fetch rack) can be washed in warm, soapy water or placed in the dishwasher (if dishwasher safe, check product specifications or manufacturer's guidelines). Rinse thoroughly and dry completely.
- Drip Tray: Empty and clean the drip tray after each use to prevent grease buildup and smoke.
- Storage: Store the cleaned and dried appliance and its accessories in a cool, dry place.
Troubleshooting
If you encounter issues with your air fryer oven, refer to the following common problems and solutions:
| Problem | Possible Cause | Solution |
|---|---|---|
| Appliance does not turn on. | Not plugged in; power outlet malfunction; power button not pressed. | Ensure the power cord is securely plugged into a working outlet. Press the power button. |
| Food is not cooked evenly. | Overcrowding; incorrect temperature/time; food not rotated. | Do not overcrowd the basket/racks. Adjust temperature/time as needed. For best results, shake or turn food halfway through cooking. |
| White smoke coming from the appliance. | Grease/oil residue from previous use; fatty food cooking. | Clean the drip tray and interior thoroughly. For fatty foods, ensure the drip tray is in place and consider reducing the amount of oil used. |
| Food is not crispy. | Too much moisture; overcrowding; insufficient oil (if desired). | Pat food dry before cooking. Do not overcrowd. A light spray of oil can help achieve crispiness. |
If the problem persists after trying these solutions, please contact customer support.
Specifications
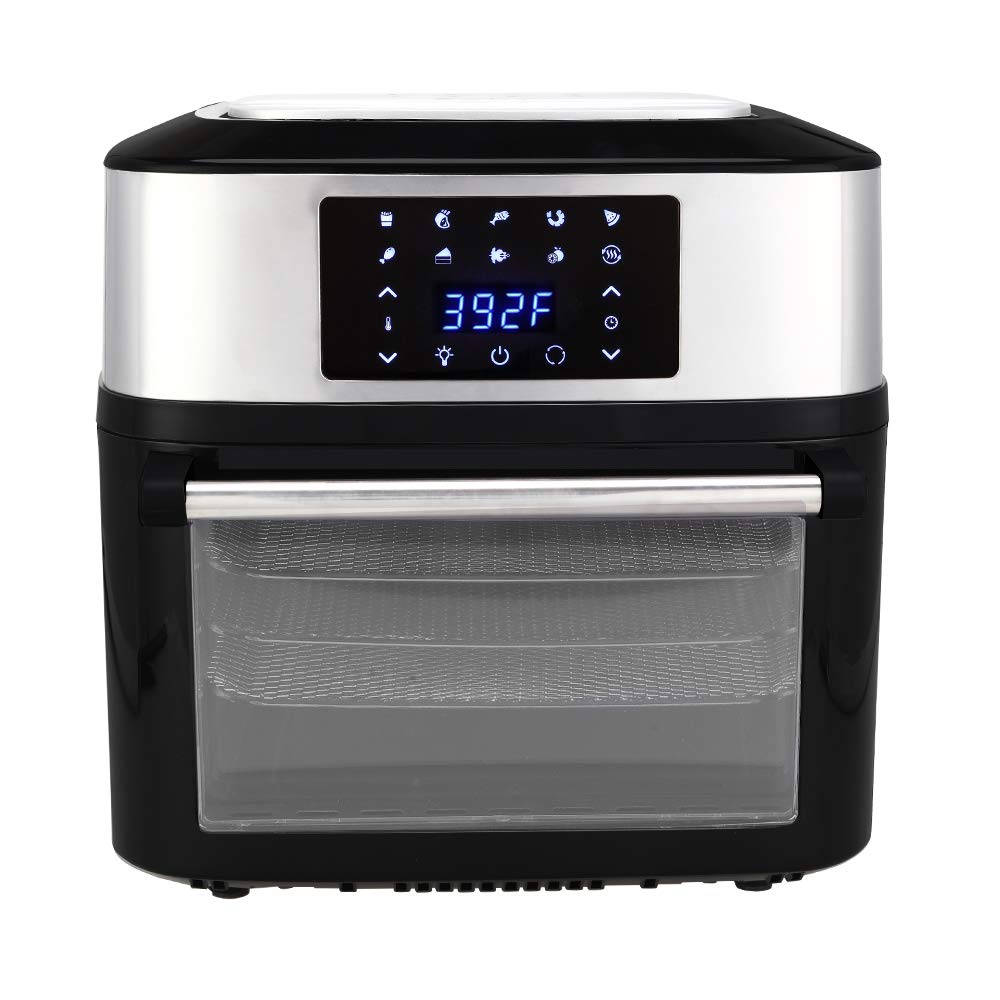
Image: Diagram showing the external and internal dimensions of the ZOKOP KAFO-1800A-D2 Air Fryer Oven. External dimensions are approximately 15.1" (width) x 14.7" (height). Internal cooking area is approximately 11.8" (width) x 10.2" (depth) x 8.3" (height).
| Feature | Specification |
|---|---|
| Model | KAFO-1800A-D2 |
| Color | Black |
| Wattage | 1800W |
| Voltage | 120V/60Hz |
| Oven Capacity | 16.91 Quarts / 16 Liters |
| Temperature Control | 80-200°C (180-400°F) for cooking; 30-80°C (90-170°F) for dehydrator |
| Timer | 0-60 minutes for cooking; 24 hours for dehydrator |
| Cooking Presets | 8 |
| Dimensions (External) | Approximately 38.3 cm (L) x 38 cm (W) x 38.7 cm (H) / 15.1" (L) x 14.9" (W) x 15.2" (H) |
| Internal Dimensions | Approximately 30 cm (L) x 26 cm (D) x 21 cm (H) / 11.8" (L) x 10.2" (D) x 8.3" (H) |
| Weight | 10.5 kg / 23.15 lbs |
| Certification | ETL Listed |
Warranty and Support
For warranty information or technical support, please refer to the warranty card included with your product or contact the manufacturer directly. Keep your purchase receipt as proof of purchase.
Manufacturer: FSD-MJ

