
ELIVED YD1008
ELIVED UL Listed Full Motion TV Monitor Wall Mount User Manual
Model: YD1008
Introduction
Thank you for choosing the ELIVED Full Motion TV Monitor Wall Mount. This manual provides detailed instructions for safe installation, operation, and maintenance of your wall mount. Please read this manual thoroughly before installation and keep it for future reference.
This mount is designed for most 14-42 inch LED LCD flat screen TVs and monitors, supporting a maximum weight of 33 lbs (15 kg) and VESA patterns from 75x75mm to 200x200mm. It is suitable for installation on single wood studs, concrete walls, or brick walls.
Important Safety Information
WARNING: Failure to read and follow all instructions can result in personal injury or damage to the product and property. Do not install into drywall alone. Concrete wall anchors will be sent per request.
- Ensure the mounting surface can safely support the combined weight of the mount and the display.
- Do not exceed the maximum weight capacity of 33 lbs (15 kg).
- Use only the provided hardware. If any parts are missing or defective, contact ELIVED customer service.
- Always use a stud finder to locate wood studs accurately.
- For concrete or brick walls, use appropriate anchors (not included by default, request if needed).
- Installation should be performed by qualified personnel if you are unsure about the process.
- Keep children and pets away during installation.
Package Contents
Verify all components are present before beginning installation. If any parts are missing or damaged, please contact ELIVED customer support.
| Part | Description | Quantity |
|---|---|---|
| Wall Plate Assembly | Main mount arm and wall attachment | 1 |
| TV Plate | Attaches to the back of the TV/monitor | 1 |
| Mounting Hardware Kit | Various screws, washers, spacers for TV and wall attachment | 1 set |
| Level | For ensuring horizontal alignment | 1 |
| Instruction Manual | This document | 1 |
Setup and Installation
Before starting, ensure you have the necessary tools: pencil, drill, Phillips head screwdriver, stud finder (for wood studs), and a hammer (for concrete anchors if applicable).
Step 1: Determine TV Compatibility and VESA Pattern
Confirm your TV's size is between 14-42 inches and its weight is under 33 lbs. Locate the four mounting holes on the back of your TV. Measure the horizontal and vertical distance between these holes to determine the VESA pattern. This mount supports VESA patterns from 75x75mm to 200x200mm.

Image: Illustration of various VESA patterns (75x75mm, 100x100mm, 200x100mm, 100x200mm, 150x150mm, 200x200mm) and how to measure them on the back of a TV.
Step 2: Choose Wall Type and Location
This mount is designed for single wood stud, concrete, or brick walls. DO NOT install into drywall alone. Use a stud finder to locate the center of a wood stud. For concrete or brick walls, mark the desired drilling locations.

Image: Depicts the wall mount installed on a wood stud, a concrete wall, and a brick wall, indicating compatibility with these surfaces. A warning states "Do Not Mount On Drywall Alone."
Step 3: Attach TV Plate to TV
Carefully place your TV face down on a soft, clean surface. Align the TV plate with the VESA holes on the back of your TV. Select the appropriate screws, washers, and spacers from the hardware kit. Secure the TV plate to the TV using a Phillips head screwdriver. Ensure the plate is centered and securely fastened.

Image: A three-step installation graphic. The first step shows a hand using a screwdriver to attach the TV plate to the back of a TV, illustrating the process of securing the mounting plate to the display.
Step 4: Attach Wall Plate to Wall
Hold the wall plate assembly against the wall at the desired height. Use the integrated level to ensure it is perfectly horizontal. Mark the drilling locations through the holes on the wall plate. Drill pilot holes according to the recommended drill bit size for your wall type. Secure the wall plate assembly to the wall using the appropriate lag bolts and washers. Ensure it is firmly attached.

Image: A three-step installation graphic. The second step shows a hand using a wrench to secure the wall plate assembly to the wall, demonstrating the attachment of the mount to the chosen wall surface.
Step 5: Hang and Secure TV to Wall Plate
With assistance, carefully lift the TV with the attached TV plate and hook it onto the wall plate assembly. Ensure the TV plate slots securely into the wall plate. Once hung, tighten any safety screws or locking mechanisms to prevent accidental dislodging. Double-check all connections for security.

Image: A three-step installation graphic. The third step shows the TV being hung onto the wall mount, illustrating the final step of attaching the display to the installed wall bracket.
Operating Instructions
The ELIVED Full Motion TV Mount offers various adjustments for optimal viewing.
Adjusting Swivel
Gently grasp the sides of your TV and pivot it left or right to achieve the desired viewing angle. The mount allows for a 180° swivel range (90° left and 90° right, depending on TV size and wall clearance).
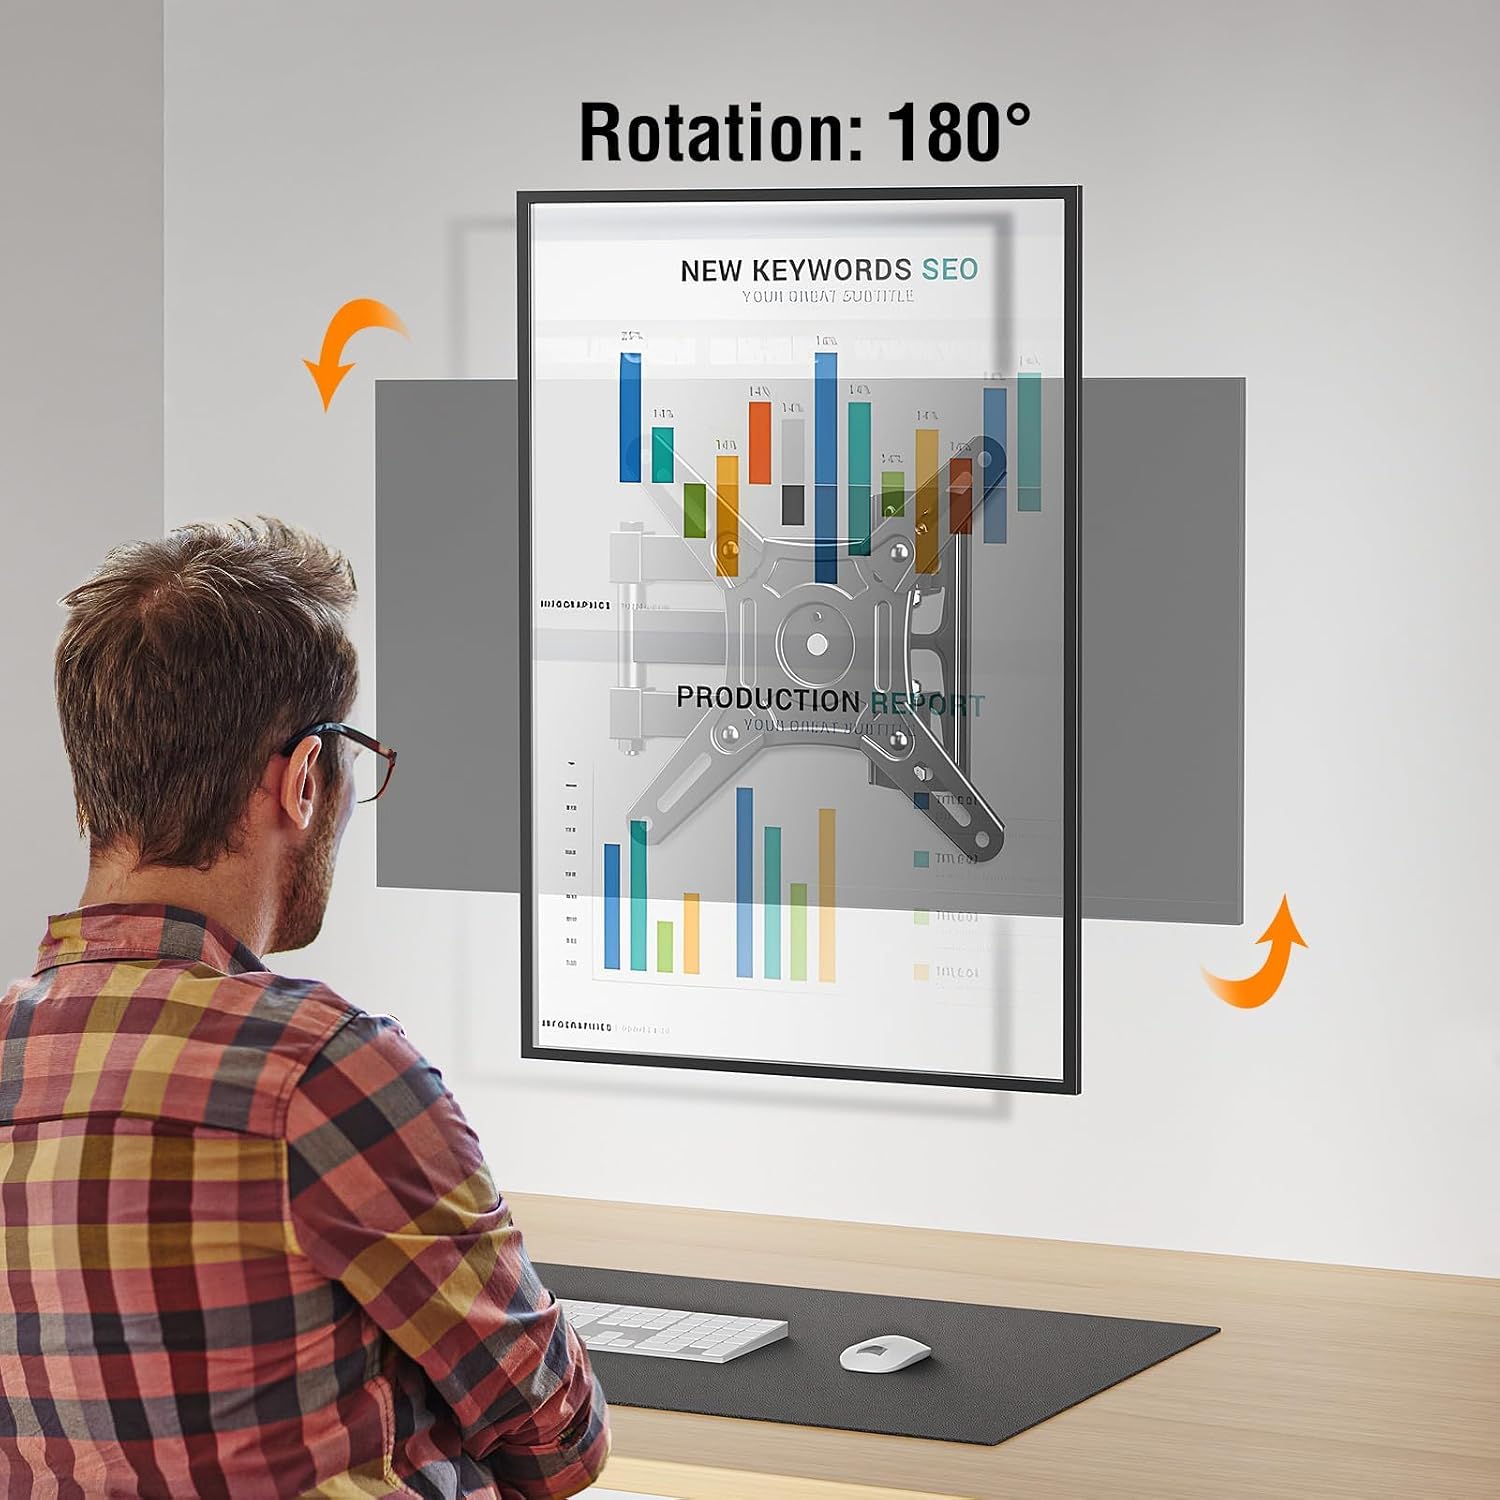
Image: A TV mounted on the wall, illustrating its ability to rotate 180 degrees, allowing for both landscape and portrait orientation. This feature is useful for dynamic content display.

Image: A TV mounted on the wall, demonstrating its swivel capability of up to 90 degrees in either direction. This allows for flexible viewing angles from different positions in a room.
Adjusting Tilt
To adjust the vertical tilt, gently push the top or bottom of the TV forward or backward. The mount supports a tilt range of +3° to -10° to reduce glare and optimize viewing comfort.

Image: A TV mounted on the wall, showing its tilt adjustment range from +3 degrees (upward) to -10 degrees (downward). This feature helps in reducing glare and achieving an optimal viewing angle.
Extending and Retracting
Pull the TV gently away from the wall to extend the arm, or push it back towards the wall to retract. The mount provides an extension range from 2.67 inches (retracted) to 14.96 inches (extended) from the wall.

Image: A TV mounted on an articulating arm, demonstrating its ability to extend and retract from the wall. The image indicates a range of 2.67 inches (retracted) to 14.96 inches (extended).
Maintenance
Regular maintenance ensures the longevity and safe operation of your ELIVED TV mount.
- Cleaning: Wipe the mount with a soft, dry cloth. Avoid using abrasive cleaners or solvents that may damage the finish.
- Periodic Check: Periodically check all screws and connections to ensure they remain tight and secure. Over time, vibrations or adjustments may cause fasteners to loosen.
- Lubrication: The articulating joints are designed for smooth movement and generally do not require lubrication. If movement becomes stiff, contact customer support for advice. Do not apply lubricants unless instructed.
- Weight Capacity: Do not hang additional items or exceed the maximum weight capacity of 33 lbs (15 kg) on the mount.
Troubleshooting
If you encounter issues with your ELIVED TV mount, refer to the following common problems and solutions.
| Problem | Possible Cause | Solution |
|---|---|---|
| Mount feels loose or wobbly. | Screws or bolts are not tightened sufficiently. | Check and tighten all wall mounting bolts and TV attachment screws. Ensure the wall plate is securely fastened to the wall structure. |
| TV is not level. | Wall plate not installed level; TV not adjusted correctly. | Use the integrated level to re-check the wall plate installation. Adjust the TV's fine-tuning level mechanism if available, or slightly loosen and re-tighten the TV plate screws while leveling. |
| Difficulty adjusting swivel or tilt. | Joints are too tight; weight capacity exceeded. | Ensure the TV weight is within the 33 lbs limit. Check for any adjustment knobs or screws on the articulating arm that might need slight loosening (refer to specific diagrams if provided in the original manual). Do not force movement. |
| Mount does not extend/retract smoothly. | Dust or debris in joints; mechanism too tight. | Clean any visible debris from the joints. If stiffness persists, contact ELIVED customer support. Do not apply lubricants without instruction. |
If the problem persists after attempting these solutions, please contact ELIVED customer support for further assistance.
Product Specifications
- Model: YD1008
- Screen Size Compatibility: 14 - 42 inches
- Maximum Weight Capacity: 33 lbs (15 kg)
- VESA Compatibility: 75x75mm, 100x100mm, 200x100mm, 100x200mm, 150x150mm, 200x200mm
- Tilt Range: +3° to -10°
- Swivel Range: 180° (90° left / 90° right, depending on TV size)
- Extension from Wall: 2.67 inches (retracted) to 14.96 inches (extended)
- Wall Type Compatibility: Single Wood Stud, Concrete Wall, Brick Wall (Do not install into drywall alone)
- Material: Alloy Steel
- Product Dimensions: Approximately 23 x 17 x 5 inches (when folded)
- Item Weight: 2.93 pounds
Warranty and Customer Support
ELIVED products are manufactured with quality and durability in mind. For warranty information, please refer to the product packaging or contact ELIVED customer service directly. If you have any questions, require technical assistance, or need to request concrete wall anchors, please contact us:
- ELIVED Official Store: Visit ELIVED Store on Amazon
- Contact Information: Please refer to the ELIVED store page or product packaging for the most current contact details.
Related documentsYD1008


Ask a question about this manual
Ask about setup, troubleshooting, compatibility, parts, safety, or missing instructions. Manuals+ will review the question and use this page’s manual context to help answer it.