
1. Product Overview
The Rugged Ridge Max Terrain Fender Flares are designed for the Jeep Wrangler JL (2018-2025 models). These flares combine classic flat-fender styling with a high-clearance design, enhancing your vehicle's off-road capability. Constructed from durable, injection-molded thermoplastic, they offer flexibility and impact resistance. The design provides increased tire clearance for maximum suspension travel. The rear flares are contoured to minimize debris accumulation against painted surfaces. They feature a dual-textured finish that complements factory trim and can be painted for a custom look. Integrated two-color DRL (Daytime Running Light) tubes are included in the front flares, providing both white driving lights and amber turn signals for improved visibility and aesthetic appeal. Installation is simplified with included hardware and requires no drilling.
Key Features:
- Designed for 2018-2025 Jeep Wrangler JL models.
- Classic flat fender styling with high-clearance design.
- Durable, impact-resistant injection-molded thermoplastic construction.
- Unique dual-textured finish, paintable for customization.
- Integrated two-color DRLs (white driving light / amber turn signal).

Image 1.1: Rugged Ridge Max Terrain Fender Flares installed on a Jeep Wrangler JL, showcasing the high-clearance design and integrated DRLs.
Video 1.1: An overview video demonstrating the Rugged Ridge Max Terrain Fender Flares and their features on a Jeep Wrangler JL.
2. Safety Information
Always exercise caution when working on your vehicle. Ensure the vehicle is parked on a level surface with the parking brake engaged. Disconnect the vehicle's battery before performing any electrical work. Wear appropriate personal protective equipment, including safety glasses and gloves. If you are unsure about any step of the installation process, consult a qualified automotive technician.
3. Package Contents
Verify that all components are present before beginning installation. If any parts are missing or damaged, contact Rugged Ridge customer support.
- Front Fender Flares (Left & Right)
- Rear Fender Flares (Left & Right)
- Mounting Hardware Kit
- Integrated DRL Tubes and Wiring Harness (for front flares)
- Installation Instructions (this document)
4. Tools Required
The following tools are recommended for installation:
- Basic Hand Tools (e.g., Socket Wrench Set, Screwdrivers)
- Wire Strippers/Crimpers (for DRL wiring)
- Electrical Tape or Heat Shrink Tubing
- Trim Panel Removal Tool (optional, for factory flare removal)
5. Installation Instructions
Follow these steps carefully for proper installation. No drilling is required for this installation.
5.1. Preparation
- Park your Jeep Wrangler JL on a flat, stable surface.
- Engage the parking brake.
- Gather all necessary tools and package contents.
- Clean the area around the factory fender flares to ensure a clean mounting surface.
5.2. Removing Factory Fender Flares (if applicable)
If your vehicle has existing factory fender flares, carefully remove them by detaching any clips, screws, or fasteners securing them to the vehicle body. A trim panel removal tool may be helpful to prevent damage to painted surfaces.
5.3. Mounting New Fender Flares
- Position the new Rugged Ridge Max Terrain Fender Flare onto the vehicle body. Ensure proper alignment with the mounting points.
- Secure the flare using the provided mounting hardware. Start all fasteners by hand to avoid cross-threading, then tighten them evenly. Do not overtighten.
- Repeat the process for all four fender flares (front and rear).
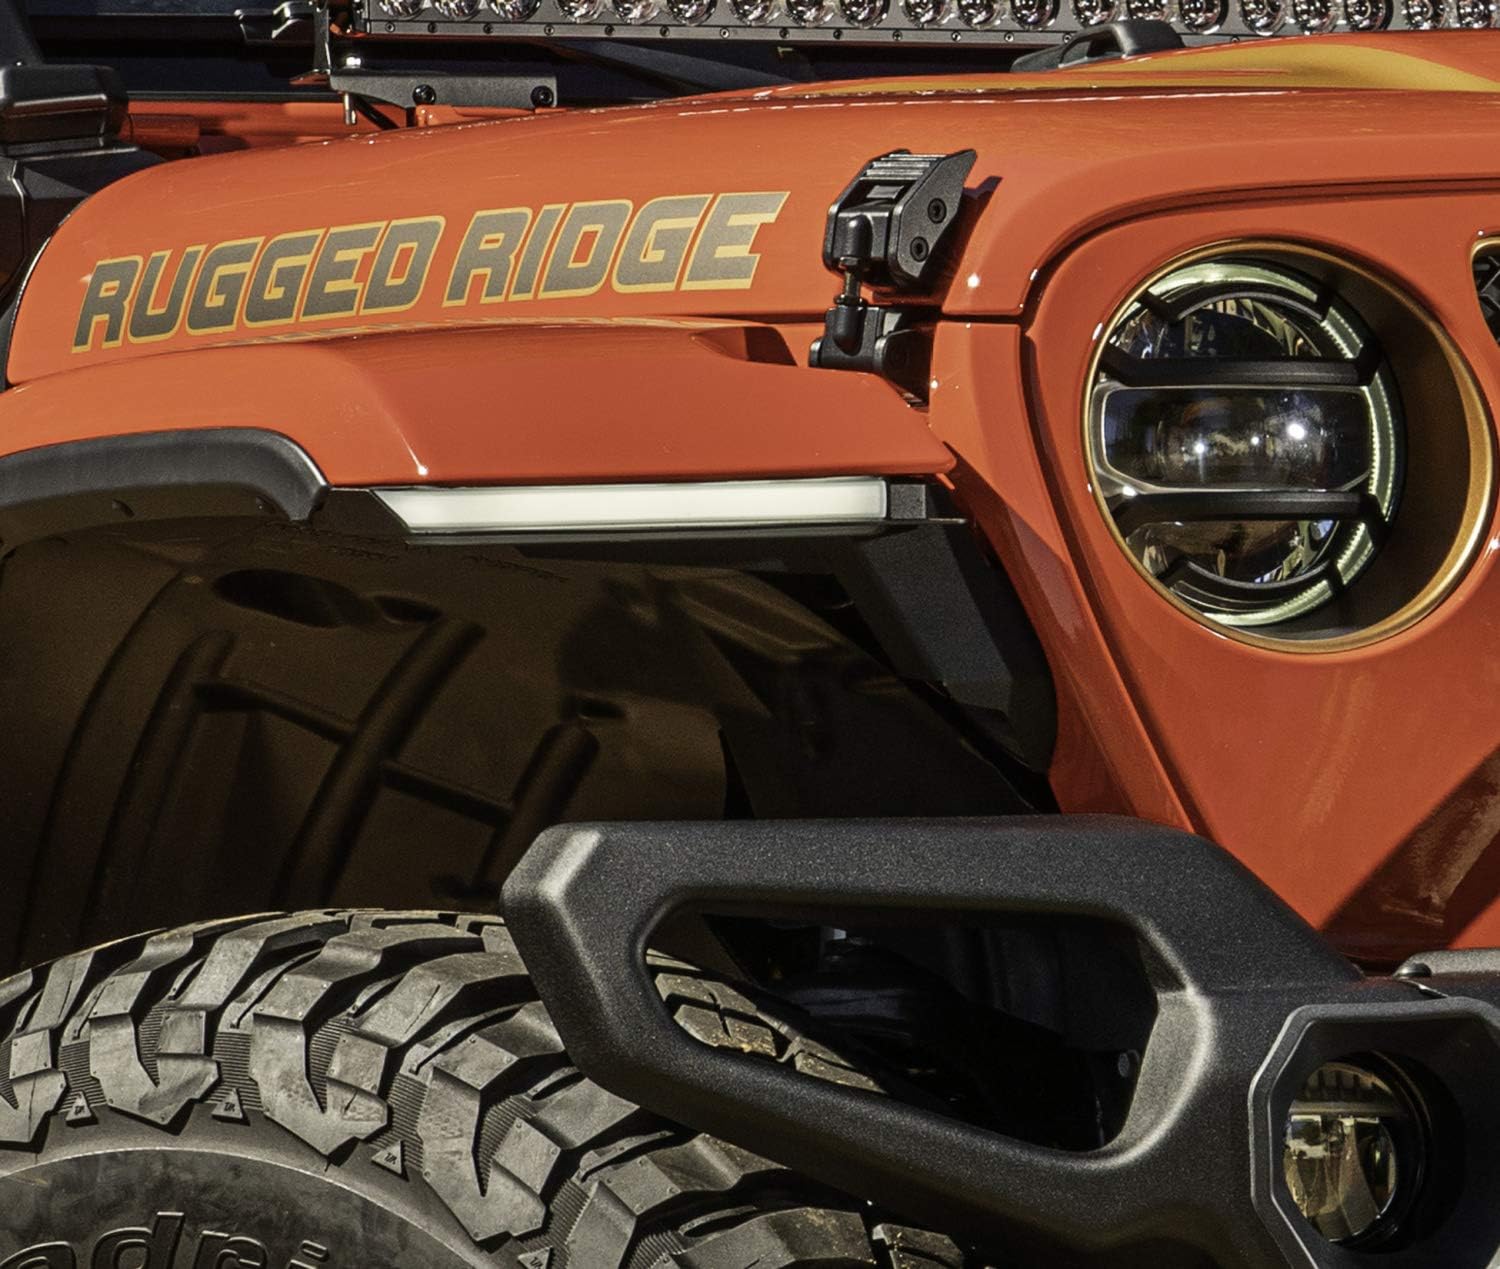
Image 5.1: Close-up view of the Rugged Ridge front fender flare, highlighting the integrated DRL strip.
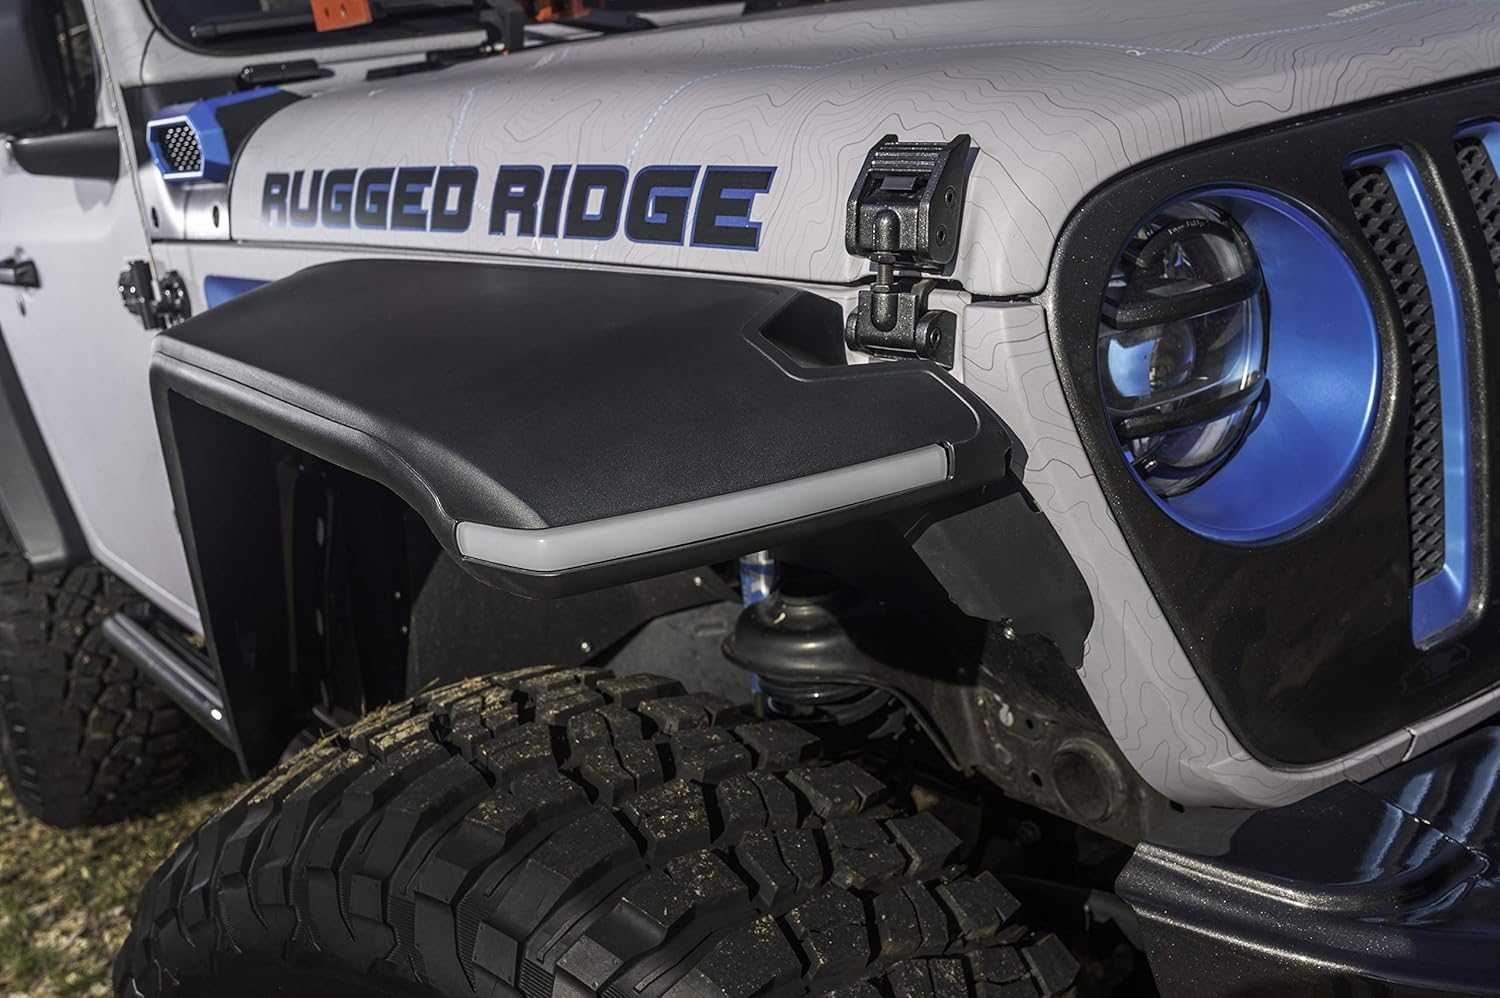
Image 5.2: Front fender flare installed on a white Jeep Wrangler JL, showing the fit and finish.

Image 5.3: Rear fender flare installed on a white Jeep Wrangler JL, demonstrating the increased tire clearance.
6. DRL Wiring Instructions
The front fender flares include integrated two-color DRL tubes that function as white driving lights and amber turn signals. Proper wiring is essential for their operation.
- Disconnect Battery: Before any electrical work, disconnect the negative terminal of your vehicle's battery to prevent electrical shorts.
- Identify Wiring: Locate the factory turn signal wiring on your Jeep Wrangler JL. You will need to tap into the power for the running lights and the turn signal circuit.
- Connect DRL Harness: Connect the provided DRL wiring harness to the integrated DRL tubes on each front fender flare.
- Tap into Vehicle Wiring: Using appropriate wiring connectors (not included, but commonly available), tap the DRL harness wires into the corresponding vehicle wires:
- Connect the DRL's white wire to the vehicle's running light positive wire.
- Connect the DRL's amber wire to the vehicle's turn signal positive wire.
- Connect the DRL's black wire to a suitable vehicle ground point.
- Secure Connections: Ensure all electrical connections are secure and properly insulated using electrical tape or heat shrink tubing to protect against moisture and corrosion.
- Route Wiring: Carefully route the wiring harness away from moving parts and heat sources, securing it with zip ties as needed.
- Reconnect Battery: Once all wiring is complete and secured, reconnect the negative terminal of your vehicle's battery.
- Test Functionality: Turn on your vehicle's ignition and test the DRLs. Verify that the white lights illuminate with the running lights and that the amber lights flash correctly with the turn signals.

Image 6.1: Components of the DRL light assembly, including the light bar, wiring harness, and mounting bracket.

Image 6.2: Side view of the DRL light assembly, showing how it integrates with the fender flare structure.
7. Maintenance
To ensure the longevity and appearance of your Rugged Ridge Max Terrain Fender Flares:
- Regular Cleaning: Wash the fender flares regularly with mild automotive soap and water. Avoid abrasive cleaners or harsh chemicals that could damage the finish.
- Inspection: Periodically inspect all mounting hardware for tightness. Re-tighten any loose fasteners to prevent movement or damage.
- DRL Check: Occasionally check the DRLs for proper function (white driving light and amber turn signal). If any issues arise, refer to the troubleshooting section.
8. Troubleshooting
If you encounter issues with your fender flares, consider the following:
- Loose Fit: If flares feel loose, check all mounting hardware and ensure they are securely tightened. Avoid overtightening, which can strip threads or crack plastic.
- DRLs Not Working:
- Check all wiring connections for proper contact and insulation.
- Verify that the vehicle's battery is properly connected and charged.
- Inspect fuses related to the vehicle's running lights and turn signals.
- Ensure the DRL harness is correctly tapped into the vehicle's electrical system as per Section 6.
- Uneven Appearance: Ensure flares are correctly aligned before final tightening of hardware. Minor adjustments may be possible during installation.
9. Specifications
| Brand | Rugged Ridge |
| Model Number | 11640.51 |
| Compatible Vehicle | Jeep Wrangler JL (2018-2025) |
| Material | Injection-Molded Thermoplastic |
| Color | Multi (Dual Textured Finish) |
| DRL Features | Integrated Two-Color (White Driving Light / Amber Turn Signal) |
| Installation | No Drilling Required |
| Item Weight | 25.4 Pounds |
| Item Dimensions (L x W x H) | 51 x 27 x 14 inches |
| UPC | 804314325787 |
10. Warranty and Support
This Rugged Ridge product is backed by a Limited 5-Year Warranty. For detailed warranty terms, conditions, or to obtain support, please refer to the official Rugged Ridge website or contact their customer service department. Keep your proof of purchase for warranty claims.