
1. Overview
The Merece Digital Soldering Station ST-2090D is a versatile tool designed for various soldering tasks. It features precise temperature control, quick heating, and multiple functions to enhance efficiency and safety during operation. This manual provides detailed instructions for setup, operation, maintenance, and troubleshooting to ensure optimal performance and longevity of your soldering station.
2. Safety Information
WARNING: Always read and understand all safety instructions before using this product. Failure to follow these instructions may result in electric shock, fire, or serious injury.
- Always work in a well-ventilated area to avoid inhaling solder fumes.
- Wear appropriate personal protective equipment, including safety glasses and heat-resistant gloves.
- Do not touch the soldering iron tip or heating element when the unit is powered on or hot.
- Ensure the soldering station is placed on a stable, heat-resistant surface.
- Keep the soldering iron away from flammable materials.
- Unplug the unit from the power outlet when not in use or before cleaning/maintenance.
- Do not allow children or untrained individuals to operate the soldering station.
3. Package Contents
Verify that all items listed below are included in your package:
- Merece Digital Soldering Station (Main Unit)
- Soldering Iron with Cable
- Soldering Iron Stand
- 5 x Assorted Solder Tips
- Tip Cleaner (Brass Wire)
- Solder Wire Spool
- Desoldering Sucker
- Sponge for Tip Cleaning
- Power Cord
- Instruction Manual

Image: The Merece Digital Soldering Station with all its components laid out, including the main unit, soldering iron, stand, solder tips, tip cleaner, solder wire, desoldering sucker, and sponge.
4. Product Features
- Digital LED Display: Clear and intuitive display for temperature readings.
- Adjustable Temperature: Wide temperature range from 176°F to 896°F (80°C to 480°C).
- PID Temperature Control: Ensures stable and accurate temperature.
- Fast Heating: Reaches desired temperature quickly (e.g., 572°F in 15 seconds).
- Temperature Lock Function: Prevents accidental temperature changes during operation.
- °C/°F Conversion: Easily switch between Celsius and Fahrenheit.
- Auto Standby Function: Heater reduces temperature to 392°F (200°C) after 10 minutes of inactivity.
- Auto Sleep Function: Heating core is not heated after 20 minutes in standby mode.
- Anti-static Design: Protects sensitive electronic components.
- Integrated Solder Wire Holder: Convenient storage and dispensing of solder wire.
- Multiple Solder Tips: Includes 5 different tips for various applications.
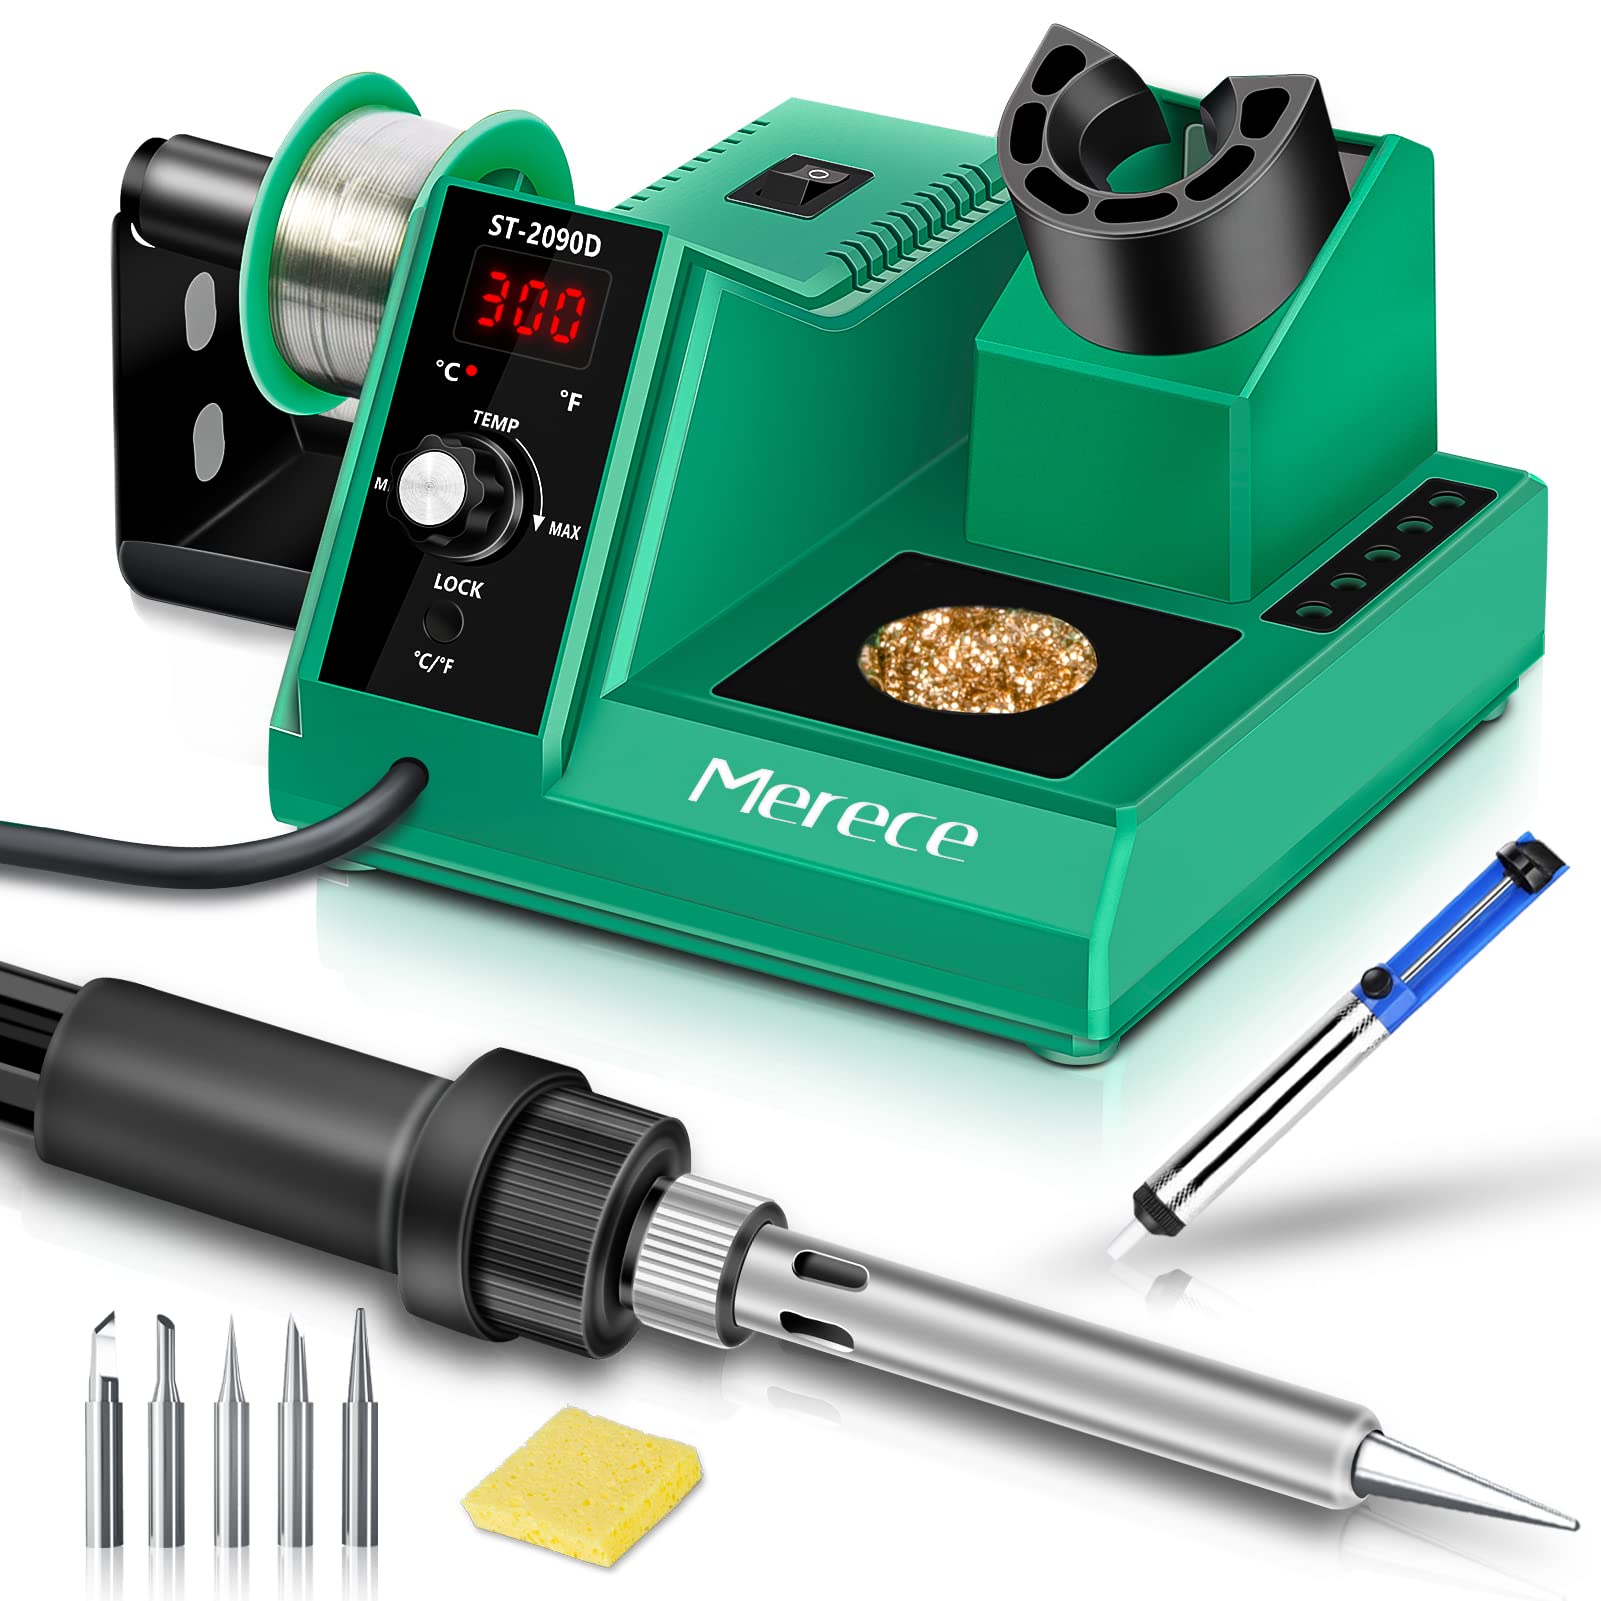
Image: Close-up of the soldering iron tip with smoke, illustrating PID temperature control technology, 65W power, fast heating, and adjustable temperature range of 176°F - 896°F.
5. Setup
- Unpack Components: Carefully remove all items from the packaging and ensure nothing is missing.
- Assemble Solder Wire Holder: Attach the solder wire holder to the side of the main unit. Place the included solder wire spool onto the holder.
- Install Soldering Iron Stand: Insert the soldering iron stand into its designated slot on the main unit. Ensure it is stable.
- Connect Soldering Iron: Plug the soldering iron cable securely into the port on the main unit.
- Place Tip Cleaner: Position the brass wire tip cleaner in its designated area on the station. If a sponge is provided, moisten it slightly and place it in the sponge tray.
- Connect Power: Plug the power cord into the back of the soldering station and then into a suitable 110V AC power outlet.

Image: A four-panel image showing the integrated solder roller holder, sturdy soldering iron holder, intuitive LED display, and the extra sponge tip cleaner with additional soldering iron tips.
Setup Video: Merece Soldering Station with Digital Dial
Video: This video provides a brief overview of the Merece Soldering Station, demonstrating its digital dial and compact design. It shows the station's components and basic functionality.
Setup Video: Soldering Station, Merece Digital Soldering Iron Kit
Video: This video offers a detailed look at the Merece Digital Soldering Iron Kit, including its setup and various features. It demonstrates the station's capabilities for different soldering tasks.
6. Operating Instructions
6.1 Power On/Off
Flip the power switch located on the main unit to the 'ON' position. The digital display will illuminate, showing the current temperature.
6.2 Temperature Adjustment
- Set Temperature: Turn the 'TEMP' knob to adjust the desired temperature. The display will show the set temperature, then revert to the actual tip temperature after a few seconds.
- °C/°F Conversion: Short press the 'LOCK/°C/°F' button to switch between Celsius and Fahrenheit display modes.
- Temperature Lock: Long press the 'LOCK/°C/°F' button for 3 seconds to lock the set temperature. The display will show 'LOC'. To unlock, long press the button again for 3 seconds.

Image: This image illustrates the °C/°F conversion function and the temperature locking mechanism on the Merece Digital Soldering Station.
6.3 Auto Standby & Auto Sleep
- Auto Standby: If the soldering iron is placed in its holder and remains inactive for 10 minutes, the station will automatically enter standby mode. The heater temperature will reduce to 392°F (200°C), and the display will show 'STB'. Picking up the iron will resume normal operation.
- Auto Sleep: If the soldering iron remains in standby mode for an additional 10 minutes (total 20 minutes of inactivity), the station will enter auto sleep mode. The heating core will not be heated, and the display will show 'SLP'. To exit sleep mode, adjust the knob or press any button.

Image: A visual representation of the Auto Standby and Auto Sleep functions, showing the display indicators ('STB' and 'SLP') and the timeframes for activation.
6.4 Changing Solder Tips
Ensure the soldering iron is cool before attempting to change tips. Unscrew the retaining nut on the soldering iron handle, carefully remove the old tip, and insert the new tip. Tighten the retaining nut securely. Refer to the included 5 solder tips for various applications.

Image: A detailed view of the soldering iron, highlighting its protective cord shield, silicone heat shield, temperature adjustment, standard plug, and the five included solder tips.
6.5 Using the Desoldering Sucker
To remove old solder, heat the solder joint with the soldering iron until it melts. Quickly place the desoldering sucker's nozzle over the molten solder and press the plunger button to create suction, removing the solder. Repeat if necessary.
7. Maintenance
- Tip Cleaning: Regularly clean the soldering iron tip using the brass wire tip cleaner or a damp sponge. This helps maintain optimal heat transfer and prevents oxidation.
- Tip Tinning: After cleaning, tin the tip with a small amount of fresh solder to protect it from oxidation and improve its lifespan.
- General Cleaning: Keep the main unit and soldering iron handle clean and free of dust and debris. Use a soft, dry cloth. Do not use abrasive cleaners or solvents.
- Storage: When not in use, ensure the soldering iron is cool and stored safely in its stand. Unplug the unit from the power source.
8. Troubleshooting
| Problem | Possible Cause | Solution |
|---|---|---|
| Soldering iron not heating up | Power switch off; Loose connection; Faulty heating element | Ensure power switch is ON; Check all cable connections; Contact customer support if element is faulty. |
| Temperature display shows 'E02' | Error for sensor | Turn off the unit, unplug, and restart. If error persists, contact customer support. |
| Temperature unstable | Loose tip; Incorrect temperature setting | Ensure tip is securely tightened; Adjust temperature to appropriate level for task. |
| Solder not melting easily | Insufficient temperature; Oxidized tip; Incorrect solder type | Increase temperature; Clean and tin the tip; Use appropriate solder for the application. |
9. Specifications
- Model Number: ST-2090D
- Voltage: 110 Volts
- Wattage: 65 watts
- Temperature Range: 176°F - 896°F (80°C - 480°C)
- Temperature Stability: ±3.6°F
- Display Type: LED
- Item Weight: 1.94 pounds
- Package Dimensions: 7.91 x 7.2 x 5.28 inches
- Materials: Lead, stainless steel, iron, brass, ceramic, solder
10. Warranty & Support
Merece products are designed for reliability and performance. For warranty information, technical support, or service inquiries, please refer to the contact details provided on the product packaging or visit the official Merece website. Keep your purchase receipt as proof of purchase for warranty claims.