
CULMKARI 791319030368
MMI Control Circuit Board E380 User Manual
For Audi A6, A6L (2005-2011) and Q7 (2007-2009) with Navigation
1. Product Overview
This manual provides instructions for the installation, operation, and maintenance of the CULMKARI MMI Control Circuit Board E380. This circuit board is designed as a direct replacement for the original MMI control unit in compatible Audi vehicles, restoring functionality to the infotainment system's controls.
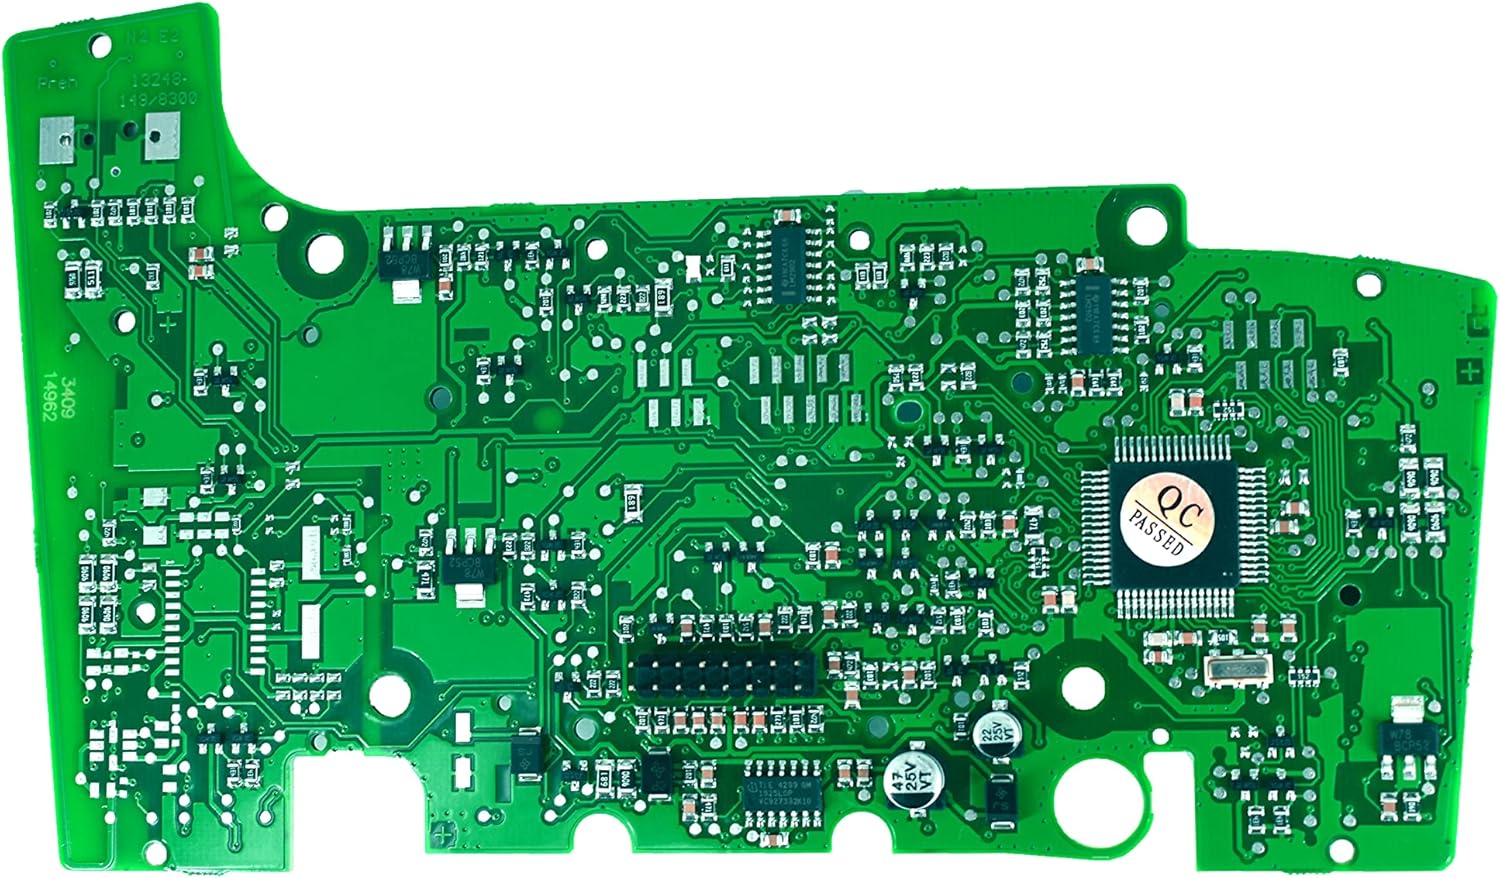
Figure 1: CULMKARI MMI Control Circuit Board E380 (Top View)
This image displays the top view of the MMI Control Circuit Board E380, showing the various electronic components and the overall layout of the board. This is the primary component for controlling the MMI system.
2. Compatibility
The MMI Control Circuit Board E380 is compatible with the following Audi models equipped with a navigation system:
- 2005-2011 Audi A6
- 2005-2011 Audi A6L
- 2007-2009 Audi Q7
This board replaces original part numbers (P/N) including: 4F0 919 604 X, 4L0 919 604 X, 4L0 919 609 K H M, 4L0 919 610 B H M, 8T0 919 604, 8F0 919 604.

Figure 2: Compatible Audi Models
This image visually confirms the compatible Audi models and years for the MMI control board, specifically highlighting Audi A6, A6L, and Q7 with navigation systems.

Figure 3: Reference Part Numbers
This image lists the various original equipment (OE) part numbers that this replacement MMI circuit board is designed to replace, ensuring proper fit and function.
3. Installation Guide
The MMI Control Circuit Board E380 is designed for easy, plug-and-play installation. However, replacing this component requires disassembly of the vehicle's center console. It is recommended that this procedure be performed by individuals with experience in automotive electronics or by following detailed instructional resources.
3.1. Tools Required
- Plastic trim removal tools
- Torx screwdrivers (various sizes, typically T20, T25)
- Small flathead screwdriver (for connectors)
- Clean microfiber cloth
3.2. Installation Steps (General Overview)
- Preparation: Ensure the vehicle's ignition is off and the battery is disconnected to prevent electrical damage.
- Accessing the MMI Unit: Carefully remove the trim pieces surrounding the MMI control unit in the center console. This typically involves prying with plastic tools to avoid scratching.
- Disassembly: Unscrew and detach the MMI control unit from its housing. Disconnect all electrical connectors.
- Board Replacement: Open the MMI control unit casing. Carefully remove the old circuit board. Note the orientation of the board and any attached components. Install the new CULMKARI MMI Control Circuit Board E380, ensuring all connections are secure and properly seated.
- Reassembly: Reassemble the MMI control unit, reconnect all electrical connectors, and reinstall it into the center console. Reattach all trim pieces.
- Testing: Reconnect the vehicle battery. Turn on the ignition and test all MMI functions (buttons, rotary knob, navigation, etc.) to ensure proper operation.
For detailed, model-specific instructions, it is highly recommended to consult vehicle-specific repair manuals or online video tutorials. Many users have found success by following readily available online guides.

Figure 4: Key Features of the Circuit Board
This image highlights the high-quality construction and plug-and-play design of the MMI circuit board, emphasizing its ease of integration into the existing system.

Figure 5: MMI Circuit Board with Button Contacts
This image shows the circuit board with the button contact points visible, illustrating the precise layout designed for seamless interaction with the MMI control panel's physical buttons.
4. Operating Instructions
Once installed, the MMI Control Circuit Board E380 restores the full functionality of your vehicle's MMI control unit. Operate the system as you would with the original equipment.
- Rotary Knob: Use the central rotary knob to navigate through menus and select options on the MMI display.
- Function Buttons: Press the surrounding buttons to access specific functions such as Navigation, Radio, Media, Car settings, and Telephone.
- Confirmation: Press the central knob to confirm selections.
Refer to your Audi vehicle's owner's manual for detailed instructions on operating the MMI infotainment system.
5. Maintenance
The MMI Control Circuit Board E380 is a sealed electronic component and requires no routine maintenance. To ensure its longevity and proper function:
- Avoid Liquid Spills: Prevent liquids from spilling onto the MMI control unit, as this is a common cause of circuit board failure.
- Cleanliness: Keep the MMI control panel clean and free of debris. Use a soft, dry cloth for cleaning. Avoid abrasive cleaners or excessive moisture.
- Professional Handling: If the MMI unit needs to be opened for any reason, ensure it is handled by qualified personnel to prevent damage to sensitive electronic components.
6. Troubleshooting
If you experience issues after installing the MMI Control Circuit Board E380, consider the following troubleshooting steps:
| Problem | Possible Cause | Solution |
|---|---|---|
| MMI buttons or rotary knob unresponsive |
|
|
| MMI display not turning on |
|
|
| Intermittent MMI functionality |
|
|
If issues persist after troubleshooting, it is recommended to seek assistance from a qualified automotive technician.
7. Specifications
- Brand: CULMKARI
- Model Number: 791319030368
- Item Weight: 5.3 ounces
- Product Dimensions: 7.87 x 4.33 x 1.57 inches
- Manufacturer Part Number: 791319030368
- ASIN: B086X9C35S
- First Available: April 9, 2020
8. Warranty and Support
CULMKARI is committed to product quality and customer satisfaction.
- Warranty: This product typically comes with a 1-year warranty. Please refer to your purchase documentation for specific warranty terms.
- Returns: Standard return policies apply, typically allowing returns within 30 days of purchase.
- Customer Support: For any questions or professional support regarding the product, please contact CULMKARI customer service. We aim to provide quick responses and assistance within 16 hours.

Figure 6: CULMKARI Reliable Service Commitment
This image illustrates CULMKARI's commitment to reliable service, emphasizing their dedication to customer support and product quality assurance.
Ask a question about this manual
Ask about setup, troubleshooting, compatibility, parts, safety, or missing instructions. Manuals+ will review the question and use this page’s manual context to help answer it.