
Introduction
This manual provides instructions for the installation, operation, and maintenance of your MGI SpeedWare 2-in-1 Voltmeter/Ammeter. This device is designed to provide real-time voltage and current measurements for 12V DC power sources. Please read these instructions carefully before use to ensure proper function and safety.
Product Overview
The MGI SpeedWare 2-in-1 Voltmeter/Ammeter features a compact design with an LED digital display for clear readings. It is compatible with various 12V DC applications.
- LED Digital Display: Provides simultaneous voltage and amperage readings.
- Universal Compatibility: Designed for 12V DC power sources.
- Versatile Applications: Suitable for cars, boats, ATVs, UTVs, campers, motorbikes, and other custom vehicles.
- Easy Installation: Mounts into a standard 1-1/8 inch round hole.
- Package Contents: Includes 1 x voltmeter/ammeter and 2 x insulated crimp terminals.
Setup and Installation
Follow these steps for proper installation of your voltmeter/ammeter:
- Prepare Mounting Hole: Create a 1-1/8 inch (approximately 28.5 mm) round hole in your desired mounting surface.
- Insert Meter: Carefully insert the voltmeter/ammeter into the prepared hole. The device is designed to snap securely into place.

This image illustrates the compact size of the meter, with a 1.5-inch overall diameter and a required 1.125-inch mounting hole.
- Wiring Connections: The device has three spade terminals on the back for electrical connections. Refer to the wiring diagram below for correct connections.
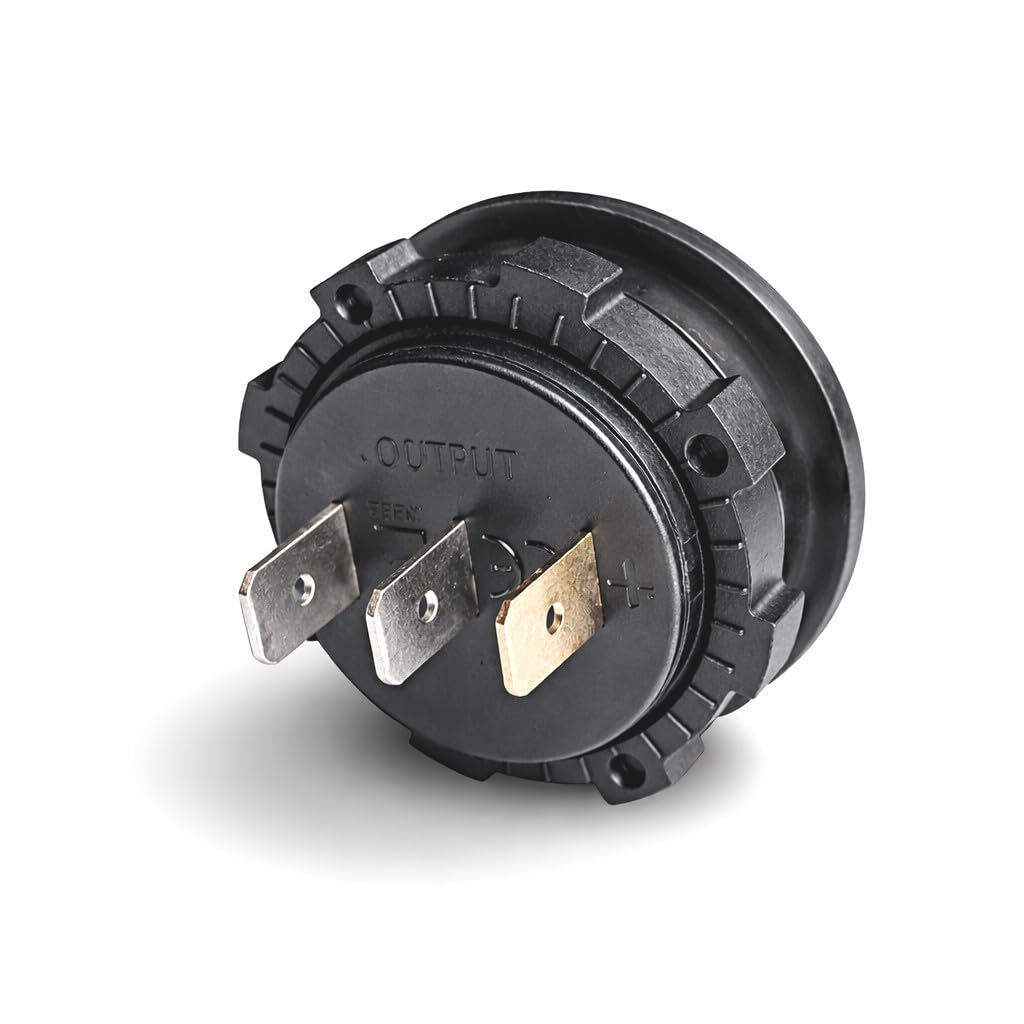
This image shows the rear of the meter with its three spade terminals: Positive (+), Negative (-), and Output (for current measurement).

This diagram illustrates the wiring for both voltmeter and ammeter functions. The voltmeter connects in parallel using the '+' and '-' pins. The ammeter connects in series using the 'OUTPUT' and '-' pins, with the middle pin connected to the negative side of the load.
- Voltmeter Connection (Parallel): Connect the '+' pin to the positive (+) terminal of your 12V DC power source and the '-' pin to the negative (-) terminal.
- Ammeter Connection (Series): For current measurement, the device must be wired in series with the load. Connect the 'OUTPUT' pin to the negative side of the load (e.g., the negative terminal of a light bulb). Connect the '-' pin to the negative (-) terminal of your 12V DC power source. The positive (+) connection for the ammeter function is typically integrated with the voltmeter's positive input.
- Important Note: The middle pin labeled 'OUTPUT' MUST be connected to the negative side of the load for accurate current measurement.
- Maximum Load: The device supports a maximum load of 10A at 12V DC. Exceeding this limit may damage the unit.
Operating Instructions
Once properly installed and powered, the MGI SpeedWare 2-in-1 Voltmeter/Ammeter will automatically display real-time voltage and current readings on its LED screen.
- Voltage Display: The upper digital display shows the DC voltage in Volts (V).
- Current Display: The lower digital display shows the DC current in Amperes (A).
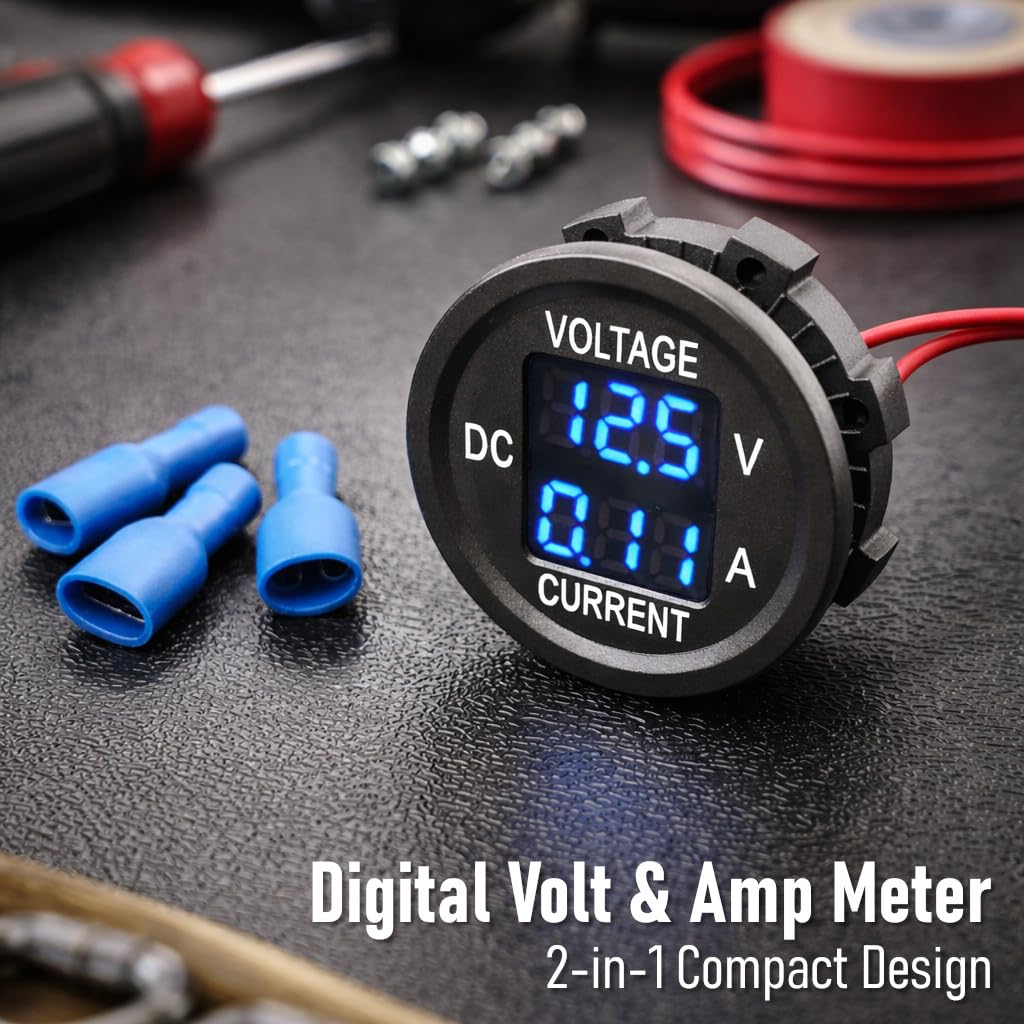
This image shows the clear LED display indicating 12.5V and 0.11A, demonstrating the device's real-time measurement capability.

The meter is shown installed in a vehicle, providing continuous monitoring of voltage and current.
Maintenance
The MGI SpeedWare 2-in-1 Voltmeter/Ammeter requires minimal maintenance.
- Cleaning: Use a soft, dry cloth to clean the display and exterior. Avoid abrasive cleaners or solvents.
- Environmental Conditions: Ensure the device is not exposed to extreme temperatures or excessive moisture. The upper temperature rating is 60 °C.
- Connections: Periodically check all electrical connections to ensure they are secure and free from corrosion.
Troubleshooting
If you encounter issues with your voltmeter/ammeter, refer to the following common problems and solutions:
- No Display/Incorrect Readings:
- Ensure all wiring connections (positive, negative, and output) are correctly made according to the wiring diagram.
- Verify that the power source is providing 12V DC.
- Check for loose or corroded terminals.
- Inaccurate Amperage Reading:
- Confirm that the 'OUTPUT' pin is correctly connected in series with the negative side of the load. Incorrect series wiring will result in inaccurate or no current readings.
- Ensure the current draw does not exceed the maximum rated 10A.
- Display Flickering:
- Check for unstable power supply or loose connections.
Specifications
| Feature | Specification |
|---|---|
| Brand | MGI SpeedWare |
| Model Number | GA-VA201 |
| Measurement Type | Ammeter, Voltmeter |
| Minimum Operating Voltage | 12 volts DC |
| Maximum Load (Current) | 10 Amperes (at 12V DC) |
| Upper Temperature Rating | 60 °C |
| Display Style | Digital LED |
| Color | Black |
| Mounting Hole Diameter | 1-1/8 inches (approx. 28.5 mm) |
| Compatible Devices | Cars, trucks, boats, ATVs, UTVs, campers, trailers, go karts, motorbikes, and other custom vehicles |
| Manufacturer | MGI |
| ASIN | B086RG8Z45 |
Warranty and Support
Specific warranty information for this product is not provided in the available data. For warranty details, technical support, or further assistance, please contact MGI SpeedWare directly through their official website or customer service channels.