Introduction
This manual provides instructions for the installation, operation, and maintenance of your VTech VS112-37 DECT 6.0 Bluetooth Cordless Phone System. This system includes features such as Bluetooth Connect to Cell, Smart Call Blocker, a digital answering system, and multiple handsets for enhanced communication within your home or office environment.
1. Setup and Installation
1.1 Package Contents
Ensure all items are present in your package:
- Base Unit
- 3 Cordless Handsets
- 3 AC Adapters
- Telephone Line Cord
- Wall Mount Bracket (optional)
- User's Manual (this document)

Image: The VTech VS112-37 cordless phone system, showing the main base unit and three cordless handsets.
1.2 Base Unit Placement
Place the base unit on a flat, stable surface, away from sources of electrical noise such as microwaves, televisions, or computers. For optimal range, position it in a central location within your home.
1.3 Handset Battery Installation and Charging
- Open the battery compartment cover on the back of each handset.
- Connect the battery pack connector securely into the jack inside the compartment.
- Place the battery pack inside the compartment.
- Close the battery compartment cover.
- Place each handset in its respective charger or the base unit. The CHARGE light on the handset will illuminate, indicating proper charging.
Allow the handsets to charge for at least 16 hours before initial use to ensure full battery capacity.
1.4 Connecting the Telephone Line and Power
- Plug one end of the telephone line cord into the TEL LINE jack on the back of the base unit.
- Plug the other end of the telephone line cord into a telephone wall jack.
- Plug the small end of the AC adapter into the POWER jack on the back of the base unit.
- Plug the large end of the AC adapter into a standard electrical outlet.
- For each handset charger, plug the AC adapter into the power jack on the charger and then into a standard electrical outlet.
Use only the AC adapters provided with the product. Do not use other adapters as this may damage the unit.
1.5 Initial Setup: Date and Time
After the handsets are charged, the system will prompt you to set the date and time. Follow the on-screen instructions on any handset to configure these settings. Correct date and time are essential for the Caller ID and answering system functions.
2. Operating Instructions
2.1 Making and Receiving Calls
- To Make a Call: Press TALK/FLASH or SPEAKER, then dial the number.
- To Answer a Call: Press any dialing key (0-9, * or #), TALK/FLASH, or SPEAKER.
- To End a Call: Press OFF/CANCEL or place the handset in the charger.
2.2 Bluetooth Connect to Cell
This feature allows you to make and receive cellular calls using your VTech cordless handsets. You can pair up to two cell phones or one cell phone and one Bluetooth headset.
- Pairing a Cell Phone:
- On the base unit, press and hold CELL 1 or CELL 2 until the corresponding indicator light flashes.
- Enable Bluetooth on your cell phone and search for available devices.
- Select "VTech VS112" from the list and follow the pairing instructions on your cell phone.
- Once paired, the indicator light on the base unit will turn solid.
- Making/Receiving Cell Calls:
- To make a cell call, press CELL on the handset, then dial the number.
- Incoming cell calls will ring on the cordless handsets. Press CELL to answer.
- Voice Assistant Access:
- Even if your smartphone is in another room, you can access Siri or Google Now from the cordless handsets. Press the dedicated voice assistant key (refer to handset display for specific key) to activate.

Image: Illustration of the Connect to Cell feature, demonstrating how cellular calls can be routed through the VTech cordless phone system.

Image: A user making a call on the VTech cordless phone, illustrating the convenience of the Connect to Cell feature.
2.3 Smart Call Blocker
The Smart Call Blocker helps filter unwanted calls, including robocalls, from ringing through. You can permanently blacklist up to 1,000 numbers.
- Blocking a Call: During a call or after reviewing Caller ID history, press the CALL BLOCK button to add the number to the block list.
- Screening Robocalls: Set the system to ask callers to press the pound key. Robocalls typically cannot do this and will be blocked.
- Screening Unknown Callers: Configure the system to ask unknown callers to record their name and press the pound key. The phone will ring and announce the caller's name, allowing you to decide whether to answer or block.

Image: Detail of the handset keypad highlighting the 'CALL BLOCK' button for quick blocking of unwanted calls.

Image: Visual representation of the 1,000 name and number smart call block directory feature.
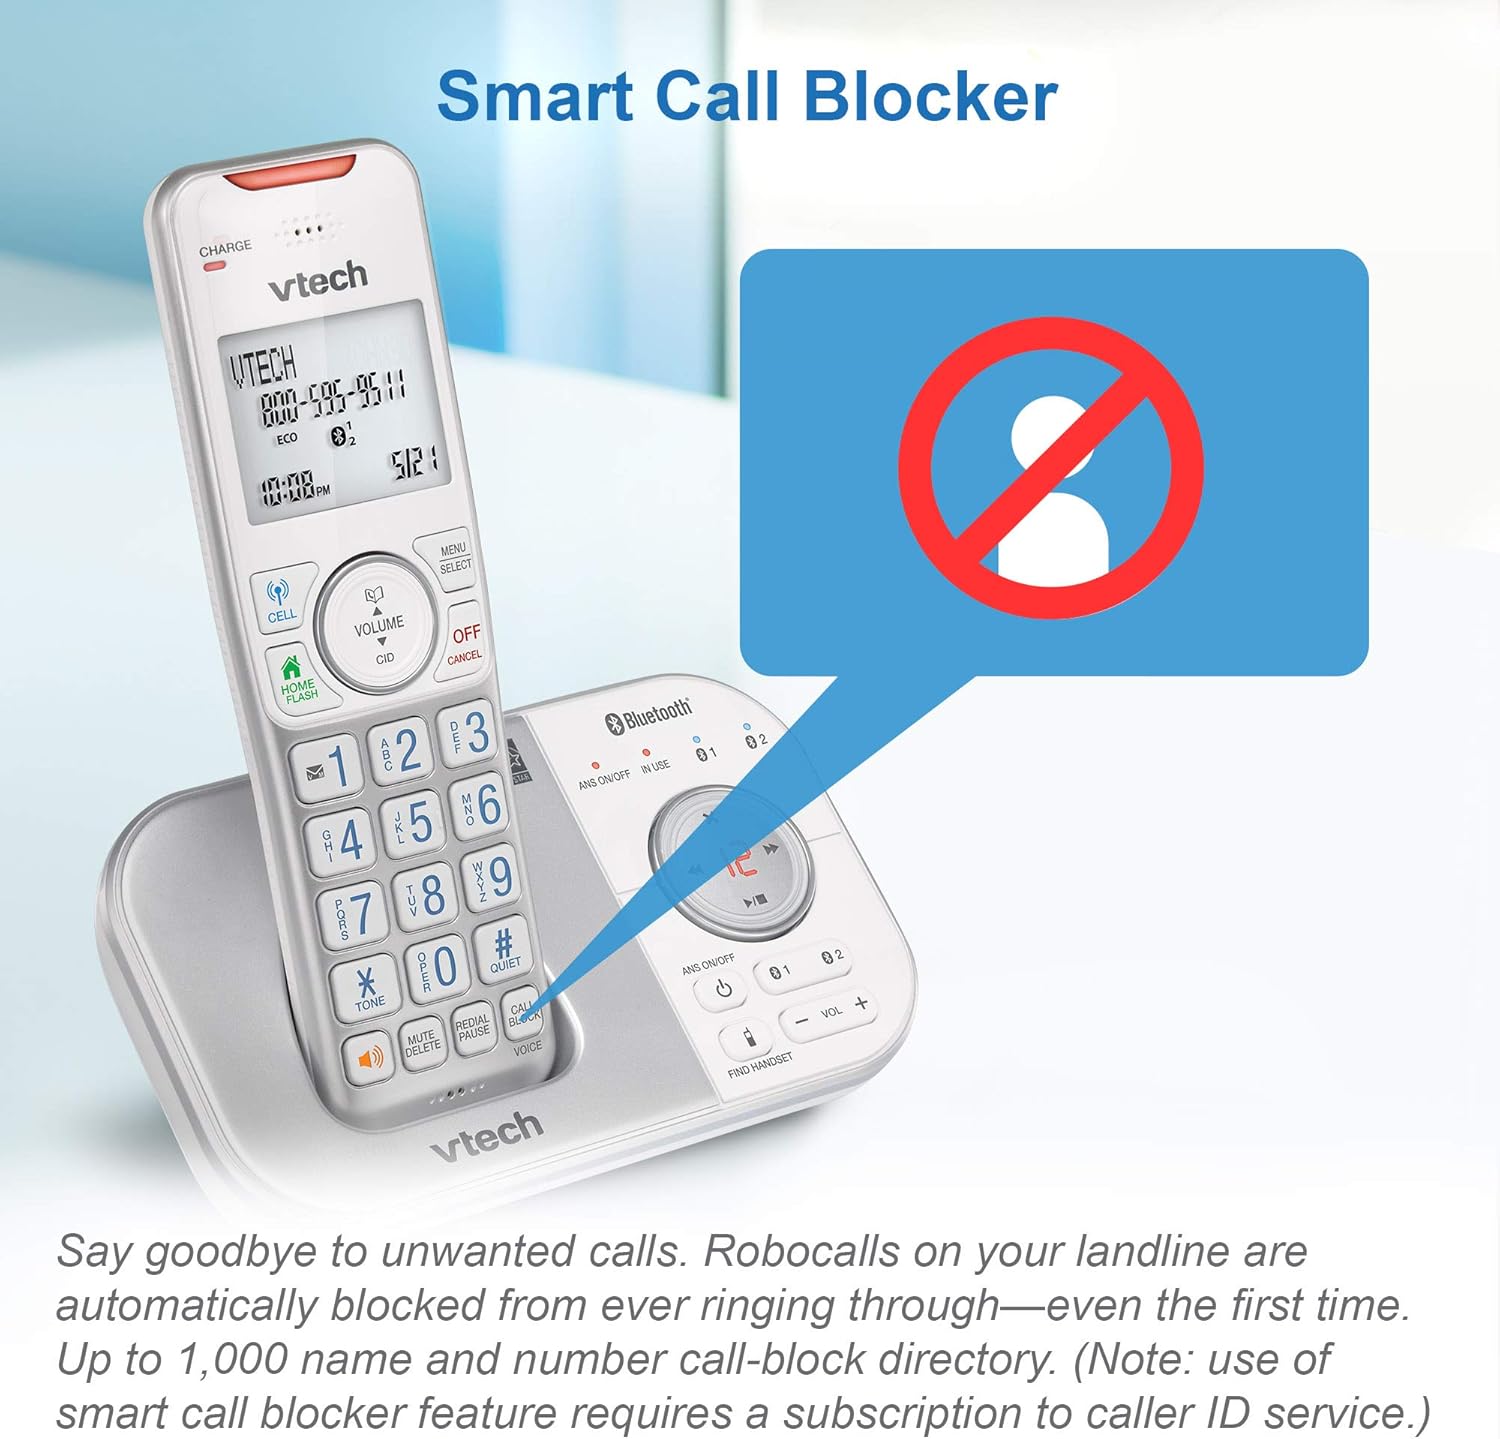
Image: The Smart Call Blocker feature illustrated with a "no entry" symbol over a person, signifying blocked calls.

Image: A family enjoying quiet time, representing the benefit of the Smart Call Blocker in preventing unwanted interruptions.
2.4 Digital Answering System
The integrated digital answering system records up to 22 minutes of messages, announcements, and memos. A voice guide assists with setup.
- Turning On/Off: Press ANS ON/OFF on the base unit or through the handset menu.
- Playing Messages: Press PLAY/STOP on the base unit or access through the handset menu.
- Recording an Outgoing Announcement: Follow the voice guide prompts after selecting the "Record OGM" option in the answering system menu.

Image: The digital answering system on the base unit, showing the message counter and controls, with an example message.
2.5 Intercom Function
Use the intercom feature to communicate between handsets or transfer calls.
- To Initiate Intercom: Press INTERCOM on a handset, then select the desired handset number.
- To Transfer a Call: During an external call, press INTERCOM, select the handset, and once answered, press TALK/FLASH to transfer.

Image: Two handsets demonstrating the intercom functionality, allowing communication between different parts of a home.
2.6 Speakerphone
Each handset features a full-duplex speakerphone, allowing hands-free conversations where both parties can speak and be heard simultaneously.
- To Activate Speakerphone: During a call, press the SPEAKER button.
- To Deactivate Speakerphone: Press TALK/FLASH to switch back to handset mode, or OFF/CANCEL to end the call.

Image: A user demonstrating the full-duplex speakerphone feature, allowing hands-free communication.
2.7 Volume Adjustment
Adjust the listening volume during a call using the VOLUME buttons on the side of the handset or the VOL + / - buttons on the base unit.

Image: Location of volume control buttons on both the handset and the base unit.
2.8 Caller ID and Call Waiting
The handset display shows the caller's name and number (if available) for incoming calls. The system stores up to 50 Caller ID records.
- Reviewing Caller ID History: Press CID on the handset to scroll through the list.
- Call Waiting: If you subscribe to Call Waiting service, a tone will indicate a second incoming call. Press FLASH to switch between calls.

Image: The handset display showing an incoming call with Caller ID information.
2.9 Phonebook Directory
Store frequently called numbers in the phonebook for quick dialing. The system can store multiple entries.
- Adding an Entry: Access the phonebook menu, select "Add New Entry," and follow the prompts to enter the name and number.
- Dialing from Phonebook: Press DIR, scroll to the desired entry, and press TALK/FLASH.
2.10 Visual Ringer
A light on the top of the handset flashes to signal an incoming call, which is useful in noisy environments or for users with hearing impairments.

Image: The visual ringer light on top of the handset, indicating an incoming call.
2.11 Large Screen and Backlit Keypad
The handsets feature a large 2-inch screen with high-contrast text and an enlarged, backlit keypad for improved readability and ease of dialing, especially in low-light conditions.

Image: The large 2-inch screen and backlit keypad of the VTech handset, designed for clear visibility.
3. Maintenance
3.1 Cleaning
Clean the phone's surfaces with a soft, damp cloth. Do not use cleaning sprays or liquid cleaners, as they may damage the finish or electrical components.
3.2 Battery Care
To maintain optimal battery performance, ensure handsets are placed in their chargers when not in use. If the phone will be unused for an extended period, remove the batteries from the handsets.
4. Troubleshooting
| Problem | Solution |
|---|---|
| No dial tone |
|
| Cannot make or receive calls |
|
| Poor audio quality or static |
|
| Handset displays "Low Battery" |
|
| Smart Call Blocker not working as expected |
|
5. Specifications
- Model: VS112-37
- Technology: DECT 6.0
- Connectivity: Bluetooth
- Handsets: 3 (expandable)
- Answering System: Digital, up to 22 minutes recording time
- Call Blocking Capacity: Up to 1,000 numbers
- Caller ID Memory: 50 entries
- Display: 2-inch backlit LCD
- Power Source: AC adapter for base and chargers, rechargeable batteries for handsets
- Dimensions (Base Unit): Approximately 5.95 x 3.33 x 7.36 inches
- Item Weight: 2.4 pounds (total system)
- Material: Plastic
6. Warranty and Support
VTech products are manufactured with high-quality components and are designed to provide reliable performance. For detailed warranty information, please refer to the warranty card included in your product packaging or visit the official VTech website.
For technical support, product registration, or to purchase accessories, please visit the VTech support website or contact VTech customer service. Contact information can typically be found on the VTech official website: www.vtechphones.com


