
1. Introduction and Overview
This manual provides comprehensive instructions for the safe and effective use of your Kreg Pocket-Hole Jig 320 and KHC-Micro 2 inch Classic Face Frame Clamp. This system is designed to simplify the creation of strong pocket-hole joints in various woodworking projects. It offers versatility for working with materials ranging from 1/2 inch to 1 1/2 inches thick.
2. Components Included
The Kreg Pocket-Hole Jig 320 kit includes the following components:
- Two (2) Drill Guides
- One (1) Removable Spacer
- One (1) Material Thickness Stop
- One (1) Easy-Set Drill Bit
- One (1) Stop Collar
- One (1) Hex Wrench
- One (1) KHC-Micro 2 inch Classic Face Frame Clamp
- One (1) Clamp Adapter
- Anti-slip base pads

Figure 2.1: All components of the Kreg Pocket-Hole Jig 320 and KHC-Micro Clamp kit. This image displays the two blue drill guides, a removable spacer, the easy-set drill bit with stop collar, a hex wrench, and the KHC-Micro face frame clamp with its adapter.
3. Setup
3.1. Determine Material Thickness
Use the included material thickness gauge to accurately measure the thickness of your workpiece. The gauge has markings for common material thicknesses (1/2", 3/4", 1", 1 1/2").

Figure 3.1: A user measuring the thickness of a wooden board using the blue Kreg material thickness gauge. This step ensures proper drill bit depth setting.
3.2. Set Drill Bit Depth
Once the material thickness is determined, set the stop collar on the easy-set drill bit. Align the step on the drill bit with the corresponding thickness marking on the material thickness gauge. Secure the stop collar using the hex wrench.

Figure 3.2: Hands adjusting the stop collar on the Kreg easy-set drill bit, aligning it with the material thickness gauge to ensure correct drilling depth.
3.3. Assemble the Jig
The Kreg Pocket-Hole Jig 320 consists of two drill guides and a removable spacer. You can use one drill guide, two with the spacer, or two without the spacer, depending on your project needs. Attach the clamp adapter to the jig for secure clamping.
4. Operating Instructions
4.1. Secure the Jig to the Workpiece
Position the jig on your workpiece where you intend to drill the pocket holes. Ensure the anti-slip base is firmly against the wood. Use the KHC-Micro Face Frame Clamp with the clamp adapter to secure the jig in place. The clamp should hold the jig tightly to prevent movement during drilling.

Figure 4.1: A Kreg Pocket-Hole Jig 320 clamped to a wooden board using the KHC-Micro Face Frame Clamp, ready for drilling.
4.2. Drill Pocket Holes
Insert the easy-set drill bit into your drill. Place the drill bit into the drill guide. Begin drilling at a moderate speed, allowing the bit to cut cleanly through the wood. Continue drilling until the stop collar makes contact with the drill guide, indicating the correct depth has been reached. Remove the drill and clear any sawdust.

Figure 4.2: A person using a power drill with the Kreg easy-set drill bit to create pocket holes in a wooden board, guided by the Kreg Pocket-Hole Jig 320.

Figure 4.3: A wooden board with several precisely drilled pocket holes, demonstrating the jig's capability for multiple hole placement.
4.3. Assemble Joints
Align the workpieces to be joined. Use the KHC-Micro Face Frame Clamp to hold the pieces flush while driving Kreg pocket-hole screws into the drilled holes. The clamp's large pads distribute clamping force evenly, helping to create strong, flush joints.
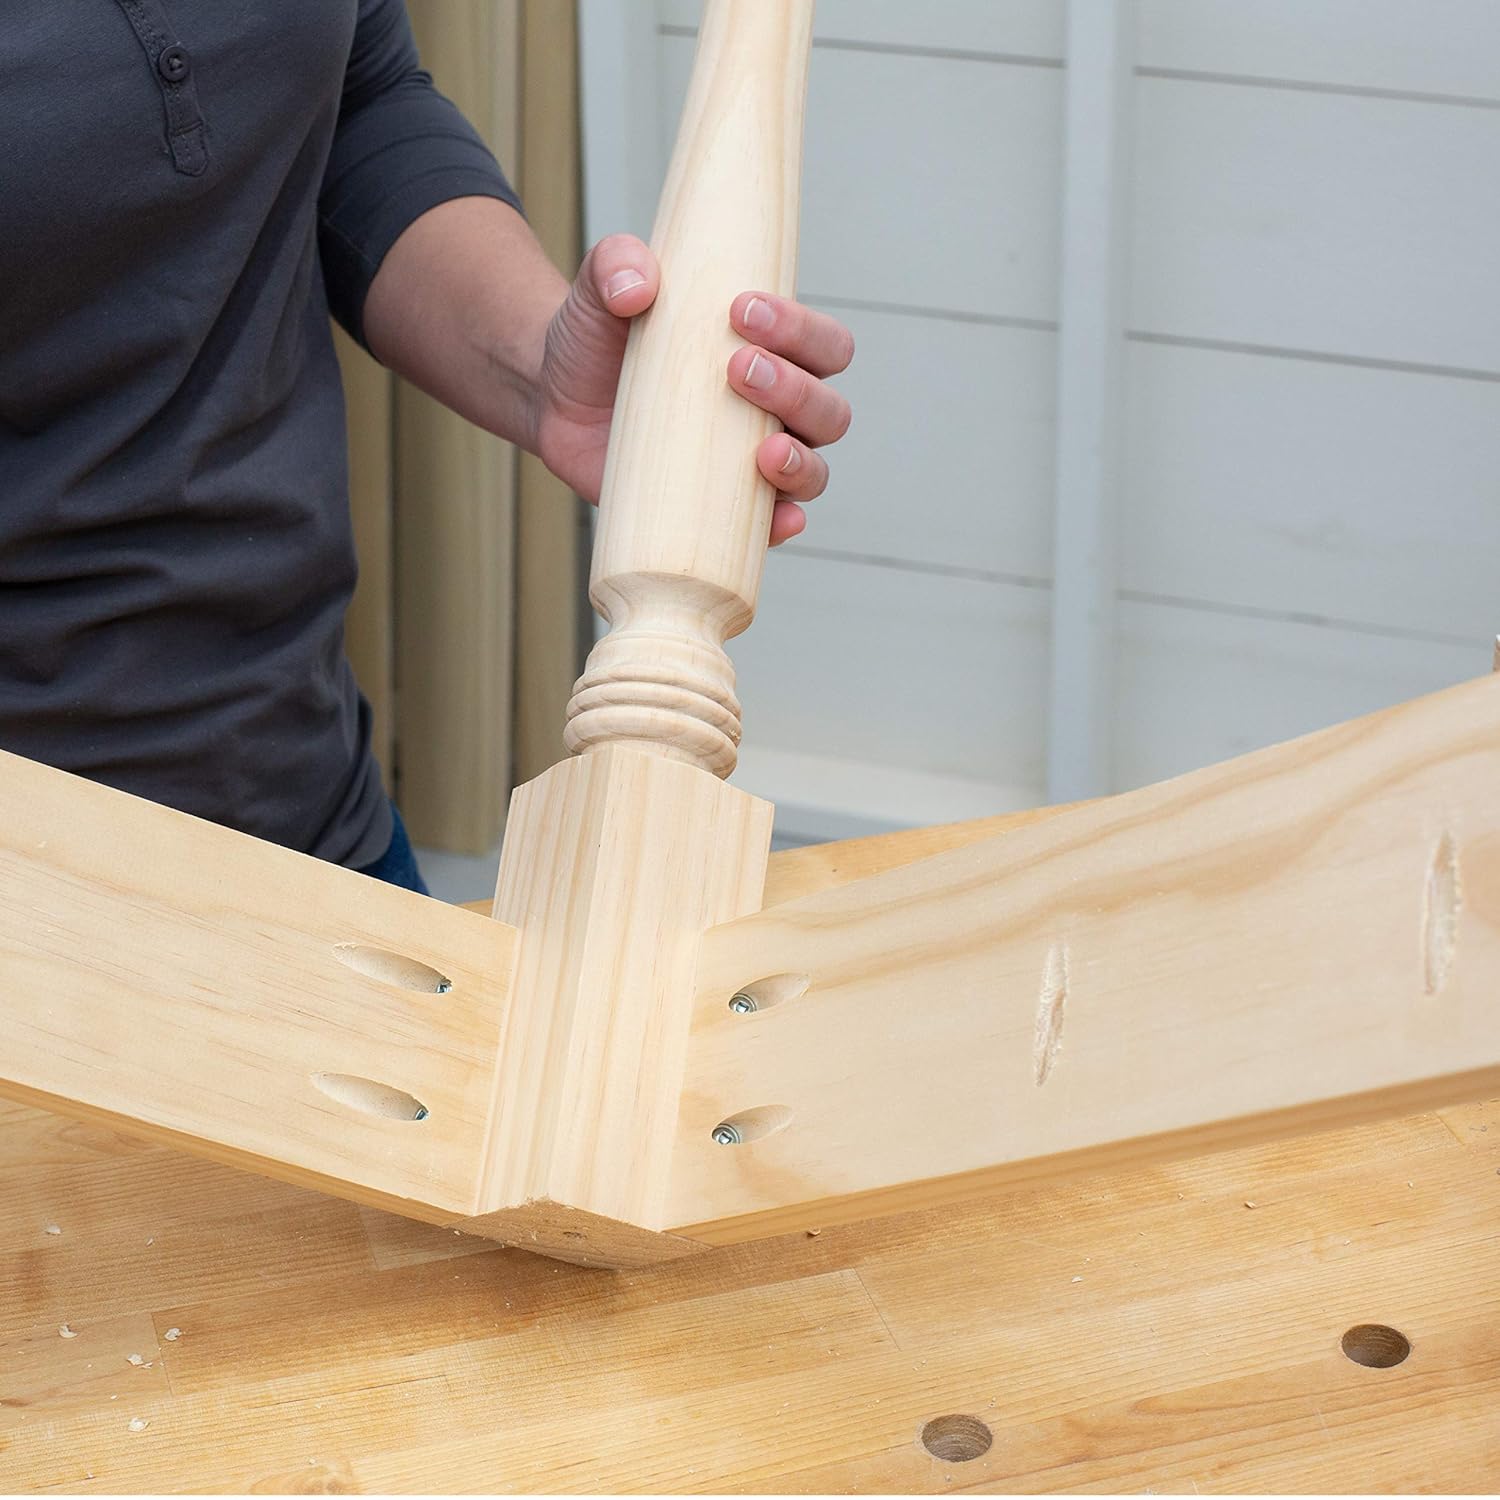
Figure 4.4: Two wooden pieces joined together using pocket-hole screws, with a turned leg attached, illustrating a completed joint.
5. Maintenance
To ensure the longevity and optimal performance of your Kreg Pocket-Hole Jig 320 and KHC-Micro Clamp, follow these maintenance guidelines:
- Cleaning: After each use, remove sawdust and debris from the drill guides and clamp using a brush or compressed air.
- Storage: Store the jig and clamp in a clean, dry environment to prevent rust and damage.
- Drill Bit Care: Keep the easy-set drill bit sharp. Replace it if it becomes dull or damaged to ensure clean cuts and prevent splintering.
- Clamp Lubrication: Periodically apply a light lubricant to the pivot points and threads of the KHC-Micro Clamp to maintain smooth operation.
6. Troubleshooting
If you encounter issues while using your Kreg Pocket-Hole Jig 320, consider the following:
- Splintering or Rough Holes:
- Ensure the drill bit is sharp.
- Verify the material thickness setting is correct for your workpiece.
- Drill at a consistent, moderate speed.
- Jig Movement During Drilling:
- Confirm the KHC-Micro Clamp is securely fastened to the jig and workpiece.
- Ensure the anti-slip base is clean and making good contact with the wood.
- Joints Not Flush:
- Use the KHC-Micro Face Frame Clamp to hold the workpieces flush during assembly.
- Ensure the correct screw length is used for the material thickness.
7. Specifications
| Feature | Detail |
|---|---|
| Product Dimensions | 2.99 x 8.75 x 11.69 inches |
| Item Model Number | KPHJ320+KHC-MICRO |
| Material Compatibility | Wood, Plywood (1/2" to 1 1/2" thickness) |
| Jig Material | Plastic |
| Clamp Reach | 2 inches |
| Clamp Capacity | Up to 2 1/4 inches thick |
| Item Weight | 2.45 Pounds |
| Color | Blue |
| UPC | 647096810481 |
8. Warranty and Support
For warranty information or technical support regarding your Kreg Pocket-Hole Jig 320 and KHC-Micro Clamp, please refer to the official Kreg website or contact Kreg customer service directly. Keep your purchase receipt as proof of purchase.
Kreg Website: www.kregtool.com


