
1. Introduction
This manual provides detailed instructions for the installation, operation, and maintenance of your Miseno MNO240C Santi Two-Piece High-Efficiency Toilet. Please read all instructions thoroughly before beginning installation or use to ensure proper function and safety.
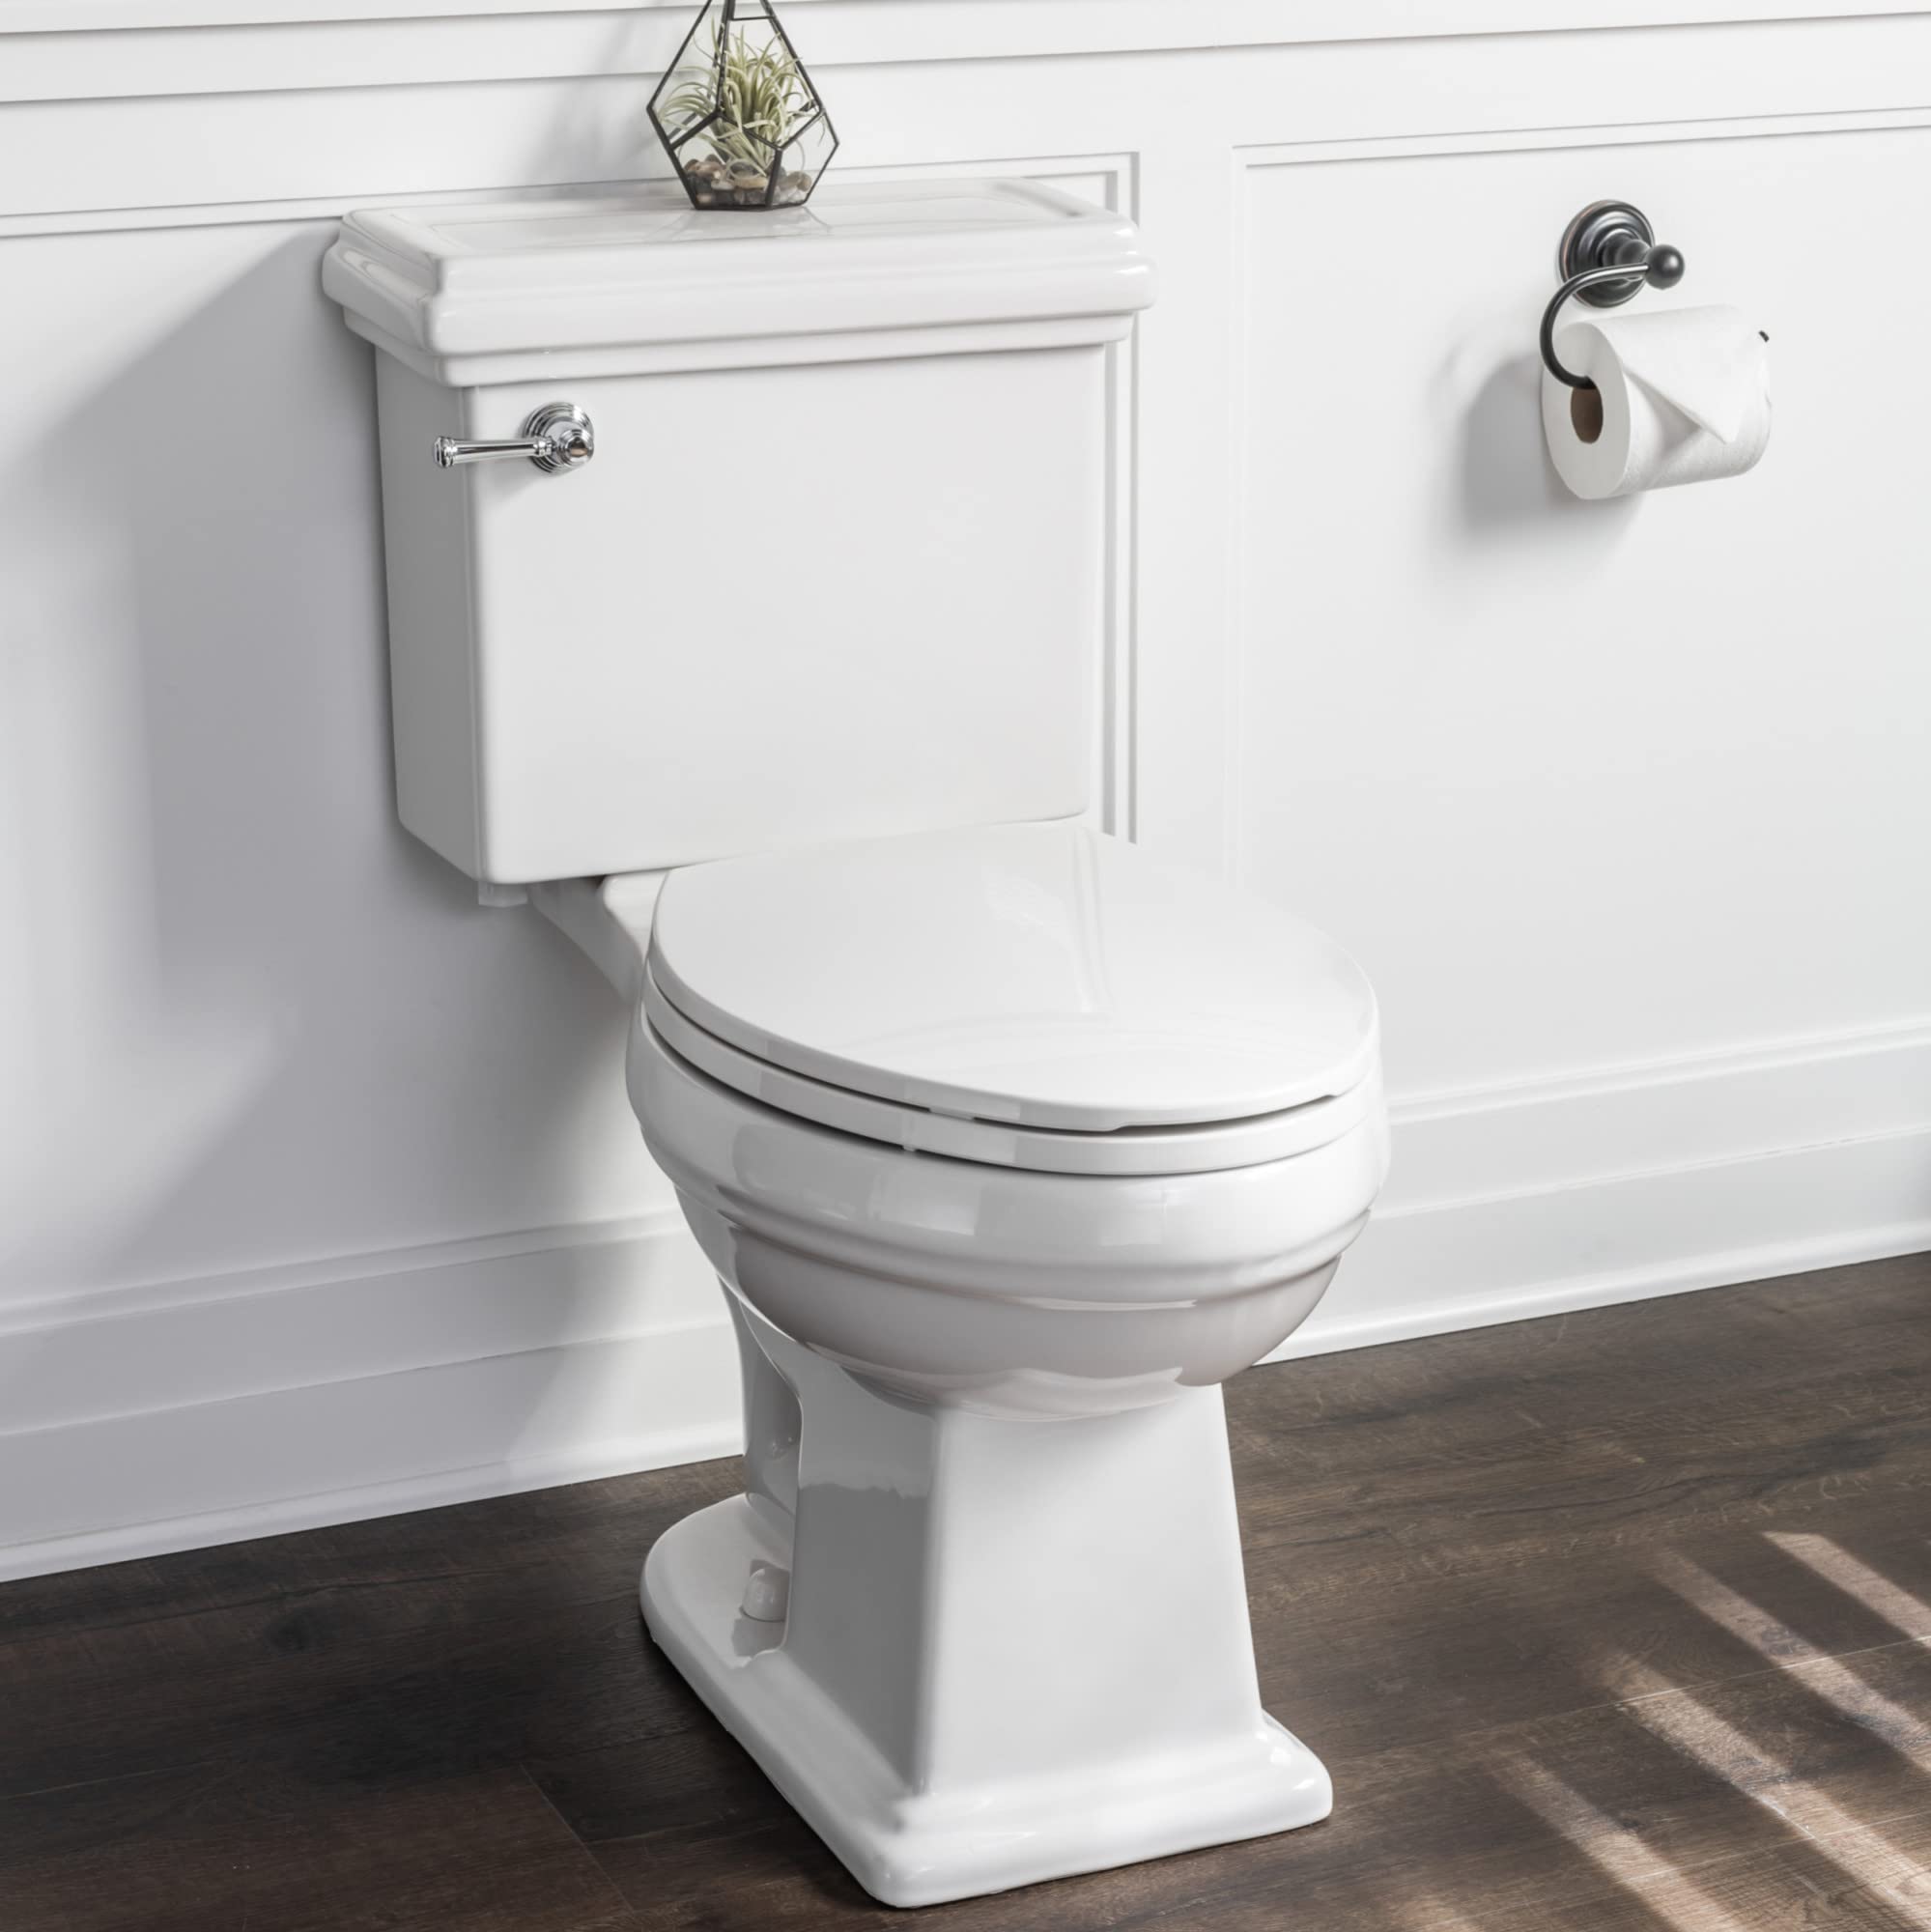
Image 1.1: The Miseno MNO240C Santi Two-Piece High-Efficiency Toilet in Bright White.
2. Safety Information
Observe the following safety precautions during installation and use:
- Always turn off the water supply to the toilet before beginning any installation or maintenance.
- Wear appropriate personal protective equipment, including safety glasses and gloves, during installation.
- Ceramic products can be heavy and fragile. Handle with care to prevent injury or damage.
- If you are unsure about any part of the installation process, consult a qualified plumber.
- Ensure all connections are secure and leak-free before restoring water supply.
3. Package Contents
Verify that all components are present before beginning installation:
- Toilet Bowl (Elongated, Chair Height)
- Toilet Tank
- Soft-Close Toilet Seat
- Tank Lid (Classic Style)
- Wax Ring Kit with Flange Bolts
- Tank-to-Bowl Hardware
4. Specifications
| Feature | Detail |
|---|---|
| Model Number | MNO240C |
| Brand | Miseno |
| Color | Bright White |
| Product Dimensions (D x W x H) | 28.88" x 17.75" x 31.25" |
| Material | Vitreous China |
| Item Weight | 105 Pounds |
| Installation Method | Floor Mounted |
| Seat Material | Plastic |
| Shape | Elongated (Oblong) |
| Flush System | High performance 3" flush valve system |
| Water Efficiency | WaterSense certified (20% less water than standard 1.6 GPF) |
| Manufacturer Warranty | Limited Lifetime |
| UPC | 781889367865 |
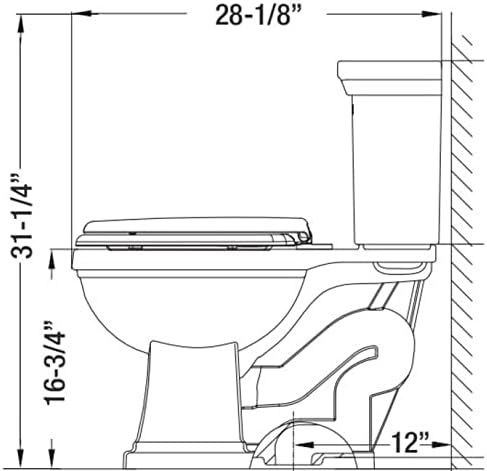
Image 4.1: Dimensional drawing of the Miseno MNO240C toilet, indicating key measurements for installation.
5. Setup and Installation
This section outlines the steps for installing your two-piece floor-mounted toilet. Professional installation is recommended.
5.1. Preparation
- Turn off Water Supply: Locate the main water shut-off valve for your bathroom or home and turn it off. Flush the existing toilet to drain the tank.
- Remove Old Toilet (if applicable): Disconnect the water supply line from the old toilet. Remove the nuts securing the toilet to the floor flange. Carefully lift and remove the old toilet. Clean the floor flange area thoroughly.
- Inspect Floor Flange: Ensure the floor flange is securely attached to the floor and is free of damage. Replace if necessary.
5.2. Bowl Installation
- Install Flange Bolts: Insert the new flange bolts (provided in the wax ring kit) into the floor flange slots.
- Apply Wax Ring: Place the wax ring onto the horn of the toilet bowl, ensuring it is centered and firmly seated. Alternatively, place the wax ring directly onto the floor flange.
- Position Toilet Bowl: Carefully lower the toilet bowl onto the floor flange, aligning the bolt holes in the bowl base with the flange bolts. Press down firmly and evenly to compress the wax ring.
- Secure Bowl: Place washers and nuts onto the flange bolts. Hand-tighten the nuts, then use a wrench to tighten them evenly, alternating between bolts, until the bowl is secure. Do not overtighten, as this can crack the ceramic.
5.3. Tank Installation
- Install Tank-to-Bowl Gasket: Place the large rubber gasket onto the threaded outlet on the bottom of the toilet tank.
- Attach Tank to Bowl: Carefully align the tank with the bolt holes on the back of the toilet bowl. Lower the tank onto the bowl, ensuring the gasket seats properly.
- Secure Tank: Insert the tank-to-bowl bolts through the holes in the tank and bowl. Secure with washers and nuts from underneath the bowl. Hand-tighten, then use a wrench to tighten evenly, alternating between bolts, until the tank is stable. Do not overtighten.
5.4. Water Supply Connection & Seat Installation
- Connect Water Supply Line: Attach the flexible water supply line from the shut-off valve to the fill valve inlet on the bottom of the toilet tank. Hand-tighten, then use a wrench for a final snug turn. Do not overtighten.
- Install Toilet Seat: Follow the instructions provided with your soft-close toilet seat to attach it to the bowl.
- Install Tank Lid: Place the classic style tank lid onto the toilet tank.
5.5. Final Test
- Restore Water Supply: Slowly turn on the main water supply valve. Allow the tank to fill. Check all connections for leaks.
- Flush Toilet: Flush the toilet several times to ensure proper operation and check for any leaks around the base or tank connections.
6. Operating Instructions
The Miseno MNO240C toilet is designed for simple and efficient operation.
6.1. Flushing
To flush the toilet, press down firmly on the chrome flush handle located on the side of the tank. The high-performance 3-inch flush valve system will activate, providing a powerful and efficient flush.

Image 6.1: Close-up view of the chrome flush handle on the toilet tank.
6.2. Water Efficiency
This toilet is WaterSense certified, meaning it uses 20% less water than standard 1.6 gallons per flush (GPF) toilets while maintaining exceptional flush efficiency. This contributes to water conservation without compromising performance.
7. Maintenance
Regular cleaning and maintenance will ensure the longevity and optimal performance of your toilet.
7.1. Cleaning
- Use a soft cloth or sponge with mild, non-abrasive cleaners specifically designed for bathroom fixtures.
- Avoid using abrasive cleaners, scouring pads, or harsh chemicals (e.g., bleach, acid-based cleaners) as these can damage the vitreous china finish and internal components.
- Clean the exterior, bowl, and seat regularly. For the soft-close seat, wipe with a damp cloth and mild soap.
7.2. Component Checks
- Periodically check the water supply line and tank-to-bowl connections for any signs of leaks. Tighten connections if necessary, but do not overtighten.
- Inspect the flapper or flush valve seal inside the tank for wear. A worn seal can cause continuous running water.
- Ensure the fill valve is functioning correctly and the water level in the tank is at the recommended mark.
8. Troubleshooting
Refer to the following table for common issues and their solutions.
| Problem | Possible Cause | Solution |
|---|---|---|
| Weak or Incomplete Flush | Low water level in tank, partially closed water supply valve, clogged rim jets, or obstruction in trapway. | Ensure water supply valve is fully open. Adjust fill valve to raise water level. Clean rim jets under the bowl rim. Check for clogs in the trapway. |
| Toilet Runs Continuously | Flapper not sealing properly, fill valve malfunction, or flush handle linkage issues. | Check flapper for debris or wear; replace if necessary. Inspect fill valve for proper operation. Ensure flush handle chain has correct slack. |
| Leaks at Base of Toilet | Loose flange bolts, worn wax ring, or cracked bowl. | Tighten flange bolts evenly (do not overtighten). If leak persists, the wax ring may need replacement. A cracked bowl requires replacement. |
| Slow Tank Fill | Partially closed water supply valve, clogged fill valve, or low water pressure. | Ensure water supply valve is fully open. Clean or replace fill valve. Check household water pressure. |
9. Warranty Information
The Miseno MNO240C Santi Two-Piece High-Efficiency Toilet comes with a Limited Lifetime Manufacturer Warranty. This warranty covers defects in materials and workmanship under normal use and service. For specific terms, conditions, and claim procedures, please refer to the warranty documentation included with your purchase or contact Miseno customer support.
10. Support
If you encounter issues that cannot be resolved using the troubleshooting guide, or if you require further assistance, please contact Miseno customer service. You may also consult a qualified plumbing professional for complex installation or repair needs.
Additional Resources
- For more information about Miseno products, visit the official Miseno Store on Amazon.
