
Introduction
The Meliconi HP Easy wireless stereo headphones provide a convenient way to listen to audio from your television or other analog audio sources without the clutter of cables. This system offers freedom of movement with a wireless range of up to 100 meters in open areas. The headphones feature an integrated rechargeable battery and comfortable over-ear design, while the compact transmitter base ensures easy integration with your home entertainment setup.
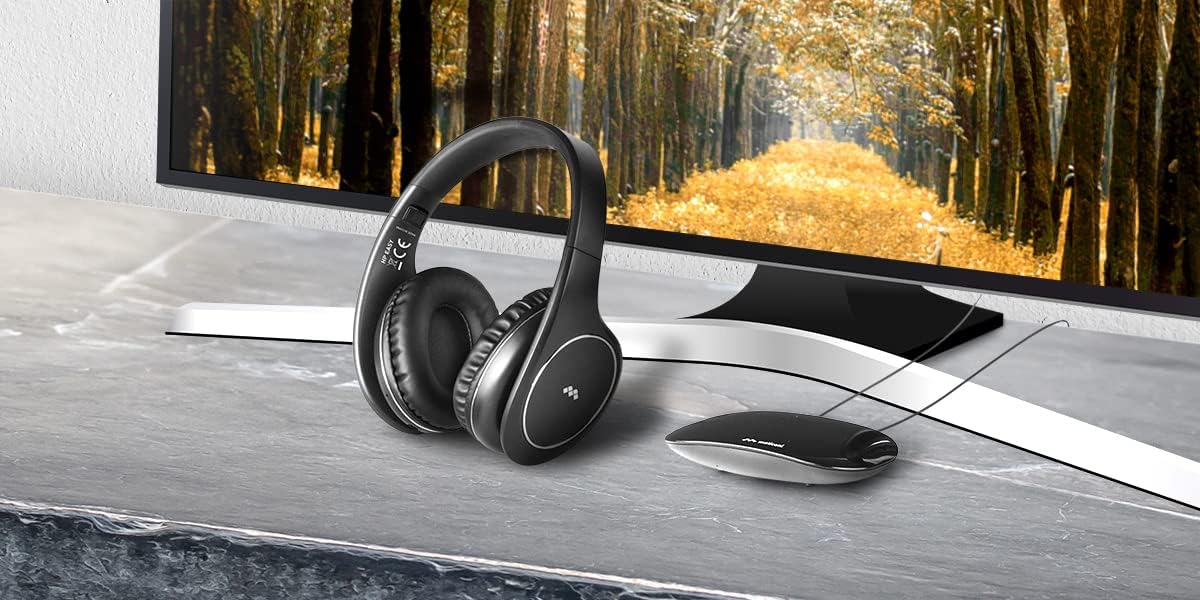
Image: Meliconi HP Easy wireless headphones and transmitter base positioned next to a television, illustrating a typical setup.
What's in the Box
Please check that all the following components are included in your package:
- 1. Headphone (receiver)
- 2. Base (transmitter)
- 3. Headphone charging cable (USB-microUSB)
- 4. Power cable for transmitter (USB-DC 5V)
- 5. Aux Audio Cable (analog stereo 3.5mm jack)
- 6. Instruction booklet
Product Overview
Headphones (Receiver)

Image: Close-up of the right earcup, highlighting the integrated volume controls and power button.
- Adjustable Headband: For comfortable fit.
- Soft Earcups: Ergonomic design for prolonged use.
- Integrated Controls: Power ON/OFF and Volume adjustment.
- Micro USB Port: For charging the internal battery.
- 3.5mm Audio Jack: For wired use.
Transmitter Base

Image: Rear view of the transmitter base, showing connection ports.
- DC 5V Input: For power supply.
- ON/OFF Switch: To power the transmitter.
- AUX Input (3.5mm): For connecting to analog audio sources.
- Compact Design: Can be discreetly placed behind a TV.

Image: Diagram summarizing key features: compact transmitter base, quick-charging lithium battery, 100m wireless range, and wired use capability.
Setup Instructions
- Connect the Transmitter Base to Power:
Connect the provided USB-DC 5V power cable to the DC 5V input on the transmitter base. Plug the USB end into a USB power adapter (not supplied) or a USB port on your TV/device. Ensure the transmitter's ON/OFF switch is in the OFF position initially.
- Connect the Transmitter Base to an Audio Source:
Using the supplied 3.5mm AUX audio cable, connect one end to the AUX input on the transmitter base and the other end to the headphone output (3.5mm jack) of your TV or other analog audio source. Important: The transmitter is only compatible with analog audio input signals. Verify your device has a traditional 3.5mm headphone output. If not, a separate digital-to-analog converter (not supplied) may be required.
- Power On the Transmitter:
Flip the ON/OFF switch on the transmitter base to the ON position. An indicator light on the transmitter should illuminate, indicating it is powered and transmitting.
- Charge the Headphones:
Before first use, fully charge the headphones. Connect the microUSB end of the charging cable to the microUSB port on the headphones and the USB-A end to a USB power source. The charging indicator on the headphones will show charging status. A full charge takes approximately 2 hours.
- Power On the Headphones:
Press and hold the power button on the headphones until the indicator light turns on. The headphones will automatically search for and connect to the transmitter base. If there are multiple wireless signals, the headphones offer two transmission channels to avoid interference.
Operating Instructions
- Turning On/Off:
To turn on the headphones, press and hold the power button until the indicator light illuminates. To turn off, press and hold the power button again until the light extinguishes.
- Adjusting Volume:
Use the volume control buttons located on the earcup of the headphones to increase or decrease the audio level.
- Using with a Cable (Wired Mode):
The headphones can also be used as standard wired headphones. Simply connect a 3.5mm audio cable (not supplied, unless using the AUX cable from the box directly to headphones) between the headphone's 3.5mm jack and your audio source. The wireless function will be disabled when a cable is connected.
- Optimizing Signal:
For best wireless performance, ensure the transmitter base is placed in an open area and not obstructed by large metal objects. The signal can pass through walls, but extreme distances or multiple obstacles may reduce range and quality.
Charging the Headphones
The headphones are equipped with an integrated lithium polymer battery. To charge:
- Connect the microUSB end of the provided charging cable to the microUSB port on the headphones.
- Connect the USB-A end of the cable to a powered USB port (e.g., computer, USB wall adapter, TV USB port).
- The charging indicator light on the headphones will show the charging status.
- A full charge takes approximately 2 hours and provides about 8 hours of continuous use.
It is recommended to fully charge the headphones before their first use and whenever the battery is low.
Maintenance
- Cleaning:
Wipe the headphones and transmitter base with a soft, dry cloth. Do not use abrasive cleaners, solvents, or harsh chemicals. Avoid getting moisture into any openings.
- Storage:
When not in use, store the headphones and transmitter in a cool, dry place, away from direct sunlight and extreme temperatures. The adjustable headband allows for a more compact storage.
- Battery Care:
To prolong battery life, avoid fully discharging the headphones frequently. If storing for an extended period, charge the battery to about 50% every few months.
Troubleshooting
| Problem | Possible Cause | Solution |
|---|---|---|
| No sound from headphones. |
|
|
| Sound is distorted or has static. |
|
|
| Headphones not charging. |
|
|
| Short battery life. |
|
|
Specifications
| Feature | Detail |
|---|---|
| Model Name | HP Easy |
| Model Number | HP600 PRO |
| Connectivity Technology | Wireless (Analog RF) |
| Wireless Range | Up to 100 meters (open field) |
| Compatible Devices | Televisions, Analog audio sources (with 3.5mm jack output) |
| Headphone Type | Over-ear, On-ear placement |
| Noise Control | Acoustic Isolation |
| Battery Type | Lithium Polymer (integrated) |
| Battery Life | Approx. 8 hours (continuous use) |
| Charging Time | Approx. 2 hours (full charge) |
| Headphone Jack | 3.5 mm Jack (for wired use) |
| Material | Synthetic leather (earcups) |
| Item Weight | 310 grams |
| Product Dimensions | 19.2 x 18.5 x 8.8 cm |
| Additional Features | Volume control, Foldable design, Adjustable headband |
| Water Resistance | Not water resistant |
Warranty and Support
For warranty information, technical support, or service inquiries, please refer to the warranty card included in your product packaging or visit the official Meliconi website. Keep your proof of purchase for any warranty claims.


