
1. Introduction
This manual provides instructions for the installation, operation, and maintenance of the UpStart Components 4317943 Refrigerator Ice Maker replacement part. This component is designed to be compatible with various refrigerator models, including those originally equipped with Whirlpool ET6WSMXKQ02 and W10190952 icemakers.
It is crucial to verify compatibility with your specific appliance model before proceeding with installation. Refer to the 'Specifications' section for a list of compatible part numbers.
2. Safety Information
WARNING: Risk of Electric Shock and Injury.
- Always disconnect power to the refrigerator before attempting any installation, repair, or maintenance. Failure to do so can result in serious injury or death.
- Wear appropriate personal protective equipment, such as gloves, to prevent cuts or scrapes.
- If you are unsure about any step, consult a qualified appliance technician.
- Ensure all connections are secure and properly insulated after installation.
- Keep children and pets away from the work area during installation.
3. What's Included
The replacement kit typically includes the ice maker assembly and various wiring harnesses and mounting hardware to ensure broad compatibility.
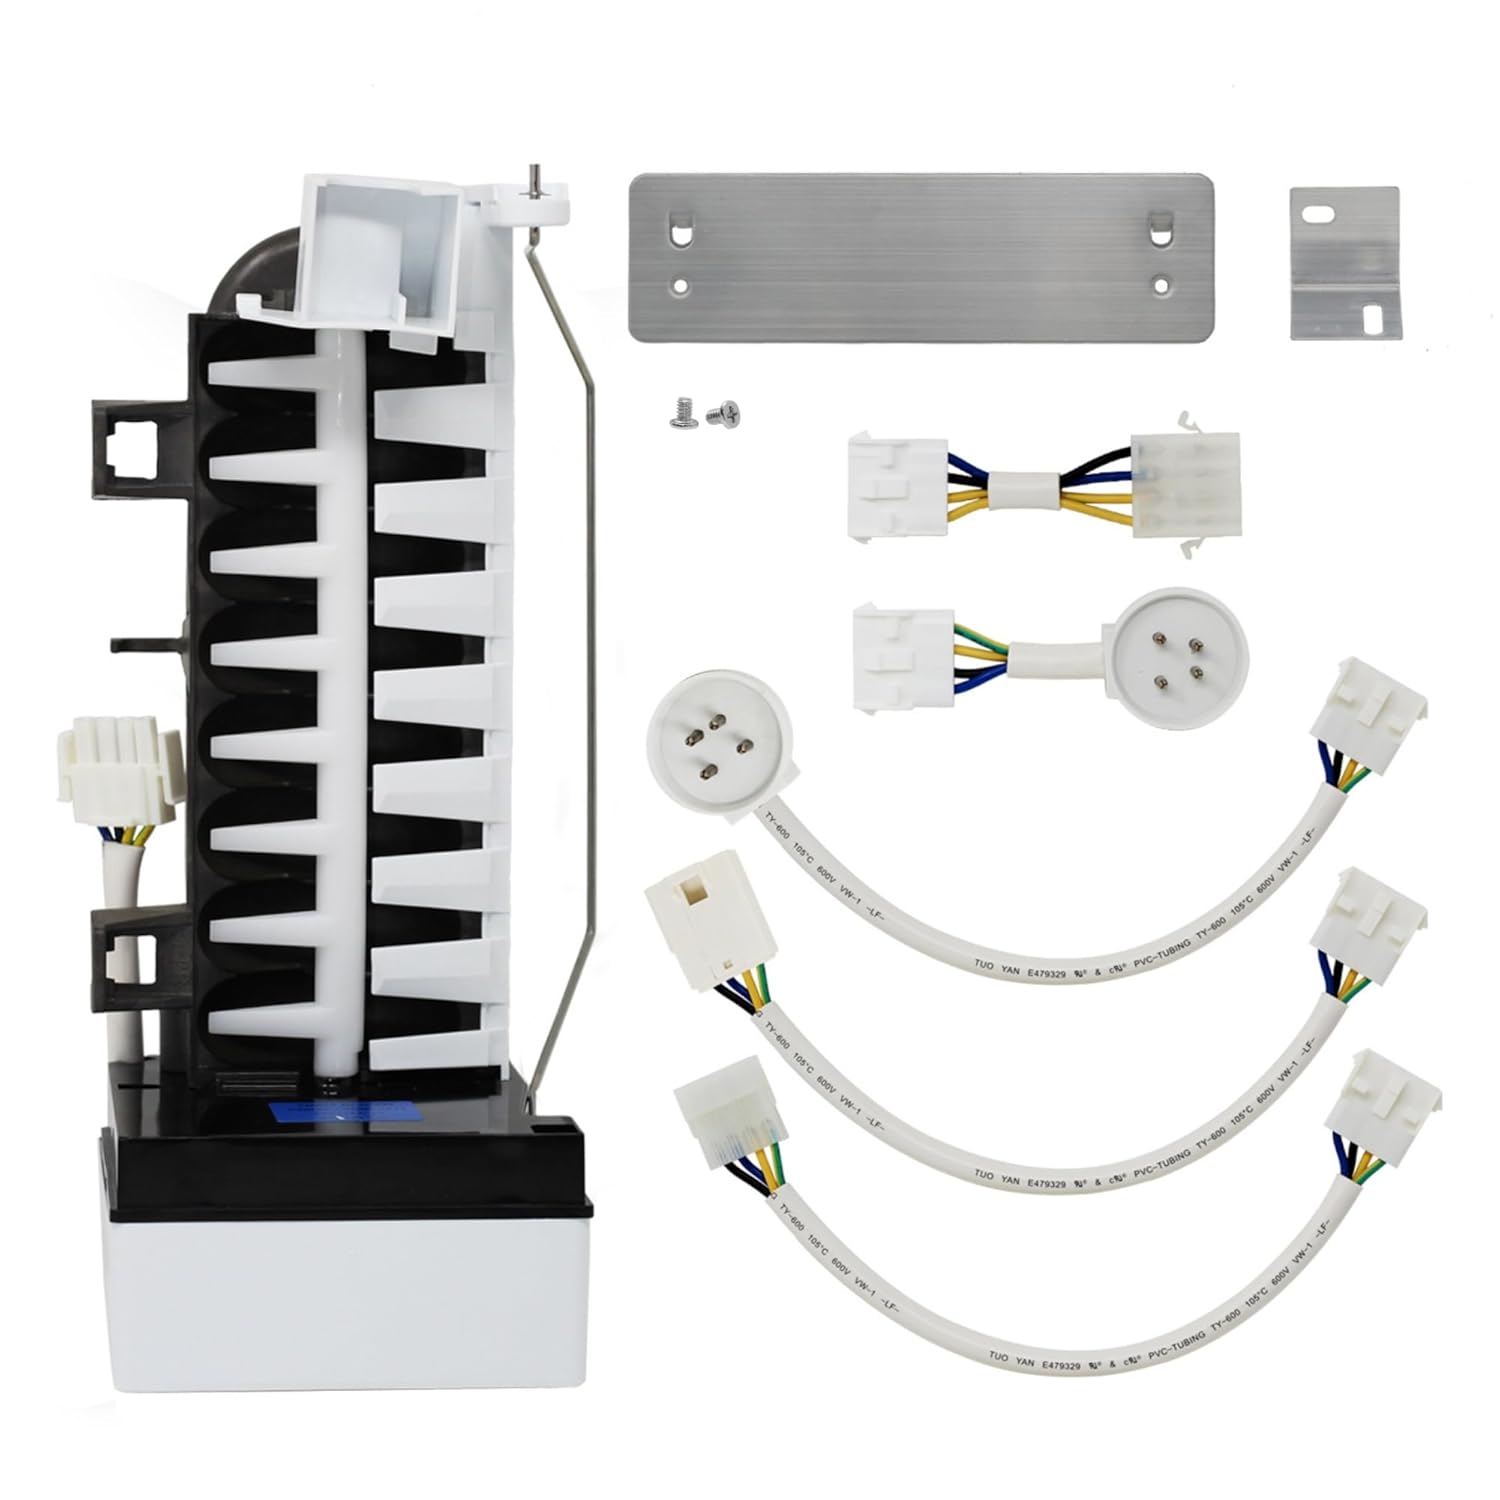
Image 3.1: Complete UpStart Components 4317943 Refrigerator Ice Maker replacement kit, showing the ice maker unit, multiple wiring harnesses, a metal mounting plate, and screws.

Image 3.2: Close-up view of the included wiring harnesses and metal mounting plate, designed to facilitate installation in different refrigerator models.
4. Setup and Installation
This replacement ice maker is designed for easy at-home installation. However, specific steps may vary depending on your refrigerator model. Always refer to your refrigerator's original service manual for detailed instructions specific to your appliance.
General Installation Steps:
- Disconnect Power: Unplug the refrigerator from the electrical outlet or turn off the circuit breaker supplying power to the appliance.
- Access Ice Maker Compartment: Open the freezer door and locate the existing ice maker. You may need to remove the ice bucket and any shelves or covers to gain full access.
- Remove Old Ice Maker: Disconnect the wiring harness from the old ice maker. Unscrew any mounting screws or clips holding the old ice maker in place and carefully remove it.
- Compare and Select Adapter: Compare the wiring harness of your old ice maker with the adapters provided in the new kit. Select the adapter that matches your refrigerator's connector.
- Install New Ice Maker: Connect the appropriate wiring harness adapter to the new ice maker. Mount the new ice maker in the same location as the old one, securing it with the provided screws or existing hardware. Ensure it is level.
- Connect Wiring: Plug the new ice maker's wiring harness (with adapter, if used) into the refrigerator's electrical connector.
- Restore Power: Replace any covers or shelves. Plug the refrigerator back into the electrical outlet or turn on the circuit breaker.
- Initial Operation: The ice maker will typically begin its first fill cycle within a few minutes of restoring power. Discard the first few batches of ice to ensure the water lines are flushed.

Image 4.1: Side view of the ice maker assembly, showing the ice mold and the metal shut-off arm.

Image 4.2: Rear view of the ice maker, highlighting the electrical connection point and the motor housing.
5. Operating Instructions
Once properly installed and power is restored, the ice maker operates automatically. It will fill with water, freeze the water into ice cubes, and then eject them into the ice bucket. The metal shut-off arm controls the ice level; when the ice bucket is full, the arm will be pushed up, signaling the ice maker to stop production until the ice level drops.
- Ensure the metal shut-off arm is in the down position for the ice maker to produce ice. If it is in the up position, the ice maker will not cycle.
- Allow 12-24 hours for the ice maker to reach full production capacity after initial installation or after being turned off.
6. Maintenance
Regular maintenance helps ensure optimal performance and longevity of your ice maker.
- Clean Ice Bucket: Periodically empty and wash the ice bucket with mild soap and warm water. Rinse thoroughly and dry completely before returning it to the freezer.
- Check Water Filter: If your refrigerator has a water filter, ensure it is replaced according to the manufacturer's recommendations to maintain water quality and ice production.
- Inspect Water Line: Occasionally check the water supply line for kinks, leaks, or blockages.
- Clean Ice Maker: If mineral deposits or mold accumulate on the ice maker, disconnect power and gently clean with a soft cloth dampened with warm water and a small amount of vinegar or mild detergent. Rinse and dry thoroughly.
7. Troubleshooting
If your ice maker is not functioning as expected, review the following common issues and solutions:
| Problem | Possible Cause | Solution |
|---|---|---|
| No ice production |
|
|
| Small or hollow ice cubes |
|
|
| Ice maker not ejecting ice |
|
|
8. Specifications
- Brand: UpStart Components
- Model Number: AP-4317943-DL1624
- Compatible Part Numbers: 4317943, AP2984633, 4317943R, 4317943VP, 46000978556, 46004211173, AH358591, EA358591, ER4317943, J21791, J22241, M626687, PS358591, RIM943, TJ90RIM943, W10122496, W10190952, W10281545, W10632400
- Manufacturer: UpStart Components
- Date First Available: March 18, 2020
9. Warranty and Support
Any warranties for this product are offered solely by UpStart Components. For specific warranty terms and conditions, please refer to the documentation provided with your purchase or contact UpStart Components directly.
For technical assistance, troubleshooting beyond this manual, or to inquire about warranty claims, please contact UpStart Components customer support.