
1. Important Safety Instructions
Please read this instruction manual carefully before using the appliance and save it for future reference. Incorrect operation may cause damage to the appliance and injury to the user.
- Always place the appliance on a stable, heat-resistant surface, away from walls or other appliances to allow sufficient air circulation.
- Do not immerse the appliance, cord, or plug in water or any other liquid.
- Keep children and pets away from the appliance during operation.
- Do not block the air inlet and outlet vents.
- Unplug the appliance from the power outlet when not in use and before cleaning.
- Do not operate the appliance if the cord or plug is damaged, or if the appliance malfunctions or has been damaged in any way.
- The surfaces may become hot during use. Do not touch hot surfaces directly. Use handles or knobs.
- Do not place anything on top of the appliance.
- This appliance is intended for household use only.
2. Product Overview
The Princess Digital Hot Air Fryer (Model 182026) uses rapid hot air circulation technology to cook food with little to no oil, offering a healthier alternative to traditional frying. It features a digital display and 8 preset cooking programs for convenience.

Figure 2.1: Princess Digital Hot Air Fryer with its 4.5L basket, pizza pan, and silicone muffin cups. This image illustrates the main unit and some of the versatile accessories included in the 10-piece set, highlighting its multi-functional capabilities for baking, roasting, and grilling.
Components:
- Main Unit: Houses the heating element and fan.
- Digital Control Panel: Touchscreen display for temperature, time, and preset selection.
- Removable Frying Basket: Non-stick coated basket for holding food.
- Basket Handle: For safe removal and insertion of the frying basket.
- Air Inlet/Outlet Vents: For proper air circulation during cooking.
Included 10-Piece Accessory Set:

Figure 2.2: The comprehensive 10-piece accessory set, including a metal rack, baking pan, pizza pan, silicone mat, and silicone muffin cups. These accessories expand the cooking possibilities of your air fryer, allowing for a wider range of recipes.
- Baking Pan: Ideal for cakes, quiches, and casseroles.
- Pizza Pan: Perfect for small pizzas or flatbreads.
- Grill Rack: For grilling meats, fish, or vegetables.
- Silicone Mat: Protects surfaces and can be used as a trivet.
- Silicone Muffin Cups: For baking muffins or cupcakes.
- Additional items may vary based on specific bundle.
3. Setup and First Use
- Unpacking: Carefully remove the air fryer and all accessories from the packaging. Retain the packaging for future storage or transport.
- Initial Cleaning: Before first use, clean the frying basket and any accessories with warm soapy water. Rinse thoroughly and dry completely. Wipe the main unit with a damp cloth.
- Placement: Place the air fryer on a stable, level, and heat-resistant surface. Ensure there is at least 10 cm (4 inches) of clear space around the back and sides of the appliance for proper ventilation.
- Power Connection: Plug the power cord into a grounded wall outlet.
- Pre-heating (Optional): For the first use, it is recommended to run the air fryer empty for about 10-15 minutes at 180°C (356°F) to eliminate any manufacturing odors. A slight smell may occur, which is normal and will dissipate.
4. Operating Instructions
Basic Operation:
- Prepare Food: Place your ingredients into the frying basket. Do not overfill the basket to ensure even cooking.
- Insert Basket: Slide the frying basket back into the main unit until it clicks into place.
- Power On: Press the power button on the digital control panel. The display will light up.
- Set Temperature and Time:
- Use the temperature control buttons (+ / -) to adjust the cooking temperature (80-200°C).
- Use the time control buttons (+ / -) to set the cooking time.
- Start Cooking: Press the start/pause button to begin the cooking process. The fan and heating element will activate.
- Shaking Food (Optional): For some foods, especially fries, it is recommended to shake the basket halfway through the cooking time to ensure even crisping. Carefully pull out the basket, shake, and reinsert. The air fryer will pause automatically and resume when the basket is reinserted.
- Cooking Completion: The air fryer will beep when the set cooking time has elapsed. Carefully pull out the basket and transfer the cooked food to a plate.
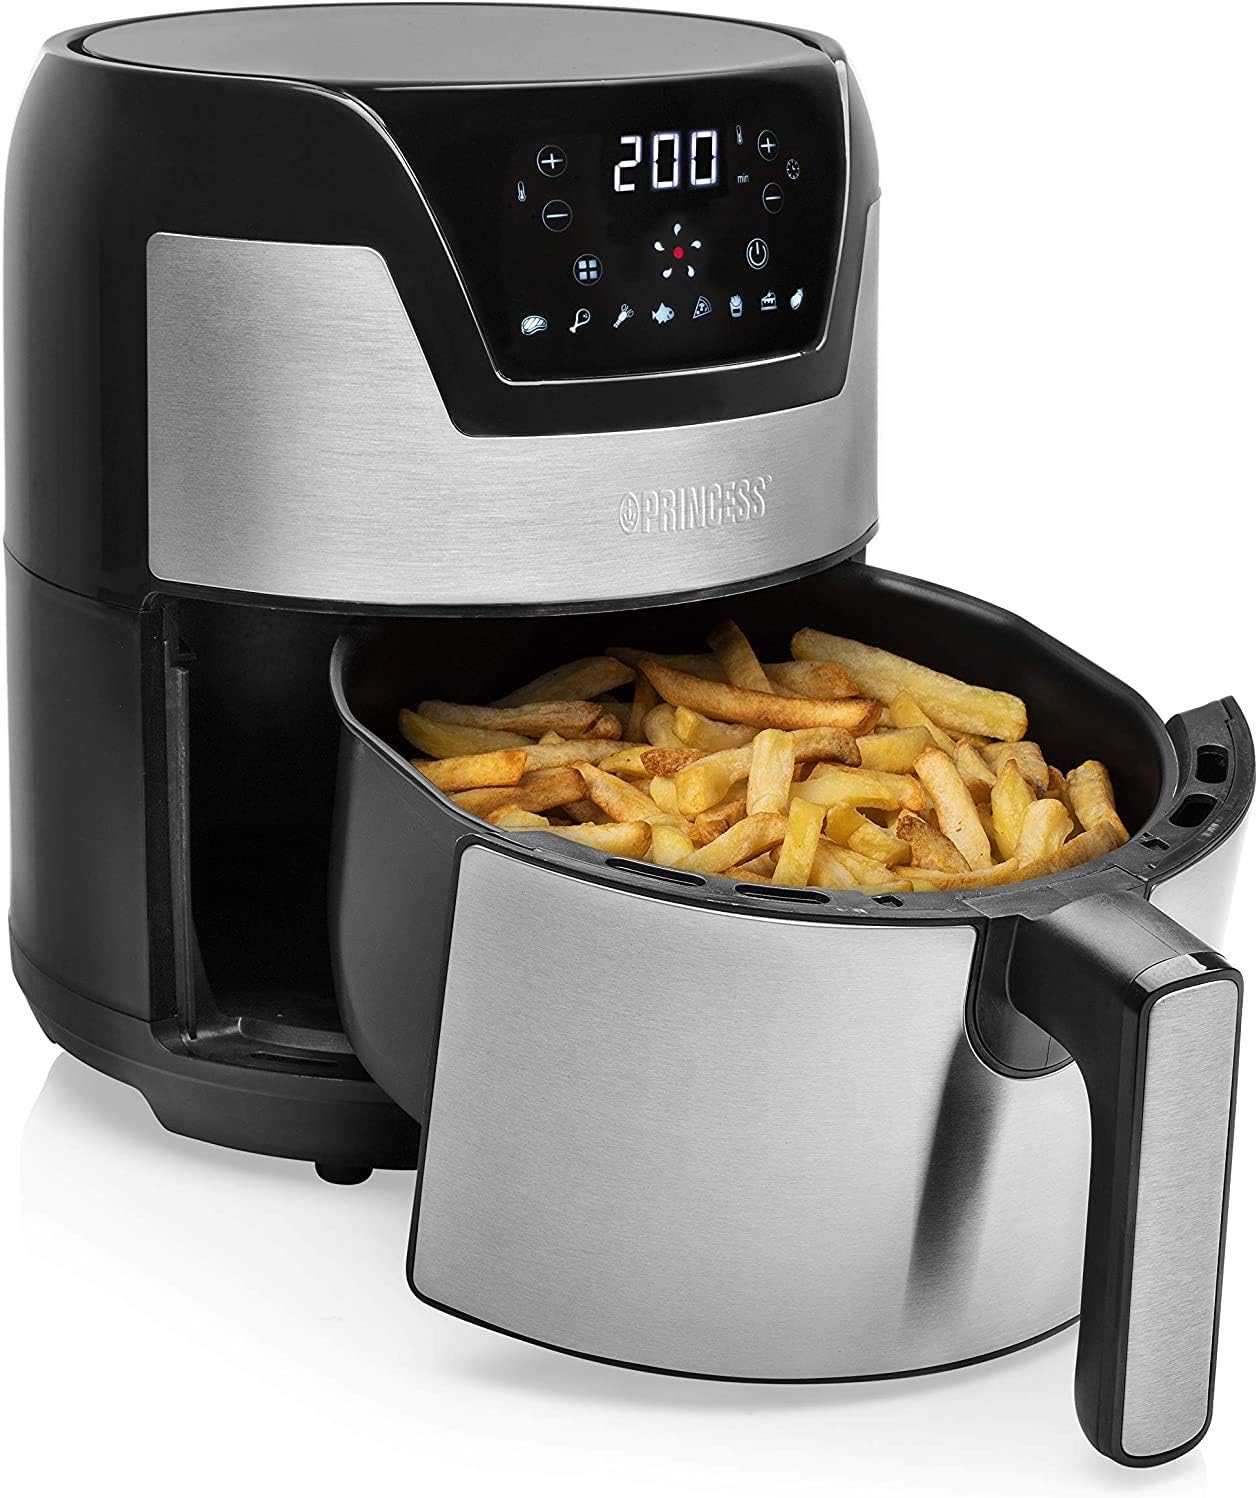
Figure 4.1: The air fryer with its basket pulled out, showing perfectly cooked fries. This demonstrates the ease of access to the food during cooking for shaking or checking doneness.
Using Preset Programs:
The air fryer comes with 8 pre-programmed settings for common dishes. To use them:
- After powering on, press the preset selection button (usually an icon representing different food types).
- Cycle through the presets until the desired program is selected. The display will show the default temperature and time for that program.
- You can adjust the temperature and time manually even after selecting a preset if needed.
- Press the start/pause button to begin cooking.
Tips for Best Results:
- For crispy results, lightly coat fresh ingredients with a small amount of oil.
- Preheat the air fryer for 3-5 minutes before adding food for faster and more even cooking.
- Smaller pieces of food generally require less cooking time.
- Use the appropriate accessories for different types of food (e.g., baking pan for cakes).
5. Cleaning and Maintenance
Regular cleaning ensures optimal performance and extends the lifespan of your air fryer.
- Unplug and Cool Down: Always unplug the appliance from the power outlet and allow it to cool down completely before cleaning.
- Clean Frying Basket and Accessories:
- The frying basket and most accessories are non-stick coated and can be cleaned with warm water, a mild dishwashing liquid, and a non-abrasive sponge.
- For stubborn residue, soak the basket in warm soapy water for about 10 minutes before cleaning.
- Rinse thoroughly and dry completely before storing or next use.
- Note: Some accessories may be dishwasher safe, refer to individual accessory instructions if available.
- Clean Main Unit: Wipe the exterior of the air fryer with a damp cloth. Do not use abrasive cleaners or scouring pads.
- Clean Heating Element: If necessary, gently clean the heating element inside the air fryer with a cleaning brush to remove any food residue. Ensure the appliance is completely cool and unplugged.
- Storage: Store the cleaned and dried air fryer in a cool, dry place.
6. Troubleshooting
| Problem | Possible Cause | Solution |
|---|---|---|
| Air fryer does not turn on. | Not plugged in; power outlet malfunction; basket not inserted correctly. | Ensure plug is firmly in a working outlet; check circuit breaker; push basket fully into place. |
| Food is not cooked evenly. | Basket is overfilled; food pieces are too large; not shaken during cooking. | Reduce food quantity; cut food into smaller, uniform pieces; shake basket halfway through cooking. |
| Food is not crispy. | Not enough oil (for fresh food); temperature too low; cooking time too short. | Lightly coat food with oil; increase temperature; extend cooking time. |
| White smoke coming from appliance. | Greasy residue from previous use; high-fat food cooking. | Clean the basket and heating element thoroughly; this is normal for high-fat foods. |
| Appliance smells during first use. | Manufacturing residue burning off. | This is normal and will dissipate after a few uses. Ensure good ventilation. |
7. Product Specifications
| Feature | Detail |
|---|---|
| Brand | Princess |
| Model | 182026 |
| Capacity | 4.5 Liters |
| Power | 1500 Watts |
| Temperature Range | 80-200°C (176-392°F) |
| Control Type | Digital Touchscreen |
| Presets | 8 Pre-programmed settings |
| Color | Stainless Steel Finish |
| Weight | 1.2 Kilograms |
| Included Accessories | 10-piece set (e.g., baking pan, pizza pan, grill rack, muffin cups) |
8. Warranty and Support
Princess products are manufactured to high quality standards. This product comes with a standard manufacturer's warranty, typically 2 years from the date of purchase, covering defects in materials and workmanship.
To claim warranty or for technical support:
- Please retain your proof of purchase (receipt or invoice).
- Contact the retailer where you purchased the product.
- Visit the official Princess website for contact information and FAQs: www.princesshome.eu
- Do not attempt to repair the appliance yourself. This will void the warranty.


