
UpStart Components D7824706Q
UpStart Components D7824706Q Refrigerator Ice Maker Replacement Manual
Model: D7824706Q
1. Introduction
This manual provides detailed instructions for the installation, operation, and maintenance of the UpStart Components D7824706Q Refrigerator Ice Maker Replacement. This component is designed to replace the original ice maker in compatible Kenmore/Sears refrigerators, including model 596.67942600, and is compatible with W10190978 icemakers. Please read this manual thoroughly before beginning installation to ensure proper function and safety.
Note: This is a replacement part manufactured by UpStart Components. It is not an OEM product. Compatibility is stated for reference purposes only.
2. Safety Information
Always observe the following safety precautions when installing or servicing refrigerator components:
- Disconnect Power: Always unplug the refrigerator from the electrical outlet before performing any installation or maintenance. Failure to do so can result in electric shock or injury.
- Water Supply: Turn off the water supply to the refrigerator before beginning installation to prevent water leaks.
- Wear Protective Gear: Use appropriate personal protective equipment, such as gloves, to prevent cuts or scrapes.
- Professional Assistance: If you are unsure about any step of the installation process, consult a qualified appliance technician.
- Sharp Edges: Be aware of potentially sharp edges on refrigerator components.
3. Package Contents
Verify that all items are present in the package:
- Ice Maker Assembly (D7824706Q)
- Wiring Harnesses (2 units)
- Mounting Bracket
- Mounting Screw
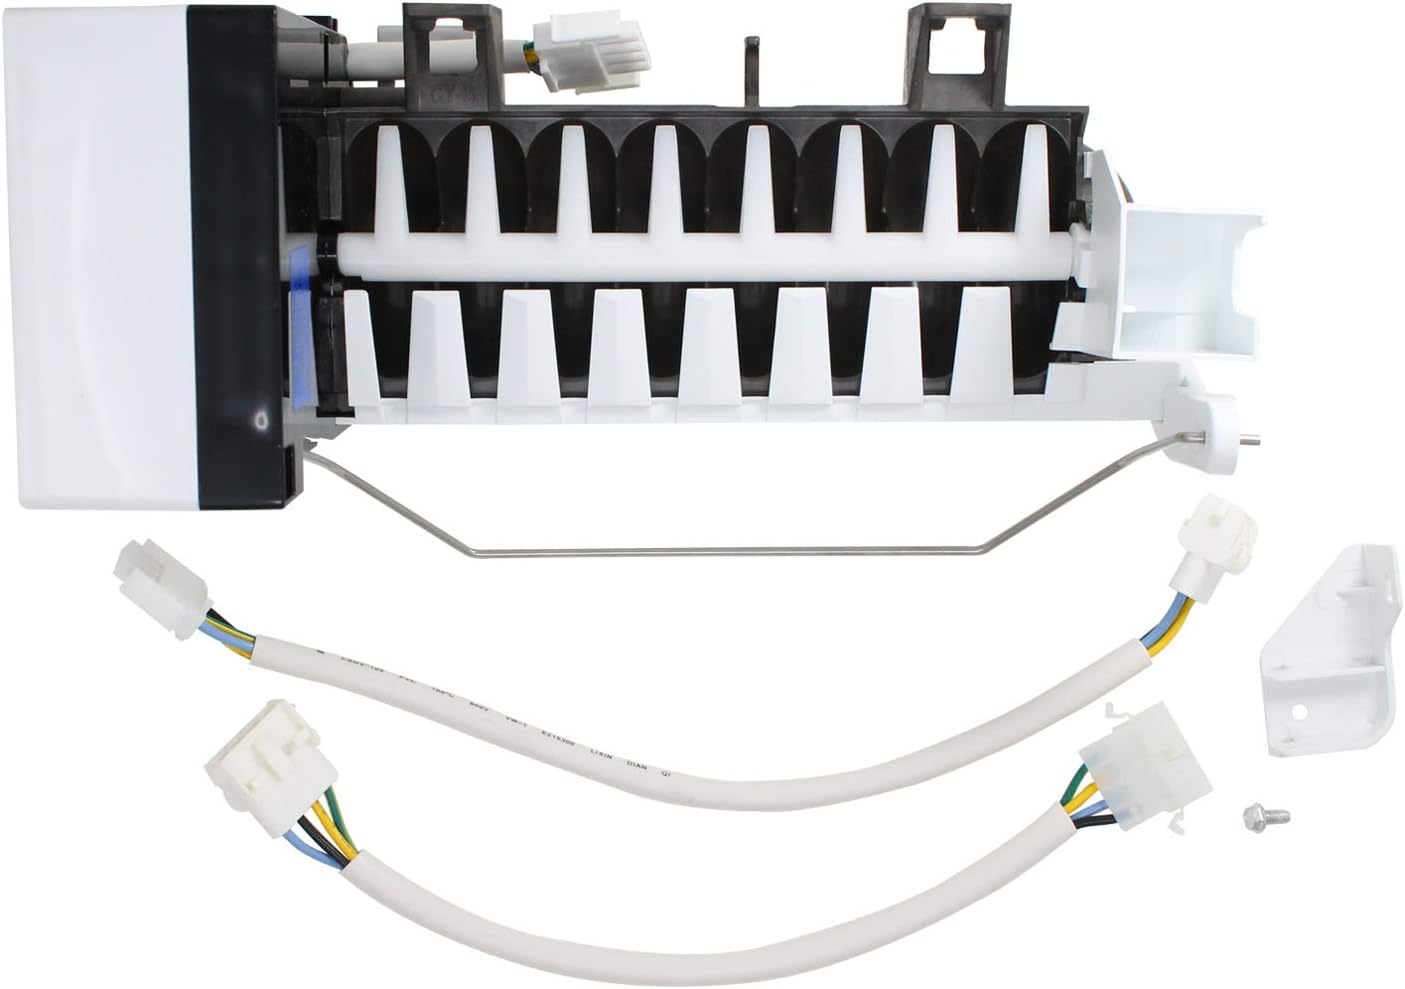
Image: The D7824706Q ice maker assembly, including two wiring harnesses, a white mounting bracket, and a small screw, laid out on a white background.
4. Installation Instructions
Follow these steps to replace your refrigerator's ice maker:
- Prepare the Refrigerator:
- Unplug the refrigerator from the electrical outlet.
- Turn off the water supply valve to the refrigerator.
- Empty the freezer compartment, especially the ice bin.
- Access the Old Ice Maker:
- Locate the existing ice maker inside the freezer compartment. It is typically mounted on the left wall.
- Depending on your refrigerator model, you may need to remove shelves or the ice bin to gain full access.
- Disconnect the Old Ice Maker:
- Carefully disconnect the wiring harness(es) from the old ice maker. There may be one or two connectors.
- Remove any mounting screws or clips securing the old ice maker to the freezer wall.
- Gently pull the old ice maker assembly out of the freezer.
- Install the New Ice Maker:
- Position the new D7824706Q ice maker assembly in the same location as the old one.
- Secure the new ice maker using the existing mounting points and the provided mounting screw/bracket if necessary. Ensure it is firmly attached.
- Connect the new wiring harnesses to the corresponding receptacles in the freezer wall. Ensure connections are secure and properly seated. Refer to the image below for visual guidance on the ice maker and its connections.

Image: A side view of the D7824706Q ice maker, showing the ice mold and the general structure, which helps in understanding its orientation during installation.

Image: A different side view of the D7824706Q ice maker, highlighting the electrical connection points on the side, crucial for proper wiring during installation.
- Restore Power and Water:
- Turn the water supply valve back on.
- Plug the refrigerator back into the electrical outlet.
- Test the Ice Maker:
- The ice maker will typically begin its first cycle within a few hours.
- Discard the first few batches of ice to ensure the water lines are flushed and the ice is clean.
- Verify that the ice maker is producing ice consistently and that there are no leaks.
5. Operation
Once installed and connected, the D7824706Q ice maker operates automatically. It will fill with water, freeze the water into ice cubes, and then eject the cubes into the ice storage bin. The ice maker features a shut-off arm that will stop ice production once the bin is full. Lowering the arm will resume ice production.
Ensure the freezer temperature is set appropriately (typically between 0°F and 5°F or -18°C and -15°C) for optimal ice production.
6. Maintenance
- Cleaning: Periodically clean the ice storage bin with mild soap and water. Rinse thoroughly and dry completely before returning it to the freezer.
- Water Filter: If your refrigerator has a water filter, replace it according to the manufacturer's recommendations to ensure clean ice and proper water flow to the ice maker.
- Water Line: Occasionally check the water supply line for kinks or leaks.
- Ice Buildup: If ice builds up around the ice maker mechanism, temporarily turn off the ice maker or remove the ice bin to allow it to melt, then clean and restart.
7. Troubleshooting
| Problem | Possible Cause | Solution |
|---|---|---|
| Ice maker not producing ice. |
|
|
| Small or hollow ice cubes. |
|
|
| Water leaking from ice maker. |
|
|
8. Specifications
- Model: D7824706Q
- Brand: UpStart Components
- Part Number: AP-D7824706Q-DL2663
- Compatibility: Kenmore/Sears 596.67942600, W10190978, and other listed compatible part numbers.
- Date First Available: March 19, 2020
9. Warranty and Support
This product is an UpStart Components brand replacement part. Any warranties for this product are offered solely by UpStart Components. For support or warranty inquiries, please refer to the contact information provided by your retailer or on the UpStart Components official website.
This product is not affiliated with any original equipment manufacturers (OEMs) and is not covered under any warranties offered by the original manufacturers.
Ask a question about this manual
Ask about setup, troubleshooting, compatibility, parts, safety, or missing instructions. Manuals+ will review the question and use this page’s manual context to help answer it.