
1. Introduction
This manual provides essential information for the safe and effective operation, maintenance, and troubleshooting of your Metro Mobility M1 4-Wheel Mobility Scooter. Please read this manual thoroughly before using the scooter and retain it for future reference.
2. Safety Guidelines
Always prioritize safety when operating your mobility scooter. Adhere to all local traffic laws and regulations. Ensure you are familiar with all controls before riding.
- Do not operate the scooter under the influence of alcohol or medication.
- Always use headlights and rear brake lights for visibility, especially in low-light conditions.
- Avoid steep inclines exceeding the specified climbing grade of 8 degrees.
- Ensure the scooter is in drive mode before attempting to move.
- Regularly check tire pressure and overall condition of the scooter.
3. Setup and Assembly
The Metro Mobility M1 scooter is designed for easy assembly and portability. It can be quickly disassembled into four separate sections for transport and storage.
3.1 Unboxing and Initial Assembly
Your scooter arrives in a few large components. Assembly typically requires no special tools.
- Carefully remove all components from the packaging.
- Attach the tiller (handlebar column) to the main base.
- Secure the seat onto the seat post.
- Connect the battery pack.

Image: The Metro Mobility M1 scooter can be disassembled into four main sections for easy transport and storage.
3.2 Seat and Armrest Adjustment
The seat and armrests are adjustable to enhance user comfort.
- Seat Height: Adjust the seat height to ensure your feet rest comfortably on the footboard and your knees are at a comfortable angle.
- Armrests: The padded armrests can be adjusted forward or backward to provide optimal support and convenience when getting on or off the scooter.
Video: Demonstrates the easy assembly of the M1 Mobility Scooter, including seat and armrest adjustments.
3.3 Battery Installation and Charging
The scooter requires two 12V batteries (included). Ensure they are properly installed and charged before first use.
- Locate the battery compartment, typically under the seat or footboard.
- Connect the batteries according to the diagram in the compartment.
- Plug the charger into the charging port on the scooter and then into a standard wall outlet.
- Allow sufficient time for a full charge before initial operation.

Image: Example of a Metro Mobility scooter battery pack.
4. Operating Instructions
Familiarize yourself with the controls and functions of your Metro Mobility M1 scooter for a safe and enjoyable experience.
4.1 Control Panel Overview
The control panel on the tiller provides access to all essential functions.
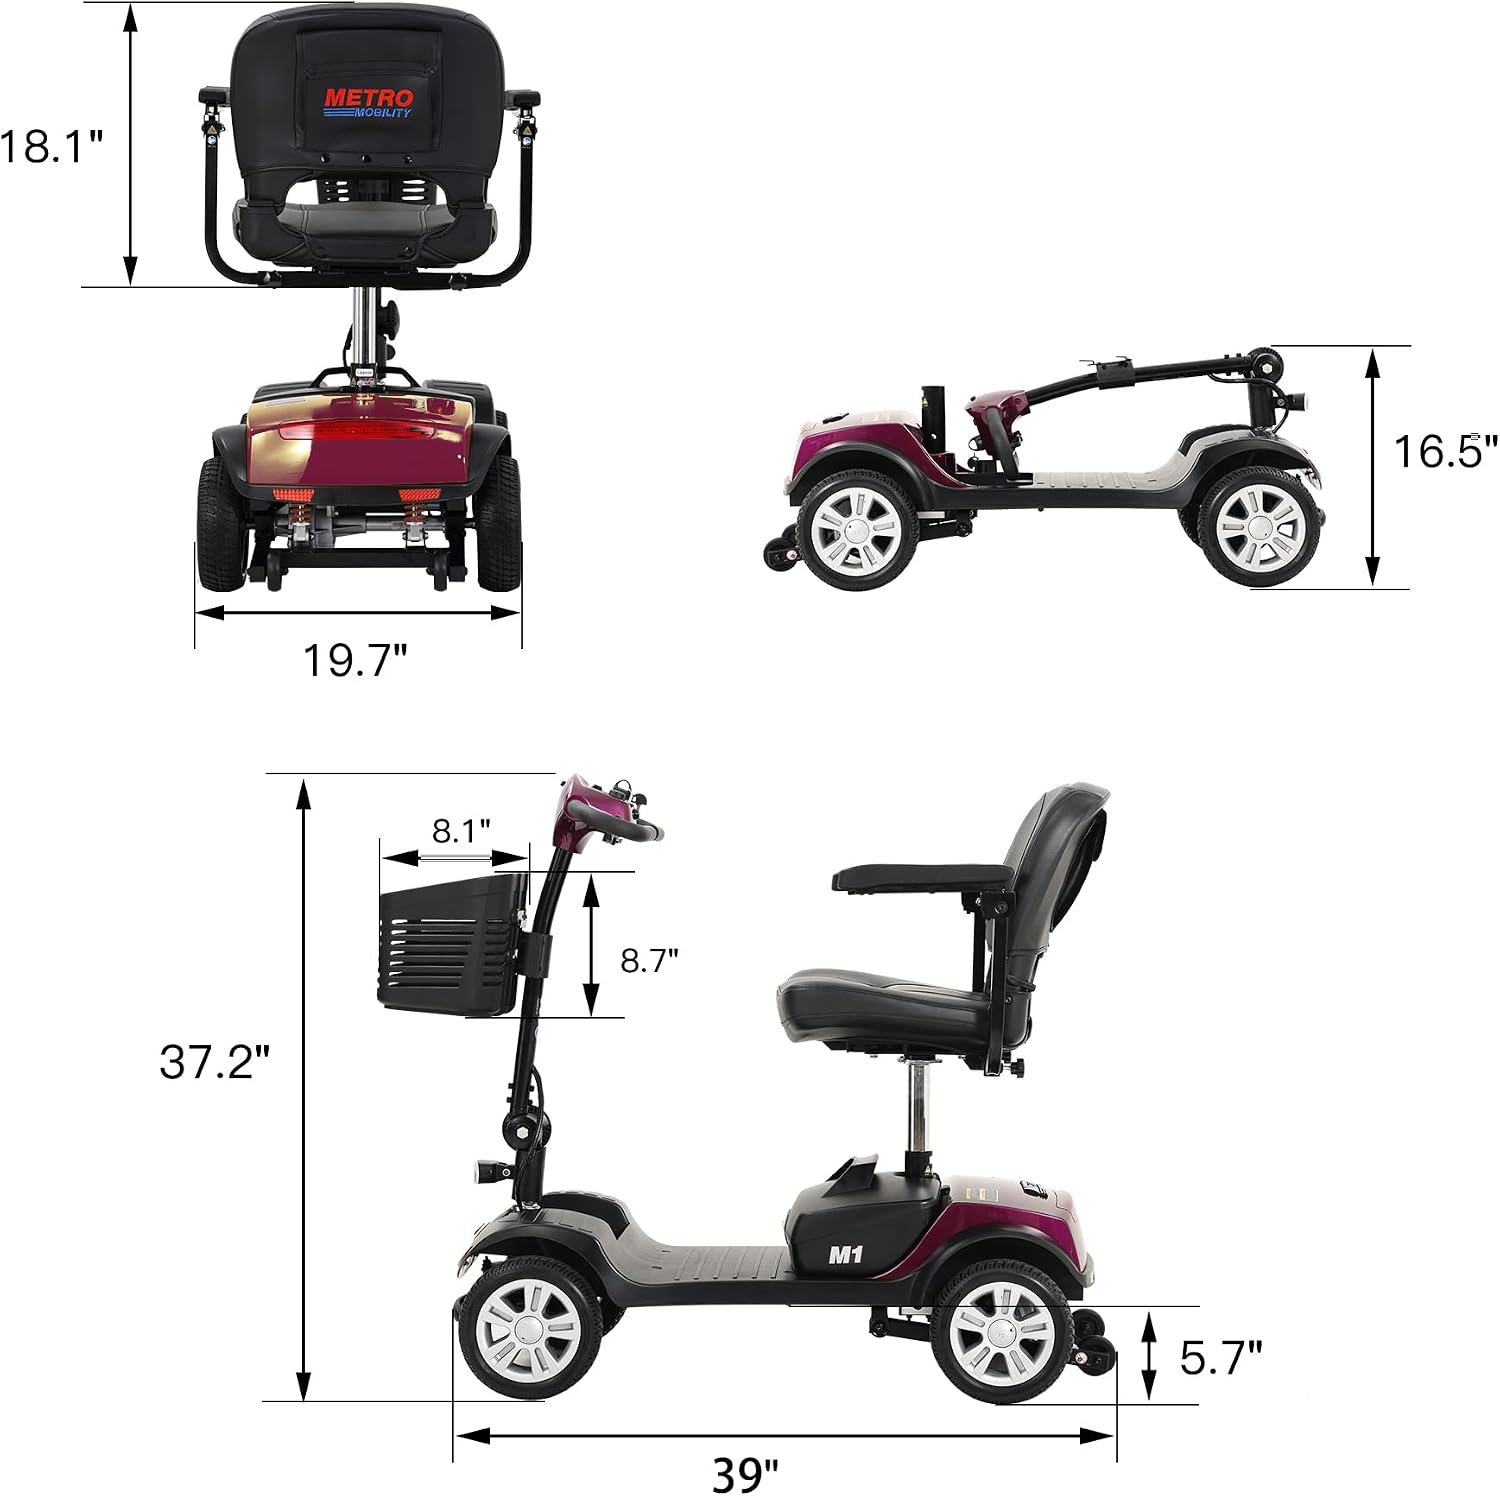
Image: The control panel features a speed dial, battery level indicator, headlight switch, and horn button.
- Power Switch: Turns the scooter on or off.
- Speed Control Dial: Adjusts the maximum speed of the scooter. Rotate towards the tortoise icon for slower speeds and towards the rabbit icon for faster speeds.
- Battery Level Indicator: Displays the current charge level of the batteries.
- Headlight Switch: Activates the front LED headlight.
- Horn Button: Press to sound the horn.
- Throttle Lever: Ergonomic wraparound handles allow for one-handed forward and reverse operation. Push forward for forward motion, pull back for reverse.
4.2 Driving the Scooter
- Turn the power switch to the 'ON' position.
- Adjust the speed control dial to your desired speed setting.
- Engage the drive lever (red lever near the rear wheels) to the 'D' (Drive) position.
- Gently press the throttle lever to begin moving. Release the lever to engage the automatic braking mechanism.
- Use the ergonomic wraparound handles for steering.

Image: A user comfortably operating the Metro Mobility M1 scooter outdoors.
4.3 Automatic Braking Mechanism
The scooter is equipped with a solenoid brake system. Releasing the throttle lever automatically engages the brakes, bringing the scooter to a smooth stop. This friction-induced system helps prevent slipping on various surfaces.

Image: Rear view of the scooter highlighting the brake lights and anti-tip wheels for stability.
4.4 Neutral Mode
To manually push or move the scooter without power, engage the neutral lever (red lever near the rear wheels) to the 'N' (Neutral) position. Remember to return it to 'D' (Drive) before operating the scooter under power.
Image: The red lever allows switching between drive and neutral modes for powered or manual movement.
4.5 Navigating Different Terrains
The M1 scooter features 9-inch solid, flat-free tires designed for durability and safety. It can handle various terrains, including rugged paths and gravel, with a turning radius of 42.5 inches.
Video: Showcases the Metro Mobility M1 scooter navigating various outdoor environments, highlighting its stability and ease of use.
5. Maintenance
Regular maintenance ensures the longevity and optimal performance of your Metro Mobility M1 scooter.
- Cleaning: Wipe down the scooter regularly with a damp cloth. Avoid using harsh chemicals or excessive water.
- Battery Care: Always charge the batteries fully after each use. Do not allow batteries to completely discharge. Store the scooter with fully charged batteries if not in use for an extended period.
- Tires: The solid, flat-free tires require minimal maintenance. Periodically inspect them for wear and tear.
- Connections: Ensure all electrical connections are secure and free from corrosion.
6. Troubleshooting
If you encounter issues with your scooter, refer to the following common troubleshooting steps:
| Problem | Possible Cause | Solution |
|---|---|---|
| Scooter does not power on | Battery not charged, power switch off, loose battery connection | Charge batteries, turn on power switch, check battery connections. |
| Scooter moves slowly or loses power quickly | Low battery charge, speed dial set too low, heavy load | Recharge batteries, adjust speed dial, reduce load. |
| Scooter does not move when throttle is pressed | Neutral mode engaged, power off, safety feature activated | Ensure drive lever is in 'D' position, turn power on, check for any error indicators. |
If problems persist after following these steps, please contact Metro Mobility customer support.
7. Specifications
| Feature | Specification |
|---|---|
| Model Name | M1 |
| Item Model Number | MM12020 |
| Product Dimensions (L x W x H) | 40.2 x 19.7 x 37.2 inches |
| Item Weight | 101 Pounds |
| Maximum Weight Capacity | 300 Pounds |
| Maximum Speed | 4.97 Miles per Hour |
| Motor Power | 300 Watt |
| Batteries | 2 x 12V (included) |
| Wheel Size | 9 Inches (solid/flat-free) |
| Turn Radius | 42.5 Inches |
| Climbing Grade | 8 Degrees |
| Brake Style | Solenoid |
| Frame Material | Alloy Steel |
| UPC | 751074175544 |
8. Warranty and Support
8.1 Limited Warranty
Metro Mobility provides a 1-year limited manufacturer's warranty from the date of purchase. This warranty covers manufacturing defects under normal use. Please refer to your purchase documentation for full warranty terms and conditions.
8.2 Customer Support
For any questions, technical assistance, or warranty claims, please contact Metro Mobility customer support. Our professional after-sales service team is available to assist you.
Contact Information: Please refer to your product packaging or the Metro Mobility website for the most current contact details.


