
Introduction
This manual provides essential information for the safe and efficient operation of your Overmax MULTIPIC 3.5 Projector. Please read it thoroughly before use and retain it for future reference.
Safety Information
WARNING: To reduce the risk of fire or electric shock, do not expose this appliance to rain or moisture.
- Do not block any ventilation openings. Ensure adequate space around the projector for proper airflow.
- Do not install near any heat sources such as radiators, heat registers, stoves, or other apparatus (including amplifiers) that produce heat.
- Protect the power cord from being walked on or pinched, particularly at plugs, convenience receptacles, and the point where they exit from the appliance.
- Only use attachments/accessories specified by the manufacturer.
- Unplug this appliance during lightning storms or when unused for long periods.
- Refer all servicing to qualified service personnel. Servicing is required when the apparatus has been damaged in any way, such as power-supply cord or plug is damaged, liquid has been spilled or objects have fallen into the apparatus, the apparatus has been exposed to rain or moisture, does not operate normally, or has been dropped.
- Do not look directly into the projector lens when the lamp is on.
Package Contents
Verify that all items are present in the package:
- Overmax MULTIPIC 3.5 Projector
- Remote Control
- Power Cable
- HDMI Cable
- AV Cable (RCA)
- User Manual (this document)
Product Overview
Familiarize yourself with the projector's components and connection ports.

Figure 1: Overmax MULTIPIC 3.5 Projector and Remote Control. This image displays the projector from the front-right angle, showing the lens, the Overmax logo, ventilation grilles, and the included remote control.

Figure 2: Top Panel Controls. This image highlights the manual focus and keystone correction dials, along with the directional pad and function buttons on the top surface of the projector.

Figure 3: Rear Connection Panel. This view shows the AV input, two HDMI ports (HDMI1, HDMI2), and a USB port for connecting various devices.

Figure 4: Side VGA Port. This image displays the VGA (D-sub) input port located on the side of the projector, used for connecting older computers or monitors.
Setup
1. Initial Placement
Place the projector on a stable, flat surface or mount it on a tripod or ceiling. Ensure the projector is positioned at an appropriate distance from the projection surface to achieve the desired screen size.
2. Power Connection
- Connect the power cable to the projector's power input.
- Plug the other end of the power cable into a suitable electrical outlet.
- Press the power button on the projector or remote control to turn on the device.
3. Connecting External Devices
The MULTIPIC 3.5 supports various input sources:
- HDMI: Use an HDMI cable to connect devices like laptops, Blu-ray players, or gaming consoles to the HDMI1 or HDMI2 ports.
- USB: Insert a USB drive into the USB port to play media files directly.
- VGA: Connect older computers using a VGA cable to the D-sub port.
- AV: Use the included AV cable to connect devices with composite video and stereo audio outputs.
4. Wi-Fi Connection
To access online features like YouTube or screen mirroring, connect the projector to a Wi-Fi network.
- Navigate to the projector's settings menu.
- Select "Network" or "Wi-Fi settings".
- Choose your desired Wi-Fi network from the list.
- Enter the network password if prompted.

Figure 5: Projector Wi-Fi Connectivity. This image illustrates the projector's ability to connect wirelessly to a Wi-Fi router for internet access and streaming.
5. Screen Mirroring (Miracast / AirPlay)
The projector supports wireless display from compatible smartphones, tablets, and computers.
- Ensure both the projector and your mobile device are connected to the same Wi-Fi network.
- On the projector, select the Miracast or AirPlay input source.
- On your mobile device, activate the screen mirroring function (e.g., "Smart View" on Android, "Screen Mirroring" on iOS).
- Select the projector from the list of available devices.
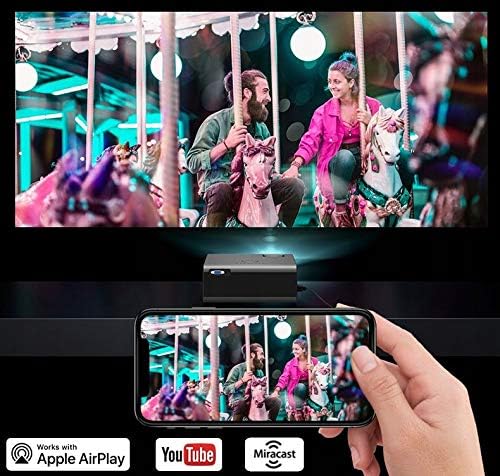
Figure 6: Wireless Screen Mirroring. This image demonstrates a smartphone wirelessly casting its display to the projector, utilizing Miracast or AirPlay functionality.
Operating Instructions
1. Basic Controls
The projector can be controlled using the on-device buttons or the included remote control.
- Power Button: Turns the projector on or off.
- Source Button: Cycles through input sources (HDMI1, HDMI2, USB, VGA, AV, Miracast/AirPlay).
- Navigation Buttons (Up/Down/Left/Right/OK): Used to navigate menus and confirm selections.
- Menu Button: Accesses the main settings menu.
- Back/Exit Button: Returns to the previous screen or exits the current menu.
2. Image Adjustment
- Focus: Rotate the focus ring on the projector lens (refer to Figure 2) until the image appears sharp and clear.
- Keystone Correction: Adjust the keystone dial (refer to Figure 2) to correct trapezoidal distortion if the projector is not perfectly perpendicular to the screen.
- Aspect Ratio: In the settings menu, you can change the aspect ratio between 16:9 and 4:3 to match your content. The image can also be rotated 180 degrees for ceiling mounting.

Figure 7: Display Resolution Example. This image illustrates the native 1280x720 resolution capability of the projector, providing clear visuals.
3. Audio Settings
The built-in speaker can be adjusted for different audio profiles:
- Access the audio settings in the main menu.
- Select from three preset modes: Music, Voice, or Movie.
- An advanced equalizer is available for fine-tuning audio parameters.
- For external audio, connect speakers or headphones to the audio output port.
4. Using Built-in Applications
The projector comes with pre-installed applications like YouTube and KoalaTV.
- Ensure the projector is connected to a Wi-Fi network.
- From the main interface, select the desired application icon.
- Use the remote control to navigate and select content within the application.
Maintenance
1. Lamp Life
The projector lamp is designed for extended operation, with an estimated lifespan of up to 50,000 hours. No regular lamp replacement is typically required under normal usage conditions.

Figure 8: Internal Optical System. This diagram illustrates the sophisticated optical components and light path within the projector, contributing to its image quality and lamp longevity.
2. Cleaning
- Lens: Gently wipe the projector lens with a soft, lint-free cloth specifically designed for optical surfaces. Do not use abrasive cleaners.
- Exterior: Clean the projector's exterior with a soft, dry cloth. For stubborn marks, a slightly damp cloth can be used, followed by a dry cloth.
- Ventilation Openings: Periodically check and clean the ventilation grilles to prevent dust buildup, which can affect performance and lifespan. Use a soft brush or compressed air.
Troubleshooting
| Problem | Possible Cause | Solution |
|---|---|---|
| No image displayed | Power not connected; Incorrect input source; Cable not properly connected. | Check power cable; Select correct input source (HDMI, USB, VGA, AV); Ensure all cables are securely connected. |
| Image is blurry | Focus not adjusted; Projector too close/far from screen. | Adjust the focus ring on the lens; Reposition the projector for optimal distance. |
| Image is trapezoidal | Keystone not corrected. | Adjust the keystone correction dial. |
| No sound | Volume too low; Muted; Incorrect audio output selected; External device audio issue. | Increase volume; Unmute; Check audio settings; Verify audio output on connected device. |
| Wi-Fi connection unstable | Weak signal; Incorrect password; Router issue. | Ensure projector is within Wi-Fi range; Re-enter password; Restart router and projector. |
| Remote control not working | Batteries depleted; Obstruction between remote and projector; Remote sensor blocked. | Replace batteries; Remove obstructions; Ensure remote is pointed at the projector's IR sensor. |
Specifications
| Feature | Detail |
|---|---|
| Model | MULTIPIC 3.5 |
| Brand | Overmax |
| Display Technology | LED |
| Native Resolution | 1280 x 720 (HD) |
| Supported Resolution | Up to 1920 x 1080 (Full HD) |
| Brightness | 2200 Lumens |
| Contrast Ratio | 1500:1 |
| Maximum Image Size | 150 inches |
| Lamp Life | Up to 50,000 hours |
| Connectivity | 2x HDMI, 1x USB, 1x VGA (D-sub), 1x AV, Wi-Fi, Bluetooth, IR |
| Special Features | Built-in Wi-Fi, YouTube, Miracast, AirPlay, Keystone Correction, Advanced Equalizer |
| Supported Media Formats | MPEG4, DIVX, XVID, AVI, WMA, MP3, JPEG, BMP, PNG, MOV |
| Aspect Ratio | 16:9, 4:3 |
| Dimensions (L x W x H) | 21.5 x 18.5 x 8.7 cm |
| Weight | 1.5 kg |
| Mounting Type | Tripod, Ceiling Mount |
Warranty and Support
For warranty information and technical support, please refer to the official Overmax website or contact their customer service directly. Keep your purchase receipt as proof of purchase.
For further assistance, please visit the Overmax official website.


